Air Fryer Apple Hand Pies are so easy to make, and make the perfect after-school or anytime snack for your family. My review will show you just how easy these are to make.
The weather is starting to cool off, and that always puts me in the mood for apple pie. Instead of making a whole apple pie, I decided on making these easy hand pies in my air fryer.
I bought the 9-inch pie crust ready-made and a can of apple pie filling. If you would like to make your own pie crust and apple pie filling See my recipe here: Sam's Apple Pie.
Apple Hand Pie Ingredients:
2 pie crusts (9-inch)
1 can apple pie filling (I used a 21oz. can of Duncan Hines Comstock Apple Pie Filling)
1 egg beaten
Water to wet the edges
White sugar to sprinkle over top
I cut out 5-inch circles from the pie crust. I didn't have a 5-inch cookie cutter so I used a small bowl that measured 5-inches across.
I got three circles out of each pie crust, and after rolling out the remaining dough I got three more for a total of 9 hand pies.
Place one tablespoon of pie filling in the middle of each cutout, wet the edge with water, fold over and crimp with a fork.
I brushed each hand pie with the beaten egg mixture and poked a fork through in three places to help release the steam. Then I sprinkled the tops of each with white sugar.
I started my Ninja Air Fryer and set it to Air Crisp. Set the temperature to 350 degrees and the time to 8 minutes. I could only fit four at a time in the basket of my air fryer, you don't want them to touch. Times and Temperatures may vary with different air fryers.
I set them on a rack to cool for at least 10 minutes. Serve with ice cream, or as you see in the intro photo I served some with caramel sauce.
My grandsons were visiting so needless to say that these didn't last very long. The best thing about these is that they are so easy to make with an air fryer.
Don't have an air fryer? No problem preheat your oven to 350 degrees and bake for 20 to 25 minutes until they are golden brown.
The Ninja Foodi Grill is so much more than just an air fryer, read my review here:
Note: The author may receive a commission from purchases made using links found in this article. “As an Amazon Associate, Ebay (EPN) and/or Esty (Awin) Affiliate, I (we) earn from qualifying purchases.”
It has been brought to my attention that most cheesecake recipes online,
and in many cookbooks, instruct readers to use a food processor to make the
graham cracker crust. Not everyone owns a food processor, therefore
today I want to review and share how I crush graham crackers for my
cheesecakes without a food processor. I will also share my graham
cracker crust recipe.
I don't own a food processor, but even if I did, I doubt I would get one
out, mess it up, and then wash it simply to make a cheesecake graham cracker
crust. My way, the old fashion way, is so much easier!
You only need a gallon size Ziploc bag and a rolling pin.
How to Crush Graham Crackers for a Graham Cracker Crust
It is very simple to crush graham crackers to make a pie or cheesecake
crust.
Simply place 15 graham cracker sheets* in the gallon size
Ziploc bag, zip the bag closed leaving about a half inch open. The half inch
opening keeps the bag from busting when crushing the graham crackers.
Then, roll a rolling pin over the closed Ziploc bag to crush the graham
crackers inside the bag.
When the graham crackers are fully crushed, pour them into a large mixing
bowl, and throw away the Ziploc bag.
Now, isn't that much easier than washing the food processor bowl, lid &
blade!
*Graham Cracker sheets consist of 4 or more small
rectangle or square pieces joined by a scored line. The sheet is the full,
unbroken graham cracker.
Full Graham Cracker Sheet (Honey Maid brand shown)
Graham Cracker Crust Recipe
2 Cups Crushed Graham Crackers (15 graham cracker sheets)
2 Tablespoons Sugar
2/3 Cup Melted Butter (11 Tablespoons)
Combine all ingredient in a large bowl and mix well with a spatula or spoon.
Press graham cracker crust in a glass pie plate or springform pan.
Fill with cheesecake or pie filling and bake according to specific recipe.
Note: The author may receive a commission from purchases made using links found in this article. “As an Amazon Associate, Ebay (EPN) and/or Esty (Awin) Affiliate, I (we) earn from qualifying purchases.”
Mix together 16 crushed
graham crackers with 3
tablespoons of sugar and one-fourth (1/4th) lb. of margarine or
butter. Press the mixture into a 9-inch pie plate. Bake crust in a 350
degree preheated oven for 15-20 minutes, or until lightly browned. Let
cool.
For the Pie Filling....
Take 4 large egg yolks and, using an electric mixer, beat egg yolks until
thick. To the eggs slowly add one 14 oz. can of
sweetened condensed milk. Then, on low speed, slowly add one-half (½) cup of
fresh Key lime juice
(about 10-12 limes).
Pour the blended filling mix into the baked pie crust. Bake again in
a 350 degree oven for about 12 minutes.
Pie Topping....
Photo by Nathan Lemon on Unsplash
Never use meringue on a Key Lime Pie. If you desire a topping, use a dollop
of 'real' whipped cream. Top the whipped cream with a cherry or a curl of
Key Lime peel.
My First Key Lime Pie Story
We were living in south Florida on the Gulf Coast when we were first
introduced to real Florida Key Lime Pie. I was working part-time for a
landscape and lawn care service company. One day our crew was doing lawn
care at a large estate when the owner asked if they would pick up a large
bunch of limes that had fallen from her Key lime tree following a storm.
They asked her what she wanted them to do with the limes and she told them
to 'just take them'. So back to the office came the crew with a bunch
of Key limes, and shared them around.
Naturally I had to use my share to make my very-first ever Key Lime Pie. I
wasn't much of a cook at the time, but the recipe was easy to follow. Well,
the pie turned out delicious, but somehow I expected the filling to be green
~ like the limes. I didn't realize that lime juice looks just like lemon
juice, despite the dark green skin on the limes. Silly me. :) But, if you've
ever had lime pie, you will notice a big difference in yummy taste when
using real Key Limes! There really is no substitute!
Note: The author may receive a commission from purchases made using links found in this article. “As an Amazon Associate, Ebay (EPN) and/or Esty (Awin) Affiliate, I (we) earn from qualifying purchases.”
For my birthday this past year, my husband decided he wanted to make me a
birthday cake. He said that I bake cakes for everyone else for their birthdays
and he thought I should have the gift of a specialty cake too. When he
asked me what kind of cake I wanted, I told him I wanted something I had never
made or eaten before. I wanted a lemon cake that actually had lemon in
the cake, not just a white cake topped with lemon frosting.
Did it deter him that I did not have a recipe for him to use? No, it
did not. If anything, he got really excited about baking a cake that
no one we know had ever made before.
He searched high and low, through my recipe books and I think even online
for a lemon cake recipe. Truthfully, I didn't realize I had given him such a
difficult task. I am the only family member who loves everything
lemon. When it comes to cakes, most of the family prefers either
German chocolate or chocolate cake. For many years, my mother has made
me a lemon meringue pie for my birthday, which is her specialty.
I went to visit my parents the day before my birthday. When I
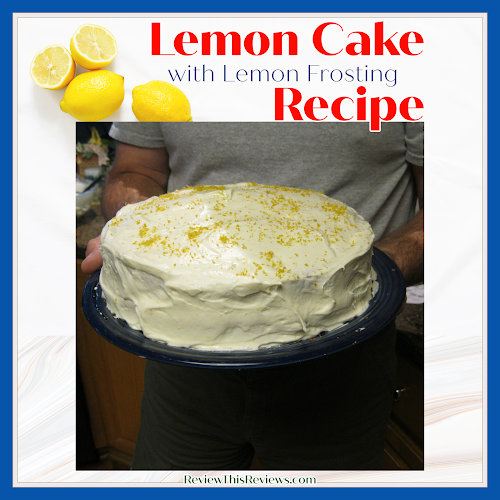
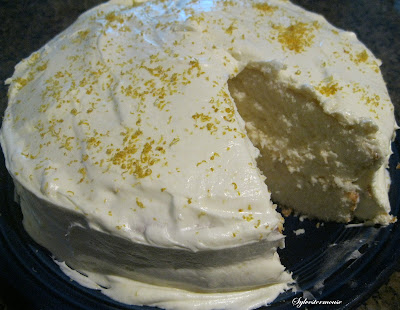
returned home, my husband had made me a luscious lemon cake with lemon
frosting. He even sprinkled lemon zest on the top! It is one of the
best gifts I have ever received and most definitely the best cake I have
ever eaten. I truly appreciate his thoughtfulness and
determination. What makes it even more special is that it is the first
cake he had ever baked. He has helped me prep for cakes before, but he
had never been the cake chef before.
He agreed to let me share his lemon cake recipe here, but I won't share my
baker.
Lemon Cake with Creamy Lemon Frosting Recipe
Prep Time
Cook Time
Ready In
Yields
1 hr.
35 min.
3½ hrs.
1 Cake
Note: Before you begin, set out your butter. It needs to be a
room temperature Then, zest 3 large lemons
In a small mixing bowl, whisk together buttermilk & egg whites (set
aside buttermilk mixture)
In a large bowl, combine the cake flour, baking powder and salt.
(set aside flour mixture)
In a separate large bowl, combine sugar & lemon zest by rubbing them
together with your fingers until moist. Add the butter and beat on
medium speed for 3 minutes. Beat in lemon extract.
Gradually mix flour mixture and buttermilk mixture into your sugar-zest
mixture, alternating the flour & buttermilk mixture &
beating well after each addition until batter is smooth
Bake at 350° for 35 minutes, until a toothpick inserted in the center
comes out clean
Let Cool for 5 minutes, remove from cake pans.
Remove cake pan liner by gently rolling it off the cake
Let cool completely, approximately 1 hour
In the meantime, set out cream cheese & butter for lemon frosting
recipe so they can warm to room temperature
Beat on high speed for several minutes, then add the remaining 1
Tablespoon to lemon juice if desired for taste
Frost the cake, decorate with lemon zest if desired & serve
This cake should be refrigerated
Cake Pan Liners
I started using cake pan liners several years ago with my German chocolate
cakes. I found that they allow me to remove the cake easily from the
pan and they keep the cake from breaking apart during
removal.
To remove the liner, after I place the cake layer on a plate (bottom side
up) I gently roll the liner off the cake. In spite of what advertising
claims, the liner will stick slightly, which is why I choose to roll it
(like cowboys roll cigarettes) instead of pulling it off.
Note: The author may receive a commission from purchases made using links found in this article. “As an Amazon Associate, Ebay (EPN) and/or Esty (Awin) Affiliate, I (we) earn from qualifying purchases.”
I recently tried Ghirardelli Dark Chocolate Brownie Mix made with a special
ingredient and loved it!
My sister, sister-in-law and I went shopping together before
Christmas. When I spotted the Ghirardelli Dark Chocolate Brownie Mix,
I commented that I would like to try it because it included the chocolate
chips. While I rarely use baking mixes, I thought using the mix might
make the Christmas baking a little easier.
The sales associate of the kitchen shoppe offered to make a batch of her
brownies so we could taste them. She had a special ingredient she
added that she thought we would want to try. I am so glad we accepted
her offer. They were the best brownies I have ever
eaten.
Needless to say, we left the shoppe with several gift bags that included
the brownie mix and the shoppe's special ingredient, blood orange olive
oil.
Ghirardelli Dark Chocolate Brownie Mix
Ghirardelli Brownie Mix, Dark Chocolate, 20 ozCheck PriceThe #1 reason I wanted to try the Ghirardelli mix is because it included
chocolate chips and required only 1 egg, water and olive oil to make.
Those are ingredients that are always in my kitchen.
Using the
newly discovered blood orange olive oil
gives these delicious brownies an extra punch with a slight taste of orange.
Everyone in my family loves them! I definitely look forward to using
the blood orange olive oil in additional recipes.
We don't all agree on whether brownies should be iced or not, so I make a
small recipe of icing. Those who want the icing don't agree on whether
it should have nuts or not, so I divide the icing in half and mix walnuts or
pecans in half of the icing. Therefore, one batch of brownies makes 3
different treats. Add a scoop of ice cream and you have the perfect
dessert.
Easy Brownie Frosting Recipe
*Baking Products are Linked in recipe so you can see recommended product packaging. However, prices are based on shipped products. Most likely, the items will be much less expensive in your local grocery store.
As far as I know, the Bazaar Orange Olive Oil that we purchased is only
sold at the
Bazaar store in Collierville, Tn, located in the historic Collierville Town Square. Sadly, I
couldn't find an online resource.
If you love to cook and are ever in Collierville, Tn, you should
definitely plan to spend a few hours in this store. It isn't a big
store, but it is packed with fabulous unique kitchen items, including
their specialty oils and vinegars. I love this kitchen specialty store and their extremely helpful sales
associates!
Note: The author may receive a commission from purchases made using links found in this article. “As an Amazon Associate, Ebay (EPN) and/or Esty (Awin) Affiliate, I (we) earn from qualifying purchases.”
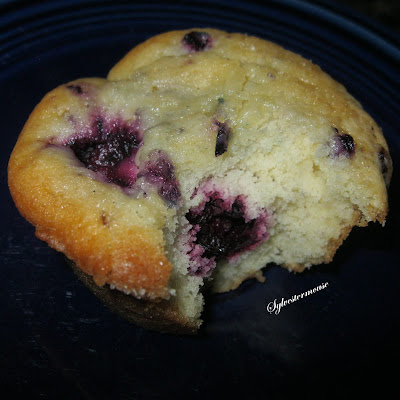
Fresh blackberries are always an invitation to bake something
delicious! When I recently purchased some blackberries at our local
farmer's market, I made Blackberry Muffins as soon as I got
home. Today, I am sharing my personal blackberry muffin recipe here so you, too, can enjoy this delicious treat.
My recipe makes 18 muffins which seems like a lot at first glance. However,
it didn't take my family long to devour these delicious
muffins.
For either of us, when we pair these muffins with coffee, we are in a
breakfast feast heaven. While I would normally say that the serving
size is one muffin, in our home, the serving size is two or more
muffins. They really are that good!
The Muffin Batter & Muffin Tins
This is a muffin recipe, not to be confused with cupcakes. The muffin
batter is thicker and won't pour like a cake batter. I "spoon" my
muffin batter into muffin tins. I bake them in
non-stick muffin tins, therefore paper liners are not required. I do grease the non-stick
tins with Crisco shortening and these muffins turn out easily.
My Blackberry Muffin Recipe
Prep Time
Cook Time
Ready In
Yields
20 min.
20-25 min.
45 min.
18 servings
Ingredients
1¼ cups of sugar (plus extra for sprinkling)
1/2 cup butter, softened (extra for brushing tops)
Note: The author may receive a commission from purchases made using links found in this article. “As an Amazon Associate, Ebay (EPN) and/or Esty (Awin) Affiliate, I (we) earn from qualifying purchases.”
Carrot Cake Cupcakes are a delicious treat anytime!
My mother recently made 2 dozen carrot cake cupcakes using the recipe
below. She was generous and thoughtful enough to share them with me
and my household. I was beyond thrilled to receive this gift. I
understand the time commitment and work behind making a few dozen cupcakes.
Therefore, I can really appreciate receiving a dozen homemade
cupcakes.
Cupcakes are a personal favorite since they are made in single serving
portions. That saves serving preparation and clean-up. You can grab a
cupcake, toss the paper liner, and eat it without needing to get out a plate
or utensils. So fast & easy!
The carrot cake cupcakes are fabulous for breakfast, a special treat, or
dessert. For 3 days straight, I was able to enjoy a carrot cake
cupcake with my coffee for breakfast. I was rather sad when they were
all gone. But, I have the recipe! And, I am willing to share it
with you so you too can start your day with delicious carrot cake.
Carrot Cake Cupcakes Recipe -
Yields 36 cupcakes
Cupcake Ingredients:
2 c. shredded julienne carrots
2 c. granulated sugar
1 c. canola oil
4 large eggs
1 (8-ounce) can crushed pineapple, drained
2 c. all-purpose flour
1 tsp baking powder
1 tsp baking soda
2 tsp ground cinnamon
Frosting Ingredients:
1/2 c. unsalted butter (softened)
8 oz cream cheese (softened)
4 c. powdered sugar
2 tsp vanilla extract
3/4 c. chopped pecans
________________________________________
Instructions for Cupcakes
1. Grate carrots & chop pecans
2. Preheat oven to 350°
3. Line large cupcake pans with cupcake liners (3 pans of 12 each)
4. In a large mixing bowl, combine sugar, oil, and eggs. Beat until
well-blended.
5. Add flour, baking soda, baking powder and cinnamon. Beat for about 2 to 3
minutes.
6. (Set aside your mixer) Stir in shredded carrots & pineapple.
7. Fill cupcake tins 3/4 full and bake for approximately 22 - 24 minutes
(toothpick test)
8. Set cupcakes on cooking racks and allow to cool completely before
frosting
9. While the cupcakes are cooling, set out the butter and cream cheese to
soften (about 30 minutes) Instructions for Frosting
1. Beat softened cream cheese and butter together until smooth.
2. Add vanilla and powdered sugar. Beat until well blended. (Approximately 4
minutes)
3. Stir in chopped pecans (or hold them to sprinkle on top of frosted
cupcakes)
4. Frost the Cupcakes
Recipe Substitutions or Additions
I prefer pineapple, but Mom suggests substituting raisins if desired. You
may also want to add 1 cup shredded coconut for a more authentic carrot cake
consistency & taste.
Baking Notes
I have a double oven, one is a convection oven. My ovens allow me to bake 3
pans of cupcakes at one time. (2 in the convection oven & one in the
lower regular oven).
Mom has one regular oven. Therefore, she makes larger cupcakes divided
across two pans, which she bakes separately. Her yield is 24 larger cupcakes
that take slightly longer to bake (approximately 26 - 28
minutes).
Because oven temperatures vary, the toothpick test is required to determine
when they are completely baked.
What is the Toothpick Test?
Quickly stick a toothpick down into the center of a cupcake or cake and pull
it right back out. If it comes out clean, the cake/cupcake is done. If it
has batter on it, you need to bake a little longer. I usually test in 1 – 2
minute intervals.
Cupcake Baking Needs
There are a few kitchen tools that allow us to bake cupcakes with ease,
starting with a large cupcake baking pan & cupcake liners.
Cupcakes are also very hard to transport from place to place. If you
do plan to take them elsewhere, I highly recommend the carrier featured
below.
Note: The author may receive a commission from purchases made using links found in this article. “As an Amazon Associate, Ebay (EPN) and/or Esty (Awin) Affiliate, I (we) earn from qualifying purchases.”
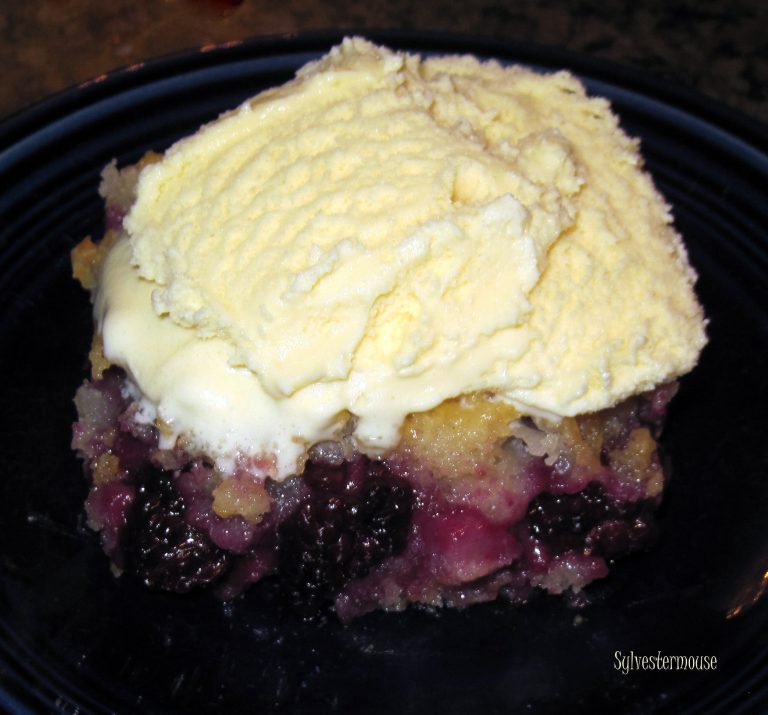
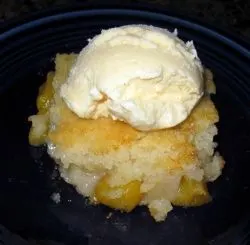
One of my favorite desserts is a fresh baked cobbler. Fortunately for me, my mother taught me how to make a very easy cobbler when I was a child.
Over the years, I have made several types of fruit cobbler. Peach cobbler is my personal favorite (you will find my peach cobbler recipe by clicking here), but my husband's favorite is an apple cobbler.
When my mother-in-law sent us a huge box of apples for Christmas, one of the first things I made was an apple cobbler. Between my husband and son, that apple cobbler disappeared almost before I remembered to take pictures.
This is a very easy and delicious cobbler recipe. You can use just about any fruit with the basic batter recipe.
Apple Cobbler Recipe
Prep Time
Cook Time
Ready In
Yields
20 min.
55 min.
75 min.
12-16 servings
Ingredients
2 cups of sugar
2 cups milk
2 cups self-rising flour
8 Tablespoons butter, melted
5 or 6 Honeycrisp Apples - pealed & sliced (each apple should be sliced into 16 pieces)
In a separate bowl, combine the sugar, milk, and flour. Stir to batter consistency
Pour batter mixture over the melted butter (do not stir)
Add
Apples in a single layer, spread evenly in the batter (do not stir -
push apples slices down to make sure they get covered with batter. They
will pop back up, but they need batter on top)
Bake for 55 - 65 min. until golden brown (varies due to pan & oven)
Note: You can half this recipe and cook it in an 8" pan for 45 min. This is a great way to use only 3 apples!
Note: The author may receive a commission from purchases made using links found in this article. “As an Amazon Associate, Ebay (EPN) and/or Esty (Awin) Affiliate, I (we) earn from qualifying purchases.”