Showing posts with label container gardening. Show all posts

Tuesday, May 7, 2024

How to Grow Potatoes in a Bag


If you want to grow your own potatoes, but you don't have a yard, or your soil is too hard, or even if you just don't want the work of having to dig them up, I have a great and easy solution!

Grow your potatoes in a bag!  I know it sounds ridiculous, but it is actually easy and fun.  It's also a great way to get lots of tasty and healthy spuds to eat!  Anyone can do it, you don't even need to buy any seeds because potatoes are grown from other adult potatoes.

How to Sprout Potatoes to Plant:

It is best to start with organic potatoes, since they are less likely to be a funky hybrid that can't be sprouted or have toxic insecticides on them or even in them.  You can use red or white potatoes.

Wash the potatoes well and then place them in direct sunlight.

In two to three weeks you will have sprouts.  When they get an inch or so long, you are ready to begin the planting process.


Cut the potatoes, with one sprout on each piece.  Leave the potato connected to the sprout, because as it rots it will be fertilizer to the new plant

It is very important that, before planting, you let the cut potatoes sit for two or three days so the cut portion of the potato can dry out and form a protective layer.  If you plant newly cut potatoes, diseases, fungus, worms and insects can easily burrow into the fresh cut flesh and kill the sprout.

While your potatoes are sprouting and curing, order your grow bags.  You can find them on Amazon for a good price, about $2.50 to $3.00 a piece, less if you order a larger quantity.  I usually get the 5 gallon size.  They look like this:


They also have bags that have a roll up flap on the side near the bottom, but I find these to be more expensive and the flap are basically useless because the growing potatoes should not be bothered by opening the side of the bag and poking around.  


How to Grow Potatoes in Bags:


1. Fold the bag down till it is about 6 inches tall.

2. Put 3 inches of good dirt in the bottom of the bag.


3. Set three to four potato pieces in the dirt with the cut side down, sprout side up and cover with 3 inches of dirt.

4. Water well.

5. Keep the soil moist but not mud and when the plants are 6 inches tall, unroll the bag about 4 inches and add more dirt, up to the bottom leaves.

8. When the plant has grown to 8 inches above the dirt, unroll the bag again, and add more dirt, up to the bottom leaves.

9. Keep doing this until the bag has dirt three inches from the top.

10. Make sure to keep them watered.  If you repeatedly let the bag dry out, the potatoes will shrink and wrinkle and not be edible.  You will have to water them more often than if they were planted in the ground.

11. When the potato vines turn yellow and look wilted, stop watering them and wait about two weeks.

12. Pick up the bag and turn it upside down in a wheelbarrow or washtub and you will find fresh, tasty and pesticide free home grown potatoes.

This is what one of my bags looked like when the plants came up:


Don't be upset if all the sprouts don't come up.  The fewer the plants the more room there is for the remaining plants to grow bigger potatoes.  You must make sure to keep them watered, it is the defining factor of whether you get a nice harvest or a big disappointment.

You don't have to use these bags, you can use any kind of bag that will take to weight of dirt pressing against the sides of it.  Canvas tote bags, plastic feed bags, reusable grocery bags, any kind of bag will do.  Just make sure if you use a plastic bag to poke lots of holes in the bottom so it has good drainage.

Grow bags are a great way to grow some of your own food in a very small space.  You can grow any type of veggie or fruit plant you want in bags, it does not have to be potatoes.  I have also grown peppers and cucumbers and I have friends that use them for tomatoes and they love them!  They take up so little space you can even use them on an apartment balcony or condo patio.  You don't need to have land to grow your own food!  The best thing is, at the end of the harvest you just empty them, fold them up and put them away till next year.  A real space saver!

_____________________________________


Note: The author may receive a commission from purchases made using links found in this article. “As an Amazon Associate, Ebay (EPN) and/or Esty (Awin) Affiliate, I (we) earn from qualifying purchases.”


Monday, March 18, 2024

Reviewing My First Impressions of GreenStalk Vertical Planters

I have had GreenStalk Vertical Planters on my wishlist for many years. They would have been perfect for the balconies in the apartments I rented in the past. I have recently been able to purchase two GreenStalk planters. I have been so excited about them that I talk about my planting adventures often. I find myself surprised that some people have not heard of the GreenStalk brand and I have to show them a picture so that I can describe what I'm talking about. 

text and photos of the GreenStalk brochure


GreenStalk Vertical Planters

This family-owned business is located in Knoxville, Tennessee. Jack Peterson had a passion for creating better quality plastics - a bit of history I've only just learned. In 2014, he partnered with his son, Ryan, to design these amazing, functional, and durable plant towers.

I remember my excitement when I first saw the Original GreenStalk. 

  • 5 tiers 
  • Each tier has 6 pockets
  • Each pocket is 10" tall
  • Each tier should be filled with 1 cu ft of "high quality potting soil"


Then the Leaf version was invented

  • 7 tiers
  • Each tier has 6 pockets
  • Each pocket is 7" tall
  • Each tier should be filled with .75 cu ft of "high quality potting soil"


Both green stalks include tiny holes in the bottom of each tier and a watering discs for each tier and a water reservoir at the top. I can best describe this design as a built-in drip irrigation system. 

Something that GreenStalk offers that I love - but I've heard others wonder about - is that not only can you purchase a tower (tiers, discs, and water reservoir) as a unit, but you can also purchase the individual pieces and additional items such as the water reservoir lid. In this way, I feel, you can create the system specific to your needs. Do you want only 3 tiers and a lid? Perfect, you can purchase those items individually. Some folks think this is a gimmick to make extra money but I LOVE the ability to mix and match only the pieces I want, when I want. 

GreenStalks also come in a variety of colors. I chose red to match my siding. Greenstalk is also preparing to offer a "basket weave" textured version. 

GreenStalks are pricey. Which is why it took me so long to see my way clear of buying one. But, I've known people who have used theirs for years. In a variety of climates. The durability makes them worth the price tag. Also, GreenStalk offers a variety of sales through the year. I purchased mine during a "buy one get one half off" sale. I've also heard that there is usually a big sale around Mother's Day. And, if you follow the gardening or homesteading social media channels, you can find folks who offer discount codes now and then.

My GreenStalks

I have installed heavy-duty wheels on a small pallet and have placed my GreenStalks on that moveable "cart". In this way, I will be able to move my filled GreenStalks across the deck with ease. 

It is very early in the gardening season here so I have only just placed a few seeds into my GreenStalks. And I am very excited to have some germination happening. I am beginning with spinach, lettuce, carrots, and beets. I will soon add strawberries. I think the GreenStalk Leafs are PERFECT strawberry growing containers. 

With the exception of squash and tomatoes, I have not been a very successful gardener over my lifetime. I have struggled with keeping things watered and weeded. When I had a large garden in the backyard, it was out-of-sight-and-out-of-mind. So it was neglect. And I currently live on land that basically requires the use of containers for gardening. For these reasons, I am very optimistic about vertical gardening with the GreenStalks on my deck.

Related Links

GreenStalk Website  - The place to shop

GreenStalk Gardeners Facebook Page - The place to talk to other GreenStalk fans and see what they are doing with their planters. 

GreenStalk on Instagram -  Planting and growing tips & ideas, beautiful photos, and sales announcements. 

GreenStalk on YouTube -  A small handful of helpful videos. 


Note: The author may receive a commission from purchases made using links found in this article. “As an Amazon Associate, Ebay (EPN) and/or Esty (Awin) Affiliate, I (we) earn from qualifying purchases.”


Monday, July 24, 2023

A Review of Growing Vegetables in Pots


vegetables growing in pots


Can You Successfully Grow Vegetables in Pots?

I have grown plants in pots practically my whole life.  It started out when I lived in apartments and I grew flowers on my balcony.  I always loved having pots of pretty flowers around my table and chairs where I sat to drink coffee in the morning.

Things changed when I moved to a beautiful ground floor townhouse with a large sunny patio.  I loved the patio and I was discussing it with my mom when she came over to see it and and she told me I should start a potted vegetable garden.  I was surprised as I did not know that veggies could be successfully grown in pots.  I was excited to try this and I picked her brain for all the gardening tips I could get!  Remember, this was in the 80's, and we did not have all the information at our fingertips like we do today on the internet.

Thus began my hobby of vegetable gardening in containers.  I have learned a lot over the years.  I continued doing it even after I bought a house.  I would have vegetables in both pots and in elevated garden beds.  Here are a couple pictures of them:

various vegetables growing in a variety of containers

My Tips for Growing Vegetables in Pots


1.  Soil - Always buy premium potting soil.  What comes out of a pot is only as good as what goes in.  Never dig dirt out of the ground or buy top soil.  Don't put rocks or gravel in the bottom of your pot, fill the whole thing with earth.  The more soil you have to hold moisture and fertilizer, the better.

2.  Pots - Pots made of clay, ceramic, plastic, concrete and wood are good.  Never use a container that is metal or heat conductive, as it can literally cook the roots and kill your plants. 

3.  Drainage - It is imperative that your pot has a few good drainage holes.  If there are no holes, the water will sit at the bottom of the pot and roots can rot and mold and slime will contaminate your soil.

4.  Plant Tags - When buying plant sets they always come with a little plant stake with the name of the plant and instructions on how to plant, water, sun needed, etc.  Make sure to save these tags and stick them in your pot for handy reference.  Follow the directions, it is the best way to get great results.

5.  Slow Release Fertilizer - Mix slow release fertilizer in with your soil before planting.  Do not put it in the hole before dropping the plant in as direct contact can burn the roots.

6.  Quick Release Fertilizer - When your plants start to flower, give them some fast acting fertilizer like Miracle Gro, and then give them a bit more in the middle of fruiting to help them produce more.

7.  Sunlight - Make sure your plants have the required amount of sunlight needed on their tags.  Not enough sunlight and they will not produce as much as they could.  This is the great thing about pots.......you can move them in or out of the sun as needed!

8.  Water - Potted plants dry out much quicker than plants in the ground.  As such, they need to be watered every day in the heat of the summer.  Try to water in the early morning or evening and not during the hottest part of the day because at that time much of the water evaporates.

9.  Soil Maintenance - Put a teaspoon of fish emulsion liquid in your water once a week or so.  This helps the soil to maintain the nutrients needed for healthy plants.  

10.  Trimming Your Plants - If you see leaves turning yellow or the edges turning brown and curling, don't be afraid to trim those leaves off.  If a leaf is dying, the plant will use valuable resources to try to save it.  Those resources could be better used making more fruit, or helping the stem grow.  Don't be afraid to trim your plants, sometimes that's what it takes to save them if they are looking bad!

11. At the End of the Season - When your harvest is done, pull all the plants and throw them away.  Dump the dirt and rinse out your pots and store them inside for the winter.  (if you have winter) Leaving them outside full of dirt in freezing weather can make them crack.

12 At the Beginning of the Next Season - In the spring, put one part bleach to 9 parts water in a spray bottle and generously spray the inside of your pots to kill any bacteria, diseases or insects that may be inside.  Rinse well to remove the bleach and set in the sun to dry.  Now you are ready to begin your new potted garden!

Gardening is fun and relaxing

Don't expect things to perfect from the start.  I have made a ton of mistakes over the years.  Sometimes you are just unlucky, like the year my peppers were invaded by pests and I lost almost all my plants.  Sometimes you can replant, if you have enough time, but sometimes you just have to shrug it off.

I will never forget the year that I somehow thought it would be smart to plant 6 pots of lettuce all at the same time.  We had barely eaten two of the pots worth when the rest bolted and went bitter and I had to throw it away.  A valuable lesson learned.  Don't plant more than you can eat before it goes bad!  This applies only to veggies that you cannot can or store to eat later....like lettuce!

If you want more detailed information on how to grow lettuce, check out my blog Homemade by Jade and the post on How to Grow Lettuce in Containers


Failure is instructive. The person who really thinks learns as much from his failures as from his successes." - John Dewey


Seven years ago we moved to the country on five acres.  Believe it or not, I still grow a lot of stuff in pots.  It is just so easy.  Less weeding and easy to water and pick.  We also do it because it is just too dang hard to garden in the ground at our age.   That is why we use elevated garden beds and tote and trellis systems for most of our gardening, in addition to pots.  It is so much easier for us old folks!


vegetables growing in contained garden beds
Elevated Garden Beds                                Tote and Trellis

If you would like to know more about Elevated Garden Beds, check out my Review of Elevated Garden Beds, right here on Review This Reviews!

I guess this is not really a review, more like a recommendation.  Container gardening is fun and easy, not to mention saves you a bit of money and gives you healthier food to eat.  It helps to calm your mind and gives you a feeling of accomplishment.  It's also a great way to spend time with your kids and teaches them how to be more self sufficient.  Everyone should have a garden and growing in pots lets everyone try it out and learn, even if those who don't have any land.


Note: The author may receive a commission from purchases made using links found in this article. “As an Amazon Associate, Ebay (EPN) and/or Esty (Awin) Affiliate, I (we) earn from qualifying purchases.”


Tuesday, June 14, 2022

Advantages and Disadvantages Of Moving House With Plants Reviewed

Yellow roses moving house

I know that within the next few years we will likely move house. We have put a lot into our garden which will be the hardest aspect of our home to leave. 
For our house move we are hoping to find a smaller house and a bigger garden! 

When you move house of course you take all your belongings with you. However, we do not usually take items considered integral to your house such as doors, fitted kitchen and integrated appliances. So when it comes to the garden I have been considering are all the plants also integral to the sale, do we leave everything or are there plants we want to take with us? Is it acceptable to remove plants from the garden and how do we do that? 


White flower Bridal bouquet
 

We have some very treasured plants with special memories.  
Many of our plants were given to us as gifts or donated by our family in the early days of living here. Others are gifts we have given each other or have particular memories. So we are reluctant to leave these plants. 

However, I do not know what type of garden we will be moving to the aspect, or even exactly the soil type. This does not bother me too much though as I know most will be adaptable or live happily in large pots or containers. So I know that the plants I want to take that thrive here will be perfectly fine in a new home. 

However, if you are moving to an area with a very different soil type and do not want to look after container plants you may need to think carefully about which plants you take with you.

 
Magnolia pink flowers


Removing Plants From Your Garden When Selling

 First, though I had to consider the ethical question of is it right to remove loved plants from a garden you are selling?

 Buyers will view our house and garden as it is and understandably expect it to come with all the plants they see upon viewing. 

Someone once told me that to know what you can take and what you can leave you should imagine your garden turned upside down. anything that drops off you can take, otherwise it should stay! So really anything rooted in the ground stays but containers and cuttings and seeds can be removed. 

 My opinion is that it is acceptable to remove plants and take cuttings as long as you are upfront with the buyers about which plants you are totally removing. I think it is unacceptable to buy a house and then find upon arrival that half of the plants you thought you were also buying have been dug out changing the look and feel of the garden.

I have learned that it is important to check as inground plantings are often considered part of the property or a fixture. So 
if you are planning to remove a significant proportion of plantings or obvious plant from your garden it is best to indicate those exclusions in the listing process. If it is decided later than this to remove planting, an amendment should be made with the buyers agreement. It is always best to fully disclose exactly what you are planning to take from the garden. Do always check the law/rules in your country/state exactly the situation when selling. 


Blue grape hyacinths


Five Options To Move House With Your Garden Plants. 

An increasing number of sellers are taking special plants with them when they move house.

So if you want to take your treasured plants and sell the house and garden honestly, what can we do? Here are five possible solutions. 

 1. Dig Up Plants And Move Into Containers Before Selling. 

 At least a year or so before you plan to move if possible, make a plan to dig up and move any treasured plants you must take with you into pots. Before the sale begins put these pots to one side or outside the garden. Make it clear in the selling instructions or listing that anything in a container is an exclusion, not part of the house sale.

This may work for plants that are not too big. For me, this includes several treasured roses, a small Camellia and a few small evergreens. Small herbs are coming with me, two of our strawberry plants and a couple of our many Heucheras. 

Our garden is so packed full of shrubs, perennials, bulbs and other plants that these will not be noticed from the overall plan. However, you need to plan ahead for this as certain plants can only be moved with the least disruption to the plant at specific times of the year. 


purple heuchera


 2. Take Cuttings Of Your Plants And Gather Seeds Before Selling Your Home

 However, some plants are simply too big to move in this way and would leave massive gaps in the garden if I took them with me which would not be fair. For example, our beautiful Camellia and our gorgeous climbing rose.  It would take an enormous effort to dig them up, may, in fact, kill the plant and would leave a gap in planting that would look very wrong in the garden. In addition, they are used every year for birds to nest. I do not want to take this valuable resource away from the wildlife.

 I do not know if the new buyers will want them and I really hope they will keep them. I would be devastated if they felled them, but they are not practical to move. So what I have done is to take cuttings of the camellia and the rose. This way I can take a little of the plant and grow it on to become just as gorgeous as its parent.


pink Camellia flower


No one will notice cuttings taken and it will not change the look of the garden or any current benefit to wildlife. I am also  taking cuttings of our laurels, some of the roses, fuchsias, forsythia, rosemary our large wegelia and bridal bouquet.

 It is important to start this process as soon as you think about moving. For many plants, there is an optimum time to take cuttings. If they do not take one year you will want to have another year to take them so ideally start as early as you know you are moving. 

Taking cuttings will save us a huge amount of money and leave the garden still beautiful for the buyers and available for the wildlife.


rosemary


3. Negotiate With Buyers About The Plants.

This is an option if you would like to take certain plants with you and have not had time to pot them up before viewings.

When you have a firm offer check with the buyers if they would mind if you took the plant. Some won't mind at all, others may refuse, so this is riskier but still worth asking. 

 Seek advice from your Realtor or Estate agent before taking this course of action. This may need to be negociated and added as an exclusion in the sale agreement.

 4. Ask Buyers If You Can take Unwanted Plants.

 Ask the buyers if they plan to or later decide to get rid of any plants to let you know and you will collect them. It is probably better if the new buyers who are now the homeowners actually dig up the plants and you just collect them otherwise there could be misunderstandings. 

This only works if you remain local and if the buyers actually remember to contact you. I feel this is the least likely strategy to work and could incur issues that may not be worth it.

5. Take Photographs Of Your Garden And Plants

If there are treasured plants that you cannot take with you for whatever reason then take a photograph. We can then carry the memory of the plant with us. 

We can even get the photographs made into posters, greeting cards, or canvas prints such as the one below. 


Tools For Taking Plant Cuttings And Moving Plants

All you need in order to take cuttings is a strong pair of secateurs such as these Wolf ByPass Secateurs.

You will also need some good quality compost for full grown plants and cuttings and however many pots of different sizes you think you will require. 

Labels are also a good idea so you can tell what all the cuttings are.

I like to have a variety of sized pots. I reuse every pot that comes into our garden so none ever go into landfill. 

For the purpose of moving larger treasured plants I have bought a few larger planters in different sizes for the plants I am taking with us. I would recommend ones with handles so that they are easier to move. Once they are served their purpose they will be reused for vegetable growing forever. 

 Advantages To Taking Your Existing Plants

 1. You take treasured plants, especially those with special significance and memories with you. These are valued things you may not be able to bear to leave behind. 

2. You save significant amounts of money on replacing favorite plants. Plants are so expensive now so if you can take cuttings and seeds, especially it will save you a lot of money. 

 3. You have continuity to settle in a new place. Familiar plants may help you to settle more easily.

 4. You can easily stock an empty garden for very little financial outlay. Gardens take time to develop so if you have some plants ready you are ahead. 

 Disadvantages To Taking Your Plants

 1. Your new garden may be very different from your existing one and your plants may not suit or fit the place and the soil type and aspect may be different. For example from heavy clay to chalk. Or South to North facing. 

 2. You may want a totally new start with fresh, maybe very different plants or garden theme. For example a change from cottage garden to modern minimalist. 

 3. You may be moving to a garden that is already well-stocked with plants you love.

 4. You may be moving to a place with a balcony or courtyard your existing plants will not fit into or be happy living there. 


So as an avid gardener who loves her plants I am seeking a happy medium. We are taking some treasured plants and taking cuttings and seeds of others we want. I aim to pot up all those we are taking before the house goes on the market and be upfront with buyers that anything in a container will not be staying.

We have put such a lot into this garden from an empty patch to a vibrant, full and wildlife-friendly paradise. It will be a wrench to leave, but that won't be for quite a while yet and when the time comes I know I will look forward to taking some of the treasured memories with me and creating a new garden.  


More Gardening Articles


Note: The author may receive a commission from purchases made using links found in this article. “As an Amazon Associate, Ebay (EPN) and/or Esty (Awin) Affiliate, I (we) earn from qualifying purchases.”


Thursday, April 29, 2021

How To Grow Camellias In Your Garden Or Container Reviewed

I have always loved the beautiful Camellia. I see it as the beautiful rose of Springtime. When we first moved here I thought one would look lovely in the garden. 

This one is now twenty years old and about ten foot tall and four foot wide. It has been lightly pruned perhaps four or five times in its life so far. 


stunning camellia in full bloom with pink blossoms


My Top 5 Reasons To Grow A Camellia 

I love them because all year round they are evergreen with thick glossy beautifully shaped leaves. Camellias provide a fantastic structure in the garden all year long and make a superb hedge too

They look stunning when covered in snow as the dark green leaves and the white snow complement each other beautifully.

They have the most stunningly beautiful flowers in Spring that lift your heart and are a perfect shape and come in pinks, whites, creamy yellows and reds mainly.  

They need very little care once established and grow a dense bushy appearance that no one can see through. 

A mature Camellia provides excellent cover for small birds who also like to nest in it. 


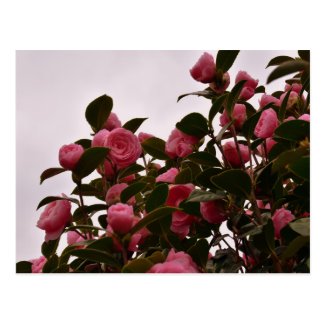
Camellia Flower Blossoms

However, for all these marvelous attributes their true moment in the spotlight arrives in early Spring and culminates in April and May.

From early March I am aware of tight fat buds appearing amongst the green leaves, a promise of what is to come. 

Battered by strong winds and rain here they hang on and remain tightly compressed until the weather calms a while and the sun starts to shine and warm up.

Then slowly the fat buds begin to unfurl revealing beautiful pink flower buds. Over the coming weeks more and more unfurl and the green shrub becomes a riot of pink blossom!

It is so stunningly beautiful and something I look forward to every year.

pink camellia blossoms on the bush


Each flower petal is perfect a gorgeous unique soft yet strong flower.

The petals are quite thick and not easily broken or torn and I noticed that the birds often take the fallen petals to use in their nests. I can imagine that each petal is perfect for laying eggs in and is very soft and insulating for the little chicks. 

The sparrows often nest in the Camellia and we often hear them chattering away to each other, squabbling and bonding. Sometimes a huge flock will fly into the Camellia and they disappear into it. 

As the weeks go by the petals begin to fall and the earth around the camellia is littered with a carpet of pink petals like a bride has passed this way and has been showered with flowers. 

Then by summer, we are back to a glossy evergreen shrub.


beautiful pink camellia blooms


Where to Site A Camellia

Camellia generally needs to be sited in a position where there is light sunlight, they are essentially woodland plants so light sun to dappled shade is ideal. They do appreciate a more sheltered site and dislike cold biting winds. 

Never site your Camellia in an East facing spot as they actively dislike it. Also, the buds appear to become damaged by the morning sun when east facing so you will get fewer flowers. South or West facing is the best if possible. 

These shrubs do like acid soil but you may get away with a neutral soil that is slightly acidic. As a woodland shrub, it appreciates a good mulch with leaves each spring. You can also use pine needles or bracken or even fir tree clippings if you have them available. 

Probably the best time to plant is in the Autumn/Fall as the soil is still warm and you may have more rain at this time of year. 

When I first bought ours I planted it on one side of our garden and it basically did nothing for 3 years and looked very unhappy and started to die. So I dug it up and planted it on the other side of the garden where, as you can see it quickly flourished and grew and blossomed. 

I am still not sure why this happened as theoretically this first site was ideal, but there was something the plant did not like. It is worth trying an ailing plant in a different site before giving up. 


Watering Camellia 

When first planting, like any other shrub, do water regularly and deeply every week especially in very hot weather. Do not just sprinkle water on, give it a really good deep drink. Unless it rains heavily I continue to do this with newly planted shrubs for about a year to a year and a half. I find it gives them a good start in life then afterward they are little trouble. 

Light watering will be bad for the plant as it encourages roots to turn upwards to seek the water on the surface. You need to really soak the soil thoroughly so that the water is below the root level and the roots search down and out for water. 

Once it is mature and established you should not need to water at all unless you live in an extremely dry climate or suffer drought conditions. If small buds cease to grow or start to drop, or you do not see any buds, then you know it is suffering drought.


pink camellia blooms in abundance on camellia bush


Pruning Camellia

This is good news for people who do not like pruning! Camellias do not really need much pruning. The only exceptions are if they grow either too big or are growing in a shape you do not like.

If you need to prune only do it immediately after flowering. If you do it any other time you will damage the emerging flower buds. 

Please do not use a hedge trimmer on your gorgeous Camellia. The result is so much better if you carefully prune with secateurs like these Wolf By Pass Secateurs It will take a little time but can be done gradually.

You can deadhead the faded Camellia flowers if you want to. I think this would be possible on a smaller plant. With a Camellia ten-foot high for me, it would be quite a time-consuming task.

Some people will want to do it though to prevent petal fall over the borders. I do not do this as I like to see it naturally fade and I love to see the pink petals fall to cover the earth and the lawn like a bride has just passed by and guests have thrown confetti! Once they have fallen to the ground, I just treat them as very pretty mulch.

Otherwise, you can let it grow and fade at its own pace and time and simply enjoy it.


pink camellia blossoms


Taking Camellia Cuttings

Once you have a mature Camellia I would recommend taking cuttings. This way you can over time have more Cameillas and if you ever move you can start a new plant. They also make lovely gifts. 

Cuttings are easy to take and so far I have had great success with them forming roots and growing on well. They are, however, fairly slow to grow from cuttings so plan ahead. 

Soil Conditions For Camellia

It is advantageous to have acid soil but it can cope with a neutral to slightly acid soil especially if you mulch with acid based materials or an ericaceous compost and feed each spring. 

To check your soil look around at your neighbour's gardens and see what is growing well. If Acers, Azelias, Camellias and Rhododendrons are growing happily in the soil then a Camellia should be just fine. 

The other way to check is to do a soil testing kit available in many places where you can easily test your own soil. 

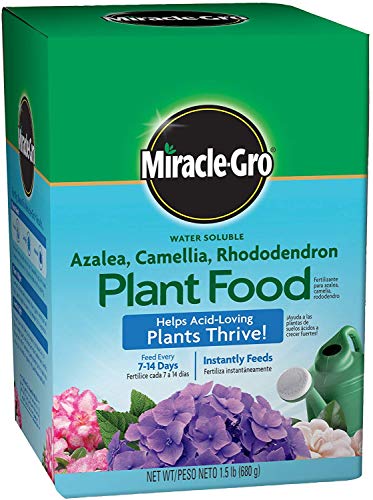
If your soil is not suitable then do consider growing Camellia in a container with ericaceous compost and using ericaceous plant food.


Growing Camellia In A Pot

I always have a "can do " attitude when it comes to gardening. Many people have smaller plots and less room to grow in the soil so its important we consider any plant that can be grown in a container. 


camellia bush growing in a planting pot


In my experience yes, you can grow Camellia in a container. It will need to be size appropriate and have good drainage holes.

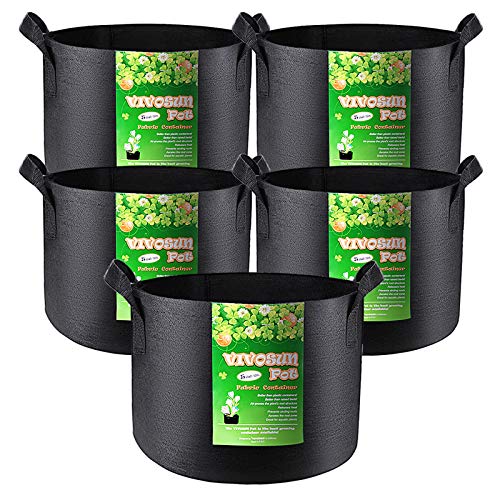
Even if you start with a small cutting which you can pot on in a small container, you will eventually need a large tree pot as they can grow large. You may well need to repot into a larger container every 2 or 3 years.

You will need to provide everything for the shrub in terms of water and food.

The big advantage is that you can move the shrub easily into its perfect position to give it the correct sunlight and shelter positions and you can take it with you if you move to another house. 

Make sure the soil is ericaceous or acid soil as it needs the best conditions to live happily in a container. I generally use this type of ericaceous compost below and every gardener has their own preferences as long as it is suitable for acid loving plants.


You will need to water well at least once a week. This is vital in the autumn/fall as this is when the buds for the flowers are forming. If you do not give it enough water at this time flower buds will not form and that means no beautiful flowers.

Many people chronically underwater Camellia in pots and do not get any flowers and think the shrub is not a good one to grow. This is so easily remedied by simply watering. Especially make sure you water enough in the autumn when buds are forming.

Rainwater from a water butt is best but if you do not have that simply use tap water and ensure you are careful with feeding enough so you maintain the acid balance in the soil.  Feeding is also vital for container grown Camellias and an ericaceous feed is recommended


You may find as I do that a little more pruning is necessary. The one in the container above is in need of both repotting and a prune to reshape slightly so it sits the container better. I will prune it after all the flowers have bloomed. 

I love the Camillia and would recommend growing it. I see it as an early rose-like flower without the thorns of most roses! I love to grow Roses as well but Camellia flowers early before roses are in bloom and gives a beautiful show of lovely colour along with the Spring flowers and bulbs before the summer flowers bloom.

In the ground it is a real low maintenance shrub that can be easily pruned into size and shape. In a container a little more care is required but it is always a pleasure to look after. 


I will always have at least one Camillia in containers and in the garden, but most likely two or three! 


More Gardening Articles

6 Ways To Help Wildlife In The Year Ahead Gardening Articles On Review This Reviews


Note: The author may receive a commission from purchases made using links found in this article. “As an Amazon Associate, Ebay (EPN) and/or Esty (Awin) Affiliate, I (we) earn from qualifying purchases.”


Most Recent Reviews on Review This Reviews


Search for Reviews by Subject, Author or Title

The Review This Reviews Contributors


SylvestermouseSylvestermouseDawn Rae BDawn Rae BMbgPhotoMbgPhotoBrite-IdeasBrite-IdeasWednesday ElfWednesday ElfOlivia MorrisOlivia MorrisTreasures by BrendaTreasures by BrendaThe Savvy AgeThe Savvy AgeMargaret SchindelMargaret SchindelRaintree AnnieRaintree AnnieLou16Lou16Sam MonacoSam MonacoTracey BoyerTracey BoyerRenaissance WomanRenaissance WomanBarbRadBarbRadBev OwensBev OwensBuckHawkBuckHawkDecorating for EventsDecorating for EventsHeather426Heather426Coletta TeskeColetta TeskeMissMerFaeryMissMerFaeryMickie_GMickie_G


Review This Reviews is Dedicated to the Memory of Our Beloved Friend and Fellow Contributor

Susan DeppnerSusan Deppner

We may be apart, but
You Are Not Forgotten


“As an Amazon Associate, Ebay (EPN) and or Etsy (Awin) Affiliate, I (we) earn from purchases.” Disclosure Statement

X