

My Scotts handheld lawn spreader reviewed

Most homeowners love a lush green lawn and achieving that beautiful lawn can
be a lot of work. Luckily for me, I have a small yard so taking care of it
is not so bad.
If you have a large yard you probably have a lawn spreader on wheels. I
honestly don't have room in my garage for one more thing, so I found this
handy little handheld lawn spreader. It is perfect for my small yard.
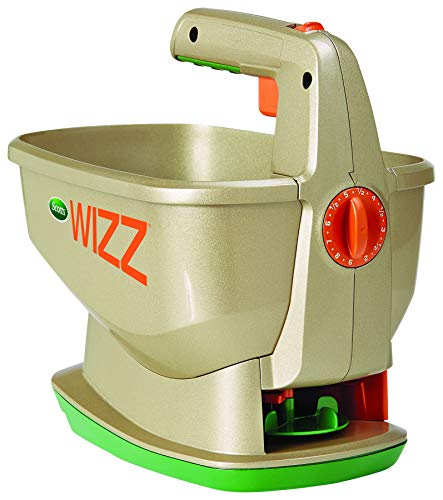
Features of Scotts Hand-Held Lawn Spreader:
Great for small yards
All sturdy plastic
Fully assembled and ready to go
Five spreader settings
Holds up to 1,000 sq. ft. of lawn products
5-Feet of broadcast
Easy hand crank
Scotts recommends feeding your lawn with weed and feed or lawn food four
times a year. I would only feed twice a year, once in early spring and then
again in the fall.
Because we live only two blocks from a lake I quit using weed and feed
because of chemical runoff into the lake. I still use my lawn spreader in
early spring. I spread granulated lime and a couple weeks after that I spread
grass seed.
The lime increases the PH balance and calcium in the soil for thicker
greener lawns and improves the soil structure and root development. The
grass seed is for new growth and helps choke out weeds. The spreader is
perfect for small yards, gardens, and flower beds.
In the winter this little lawn spreader is a handy tool to spread ice melt
on my driveway and sidewalks. Although I prefer spreading the lime and grass seed much better. Scotts even makes a battery-powered spreader. For this one, you will need two AA batteries.
Find more Product Reviews here: ReviewThisProductReviews.com
Scotts Wizz Battery Powered Fertilizer, Seed, and Ice Spreader Scott's 71133 HandyGreen Hand-Held Spreader

Note: The author may receive a commission from purchases made using links found in this article. “As an Amazon Associate, Ebay (EPN), Esty (Awin), and/or Zazzle Affiliate, I (we) earn from qualifying purchases.”
FOLLOW US ON:


