Showing posts with label Cheryl Paton. Show all posts

Thursday, December 5, 2024

I Love Cats Coloring Book Review

I love cats from way back. I had even started doing drawings from photos of our cats over the years, before the internet was even a thing. I had hopes and dreams that our lovey kitties would be the stars in a coloring book.

Years later, after having gotten a computer, and having learned how to do drawings on my computer, I finally got around to creating the book of my dreams. I named it, I Love Cats Coloring Book.

I published it through KDP - Kindle Direct Publishing, which is a subsidiary of Amazon. This is my review.

The print quality of both the cover and the interior turned out great. The only colors are on the cover.


cat coloring book


The coloring pages are printed on the top side of each page and a background page of cats on gray is printed on the reverse side of each page. The gray does not show through to the top page, and it does a good job of reducing and or preventing bleed through to the next coloring page.

As with my other coloring books, there are two pages to test out your coloring media in the back of the book. There you can try out blending techniques, color coordinating, and whether or not the chosen media will bleed through to the next page or not.

This book is more than a coloring book. It has cute little sayings that go along with each picture. I like the added interest; it gives the book a more heartfelt feeling to it and also some humor.


sample cat coloring pages


The pages have a good weight to them and are perfect for coloring. If you are purchasing this for children, then I recommend these colored pencils by Prang. In this set, the core is 3.3 mm thick, making them thicker than some of the others, so they should hold up better for the kids: Prang 3.3 mm colored pencils.

Instead of burnishing with the colored pencils themselves, (laying down lots of color on top of already colored areas), I recommend less pressure and using paper blending stumps to rub over the initial layers. Then color on top of that layer. That helps to spread the colors out better, and it's easier to lay new or more color down on top, and is less damaging to the paper: Blending Stumps. This pack also includes an artist eraser which is also less damaging to the paper. It also includes a sandpaper pencil sharpener.

If you want to get one color off of the blending stump, you can just rub it on a scrap sheet of paper to rub off any excess color. This will make your blending look more like the color that you want it to be, in the picture.

Overall, I am pleased with how the book turned out and highly recommend it to other cat lovers, of any age.


I love cats coloring book


I Love Cats Coloring Book on Amazon


For a coloring relaxing coloring book for adults, check out Signs of Autumn Coloring Book for Adults Review.

For a list of all of my coloring books by category, check out Coloring Books by Cheryl Paton.

Cheryl Paton

As an Amazon affiliate, Cheryl Paton earns income on qualifying purchases made through links on this page at no additional cost to the purchasers.


Note: The author may receive a commission from purchases made using links found in this article. “As an Amazon Associate, Ebay (EPN) and/or Esty (Awin) Affiliate, I (we) earn from qualifying purchases.”


Thursday, November 21, 2024

Atmoko Hair Clippers Review

hair clippers
I did it! I gave myself a full haircut using Atmoko hair clippers for men and women.

I have given myself partial haircuts using hair clippers over the last couple of years or so. But I had done the top part of my hair using scissors. This time I took the plunge. I did the all over cut using clippers!

Here is the before photo. This haircut was mostly done by a salon person in a beauty shop. I had since trimmed my bangs and the back. Believe me when I tell you that the trim in the back was straighter by me than it was done by the stylist. Anyway.... Also, my hair does have some wave to it; that left side usually has a mind of its own, lol.


haircut


The process:

I combed my hair. I left my hair dry as per the instructions for using the clippers, and also added oil to the cutting part; I use sewing machine oil.

Then I gathered my supplies. My plan is to use four comb attachments that came with the Atmoko clippers. Ten actually come with the set, but I chose four of the ten. The largest one is for one inch. I used the one inch, the 3/4 inch, the 1/2 inch, and the 3/8 inch.

I placed rows of paper towels over the bathroom sink. With the clippers in hand, with the one inch comb attachment, a cut my hair, combing it in an upward direction. I also cut it with the same one inch comb attachment, combing my hair in a horizontal direction, going one way and then the opposite way.

I then pinned the upper part of my hair up on top of my head, so that I would accidentally cut off any more from the top than what I had already cut.

Then I used the 3/4 inch attachment on the clippers and followed pretty much the same cutting pattern; up and also horizontally. As I come up with the clippers (with attachment attached), I comb away as I get to the top part of cutting upward.

Then I repeated the previous step with the 1/2 inch comb attachment, but not going up quite as far as I did in the previous step.

Then I only did the process with the 3/8 inch comb attachment on the lower back part of my hair.

I combed it with a regular comb, trimmed the neck with scissors, and gave myself a neck shave.

Here are the results.


haircut, after


I am pretty pleased. 


Here are the clipper supplies that I used.


Having used most of these supplies before, I do recommend them. They give a good cut, and I like that I can do various hair lengths on the back of my head, without always having to have someone else do it.

Other supplies that I used:

Are scissors; I used them to trim around my ears and to cut the line across at the back of my neck.

Styling clips, to hold the top part of my hair out of the way; these are so much better than bobby pins. This is a link for the brand that I used. https://amzn.to/3YZNHaF

And an Olay five blade razor. I like that these have the lotion strips on them and that the five blades gives a closer shave than ones with three or less blades. Here is the link for that. https://amzn.to/3OjgxxE I hold the razor in one hand, a small mirror in the other hand, while I sit in front of a large mirror.

And the star of this hair cutting venture, is the Atmoko Hair Clippers. It is relatively quiet, the attachments are easy to put on, and it is pretty easy to use. They are sold on Amazon.

This looks to have some different combs for over the ears than the ones that came in my set. The ones below look longer. They are the angled ones.


Atmoko Hair Clippers for Men and Women


One BIG tip that I give you, is to lay out your comb attachments that you plan to use, in plain sight, before you start clipping! I didn't do this step one time, and I gave myself a really short haircut! I didn't reach the top of my head, so I was pleased about that. My daughter thought it was cool, but I wasn't a big fan. So yes, do lay those little comb attachments out in plain sight before you start.

Happy hair cutting.

If you are interested in learning how I give a straight haircut at home, check out this blog: How to give a straight haircut at home.

Cheryl Paton


Note: The author may receive a commission from purchases made using links found in this article. “As an Amazon Associate, Ebay (EPN) and/or Esty (Awin) Affiliate, I (we) earn from qualifying purchases.”


Thursday, November 7, 2024

Joomra Barefoot Shoes for Women, Review

I got my first pair of Joomra barefoot shoes for women in April of 2024. I was looking so forward to them. I had been gradually shifting from well padded soles, curved soles, and a slew of other types of shoes from my past. Things had become gradually uncomfortable over the years, that even with wearing low based running and walking shoes as my regular shoe attire, I still longed for something that was better for my feet. Even without having a local shoe store to try any of these barefoot shoes on, it was time to take the plunge. I placed my order with Amazon.

barefoot shoe


The main difference about barefoot shoes, in general, is the wide toe box. They also usually have a soft upper fabric, so toes can stretch out and up to, without being blocked.

Another main difference is their flexibility. I can actually bend my foot from right behind my toes, without any restriction from the shoe.

The other main difference is the zero heal drop. The heal is not raised, so it is like you are walking on level ground when barefoot. They also don't come with arch support, which I am fine with.

My overall impressions:

I love being able to stretch my toes in various directions while wearing my barefoot shoes. Since I work from home, I usually go barefoot or wear flipflops around the house. I thought it would be a breeze switching to wearing barefoot shoes. Overall, it was pretty easy. But new muscles were being used, adjustments in my feet were being made. New aches were beginning to show up.

For awhile, I switched back and forth between my favorite running shoes (I used them for walking.), and the barefoot shoes. That just seemed more confusing to my feet, so I decided to just wear the barefoot shoes.

I started feeling quite a bit of soreness near my big toe, especially on my right foot. I would stretch it out with my foot stretched out behind me, both with the bottom of my toes facing the floor, and then with the top of my toes facing the floor. I would do this several times a day. The stretches helped somewhat.

I did not consider going back to the old style of shoes; they were the reason I had decided to give barefoot shoes a try. So I continued with doing the stretches, and also did some massaging of my feet. My feet started improving. I ordered another pair of barefoot shoes to have another color choice.

One day, as I was scrolling through YouTube videos, I came across ones about fixing your bunion. Hmmm. I didn't really know what a bunion was. But the feet shape looked somewhat familiar. I recognized how the base knuckle of my big toes protruded more outward. Ah, so that's what they are.

Apparently bunions are caused from wearing shoes that cramp your toes. Yep, even as a kid, my toes were cramped. Narrow shoes weren't very common then, and I ended up getting shoes that were too short for my foot length so that they wouldn't be too wide. Then as I grew up, there was the wanting to wear heals. Yep, did that too. Anyway, those past behaviors had contributed to what I was now dealing with.

So low and behold, I have found out about some exercises that I found to be helpful.

The one that I have found most helpful, is wearing a somewhat wide stretchy hair tie, around both big toes at the same time. Both big toes are inside the hair tie. (My feet are elevated on the chair support while I watch some TV.)

feet


When I first started doing this exercise, it was rather uncomfortable, so I place a thick sock folded in half and placed it in the space between big toes. I would wear that for 15 minutes and after a few days, for 20 minutes at a time. Then I was okay with going without the folded sock. My bunions are feeling better. I don't have to do those original toe stretches so much any more. My feet are improving! Smiles.

Other exercises that I have been doing, is squeezing all my toes under, followed by stretching them up and then spreading them out. Since I have added the above exercise, I am able to spread my toes further now. I have also heard that this particular exercise for toes, is helpful in improving circulation in the feet.

The other main thing to mention about barefoot shoes, is that they aren't as padded. I have found that if I am wearing barefoot shoes and walking across a grassy area in my yard, that they are rather comfortable on the bottom of my feet, even without extra padding. But when I am walking on hard surfaces, I usually walk on hard floors and blacktop pavement, I want some extra padding. So I am using Doctor Scholl's air pillow inner soles, no arch support, no bends, just the flat plain inner soles. And I do mean plural, I have two pair of the plain flat inner soles in my barefoot shoes, and that works pretty good.

Was it worth it?

Yes.

My feet are getting stronger. They are healing from my past habits. I'm glad I took the plunge.

The local stores where I live still do not sell any barefoot shoes that I know of, but I know I can get them on Amazon.

Joomra shoes


Joomra Barefoot Shoes on Amazon


These particular shoes come in a variety of colors and patterns. I chose the Joomra brand because I like the shoe style, I resonated with a lot of the reviews, and they are reasonably priced.

I have since tried on a couple of wide rounded toe shoes in a couple of stores, and they did not provide the room and comfort that I found in the Joomra shoes.

Cheryl Paton


If you want to find another use for the wide stretchy hair ties, check out my blog on Alternative Toys for Cats, Review.


Note: The author may receive a commission from purchases made using links found in this article. “As an Amazon Associate, Ebay (EPN) and/or Esty (Awin) Affiliate, I (we) earn from qualifying purchases.”


Thursday, October 31, 2024

The Little Fairy and Her Imagination Review

book cover


The Little Fairy and Her Imagination is a children's story about using one's imagination. The Little Fairy likes playing with her imagination and daydreams about all kinds of things that she likes.

But one day she desires for her friend to have a special home and starts imagining what that home would look like. She so much wanted her friend to have this special home, that she took the time to daydream about it on multiple occasions. Then one day, it seemed that her day dream came true, or at least was beginning to come true.

Did her imagination have anything to do with what seemed to have appeared?

Those are questions that can be raised and talked about when reading this book.

The story goes on, and the Little Fairy tries focused imagining even more. Read the story to find out what happens.

Do you believe in using your imagination in imaginative ways? As a child and a teenager, I imagined things. Nothing came true right away, yet sometimes things did come true further down the road. Hmmmm. Could it be that our imagination can or may have an affect?

This story really doesn't provide the answers, but it does help in getting the discussion started.

I do kind of have my own views. I wanted to convey some of that in the story, without telling but showing what could be possible.

This story, of course is fiction. However, it was inspired by true events that happened in my life.

One day, I was in my home office and glanced out my window, and noticed that the neighbor's tree behind our yard, was being cut down. Oh no, I thought. Then I thought, maybe it's just a trim. But no, it was definitely more than a trim. The whole tree was cut down.

I was disheartened. That tree had provided afternoon shade to my office as the sun moved across the sky. There went my shady reprieve.

From time to time, I gave some thought to, if I was to plant a tree, where would I plant it. I kind of picked out a spot and did imagine where I wanted it to be from time to time. Then I actually thought better of it, and gave it no more thought.

I had wisteria plants that had been growing quite tall out there, that I didn't even know that a tree had sprouted right about where I had wanted it to be. By the time I noticed it, it was taller than me. I decided it was too close to the back wall, and sawed the top of it off. It was quite heavy when it fell.

I thought that was the end of it. Then later, there it was growing back again. I cut it down again and painted the stumps that were left. I had figured that should stop it from growing back. But nope, it grew back again.

And then it dawned on me, that is about where I had wanted one to grow. Then I figured, that if it was meant to be, who am I to now say no to it.

And now it grows in my back yard. It's not quite high enough to shade out the afternoon sun, but it is getting there.

There have been other times over the years that I have imagined some things, that also seemed to have happened out of the blue. So again, I ask you, do you ever play with your imagination?

If you would like to read a fun and simple story that would spark thinking along those lines, then I recommend reading - The Little Fairy and Her Imagination: A story about a thoughtful gift. It is available on Amazon.


The Little Fairy and Her Imagination: A story about a thoughtful gift.


If your answer is no, that is fine too.

Cheryl Paton


Note: The author may receive a commission from purchases made using links found in this article. “As an Amazon Associate, Ebay (EPN) and/or Esty (Awin) Affiliate, I (we) earn from qualifying purchases.”


Thursday, October 17, 2024

My Favorite Gardening Tools, Review

I have been gardening, off and on, for forty plus years. Over the years, I have come to know some gardening tools as my favorite.

The first one is one I happen to find just last year, in 2023. I had been searching the local warehouse stores to replace my trusty forked prong garden tool. No one had any! What happened to them I wondered.

Then low and behold, the last store I checked, I found a different version of my old trusty tool. The blade part wasn't as long or as sturdy as the old version, but it had some new features. Instead of the long round barrel with a forked prong at the end, it had a flattened out and curved blade part, a more pointy prong at the end, and a saw tooth edge along the lower left edge. Hmmm, I thought. I'll give this a try.


weed puller


I was hoping for a longer barreled tool, but overall it seemed to reach a pretty decent depth. And that little more point forked prong seem to grab hold of the weeds, and more easily pull them up. Whoa! I was impressed.

The saw toothed edge also came in handy in sawing off some thicker roots and thick stems. I was beginning to love its versatility.

Then I moved some of my cement garden edgers and needed to channel out a somewhat narrow channel for their new location. This little trusty pronged tool was the answer. It was just wide enough and it allowed me to saw off hardened dirt along the sides which gave me a straighter channel to fit the cement edger in to. I was doubly impressed.

This is the link for it on Amazon: https://amzn.to/3U8Hbg1 I did see other brands on Amazon that had the sawtooth edge on the opposite side, if you prefer those.

I have since found the other prong tool that I had been looking for on Amazon. Some companies call it a dandelion weed puller


Another tool that has become a favorite, is a spade shovel. Since I now have a prong tool that does narrow type digging and prying, I prefer to have a wider type spade shovel. Whether I'm digging up a minor patch of weeds, or having to dig around the roots of larger plants, I really like having a wider spade shovel.
spade shovel


The Fiskars model is pretty heavy duty and has been holding up well. It has an ergonomic type handle, which is much easier to hold than wooden handled spades that I have owned.

The model that I purchased and use is found on Amazon through this link. https://amzn.to/4dQ6JFM

Sometimes my gardening ventures require some more heavy duty digging. Although I like the general rounded type shovel, I use those to dig up large plants, I have really come to appreciate the flat edge shovel.


flat edge shovel


When I want a larger shovel to help define an edge, or when I want to remove top layers of soil that turn out more even, I reach for the flat edge shovel. It helps to create the desired finish that I want.

The closest one that I could find on Amazon is made by Hantop. The one that I have does not have a brand name on it; other than it says USA tempered 2 on it. Mine has a totally flat straight edge on the shovel part, and this one has a sawtooth edge. The saw tooth edge appears to be on the top part of the blade, as customers have commented about it giving a straight edge. This would be my recommendation; it has a 4.9 star rating with 27 reviews. Here is the link on Amazon: https://amzn.to/3A8E4h9


Note: The author may receive a commission from purchases made using links found in this article. “As an Amazon Associate, Ebay (EPN) and/or Esty (Awin) Affiliate, I (we) earn from qualifying purchases.”


Thursday, October 3, 2024

Plant Based Ice Cream Review

plant based ice cream
I had been trying to eat more plant based and began a journey of trying out different types of plant based ice cream. My first attempts on this journey left more to be desired. It just seemed like something was missing, but mostly, the types I tried were rather sweet to me.

I'll give you some background on that. I had been switching my preference for ice tea from sweet to fifty percent sweet, and then to three quarters unsweet and only 1/4 sweet. So I was becoming less inclined to go for anything overly sweet.

For the most part, dairy based ice cream did not seem overly sweet to me. Perhaps that was due to the ratio of fat to sweet. Since there wasn't much if any fat in the plant based ice creams, that might have been part of the reason for the extra taste of sweetness.

The types of the plant based ice creams that I tried, (ones I purchased from grocery stores), had a base of either soy milk, almond milk, coconut milk, and cashew milk. The first three plant based milks I tasted seemed very sweet, and they were from different brands. I was about to give up, and then I happened upon cashew milk based ice cream. It was the best. It had good ice cream flavor and wasn't overly sweet.

There weren't many flavors of the cashew milk based ice cream to choose from, but it did do in a pinch. I highly recommend the ones made with cashew milk. Perhaps the fat content in the cashews also helped with the flavor.

On with my ice cream journey:

I was also exploring various vegan type recipes on YouTube and found quite a few on making your own ice cream. I took the basics from what I learned from various recipes and decided just to give a go with the basics only. This is the recipe that I came up with.

Basic Plant Based Ice Cream Recipe

1 part frozen sliced bananas, 1 part fresh or frozen desired fruit, and 1/2 to 3/4 parts of plant based milk

frozen bananas strawberries


Put all three ingredients in a good performance blender and blend.

ice cream ingredients in blender


It will come out more like soft serve ice cream. If you want it softer, add more of the plant based milk, and less if you want it firmer.

strawberry ice cream in blender


I used my Ninja Auto IQ Kitchen System blender when I am making enough ice cream for two or two plus. Sometimes the portions are larger, lol.

Here are some tips on using the Ninja Auto IQ Kitchen System:

+Plug the unit in once the base is secure on your counter, table. (It has suction feet.)
+Add the ingredients and attach the lid. +Push in the power button. The almost full circle with a vertical line at the top of the circle.
+Then selected the Smoothie button.
+The machine blends and pauses according to it's built in program. It will count down the seconds until it is completely done blending. (I love this part!)
+Almost done. Remove the lid then carefully lift out the blending blade unit. The blades are very sharp. Use a spatula to slide any ice cream into the blender and transport the blending blade to the sink.
+Rinse and then use a bottle brush, I use foam dishwashing liquid to spray it with, and proceed to clean using the bottle brush and the foam cleaner. Do Not Touch the Blades.
+I clean these blades off at this part so that everything comes off more easily. Then it's a breeze. The blender container and the blade assembly can also be washed in the dishwasher. I do it the way I previously described, so that water doesn't set in any of the insides. It's also pretty quick.
+Then, if the mixture is thick enough for ice cream, use a spatula to scrape out the goodness into your bowls or pour the liquid into your cups.

This particular batch turned out to be a milkshake batch! Yum!

plant based ice cream


The ice cream is fresh and tasty, and not overly sweet unless you add additional sweetener of some kind.

If you want to freeze this ice cream, it will come out really firm. You will need to let it defrost at room temperature for 20-30 minutes or more, depending on how much ice cream you are trying to thaw. I really do prefer enjoying it freshly made.

Does it matter which plant based milk to use?

I have used almond milk or oat milk. Those are my main go to's that I have on hand. I occasionally buy cashew milk if I know I am making mashed potatoes. There is only one store here that carries the cashew milk, so I make it with whatever I happen to have on hand. Any of the plant based milks that I have used have turned out well.

This link will take you to the Ninja Auto IQ Kitchen System on Amazon if you are interested in checking that out. https://amzn.to/4eNBs7n
.

This is the link if you're a one serving kind of person and want to check out the NutriBullet blender. This one has 1200 watts, which is good one to use for blending frozen items. https://amzn.to/4042pzB

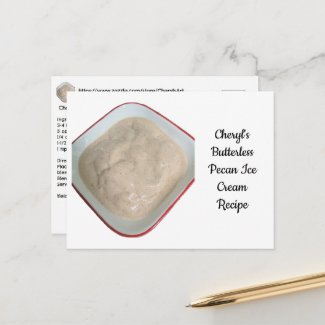
If you are interested in checking out the plant based Butterless Pecan Ice Cream that I came up with, you can check out the recipe post card in my CherylsArt store on Zazzle:

It is scrumptious!

Have you had and or made plant based ice cream yet? What did you think? Will you try making your own batch of plant based ice cream?

Cheryl Paton


Note: The author may receive a commission from purchases made using links found in this article. “As an Amazon Associate, Ebay (EPN) and/or Esty (Awin) Affiliate, I (we) earn from qualifying purchases.”


Thursday, September 19, 2024

Signs of Autumn Coloring Book for Adults Review

I had been looking through coloring books that had relaxation somewhere on the cover. So many of them had intricate designs, many with no real rhyme or reason to them, that filled the page. If I were to describe what I saw, I would say that they were too busy for my taste.

When I think of relaxation, as far as coloring goes, I like at least somewhat recognizable designs, that have larger shapes for the most part. Being an artist and designer, I decided to design a coloring book that I would like.

I chose autumn as the theme; therefore, I could choose a variety of designs that could cover a variety of things that represented autumn. I could have autumn leaves, Halloween, apple pie, and more; all in the same book.


signs of autumn


Yes, I do like the themed designs. I chose to make the coloring pages single sided, so each coloring page could come out cleaner. There would be little to no bleed through should the coloring artists choose markers.

Provided in the back of the book are pages to test out various coloring mediums. Below is an image of the different mediums that I checked out. I used mediums that I had on hand, to give you an idea of how well they and the paper performs.


test of medium samples for coloring


Results of testing of mediums:

Bleed through:
There wasn't any bleed through from any of the colored pencils that I used.

There was bleed through from both types of markers that I used. The bleed through showed on the back of the page I colored on, but did not show up on the next consecutive page. Heavier pressure and or different brands could render different results.

There was some bleed through of the Prismacolor water-soluble colored pencils, once I added water to the color that I had already applied on the page.

There wasn't any bleed through from the watercolors that I premixed with water and paint on the brush, with very little water.

Pressure lines:

Pressure lines showed up through the back side of the page when I used the PaperMate Ink Joy Gel Pen. It was a size 0.7. The pressure lines also went through to the next page.

Pressure lines also showed up on the back side of the page when I used the Office Depot Gel Pen, but they weren't as noticeable as the pressure lines from the PaperMate gel pen.

On with the review:

Each design page has a dark gray border around the perimeter of the drawing, should anyone want to frame and or hang individual pages. The frame type border also provides a nice finished edge.

The paper has a good weight to it. It has a smoothness to it that is not overly smooth; it is not type writer paper. It has a bit of texture to it, as to grab and hold the color from colored pencils, etc.

My recommendations:

If you or you know someone who likes coloring larger images and or autumn themed coloring books, then I recommend this book.

If you prefer using gel pens in your coloring book, and you like this book, then I recommend placing a sheet of thin smooth cardboard under the page that you are coloring and or outlining with gel pens.

My preferred coloring medium for this project is the Koh-I-Noor Polycolor Coloured Pencils. I used the twelve pack, but would very much like to have the 24 pack, as they have a variety of landscape colors which would be great for coloring leaves and such.

This coloring book is ready for purchase on Amazon.


Autumn coloring book


Signs of Autumn Coloring Book for Adults on Amazon


You can find more coloring books by Cheryl Paton on this blog: Coloring Books by Cheryl Paton.

Cheryl Paton


Note: The author may receive a commission from purchases made using links found in this article. “As an Amazon Associate, Ebay (EPN) and/or Esty (Awin) Affiliate, I (we) earn from qualifying purchases.”


Thursday, September 5, 2024

Alternative Toys for Cats Review

For many of us cat lovers, we strive to please our fur babies. Many times we buy the next toy at the pet store hoping this will be the one to strike their fancy. Today, I will share some of the lesser known toys for cats that you won't find at the pet store.

First up is hair bands. I purchased a package of thick ones, made for pony tails. I wanted thicker ones, figuring that they would hold up longer and probably go farther than the thinner ones. I shot the thick hair band across the floor, and it caught Tori's attention. She was after it in no time.


cat pounce


Tori is most intrigued with the hair band when I shoot it but has also been observed playing swat and bat it around, and carry it, without my input. That's a winner for me. The ones that I bought are around 5/8 of an inch wide, and are rated as no damage as far as hair goes. You can check out the options for these types of hair bands on Amazon.

While I was checking out things that might intrigue my cat, I considered other alternative options that fly. Hince, the paper airplane.

The first one I made was from a post it note. Post it note airplanes do not travel far at all, but they do kind of float down. Tori was somewhat intrigued, and also showed interest in it even when I didn't make it fly. But not as much interest as she showed in the hair band. I give the Post it note airplane a medium thumbs up.

Then I tried making an airplane from a larger sheet of paper, without any takiness on the edge of it. It too, didn't go that far. Then I added a flip up on the long folded edge. I also did this modification to the Post it note airplane; they both went further! Yay! Tori's interest however was short lived, even with the longer distance. She did though prefer to bat the smaller airplane around in some of her passings though. So if you make paper airplanes for your cat(s), I recommend the smaller size.

If you need a refresher course on how to fold a paper airplane, here is one of the options.


If your cat or cats like the proverbial cardboard box, then a box train can be a fun alternative for your cat(s). Some pet owners have made a train with multiple boxes attached; some held together better than others. It can also be a fun alternative for a single cat. This video shows how the cord can be more entertaining than riding in the box. However, it is still a fun adventure. It is one I'm definitely considering once I get a good box size that is in decent shape.


For my last alternative cat toy option today, I present the idea of Dominos. From what I've seen, the Dominos cat adventure appears to be more of a spectator sport. Unless the cats already know how to press buttons, in a way that the Dominos builder has made in an intriguing way for the cat to nudge a Domino, it is pretty much just the cats being aware of all the Dominos falling in various formations. If you have lots of time on your hands and want to entertain your fur babies in this way, I would pass on this. But there are many people who love building Dominos in this way.

In this video, however, is a fun toy meant for children, where a cat was most intrigued in trying to retrieve a ball that was ready to go down a spinning hole. I would say, forget the Dominio buildng, and play with the spinning ball toy. Here you go:


The marble run toy looks similar to this one. I chose the one with the Lego base, as I figure it would be less likely to get knocked over, and would make for a longer, and therefore more playing time with your cat(s).

marble run toy


Marble Run Toy on Amazon


What are your opinions? Do you have a favorite alternative you would like to try with your cat(s)? Do you have a different cat toy alternative that you would like to share?

Thank you in advance for your comment.

Check out other favorite cat toys for cats on my blog: Fun Cat Toys to Play with Cats.

Cheryl Paton


Note: The author may receive a commission from purchases made using links found in this article. “As an Amazon Associate, Ebay (EPN) and/or Esty (Awin) Affiliate, I (we) earn from qualifying purchases.”


Thursday, August 15, 2024

Meet Cheryl Paton on Review This Reviews

I am honored to be invited to add reviews on Review This Reviews. My passion is cats; I love cats. You will probably find reviews about my favorite cat items, some common and some not so common. Sometimes the best toys are not things made specifically for cats, i.e. paper bags. I will be writing about perhaps lesser known items that cat lovers will love.

contributor


I also have a variety of interests. I am an artist. I was a literacy tutor for 12 plus years. And I am a homeowner. I will be sharing about things that I have liked and have found helpful. Hopefully you can learn some things that are helpful to you as well.

As an artist, I love being creative. My main medium is acrylic paint, and I also dabble in watercolor. I have a variety of stores on Zazzle, including my main one, CherylsArt. I have been having a lot of fun designing scrapbook paper. You can find individual sheets at my ScrapbookBackgrounds store on Zazzle. Paperback books of my scrapbook paper designs can be found on my blog Cheryl Paton Scrapbook Paper. The paperback books are arranged by category there.

It's been awhile since I was a literacy tutor. However, I did write a variety of tips and strategies about what can be helpful, literacy wise. I also wrote a Phonics Guide book, with phonics tips arranged alphabetically. You can head on over to my Phonics blog here.

As a homeowner and shopper, I also started writing about product reviews, and you can find my earlier product review writings here.

On any of my blogs, you can find a list of my other blogs in the right hand column, including the one on cats.

If you visit any of my blogs and find an unhappy face where an image used to be, leave me a comment and I will get to updating it. Amazon had changed the way they allow affiliates to promote, and I am still updating them. Thank you for your understanding.

I'm around on various sites. The main ones are:

CherylsArt1 on Facebook
Art on Products on Blogspot
CherylsArt on Zazzle

Cheryl Paton


Note: The author may receive a commission from purchases made using links found in this article. “As an Amazon Associate, Ebay (EPN) and/or Esty (Awin) Affiliate, I (we) earn from qualifying purchases.”


Most Recent Reviews on Review This Reviews


Search for Reviews by Subject, Author or Title

The Review This Reviews Contributors


SylvestermouseSylvestermouseDawn Rae BDawn Rae BMbgPhotoMbgPhotoBrite-IdeasBrite-IdeasWednesday ElfWednesday ElfOlivia MorrisOlivia MorrisTreasures by BrendaTreasures by BrendaThe Savvy AgeThe Savvy AgeMargaret SchindelMargaret SchindelRaintree AnnieRaintree AnnieLou16Lou16Sam MonacoSam MonacoTracey BoyerTracey BoyerCheryl Paton Cheryl PatonRenaissance WomanRenaissance WomanBarbRadBarbRadBev OwensBev OwensBuckHawkBuckHawkDecorating for EventsDecorating for EventsHeather426Heather426Coletta TeskeColetta TeskeMissMerFaeryMissMerFaeryMickie_GMickie_G


Review This Reviews is Dedicated to the Memory of Our Beloved Friend and Fellow Contributor

Susan DeppnerSusan Deppner

We may be apart, but
You Are Not Forgotten


“As an Amazon Associate, Ebay (EPN) and or Etsy (Awin) Affiliate, I (we) earn from purchases.” Disclosure Statement

X