Showing posts with label Photo Bug on Review This. Show all posts

Thursday, August 7, 2014

National Lighthouse Day

Today, August 7th is National Lighthouse Day in the USA.  In honor of the day I will be posting photographs of lighthouses that I have taken during my trip to the New Jersey coast this past week.

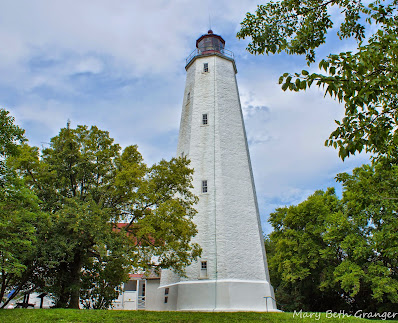
This first lighthouse is the oldest continuously operating lighthouse in the US.  It was first put into operation in 1764. Sandy Hook is found at the tip of the peninsula just across the harbor from New York.  
Sandy Hook Lighthouse photo by mbgphoto
Very near Sandy Hook high on the hill overlooking the harbor I saw the dual lighthouses of Navesink.  With my long lens I was able to capture this photo.
Navesink Lighthouses photo by mbgphoto
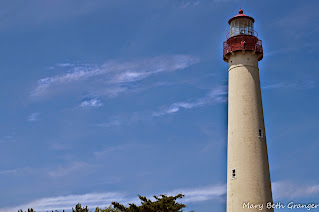
On the very southern tip of the New Jersey shore we visited the lighthouse at Cape May.  It is a tall lighthouse that is open for visitors to climb.  I took this photo as I walked along the wood walk out to the shore.
Cape May Lighthouse photo by mbgphoto
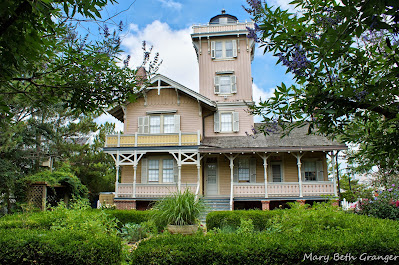
One lighthouse I really enjoyed visiting was Hereford Inlet light.  This lighthouse is located on the Jersey shore about 1/2 hour south of Atlantic City.  It has beautiful gardens that surround the lighthouse.  Here a couple of photos of the lighthouse and the gardens.
Hereford Inlet Lighthouse photo by mbgphoto

Hereford Lighthouse boat photo by mbgphoto

flowers photo by mbgphoto
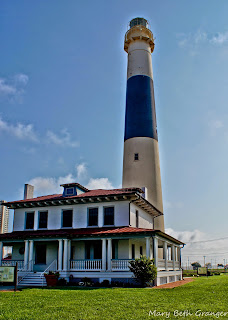
Atlantic City also has a lighthouse called Absecom.  It was hard to get a good photo because of the fence and the lighting but here is one that I was able to shoot.
Absecom lighthouse photo by mbgphoto
In the last 8 years I have traveled all around the US and some of Canada photographing lighthouses, as of yesterday I photographed 101 lighthouses.  It is always an adventure locating the lighthouses and looking for the best angles for photographs.  I hope you enjoy my latest photos.  

If you have a hobby you would like to share I encourage you to write about it .


Note: The author may receive a commission from purchases made using links found in this article. “As an Amazon Associate, Ebay (EPN) and/or Esty (Awin) Affiliate, I (we) earn from qualifying purchases.”


Thursday, July 31, 2014

Seeing your Home Town- Don't Forget the Camera

When you are out and about the town this summer be sure to remember to take your camera.  We always seem to take our camera on vacation but often we forget about taking photos when it comes to activities in our own town.

I am from the St. Louis Missouri area and when my grandchildren visit from Atlanta, Georgia I try to take them around and show them the sites.  I have taught them to take photos of the places they see and they love to look for photo opportunities.
Here are some photos of a recent trip to The Butterfly House.
The first was taken by Rachel who is 10.

butterfly photo by mbgphoto
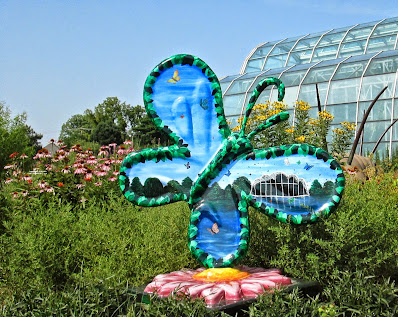
Ella who is 8 also loves to take photos.  Here is one she took outside The Butterfly House
Butterfly House in St. Louis photo by mbgphoto
Taking photos of their home town and sharing them online is a popular activity.  Here are some
home town area articles.


Here is another photo from my hometown.  It was taken at the St. Louis Zoo.
colorful parrot photo by mbgphoto

Wherever you live I hope you will share your photos from your area in your writing. 


Note: The author may receive a commission from purchases made using links found in this article. “As an Amazon Associate, Ebay (EPN) and/or Esty (Awin) Affiliate, I (we) earn from qualifying purchases.”


Thursday, July 24, 2014

Remember Special Times with Photos

Special Occasions are great times to take photos.  They also make great subjects for your writing.  I have written several pages about special times for our family and included our family photos on the pages.  We have a family christening dress that has been worn by all of the female members of three generations.  I found writing a page to be a great way to write about the dress and share it with my children and nieces and nephews.  Here is a link to the page I wrote about the dress.
Christening Dress


photo by mbgphotoMany online writers like to write  about their parents.  It is a great way to put those memories from the past in writing.  When my Mother died last March my sister made copies of the lens that I wrote on Mother to have available for visitors at the funeral home.   We also sent copies to some of our out of town relatives.  Everyone said they really appreciated the piece.  My Mom a Very Special Lady


My grandchildren all live several hours away from me in another state so it is a big treat for all of us when they come to stay with us during the summer break from school.  We try to make this time special with visits to places around St. Louis where we live and special times with Grandma and Grandpa.  In some years I will make a photo book for them on Shutterfly and other times I write about the experience on Hubpages and include lots of photos.
Summer Fun with Grandchildren


photo by mbgphoto


Next time you are searching for a subject to write about, consider some of those special family memories and put them on a page to share with others.


Note: The author may receive a commission from purchases made using links found in this article. “As an Amazon Associate, Ebay (EPN) and/or Esty (Awin) Affiliate, I (we) earn from qualifying purchases.”

Thursday, July 17, 2014

Using Photos to Tell Your Story

I think photos make a story so much more interesting.  Yes you can use your imagination when you read a story, but actually seeing a place or object can really bring it to life.

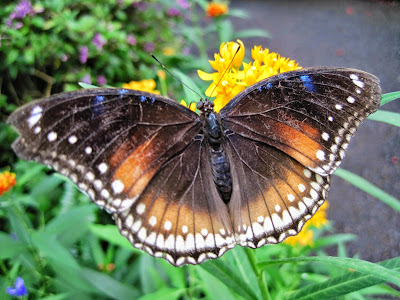
The photo below shows one of the beautiful butterflies at The Butterfly House in St. Louis.  When I wrote about this butterfly, I used lots of photos to tell my story. Paper Kite Butterfly .
Paper Kite Butterfly photo by mbgphoto

Here are some  more ways that writers use photos to enhance their pages.

  • The photos on this recipe lens written by MissMerFaery really help you to visualize how to make the custard.  It also  makes you hungry!  Homemade Custard
  • Next time you get ready to write a page online be sure to look through your photo files and find the photos that will bring your subject to life.  

butterfly photo by mbgphoto


Note: The author may receive a commission from purchases made using links found in this article. “As an Amazon Associate, Ebay (EPN) and/or Esty (Awin) Affiliate, I (we) earn from qualifying purchases.”


Thursday, July 10, 2014

Creative Flower Photography

Flowers are everywhere and I have seen many pages online  where people include photos of flowers.  It may be a page about gardening, a product for flowers, or perhaps a vacation where you  enjoyed beautiful flowers.  Whatever the occasion you will want to make sure you have some great photos of flowers to include on your page.

Taking photos of flowers is easy and with a bit of creativity you can capture some great images.
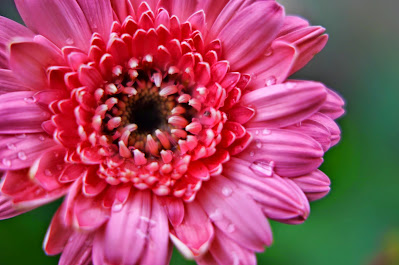
pink flower photo by mbgphoto


This week as I was browsing through some of my own flower images I wrote this page on photographing flowers.

Here are some pages where writers online use flower photos 


  • On this page Sylvestermouse shows us the beauty of her own garden Gardens and Trees
  • Dawn Rae writes about travel in the mid atlantic states.  On this page she shares her flower photos on a trip to Longwood Gardens
flower photo by mbgphoto
I am looking forward to seeing even more great flower photos online.  Happy Shooting !
photographs on this page are my own-mbgphoto


Note: The author may receive a commission from purchases made using links found in this article. “As an Amazon Associate, Ebay (EPN) and/or Esty (Awin) Affiliate, I (we) earn from qualifying purchases.”

Thursday, June 26, 2014

What should I Photograph?

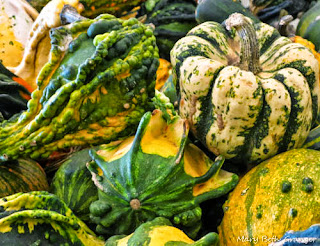
gourds photo by mbgphoto
I am always looking for different things to photograph.  In this photo I found a bin of gourds at a farmers market and thought they looked interesting.  I tried to get in close to get the details in the gourds.
cute dog photo by mbgphoto

Pets are always fun to photograph.  Try to look in to their eyes in the photograph.  I know that is easier said than done many times.

In this photo, I got my brothers dog, Jessie to sit still and look at me as I took her photo.

Wild animals are fun to photograph too.  I often sit by my sliding doors with a longer lens camera and take photos of birds, squirrels and rabbits in my backyard.


Have you ever been stuck for an idea of something to photograph?  A good way to get out of this kind of funk is to view the photography of other people.  On this page Pat Goltz gives you some really different ideas of things to photograph Think Photography .  I love the way she looks at subjects.  She comes up with some amazing photographs. In this article she shows you weird items to photograph and ways to use filters on ordinary objects to make them look different.  Stop by and read Pat's lens for some real motivation.

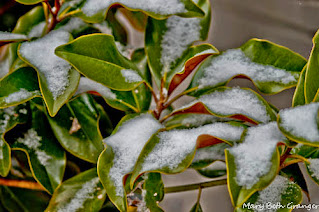
When you photograph nature try to find ways to make your photograph different.  Look for a flower after the rain or perhaps some leaves catching the falling snow.  Here are two photographs where I captured nature with the elements.

orange hibiscus flower photo by mbgphotophoto by mbgphoto


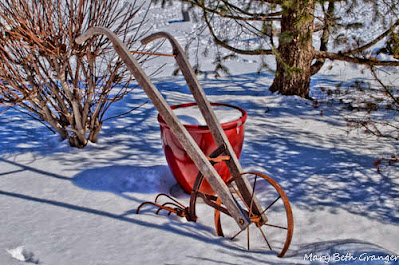
Shadows can make an ordinary item look unique in a photograph.  Notice the long shadows of the old plow in the snow.
wheel plow in the snow photo by mbgphoto


There are an endless number of things to photograph in this world.  Just look around you, use your imagination and your creativity.  If you are stuck on what you should photograph next, take a look at this lens by danthemans Photography Ideas.  On this page he gives you lots of ideas to spark your imagination and motivate you.

No matter what type of camera you use whether a camera phone, point and shoot or DSLR it is the ideas that you have that make the photo.  Take the time to look at the world around you through the lens of a camera.  It will give you a greater appreciation for this amazing world.


Happy Photographing!


Note: The author may receive a commission from purchases made using links found in this article. “As an Amazon Associate, Ebay (EPN) and/or Esty (Awin) Affiliate, I (we) earn from qualifying purchases.”

Thursday, June 19, 2014

Photographing your Vacation

I recently took a course on travel photography and the instructor gave some valuable advice on taking photos when you travel.  He said the first thing you needed to do is to decide on the purpose of your photography.  He suggested three possible goals.


  • Document your trip
  • Document your destination
  • Just take great photos
If you are looking to document your trip than you want to have lots of photos that include you and the people you travel with.  You would document what you are doing and with whom.  This is a very common form of photography for many amateur photographers, some of which only get out their camera out at vacation time. This is a great way to capture those memories to enjoy in the future.
photo by mbgphoto


Other people want to really capture the essence of the places they visit.  They will spend a lot of time making sure that they photograph all of the sites in the place they are visiting.
lighthouse photo by mbgphoto


The third group is people who don't care as much about the documentation as they do taking great picks.  Many "Photo Enthusiasts" fall into this group.
seashells on the beach photo by mbgphoto


Vacation time is a great time to take photographs and with a bit of advance research you can make sure you get some wonderful photos that will meet your photo goals.  Here are some things you should consider.


  • Research your destination ahead of time. There are many great books on travel destinations at the library or you can research your location on the internet for lots of great information.  Find out about events or festivals that might be taking place when you are there.  Identify iconic structures that you would like to photograph.  Make sure you understand the weather and are prepared for it.  
  • Pack you camera equipment carefully.  Make sure it is all in working order before you leave.  Bring extra batteries and memory cards.
  • When you get to your destination talk to people about where you want to visit and places to photograph.  Some good sources of information are hotel lobby clerks, employees of restaurants and shops and cab drivers.  Be sure to check out the brochure racks in the hotels.  If you are driving I have found the the information centers as you enter each state are a great source of information.
Jupiter Florida photo by mbgphoto


Photos on this page are all from a trip I took to Jupiter Florida last March.  They show the three types of photography goals for travel.


Note: The author may receive a commission from purchases made using links found in this article. “As an Amazon Associate, Ebay (EPN) and/or Esty (Awin) Affiliate, I (we) earn from qualifying purchases.”


Thursday, June 5, 2014

Photographing a Lighthouse at Sunrise

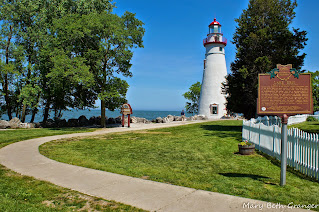
Marblehead Lighthouse on Lake Erie in Ohio photo by mbgphotoPhotographing a lighthouse at sunrise is a challenging but rewarding adventure.  I recently photographed Marblehead Lighthouse on Lake Erie in Ohio.  I wanted to make sure I got just the right shot, so we went to the lighthouse the day before to check out the site.  The lighthouse was open at the time and there were lots of people around, so although it was not an especially good time to get photographs it was a good time for me to explore and consider what vantage point would be best for my sunrise shot.

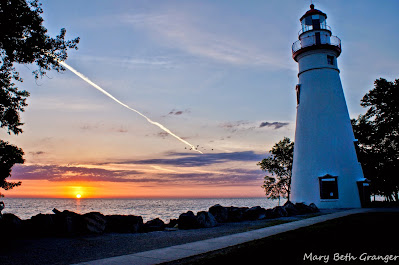
The next morning I arrived at the lighthouse well before sunrise.  As it turned out I must have looked at the sunrise chart wrong and thought it was at 5 a.m. when it was really 6 a.m..  It was really dark when I arrived but I went ahead and set up my camera to take the photos.  The green light in the tower was blinking every few seconds and gave off an eerie glow in the night sky.  For my first photos I set my camera on the tripod and used the automatic scene setting for nighttime shots.  This set my camera at f3.5 with a speed of 1/5 sec.  Because it was so dark the aperture went to 3200 and gave the photo a rather grainy look as you can see below.  I really do like the effect with the green light on the lighthouse and the pink in the early morning sky.
Sunrise at Marblehead Lighthouse on Lake Erie in Ohio photo by mbgphoto
It was still about a half an hour till sunrise and my camera was set up and ready for the sunrise.  I was able to enjoy the beautiful scene and watch the sky turn colors as the sun was just below the horizon.  What a magnificent sight.  I will never tire of watching the sun rise and marveling at how each one is just a bit different.  As sunrise got closer I took my camera off the automatic setting.  The sunrise photo was taken with the camera at f6.3 at 1/100 sec.  My ISO was set at 100.

As the sun rose above the horizon, I watched as everything took on a different look.  Just as the sun tipped over the horizon an airplane went through the sky leaving behind a contrail in the middle of my photo.  Some may feel the white line is distracting and at first I thought oh no!  As I look at my finished photo, I kind of like that white streak.    What do you think?
Sunrise at Marblehead Lighthouse on Lake Erie in Ohio photo by mbgphoto

Marblehead Lighthouse on Lake Erie in Ohio photo by mbgphoto


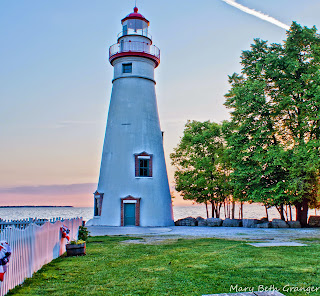
After sunrise I walked around the grounds looking at how the newly risen sun was coloring everything.  I love this shot with the fence glowing in the pink bask from early morning sun.  It seems like the whole scene is taking on a pinkish cast.  

It is really fascinating to  photograph a scene at different times of the day.


Checklist for Photographing Sunrises


  • If possible, check out your location the day before.
  • The night before recheck your equipment and make sure everything is charged and working.
  • Practice camera settings in daylight so you aren't fumbling in the dark.  You  might want to bring a small flashlight with you.
  • Don't forget your tripod...it is critical for good sunrise photos
  • Arrive before sunrise so you have plenty of time to set up and get some of those beautiful presunrise photos.  Some of the best colors are often 30 minutes before sunrise.
  • Relax and enjoy the beauty of the moment!
Here is a page I wrote on my adventures of photographing the Marblehead lighthouse.


Note: The author may receive a commission from purchases made using links found in this article. “As an Amazon Associate, Ebay (EPN) and/or Esty (Awin) Affiliate, I (we) earn from qualifying purchases.”


Thursday, May 29, 2014

Photography Field Trip

This week was the end of my photography class.  I will have to say that I learned a lot and feel that I have lots of new information to enhance my skills as a photographer.  Our last two sessions included a field trip to the Missouri Botanical Garden and then a classroom session to go over the photos that we took during the trip.  I thought I would take this week's blog post to share with you the photos that I took on the trip and a few tips I learned along the way.
purple iris photo by mbgphoto
The Irises were at their peak when we visited the garden so I was able to get several nice shots. This photo of the purple iris was taken with my 50mm lens using aperture priority at F1.8.  This lens was new to me so I used it the entire trip to get myself comfortable with the lens.  You will note how when I focused on the main iris it put it in focus and gave a soft focus to the rest of the photo. I used the same lens and aperture for the daisies that you see in the photo below.   In this case I was closer to the daisies in the foreground so I got an even greater blur in the background.
yellow daisies photo by mbgphoto

I had a bad habit of using my screen to look at when I took photos instead of the viewfinder.  I worked hard at trying to break this habit during this field trip and was successful for the most part.  My instructor encouraged the use of the viewfinder in taking photos and after using it I could really see the difference.

The other tip that I learned from the instructor during the trip was to turn off my automatic ISO setting.  I am not sure how I ever got in the habit of leaving it on but it was interfering with some of my close up shots and I found my problems were taken care of when I used the manual settings for the ISO.  I kept it at 100 for most of this trip.
flower photo by mbgphoto
Here is another flower using the F1.8 setting.  In addition to photographing flowers we also photographed a waterfall using different aperture settings in aperture priority.  What this does is changes the speed the camera is using and gives you a completely different look to the water.  In this photo I used the F4 setting and you see the more distinct water in the photo.
waterfall photo by mbgphoto
For getting the smooth flowing look in the water I changed the aperture to f22 which slowed down the speed of the camera.  The result is seen in the photo below.
waterfall photo by mbgphoto
I hope you have enjoyed my series of posts on my Nature Photography class.


Note: The author may receive a commission from purchases made using links found in this article. “As an Amazon Associate, Ebay (EPN) and/or Esty (Awin) Affiliate, I (we) earn from qualifying purchases.”

Thursday, May 22, 2014

Macro/Close Up Photography


close up photo of a yellow daisy photo by mbgphoto


Taking photos close up can really be a lot of fun.  You see the world in a whole new light.  I am always amazed by the details in flowers when I get close up.  In the last session of our nature photography class the instructor talked about equipment for macro and close up photography.  If this would be my primary focus for photos I would want to buy a macro lens but they are rather costly and my primary focus is lighthouses and landscapes.  The instructor suggested several alternatives.  The one that seemed to fit my needs was to buy a 50mm 1.4 or 1.8 lens and then to get extension tubes for even closer shots.

The photo above was taken with the 50 mm lens at at 1.8 aperture. I have a bit to learn about getting the focus in the right spots, but overall I am very pleased with my first results.  The 1.8 aperture allows a lot of light into the camera and I am able to focus at a very close range.  The daisy above was taken with this camera.  You will not how just the very center of the flower is completely in focus.  The primrose below is another of my first tries with the new lens.
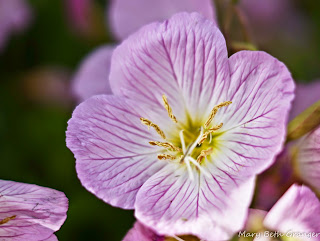
close up photo of a primrose photo by mbgphoto


Close up and Macro photography can be a lot of fun.  I hope you have enjoyed the tips on this page.  Happy Photographing!!

Stop by my page for the latest tips on Field Photography http://www.squidoo.com/field-photography-tips


Note: The author may receive a commission from purchases made using links found in this article. “As an Amazon Associate, Ebay (EPN) and/or Esty (Awin) Affiliate, I (we) earn from qualifying purchases.”


Thursday, May 15, 2014

Your Photography Kit

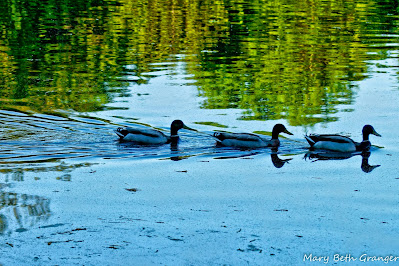
ducks on the water photo by mbgphoto

This is the 4th in a continuing series on a Nature Photography class I am taking.  For week 4 we talked about equipment and what a photographer should have in their kit.  Our instructor showed us much of his equipment and talked about some good options depending on what type of photography you take.

My primary camera is a Sony DSLR A57.  The list below is what I have in my kit.  The starred items are ones that I'm hoping to get in the future.


  • Lens coverage from 18mm to 300 mm.  I have two zooms to cover this area.  One is a 18-70 and the second is a 75-300 zoom lens.
  • *  I have just ordered a 50mm 1.8 lens
  • * An off camera flash is on my wish list.
  • Extension tubes
  • Polarizing Filter
  • Tripod
  • *Cokin gradient Neutral Denisity filter is on my wish list.
  • Monopod
  • Pop out Reflector set
  • Cable  Release
  • Extra Battery
  • Extra memory cards
I use a lowepro sling backpack type bag to carry my camera equipment.  It is lightweight and carries everything I need when on a photograpy outing.
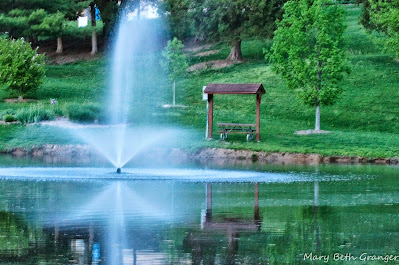
fountain photo by mbgphoto

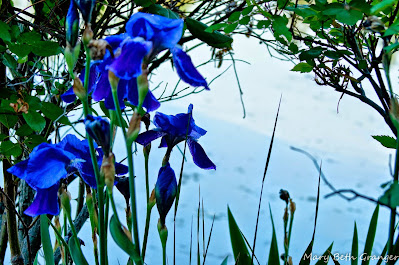
The photos on this page are ones I took for our assignment this past week. We were to go to a remote place and carry with us the equipment we would need to take our photos. I used my 75-300 mm zoom telephoto lens.  Since it was evening and the sun was setting, I used my tripod and my cable release to get a clear photo.  
blue irises photo by mbgphoto


Note: The author may receive a commission from purchases made using links found in this article. “As an Amazon Associate, Ebay (EPN) and/or Esty (Awin) Affiliate, I (we) earn from qualifying purchases.”


Thursday, May 8, 2014

Field Photography and Close Ups

yellow flower photo by mbgphoto
This is the third post in my series on the Nature Photography Class I am taking.  Each week we have a homework assignment and the assignment for this past week was to take an artistic photo of a flower.  The photo above is the one I submitted.  It is the backside of a Gerbera daisy.  In order to take the photo I made my own background by draping a black velvet skirt over a chair and sitting the potted plant on the chair.  I used my tripod and zoomed in close to capture this photo.  Here is the photo of the front of that same flower.  The instructor said that although the front flower was a good one he enjoyed the photo of the back since it was a side people usually don't see.  He also said it was good that I did not center the back flower photo.  It gives it more interest.
pink flower photo by mbgphoto

Field Photography

In the class we talked a bit about field photography with an emphasis on what to bring when you go into the field to photograph.  The main point that I got from this was that you should think careful about what you want to photograph and not try to bring all your gear but rather just what will be needed.  Here are some considerations and items to pack in your bag to overcome them.

  • Wet Grass/Mud--carry a folded up heavy duty trash bag to kneel or sit on.
  • Wind- consider carrying an umbrella to use to block the wind
  • Controlling light- reflectors in various colors-black,white, gold, silver
  • Transporting gear- pick a bag that is lightweight and fits what you are doing....you wouldn't want a heavy bag for a longer hike

Macro  Photography

We also discussed macro and closeup photography in the class.  The instructor said the difference is that macro photography would be taking a photo  at 1/2 life size or greater.  Less than that it would be close up photography.  He said most macro settings on cameras are really close up photography.  He talked about several options for taking macro photos.
  • Macro Lenses--these are great for getting small details.  The lens come in a variety of size and the instructor said if you were to get just one he would suggest something in the 70-80 mm range.  Macro lenses are a bit on the expensive size so you may want to consider the next less expensive option.
  • Extension tubes--these tubes help you to get macro photos without the expense of the macro lens.  They can be purchased usually in sets of 3 and can be used in combination with any lens...zoom or otherwise.
  • Diopter lenses- these lenses will magnify and help in macro photography.  They DO NOT work well with zoom lenses.
  • Focus Rails--this is a great tool that can be attached to your tripod to move the camera back and forth when you are focusing.  Much easier than trying to move tripod to focus.


Note: The author may receive a commission from purchases made using links found in this article. “As an Amazon Associate, Ebay (EPN) and/or Esty (Awin) Affiliate, I (we) earn from qualifying purchases.”

Thursday, May 1, 2014

Basic Techniques for Digital Photography

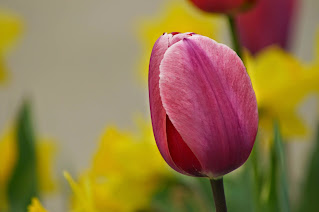
pink tulip photo by mbgphoto


Last week I shared my notes for the first session of our Nature Photography class.  Here are some additional points from that first class Nature Photography Class.  The photo of the tulip is one that I took using some tips I learned in that first class.

In our second class our instructor went over some basic techniques for photography.  The list below includes some of the points he made in class that were of particular interest to me.  I hope  you find some that will work for you too.

  • Vantage Point--  Look for a different vantage point for your photos.  Everyone sees an object straight on when they see it, help your audience to see it differently.  Take your time, walk around an object to find just the right place to take the photo and then set up your tripod.
  • Take Both Vertical and Horizontal Views--Even if you think one way would be best try taking it both ways.  You never know when the other way might be what you need for a certain project.
  • Watch Your Background-  How many times are we so focused on the person or object that we are photographing that we don't notice the background till we see the finished photo.  Before you hit the shutter, make it a habit to run your eyes through the outside perimeter of the picture.
  • Waterfalls- To get that beautiful blurr of water take the photo at a speed of 1/15 sec or slower using your lowest ISO.
  • Animals- To get the best reaction from an animal shoot 2-3 shots in close succession.  The first one will get the animals attention and the second will usually have the best reaction.


Each week our instructor gives us an assignment.  This week's assignment is to take an artistic photo of a flower.  Next Thursday I will share my photo with you along with the tips that we get in our third class.  The subject next week will be on Macro Photography. Stay tuned!


Note: The author may receive a commission from purchases made using links found in this article. “As an Amazon Associate, Ebay (EPN) and/or Esty (Awin) Affiliate, I (we) earn from qualifying purchases.”


Thursday, April 24, 2014

Nature Photography Class

jonquil flower photo by mbgphoto

Photography classes are a great way to enhance your skills as a photographer and to learn some new techniques.  I try to take a new class or seminar each year. I just started a new 6 week class on nature photography and over the next weeks I will share with you some of the tips that I have taken away from the class.

In our first class the instructor gave us an introduction to the class.  He first described his take on what comprises nature photography.  For him it is wildlife, panoramic scenes, and basically anything outdoors that does not involve the 'hand of man".  In the introduction we were given some guidelines on photo ethics.  A good photographer will respect the earth and leave the area in the same condition he found it.  Here are some of the points the instructor made.
  • Be concerned for the safety and welfare of the subject
  • Do not dig up plants
  • Don't trim or snap plants
  • Do not expose nests or handle babies
  • Do not lie!  Make your shot be authentic.
We were told that it is important to know your subject.  You can do this by taking the time to research your subject before you start photographing and to take the time to observe your subject.  For instance if you are trying to photograph butterflies take the time to learn a little bit about their habits and it will be much easier for you to find them and get a great photograph.  Many parks and wildlife areas will have pamphlets about their plants and wildlife that will give you hints on the best times to observe and photograph them.

The instructor also stressed the importance of knowing your camera.  He suggested sitting around at home and just taking photos of anything using all different settings just to get to know all the features on your camera.  In fact we have a homework assignment to photograph a ruler to learn how close our camera can focus.  We will  be doing this using each of our lenses.  We will then photograph the ruler outside with a zoom lens using both the shortest and the longest focal length at a F8 setting.  This will show us the difference in the backgrounds with each focal length.  Taking the time to learn the camera in this manner will help us to use the right settings when we are out in the field.

I am really looking forward to our next class next week and next Thursday I will again give you some tips from the class.


Note: The author may receive a commission from purchases made using links found in this article. “As an Amazon Associate, Ebay (EPN) and/or Esty (Awin) Affiliate, I (we) earn from qualifying purchases.”

Thursday, March 27, 2014

Photographing Children

Photographing children is a fun and sometimes challenging activity.  My granddaughters are used to me always having my camera around and when they are in the  mood they enjoy posing for me.  I like to catch them during their everyday moments, but sometimes it is fun to have them pose for me too. I have found if I take a few photos of them clowning around first, it will loosen them up and I can then get a few more serious photos.  Last year I got them playing around on their back deck and then encouraged a more posed photo.  Here are the results.
photo by mbgphotophoto by mbgphoto


photo by mbgphoto


Note: The author may receive a commission from purchases made using links found in this article. “As an Amazon Associate, Ebay (EPN) and/or Esty (Awin) Affiliate, I (we) earn from qualifying purchases.”


Thursday, March 20, 2014

Perspective in Photography


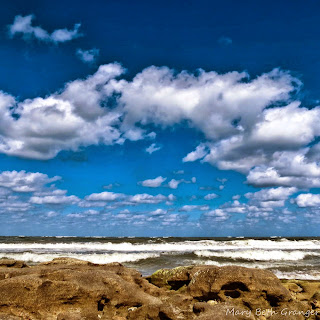
When I take photographs of landscapes, most of the time I am standing up and shooting with a wide angle lens.  I have been reading a lot of articles on perspective and challenging myself to look at things differently.  I have found if I get lower to the ground and get a bit more of the foreground into view I get a different and very pleasing composition.  In this first photo I am crouching down a bit to get more of the rocks in the foreground in the photo.


beach scene photo by mbgphoto


Look at the different look you get when you get really low and make the foreground pop out.  In this photo I am sitting on one of the rocks and holding  my camera low.
beach & sky photo by mbgphoto

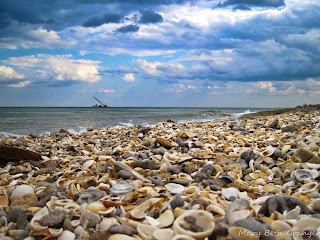
In this photo I get even lower.  I am was walking on the beach with my Canon point and shoot camera and I bent down and held my camera in the middle of the shells.  I love the effect this got me with all the shells up close and the sky in the background.
seashells on the beach photo by mbgphoto


Flower photos are always fun, but again be sure to change your perspective.  Everyone seems to take flowers while they are standing up and looking down at the flower.  In this photo I sat down in front of the flowers and zoomed in on one flower to create a different look.
yellow flower photo by mbgphoto


Note: The author may receive a commission from purchases made using links found in this article. “As an Amazon Associate, Ebay (EPN) and/or Esty (Awin) Affiliate, I (we) earn from qualifying purchases.”

Most Recent Reviews on Review This Reviews


Search for Reviews by Subject, Author or Title

The Review This Reviews Contributors


SylvestermouseSylvestermouseDawn Rae BDawn Rae BMbgPhotoMbgPhotoBrite-IdeasBrite-IdeasWednesday ElfWednesday ElfOlivia MorrisOlivia MorrisTreasures by BrendaTreasures by BrendaThe Savvy AgeThe Savvy AgeMargaret SchindelMargaret SchindelRaintree AnnieRaintree AnnieLou16Lou16Sam MonacoSam MonacoTracey BoyerTracey BoyerRenaissance WomanRenaissance WomanBarbRadBarbRadBev OwensBev OwensBuckHawkBuckHawkDecorating for EventsDecorating for EventsHeather426Heather426Coletta TeskeColetta TeskeMissMerFaeryMissMerFaeryMickie_GMickie_G


Review This Reviews is Dedicated to the Memory of Our Beloved Friend and Fellow Contributor

Susan DeppnerSusan Deppner

We may be apart, but
You Are Not Forgotten


“As an Amazon Associate, Ebay (EPN) and or Etsy (Awin) Affiliate, I (we) earn from purchases.” Disclosure Statement

X