Showing posts with label Glue Gun Slinger Contributor. Show all posts

Tuesday, July 15, 2014

Banish Summertime Boredom with Greeting Card Craft Projects!

"Hey Mom (or Dad), I'm bored! What can I do?"

 How many times have you heard those words in your lifetime? Summer is usually when those words ring out in even the busiest homes. The best advice I can give you is to have plenty of paper, glue sticks and colorful markers on hand. If you have a good public library, I suggest that you go to the "Arts and Crafts" section and look for books about greeting card making.

I recently found a delightful crafting book at my own public library.  Pop-Up Paper Structures: The Beginner's Guide to Creating 3-D Elements for Books, Cards & More is jammed packed with well-written instructions for making creative pop-up greeting cards for all kinds of occasions. The best part is that you can adapt any of the design concepts so you can use supplies that you might have on hand. Those are MY kinds of projects--the ones that reuse stuff!

pop-up paper structures book


I have a big storage box where I keep all of my hoarded paper supplies. (If you are a regular reader of this blog you might remember my post about re-using greeting cards. ) That big box is the home for the file with all those greetings card pieces. There is also a big zipper bag with my favorite tools and glues in that same big box.

I am sure your older children will be able to find a pop-up greeting in the book shown above, that they could figure out how to make. Just remember, dear parent, try not to be too critical and just go with the flow. So what if some of the cutting is not as straight as you might expect. Let your children be creative. Sometimes their ideas might just be better than yours.

If you are not in the red and green "holiday" spirit yet, you should read "How to make a Watermelon Card Invitation for Summer Parties", make the card then throw one! Not a watermelon--a party! You will still be red and green, but this card will not feature any holly or red noses!


greeting card craft projects
 "Creative Ways To Recycle Holiday Greeting Cards"
Have you saved a ton of cards, you most definitely should read Creative Ways to Recycle Holiday Greeting Cards. This page abounds with many of ideas for recycling those greetings. I particularly like the projects for a "Star Tree" and a "Woven Card" (see them above--Thank you AcornOakForest for allowing me to use your image!). You will be happy to know that there are wonderful photo tutorials to walk you through the steps for making both of these green crafty projects.

If you need a good crafting glue for paper projects, I highly recommend Elmer's Craft Bond Fabric and Paper Glue. I use it myself to repair books and make my own greeting cards.


Note: The author may receive a commission from purchases made using links found in this article. “As an Amazon Associate, Ebay (EPN) and/or Esty (Awin) Affiliate, I (we) earn from qualifying purchases.”


Saturday, June 28, 2014

Going to Disney? Save your memories!

disney scrapbook memory autograph book
Child Holding a handmade Disney Memory Book
©Mickie Goad
Some of you might be heading to Disneyworld or Disneyland soon--or maybe you know someone who is dreaming about taking the trip to this magical world.

A visit to this wonderland for children will be remembered for a lifetime so you should think about a way to preserve and collect these memories.

A few years ago, my husband and I decided to visit the Orlando park because 6 of our 7 grandchildren were headed there during the same week! Oh my goodness! How could we NOT go?

I decided I wanted to create a handmade autograph and memory book for my precious babies. I had a definite project in mind and I did a lot of thinking about how I could make the best scrapbook for them.

That memory book had to be big enough to hold a one photograph on a page. Hmmm. That meant the book had to be at least 4"x6".  The book should not be too big, however, as it must fit in a mom's purse or a backpack.  I wanted the pages in the book to be thick enough so that a pen would not bleed through to the other side of the page. I decided that the book should have a spiral binding so it could open wide enough for the "characters" to easily hold it and sign it, too.


disney scrapbook autograph memory book
One of the Finished Handmade Disney Autograph Books
©Mickie Goad

As you can see, Goofy had no trouble holding the memory book for two of my grandchildren. My grand-daughter had been to the "Princess Beauty Salon", by the way. Her hair is NOT curly.
goofy signing a disney memory book
Goofy signing the Disney Memory Book for my grandchildren. ©Mickie Goad


 The image below is how I dreamed the book would be used: notice the photo above the autograph! Yes, I gave my grandchildren something of value.

disney scrapbook autograph book
Chip -n-Dale Memory from Disneyworld ©Mickie Goad


If you want to see how I created the Disney Memory Books, you can visit two of my pages: How to Make a Disney Memory Book and Create a Child's Disney Memory Book.

The first page is where I made the original books that were red. The second page was written last year when the 7th grandchild got to go to Disneyworld. I let her help make the scrapbook and you can see what a fun project it was by clicking the "Create a Child's Disney Memory Book" link above.

I hope I have inspired you to make your own journals or scrapbooks to hold all those memories you create on your travels to that wonderful world of magic!

Going to Disney does take some planning!


Photo and content Credits: ©Mickie Goad
Do not use without permission


Note: The author may receive a commission from purchases made using links found in this article. “As an Amazon Associate, Ebay (EPN) and/or Esty (Awin) Affiliate, I (we) earn from qualifying purchases.”


Friday, June 6, 2014

Garden Decor Project: Make a Mosaic Pot

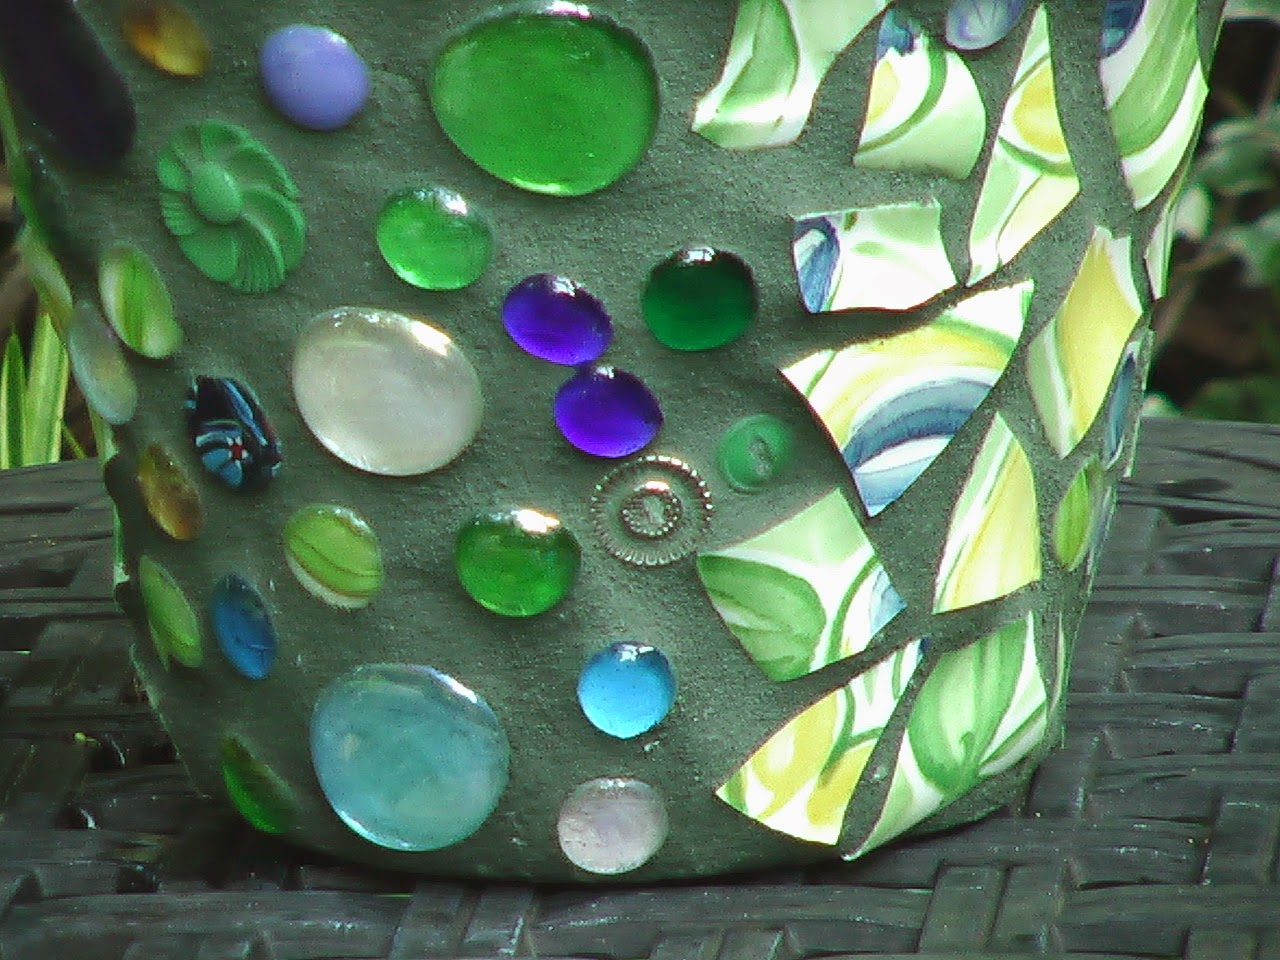
handcrafted mosaic pot
Mosaic Pot by Mickie_G
A few summers ago, I made the mosaic pot you see to the left at a workshop sponsored by Aldridge Gardens in Hoover, Alabama.

Ever since I was a child, I have loved creating crafts that involved tile. I remember my mother taking me to the hobby shop every year just before our annual summer visit to my grandmother. My mom knew that if she let me pick out a craft kit, I would not get bored. More often than not, I chose a mosaic kit.

I still remember the 6" circular dish I made with prayerful hands in the middle. The kit came with enough 1/4 inch square tiles for me to play with the design if I did not want to make one just like the example on the box lid. I usually I ended up choosing a checkerboard pattern.  These mosaic craft kits filled my days with much happiness and gave my parents a vacation from entertaining me, I imagine. But enough reminiscing!

I won't go into how I made the mosaic pot shown in the images on this page, but I will share with you some things I did learn about tile covered pots:


  • Do not leave your mosaic pot outside during the winter months as the freezing temperatures will cause the pot to break and the mosaic pieces to fall off.
  • If you use broken dishes or crockery, it is best to use totally flat pieces if you use larger, broken bits.  It is easier to rub off the grout if there are no sharp points that are higher than your decorative shards. You can see in the photo below that I used some broken pieces from a plate. I should have trimmed the sharp points on the edges off. 
  • To break up dishes and crockery, put them between several sheets of newsprint before you break them up with a small hammer. 
  • If you want to preserve the pattern as it is on the dish, use duck tape on the back of the dish before you break it into pieces.
  • Try to fit the "tiles" close together as possible but still leave enough room for the grout. I think I left too much space so there is a lot of grout space. 
  • Wear a mask to mix up your dry grout and powdered mastic. This is a MUST!
  • Gloves for your hands are another must when rubbing in the grout. Surgical ones work best. 

Close up of my mosaic pot. 

mosaic craft 
I used glass globs and a broken dish. 
Can you see the buttons, too?


I am a "keeper" of useful things and a recycler of the broken and chipped, so I have a stockpile of broken dishes and pottery. However, I do not have the supplies like the grout and ceramic tile adhesive for making a mosaic piece.


Here is a video by "DIY Maven" that I discovered on YouTube that shows a very similar and easy process for making a mosaic flower pot.


There are several articles on Squidoo that might whet your appetite for making other types of mosaic crafts. Unfortunately, there are none about how to make a pot like mine. How To Mosaic: Art For Your Garden is a good introductory article to the craft of mosaics. 


If you like the idea of a "kit", I found several mosaic craft kits for children available on Amazon. Here are a few links for you: Kits for ages 14+kits for ages 14 or overkits for ages 8 to 13kits for age 8-13; Kits for ages 5-7 yearskits for ages 5-7; Kits for ages 2 to 4. Most of the kits for young children use foam pieces and no grout. That is a good thing.

Keep your hands busy, y'all!


Photos: Mickie_G - all rights reserved.


Note: The author may receive a commission from purchases made using links found in this article. “As an Amazon Associate, Ebay (EPN) and/or Esty (Awin) Affiliate, I (we) earn from qualifying purchases.”


Monday, May 19, 2014

A Craft Project that eases my fear of Spray On Glue!

I have always been afraid to try aerosol adhesives! Yes, I am a chicken when it comes to paying good money for something that I have no idea how to use -- also, I have heard "glue everywhere!" horror stories from my friends who have tried using such products and I was definitely scared off. Even my own daughter tried using a  good name brand  spray adhesive for a design project when she was in college and told me in precise detail why she would never use a spray glue again. 


spray glue demonstation

(*Always follow manufactures's suggestions on the safe usage of their products! Click 3M: Tips and Techniques to read about how to use a spray on glue.)


Today, however, I am inspired to give spray on glue a try. "Why?" you are asking. Well, I recently read an article that gave me inspiration for a project that would put this sticky product to a good use.

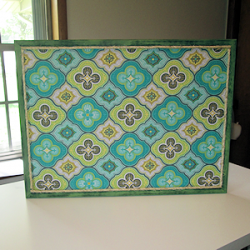
retro style bulletin board made with spray glue


How I Made My Retro-Style Bulletin Board for My Craft Room  written by a Review This! contributor, decoratingforevents, showed me in excellent photographic detail how to create a bulletin board for my own home office. One tip I found especially helpful was to use "re-positionable" spray-on glue. That tip totally made good sense for someone like me who is very often a crafting klutz.


Lensmaster Decoratingforevents also found some very attractive retro-fabrics that took me back to the 50's and 60's. (Who would have ever predicted that the futuristic designs of that bygone era would EVER come back in fashion?) Another reason I like this bulletin board project: the author used a Glue Gun! As as a Glue Gun Slinger  that made me very happy, indeed.

Now, I am off to drool over the fabrics that decoratingforevents found on Amazon to see which one I can use to pull my "office" together with my own retro-style bulletin board. I just might purchase some spray adhesive, too.


Note: The author may receive a commission from purchases made using links found in this article. “As an Amazon Associate, Ebay (EPN) and/or Esty (Awin) Affiliate, I (we) earn from qualifying purchases.”


Tuesday, May 13, 2014

Mod Podge can make miracles happen!

craft idea modpodge
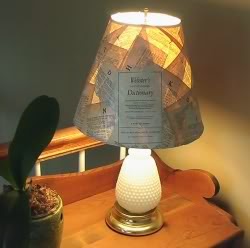
A Dictionary Lamp--just needs some trim!
A few years ago I got the "make over" bug and decided to re-do an old lampshade (that is a link to my DIY page, btw).  I used what I had on hand and you can see the result in the photo to the left. Yes, I did rip up an old dictionary! Do not hate me, because the book was already headed to the recycle bin. Those of you who know me will confirm that I never destroy a book that is still in good shape. I then decoupaged the pages from that torn up book onto the lamp using watered down craft glue. This recycled lampshade project turned out pretty good. 


While I was the The Glue Gun Slinger Contributor on the now defunct website, Squidoo, I  discovered that I could have used ModPodge (by Plaid) for the project instead of that diluted glue! Using a glue + water mixture was successful for me at the time, however. As it turns out, lots of people use a homemade version of ModPodge just as I did on my lampshade project. Tracy Boyer wrote and article and shared a recipe for this economical adhesive mixture for those of us who don't want to guess at proportions.  The Tracy suggests 2 parts glue to 1 part water.

Sometimes using a name brand commercial product will produce consistently good looking results. I have to admit that my own decoupage medium did not look as good after it dried as some other projects that I have seen at craft fairs and such. 


Now, I need to haul out the glue gun and put some trim on that dictionary themed lampshade. Who knows, I just might give it a fresh coat of ModPodge! Stay tuned for the results!


Note: The author may receive a commission from purchases made using links found in this article. “As an Amazon Associate, Ebay (EPN) and/or Esty (Awin) Affiliate, I (we) earn from qualifying purchases.”


Sunday, May 4, 2014

Do Not Toss Your Greeting Cards--Reuse Them!

I am a hoarder! I will admit that to you, but you have to promise not to tell my friends and family.

I mostly hoard greeting cards that I cannot bear to toss into the recycle bin or trash barrel. In order to save space, I usually tear off the front of the card so I can use the artwork again in some other form (ie. gift tags -- see the image below, the stocking tag used to be the front of a greeting card).

However, the one practical use is to recycle the front of the card INTO another greeting card. That is actually very easy to do. All you need is some card stock or blank greeting cards and envelopes. You then just cut the original front to fit on the new blank card. Sometimes I find the written verse in a card to be so very good that I trim off the signature on the card and so I can "borrow" the sentiment and glue it into my "new" card.

gift bag stenciled with green tree and snowflakes

Having been the "official" Glue Gun Slinger Contributor on the now defunct website, Squidoo, I do have a few adhesives in my crafting tool kit, but my knowledge about glues for "paper" crafts is mostly limited to book repair. However, I have been know to make a paper craft project or two, and I highly recommend Elmer's Washable All-Purpose School Glue Stickscraft glue

While you are on the site, be sure to check out "Card Making and Craft Budget Tips" by writer/crafter "paperfacets". If you are at all interested in making greeting cards, this page will be helpful, indeed.

I have read that it is best to use a glue that will not "wrinkle" the card stock when making a card. Does anyone have a good suggestion for me to try? I am thinking that a glue stick might work. What about glue dots? Has anyone used them? I really like to know about a product before I invest my hard earned cash.


Note: The author may receive a commission from purchases made using links found in this article. “As an Amazon Associate, Ebay (EPN) and/or Esty (Awin) Affiliate, I (we) earn from qualifying purchases.”


Sunday, April 27, 2014

Crafting is not just about having a Glue Gun!

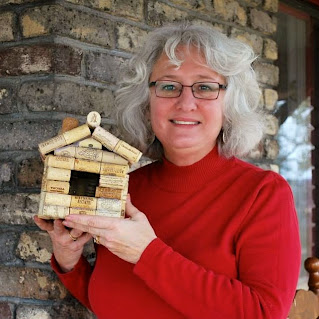
I am Mickie and I was formerly known as "The Glue Gun Slinger" contributor on Squidoo (Now Squidoo is no more and all of my articles are on Hubpages.) It was my job to find wonderful craft projects that use some kind of glue and share them with my followers. For example, I recently discovered how to make a birdhouse out of wine corks (yes, that is a link!) and published my own page featuring this project. As can be expected from this Glue Gun Slinger, that project uses lots of hot glue and a glue gun. Here is a photo of my friend, Toni, and her bird house:

bird house made out of wine corks


What I would love to be the most famous for, however, is "saving the world, one book at a time"! My favorite way to use glue is for repairing books. Yes, real everyday paper books that have actual pages you can turn with your very own fingers.

I am a retired librarian and I learned how to make repairs while working and volunteering in public libraries. I have written several tutorials on subjects like repairing a child's Bible, repairing a torn page,  and reattaching a cover to a board book. I even have an article about (of all things!) The Best Glues for Book Repairs.

While I was the Glue Gun Slinger, I corralled many sticky projects on a Pinterest Board that you can visit by clicking here. I just know that you will find a craft that you would love to make! Make sure you have glue!

What am I crafting now? Greeting Cards. With Mother's Day and Father's Day quickly approaching, I wanted to find an easy, yet spectacular personal card for those occasions. One page I found on the Hubpages website was Old Book Page Crafts by "lbrummer". This contributor shares ideas for using pages from books to craft beautiful projects. Yes, this might involve tearing apart a book, but sometimes books are beyond repair and the best use for them is to upcycle those tomes into something beautiful. I have even used pages from an old dictionary to cover an old lampshade using glue thinned with water as the decoupage medium.


lamp shade covered with book pages

So, as you can see, I have more than just a glue gun in my holster!


Note: The author may receive a commission from purchases made using links found in this article. “As an Amazon Associate, Ebay (EPN) and/or Esty (Awin) Affiliate, I (we) earn from qualifying purchases.”


Most Recent Reviews on Review This Reviews


Search for Reviews by Subject, Author or Title

The Review This Reviews Contributors


SylvestermouseSylvestermouseDawn Rae BDawn Rae BMbgPhotoMbgPhotoBrite-IdeasBrite-IdeasWednesday ElfWednesday ElfOlivia MorrisOlivia MorrisTreasures by BrendaTreasures by BrendaThe Savvy AgeThe Savvy AgeMargaret SchindelMargaret SchindelRaintree AnnieRaintree AnnieLou16Lou16Sam MonacoSam MonacoTracey BoyerTracey BoyerCheryl Paton Cheryl PatonRenaissance WomanRenaissance WomanBarbRadBarbRadBev OwensBev OwensBuckHawkBuckHawkDecorating for EventsDecorating for EventsHeather426Heather426Coletta TeskeColetta TeskeMissMerFaeryMissMerFaeryMickie_GMickie_G


Review This Reviews is Dedicated to the Memory of Our Beloved Friend and Fellow Contributor

Susan DeppnerSusan Deppner

We may be apart, but
You Are Not Forgotten


“As an Amazon Associate, Ebay (EPN) and or Etsy (Awin) Affiliate, I (we) earn from purchases.” Disclosure Statement

X