

I discovered the OXO Good Grips Non-Stick Pro Baking Pan line while researching options for replacing my old Teflon nonstick baking pans with ones that had newer, more durable, and safer PFOA-free coatings.
I purchased the OXO Good Grips Non-Stick Pro 1-Lb. Loaf Pan recently, and I am quite impressed with its value and performance so far. In fact, I'm seriously considering buying other pans from this line to replace my older Teflon nonstick bakeware.

|
| This durable one-pound loaf pan features a durable molded, seamless construction, sturdy square-rolled edges to prevent warping, and a PFOA-free nonstick coating in a light champagne-gold color and micro-textured bottom surface that promote even baking. |
Pre-2015 Nonstick Bakeware Is Not Safe to Use
Until six years ago, most nonstick bakeware (and cookware) used a Teflon coating made with both PFOA (perfluorooctanoic acid) and polytetrafluoroethylene (PTFE). PFOA has been linked to cancer and other health risks, and is one of a group of manmade chemicals known as per- and polyfluoroalkyl substances (PFAS). In 2006, because of concerns about the impact of PFOA and long-chain PFASs on human health and the environment, the Environmental Protection Agency (EPA) launched a PFOA Stewardship Program, asking the eight leading companies in the PFAS industry to commit to voluntarily eliminating PFOA and related chemicals and emissions by 2015.
PTFE continues to be used in Teflon and other nonstick coatings, and while some people have concerns about its safety, most experts consider nonstick bakeware and cookware with coatings containing PTFE to be safe, as long as they are:
- treated and cleaned with care to avoid scratches or abrasion
- not overheated or preheated empty
- replaced after a few years, when the coating begins to show signs of fine scratches or abrasion
- discarded as soon as the coating is scratched or chipped
Time to Replace Old Nonstick Baking Pans!
Last year, I replaced all my old nonstick pots and frying pans with Copper Chef Black Diamond Nonstick Cookware. During my research, I discovered that some of the newer nonstick coatings not only are safer, but also perform better than older types. Now, I'm starting the process of replacing my large collection of older nonstick baking pans, too. (Copper Chef Black Diamond Nonstick Cookware has a diamond-infused ceramic nonstick coating that is both PFOA-free and PTFE-free, and that I know from experience delivers excellent performance. If only they made baking pans, too!)
I became an avid home baker at the tender age of nine. During my mid-twenties and early thirties, when I was married to an attorney at a prominent New York City law firm, we did a lot of formal entertaining, and our dinner parties always ended with a choice of elaborate cakes or pastries for dessert. Now, more than 30 years later, I am happily married to a man in a different profession, and we live in the Boston suburbs, and if I never host another five-course dinner party extravaganza, that will be just fine with me! Since I live a very different lifestyle now than I did back then, I've decided to replace only the pans I use on a regular basis, rather than the entire, extensive collection of both basic and specialty bakeware I am getting rid of.
Since trying out nonstick pans from a few different companies was a successful strategy that helped me determine which brand and type of coating performed best in my kitchen, I'm planning to follow the same approach as I begin the process of replacing my old nonstick baking pans
Ever since I switched to a low carb keto approach to eating in May 2019, I have been baking, rather than buying, the majority of the low carb bread I use. So, I decided to shop for a nonstick loaf pan first.
After doing a bunch of online research, as usual, before deciding which one to buy, I recently ordered an OXO Good Grips Non-Stick Pro Loaf Pan (with fast, free shipping, thanks to Amazon Prime!). I thought it might be helpful to share the things I looked for in narrowing down the available options, and why I ultimately chose this particular pan. I will need to see how well it performs over time before I can recommend it without reservations.
I often like to bake two loaves of bread and put one in the freezer, which doesn't take much more time and effort than baking a single loaf. Given my strategy of testing individual pieces from a few different brands (or with different coating materials), I'm still trying to decide which one to buy for my second nonstick loaf pan. However, when I do, I am looking forward to comparing how the two measure up against each other. Stay tuned for future updates!
Key Features and Benefits of the OXO Good Grips Non-Stick Pro Loaf Pan

|
| Product image courtesy of Amazon |
I have long been a fan of the OXO kitchenware brand, and have been buying and using their products for a very long time. However, I was quite surprised to discover the OXO Good Grips brand (which I have always associated with kitchen tools and cooking utensils) on a line of bakeware, as I was doing my online research!
It's definitely not a brand that comes to mind when I think about baking pans. But, since the kitchen tools and cooking utensils I have bought from them over the years have been durable, well made, and well designed, I decided to give OXO the benefit of the doubt and keep an open mind. I'm glad I did!
Here are the most important features and attributes that influenced my decision to choose the OXO Good Grips Non-Stick Pro Loaf Pan, rather than one of the many other nonstick loaf pans on the market from competing brands.
Ceramic-Reinforced, Two-Layer, Commercial Grade Nonstick Coating for Durability
Obviously, the most important among my selection criteria when researching and shopping for a new loaf pan was a PFOA-free nonstick coating. I also knew from my experience with my Copper Chef Black Diamond nonstick pots and pans that a ceramic component adds durability to nonstick coatings, so I was pleased that the OXO Good Grips Non-Stick Pro line uses what the company describes as a "Swiss-engineered, PTFE, ceramic reinforced, two-layer, commercial-grade coating," ILAG Non-Stick Ultimate Resist R Plus, that resists scratching, staining, corrosion, and abrasion. These qualities help give these pans a longer, safer, useful life, as long as they are treated with care and not preheated empty or allowed to get too hot. (For example, I would never use a pan with a nonstick coating to bake a recipe with a topping that needs to be caramelized under the broiler.)
Light-Colored Nonstick Coating and Micro-Textured Surface for Even Baking
Most nonstick loaf pans, cake pans, muffin tins, and other bakeware has a dark coating. Unfortunately, since dark colors absorb heat, the sides and bottom of whatever you put in them bakes (or cooks, in the case of a meat loaf, for example) faster than the top or center of the pan's contents. In fact, by the time the center tests done, the bottom and sides are often overbaked or even burned. Until recently, all nonstick baking pans had dark-colored coating, which is why some recipes tell you to reduce the oven temperature if you use a nonstick pan.
By contrast, light colors reflect heat instead of absorbing it. So using a pan with a light-colored nonstick coating promotes more even baking (or cooking).
I first discovered bakeware with a light, metallic gold- or champagne-colored nonstick coating quite a few years ago at Williams-Sonoma. Then Nordic Ware came out with gold-colored nonstick versions of their gorgeous, elaborate, specialty baking pans. I confess, I have secretly coveted them ever since! But back when I was drooling over them, the prices for pieces with the light-colored coating seemed exorbitant, compared to the cost of their counterparts with the much more common dark-colored coating, and I refrained from indulging.
When I started my current product research product, I was surprised and delighted to find that the prices for pans with a lighter champagne- or gold-colored nonstick coating have come down quite a bit, which makes these a much more affordable and practical option.
I also love the look of these lighter-colored coatings. Since I usually make myself choose function over form when buying something practical, like a nonstick loaf pan, it's quite a treat to find one that whose excellent performance is also paired with a beautiful finish.

|
| The light-colored ceramic-reinforced PFOA-free nonstick coating promotes even baking, and the micro-textured bottom surface of the pan promotes airflow. |
There is also a unique, micro-textured surface pattern on the bottom that minimizes contact between the food and the pan, and allows some airflow under the loaf. I've found that this not only prevents my bread loaves from having a burned bottom crust, but also avoids sogginess that can occur from steam condensation when a freshly baked loaf needs to stay in the pan at the start of the cooling cycle before being removed to a wire rack to finish cooling completely.
Seamless Interior and Rounded Corners for Easy Clean-Up
One of my pet peeves about nonstick baking pans is the seams, especially the corner seams. I always grease my pans, even those with an anti-stick coating, before adding a dough or batter, sometimes followed by a thin coating of cocoa powder or low carb flour. Thoroughly cleaning the residue from the narrow points at the bottom corners, using nothing narrower or firmer than the edge of a soapy sponge (to avoid abrading the coating), can be challenging.
I always dreamed of having nonstick baking pans with rounded corners and no seams, like my old glass cake pans. When I saw this OXO Good Grips Non-Stick Pro loaf pan, it felt like someone had overheard that dream and decided to make it come true.
The seamless interior and rounded corners really do make this loaf pan is an absolute breeze to clean! I'm pretty sure that the lack of seams or sharp corners will also make the nonstick interior less prone to wear or cracking.
Strength and Structural Rigidity for Warp Resistance
I have a few pieces of cookware and bakeware that, despite being constructed from heavy-gauge metal, tend to warp after they have been on a hot stove or in a hot oven for a while. This really bugs me, and especially on a nonstick pan, whose coating was not designed to hold up to repeated flexing and twisting! So, now that I'm shopping for new pans, I'm looking for ones that are made to resist warping.
One of the things I liked about the OXO Good Grips Non-Stick Pro Loaf Pan it that was designed with structural integrity and rigidity in mind, which increase durability and help prevent warping.

|
| Square-rolled edge increases rigidity, creates a wider lip/more secure grip |
The square-rolled edge is another important feature for better structure, strength, and durability. Unlike most loaf pans, whose rim is formed by folding the sheet metal over a piece of wire, the rim around the OXO Good Grips Non-Stick Pro Loaf Pan is formed from a single piece of steel, molded into what the company calls "a unique square-roll shape." This uniform construction and substantial, square-rolled edge creates a thick, solid rim that not only adds structural rigidity, it also makes the pan easier to grip and lift. That's a design feature I really appreciate, especially when I'm moving a full, hot metal loaf pan from the oven to a heatproof mat or cooling rack!
Commercial Grade Materials and Construction for Superior Performance
While it may be tempting to buy the cheapest nonstick pans you can find, since they have a limited recommended lifespan, in my experience, that approach is penny-wise and pound-foolish. I've only made that mistake twice, when I was much younger, and it taught me the value of spending a bit more to get nonstick bakeware made with high quality materials and durable construction. Commercial grade materials and construction, designed to meet the much more demanding requirements of a commercial kitchen, will perform better, last longer, and resist not only warping but also scratches and abrasion, significantly extending their safe, useful life before they need to be replaced.
I have found that in the long run, the cost of buying well made, commercial quality bakeware and cookware is almost always a better investment than buying cheaper, lower quality, less durable pans that don't perform or hold up as well and need to be replaced much sooner.
Versatile Size for Different Types of Recipes
The OXO Good Grips Non-Stick Pro Loaf Pan is designed for a 1-pound loaf, which is pretty standard. Since my previous loaf pans had always been 9" x 5" and this one is 8.5" x 4.5", I wanted to make sure the slightly smaller dimensions would work for the majority of recipes.
The baking pros at King Arthur Baking Company are a trusted, authoritative source of professional expertise. Their advice (like their recipes) is consistently excellent, helpful, and reliable. So, when I was researching nonstick loaf pans, their website was one of the resources I turned to.
The King Arthur blog post on "Choosing the right bread pan" explain that some yeast bread doughs can be baked successfully in either a 9" x 5" or an 8.5" x 4.5" loaf pan, while others turn out better in one size pan or the other, depending on both the type of flour and the number of cups of flour the recipe calls for.
According to the post, any yeast bread loaf recipe that uses 3 cups of flour (or slightly less) should be baked in an 8 1/2" x 4 1/2" pan. A recipe that uses 3 1/2 cups of flour can be baked in either size pan (although the smaller loaf pan is recommended for whole grain breads and the 9" x 5" pan is preferred for yeast doughs made with all-purpose or bread flour). The only yeast bread doughs that definitely should be baked in the larger pan are single-loaf recipes that use at least 3 3/4 cups of flour, regardless of type.
Since I can't foresee many occasions when I might want to bake a really large loaf of bread, the article confirmed that an 8 1/2" x 4 1/2" loaf pan would be fine for the majority of recipes, including the (yeast-free) low carb bread I'm mostly baking these days, most of which specify this pan size. It's also a nice size for baking a meatloaf whose slices fit neatly between two slices of bread. (Meatloaf sandwich, anyone? Yes, please!)

|
|
The length and width markings are permanently stamped into the metal,
instead of the more common printed dimensions that can wear off over
time |
I also really appreciate having the dimensions in both inches (4.5 x 8.5 in) and centimeters (11.5 x 21.5 cm) stamped permanently into the metal, in large, raised letters and numbers that are very easy to read, without having to turn the pan over to see them.
Note: The exterior dimensions of the OXO pan are 9" x 5", due in part to the wide square-rolled edges; however, the interior dimensions, which are the ones that count, are 8.5" x 4.5".
Made in the USA
It's getting harder to find well made, reasonably priced products manufactured in the USA. I prefer to buy American-made goods, when possible, so the fact that this OXO Good Grips Non-Stick Pro loaf pan is made in the USA was definitely a big point in its favor. It feels good to support American businesses that make high quality products and continue to manufacture them in this country and providing employment opportunities for American workers, especially now that so many companies have relocated or built plants in countries where they can lower their labor costs by paying cheaper wages.
Note: This pan is "Made in the USA from globally sourced materials." That's not surprising, since fewer and fewer products are being manufactured exclusively with USA-sourced materials.
Excellent Value
For me, the value of a product is a function of both price and quality: is what the product provides in terms of function, form, useful lifespan, etc., worth the price? It's common for manufacturers to compete for market share by identifying popular, successful, highly rated products from other companies and creating their own versions (knock-offs) that look and sound extremely similar and cost less. But in order to sell the product for less, they need to manufacture it for less (or use a different distribution model, such as direct-to-consumer sales). And, often, the way they bring down the retail price is to cut corners, either by removing certain features or using less expensive (and usually lower quality) materials or manufacturing/construction methods.
Since the OXO Good Grips Non-Stick Pro Loaf Pan looks quite similar to the higher-priced Williams-Sonoma Goldtouch Pro Loaf Pan of the same size, I decided to compare their technical specs and product descriptions before finalizing my decision to purchase the OXO pan. Here's how they stack up against each other, as of this writing, with differences highlighted in green (better value) or orange (not as much value):
| OXO Good Grips Non-Stick Pro | Willams-Sonoma Goldtouch Pro | |
| Size: | 8.5 x 4.5 x 2.75 inches high | 8.5 x 4.5 x 2.75 inches high |
| Capacity: | 1 lb. | 1 lb. |
| Where It's Made: | Made in the USA with globally sourced materials | Made in the USA with globally sourced materials |
| Materials: | Commercial-grade aluminized steel | Commercial-grade aluminized steel |
| Light-colored, ceramic-reinforced, PFOA-free nonstick coating | Light-colored, ceramic-reinforced, PFOA-free nonstick coating | |
| Max Temperature: | Up to 450 ℉ | Up to 450 ℉ |
| Dishwasher Safe: | Yes, but hand washing recommended | Yes, but hand washing recommended |
| Construction: | Seamless, molded construction | Seamed, folded construction |
| Square-rolled rim formed from a single sheet of steel | Rim reinforced with coated wire | |
| Micro-textured diamond-patterned bottom surface | Smooth bottom surface | |
| Price as of 1/12/21: | $17.99 on amazon.com | $21.95 on williams-sonoma.com |
| Shipping Cost: | Prime FREE delivery (for Amazon Prime members) | $6.99 shipping and processing fee for standard shipping (3-Day Select) |
| MA Sales Tax: | $1.12 | $1.37 |
| Total Cost (Delivered): | $19.11 | $30.31 |
Based on the product information I was able to find on Amazon, Williams-Sonoma, and other retailers' sites, the two pans are extremely similar in some ways. However, the OXO Good Grips Non-Stick Pro Loaf Pan's seamless, molded construction and rounded corners give it an edge in terms of durability, warp-resistance, and ease of cleaning. Best of all, those superior features and attributes also come at a better price. The total cost for this pan, including the purchase price, sales tax, and delivery, is 30 percent less than the total delivered cost of the similar Williams-Sonoma Goldtouch Pro Loaf Pan!
Getting a better pan for less money definitely makes the OXO Good Grips Non-Stick Pro pan an excellent value.
Timing is Everything!
The day before this post was published, I noticed this pan wasn't in stock on Amazon, but could be ordered with an expected delivery date in late February. However, it is a few minutes before this post is set to publish, and it appears that, at the moment, the pan is no longer available to buy new at the $17.99 price with free delivery. A couple of sellers are offering new pans for twice that price, and it's currently available in Used - Very Good condition from Amazon Warehouse for $16.55 with free Prime Delivery. If you're interested in getting one or more of these nonstick loaf pans, I suggest checking back once a week over the next few weeks to see when it becomes available to order new for $17.99 again with free Prime delivery.
Wouldn't Someone You Know Love to Receive a New, High Quality Nonstick Loaf Pan?
Most home cooks and bakers own at least one loaf pan. But chances are good that either they don't yet have a well-made, nonstick loaf pan that's in good shape and has a PFOA-free coating, or that they have a nonstick loaf pan (or two) that is starting to show a few scratches and is no longer safe to use, but they haven't yet gotten around to buying a new one to replace it.
Either way, I'm sure that one (or a pair) of these OXO Good Grips Non-Stick Pro Loaf Pans would be a welcome addition to their kitchen cabinet, pantry, or wherever they keep their baking pans. And with a price tag of only $17.99, it's an affordable as well as thoughtful gift that they will likely get a lot of use from.
Happy baking!
OXO Good Grips Non-Stick Pro Loaf Pan Review by Margaret Schindel
Posts About My Keto Diet Journey
My First Year on The Keto Diet
Preparing to Succeed on the Keto Diet, Part One
Preparing to Succeed on the Keto Diet, Part Two
Low Carb Muffins & Cupcakes: Treats to Enjoy on a Keto Diet
Low Carb Keto Chocolate Yogurt Granola Chip Pudding Recipe
Good Dee’s Keto Cookie Low Carb Baking Mix Review
Hamama Microgreens Growing Kit Review & Success Tips
My Favorite Hamama Microgreens Seed Quilt Accessories
Keto Cheddar Cheese Biscuits With Chives Recipe
The Ultimate Keto Hot Chocolate Recipe
The Best Low Carb Keto Gift Ideas: Keto Gift Guide
The Best Low Carb Keto Cinnamon Muffins
Wholesome Yum Keto Bread Mix and Yeast Bread Recipe
The Good Chocolate 100% Organic No Sugar Dark Chocolate Review
The Best Advice to Maintain Your Keto Diet Weight Loss
My New Irresistibly Delicious Keto Cheese Crackers Recipe
Luscious Low Carb Keto Triple Peppermint Cheesecake Brownies Recipe
Quick & Easy Livlo Blueberry Scones Keto Baking Mix Review
Snack Better With The Best Healthy Keto Cookie Dough Bites
The Best Quick and Easy Low Carb Keto Pizza Recipe
The Best Quick and Easy Low Carb Keto Shortcake Cupcakes Recipe
Comparing the Best Keto-Friendly Chocolate Hazelnut Spreads - No Added Sugars
The Best Low Carb Keto Sandwich and Burger Buns Mix
Blueberry Biscuit Scones — New, Easy, Low Carb Keto Recipe
The Best Keto Pizza Crust Mix With 0 Net Carbs
An Unusual, Delicious Strawberry Chocolate Tea With 0 Calories
Delicious Sugar-Free Keto Cookies That OREO Fans Will Love
Healthy Pistachio Cherry Chocolate Chip Marshmallow Cereal Treats Recipe
Easy, Decadent, High Protein, Sugar-Free Rocky Road Cottage Cheese Ice Cream
The Best Quick & Easy Low Carb Sausage and Ricotta Calzones
How to Make Refreshing Vanilla Italian Soda (With or Without Cream)
Reviews of the Keto Diet by Barbara C. (aka Brite-Ideas)
How I Stayed Committed to the Ketogenic Way of Eating


 Reviewing Don't You Forget About Me by Mhairi McFarlane by Lou16
 Reviewing Right Behine You by Rachel Abbott by Lou16
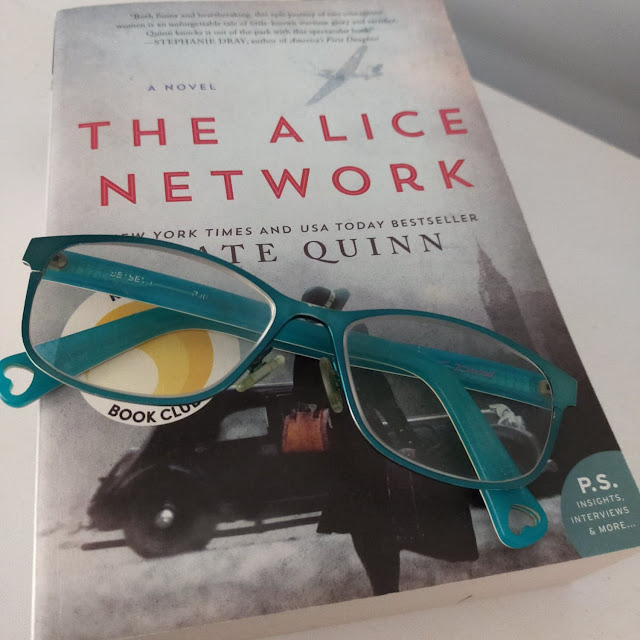 Reviewing The Alice Network by Kate Quinn by Lou16
 Reviewing Joy Ellis' Nikki Galena Series by Lou16
 Reviewing The Slight Edge by Jeff Olson by Lou16
 Reviewing The Forgotten Village by Lorna Cook by Lou16
 Girls Night Out - A Novel reviewed by Lou16
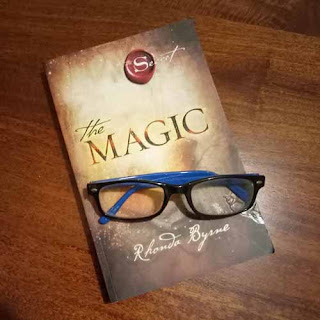 Reviewing The Magic by Rhonda Byrne by Lou16
 Her Fearful Symmetry - A Book Review by Lou16
 The Coffeehouse Mysteries - A Series Review by Lou16
 I KNow This Much: From Soho to Spanday reviewed by Lou16
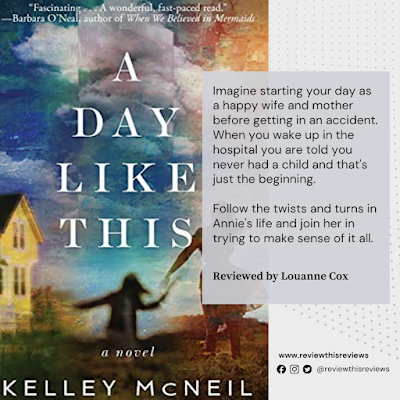 Reviewing A Day Like This by Kelley McNeil by Lou16


