Showing posts sorted by relevance for query muffins. Sort by date Show all posts

Thursday, June 2, 2022

Coleman Camp Oven Review

coleman camp oven

Who knew a Coleman Camp Oven could prove to be an essential baking tool at home? When I purchased this oven for a camping trip, it never once crossed my mind that I would find myself thankful for its use during an extended power outage at my primary residence. I have actually used it more at home during the pandemic than I would ever have imagined.

cinnamon rolls

Deliciousness! That is the word I associate with my little camping bakery. Imagine waking up to the irresistible aroma of fresh-out-of-the oven hot cinnamon rolls. Oh my yes! One might even make up an excuse for a staycation if this is how we roll.

homemade pizza

And that's only the start of the day. How about some homemade pizza for lunch? Such a breeze to bake in your Coleman oven. I found it best to bake the pizza on the top rack in the oven, though some cooks use a pizza stone on the bottom rack with very good results.

folded up coleman camp oven

Getting back to the oven itself, let's take a look at a few of the great features, along with more baking tips. When first unboxing the oven, I was pretty surprised at how compact it folds up for storage and travel. Very impressive design. It takes up almost no room in the Rubbermaid tote I use for organizing my camping kitchen gear. Included in the box: Coleman Camp Oven, two baking racks, and instructions.

Set-up takes less than 30 seconds. Open a couple of latches, unfold the oven, lock the latches, and pop in the two racks. Didn't even break a sweat.

ready to use coleman camp oven

The oven sits over the top of a burner on my Coleman propane stove. To bake with the oven, you do need the stove and a full one-pound bottle of propane. I made the mistake of starting a pan of muffins with a partially empty propane canister attached to the stove. The propane ran out before the muffins had finished baking. Lesson learned. 

coleman camp oven heat indicator gauge

You will note the heat indicator gauge on the front door of the camp oven. I keep an eye on the temperature as the oven initially preheats and also while my food is cooking. It only takes about a minute for each 100 degrees of heat gain. Amazing!

cinnamon rolls

That said, the most important thing I have learned about baking temperatures with my Coleman oven is to bake things at a lower temp than what is recommended on the recipe or package. I get perfect muffins and cinnamon rolls when I bake them 100 degrees below the temperature I would use in a regular home oven (250 degrees instead of 350 degrees). They bake for about the same length of time.

coleman camp oven

Finally, it is important to use this camp oven out of the wind. If you are cooking outdoors on a windy day, or a chilly day, a windbreak makes a huge difference. Some owners of this oven cover it with a small welding blanket to help conserve heat when cooking outside in conditions that would make the oven work harder and longer. They do this because the oven has vent slots where heat can escape. I haven't tried this, but I appreciate the tip, and could see myself making use of this idea.

For a very moderate price, the Coleman Camp Oven is a winning addition to any camper's kitchen. And, as I have experienced this year, it is invaluable for those temporarily unable to use their regular home oven. It definitely perked me up on days when I would have had no other way to bake my meals. I can honestly say I am happy I made this purchase. Enough said. Let's eat!

homemade pizza with a bite out of it


You may also be interested in this related review by a writing colleague: Coleman Classic Stove


Note: The author may receive a commission from purchases made using links found in this article. “As an Amazon Associate, Ebay (EPN) and/or Esty (Awin) Affiliate, I (we) earn from qualifying purchases.”


Tuesday, September 22, 2020

Good Dee’s Keto Cookie Low Carb Baking Mix Review

If you have been following my ongoing series of posts here about my successful keto diet weight loss journey, you’ll know that I love baked goods and desserts. You’ll also know that finding ways to indulge in keto desserts has helped me maintain a fairly strict ketogenic diet approach to eating since May 2019, a very low carb, healthy lifestyle that I continue to follow now that I have achieved and surpassed my original weight loss goals.

I also enjoy baking, but I don’t always have time to do low carb baking from scratch. That’s why I keep a selection of high quality keto baking mixes in my pantry, so, I can enjoy fresh-baked sweet treats in just minutes. In a recent post, I shared my favorite low carb baking mix brands and keto recipes for low carb keto muffins. In this post, I'll share the excellent Good Dee's Cookie Mix low carb baking mix line.

Good Dee's Low Carb Cookie Baking Mix - Keto Friendly, Sugar Free
Bake fresh keto cookies in just minutes 
with Good Dee's low carb cookie baking mix

Good Dee's Low Carb Cookie Mix

Fresh Baked Keto Cookies in Minutes!

All Good Dee's Low Carb Cookie Baking Mix flavors are sugar free, gluten free, grain free, and wheat-free. Some (but not all) are also manufactured in a dedicated gluten free facility. Anyone who either has a food allergy or bakes cookies for someone who does will appreciate the allergy information on the packaging and the brand owner's efforts to accommodate multiple common food allergies.

A Changing Flavor Selection

Good Dee's continues to expand their low carb baking mix line for keto cookies and other products. Not every flavor is available year round, and some are considered seasonal. I recommend checking on both Amazon (free shipping for Amazon Prime members) and the Good Dee's website (free shipping for orders over $50) to see which flavors are currently in production and in stock. Occasionally, these products also go on sale, another reason to keep an eye out on both websites, and also to sign up for the Good Dee's mailing list for exclusive offers.

Last week, I used the three Good Dee's low carb baking mix flavors I had on hand to bake the three dozen cookies I photographed for this post. I've also tried a fourth flavor (double chocolate chip) that I didn't have in my pantry at the time. Today, I'll share my product reviews of the four low carb baking mix flavors that I've purchased and made into keto cookies.

Good Dee's Chocolate Chip Cookie Mix

Good Dee's Chocolate Chip Cookie Mix and baked cookies
These thick, soft, chewy chocolate chip cookies 
are also low carb and keto diet friendly treats

It's not surprising that the first keto cookie mix Good Dee's introduced was chocolate chip. After all, chocolate chip cookies are the most popular cookie in the United States, and the second most popular cookie in the world, after French macarons.

I tried Good Dee's Chocolate Chip Cookie Low Carb Baking Mix for the first time shortly after I discovered it on Amazon and, truthfully, I was a bit underwhelmed. Fortunately, the "new & improved recipe" lived up to its promise, and the second batch I made, using the mix with the new recipe, was much better. Like all the Good Dee's cookie mixes I've tried to date, the improved chocolate chip version produced cookies that were large, thick, soft and chewy. That's how I prefer my "chippers," but if you like thin, crisp cookies, you probably won't be a fan of the Good Dee's mixes

As you can see, they certainly weren't the best-looking chocolate chip cookies I've ever baked. Both times I've made them, the batter underneath the chocolate chips seemed to pull away from them, resulting in small, chocolate-filled craters after baking. However, I don't care that much about how pretty they are, since they meet my much more important criteria for being tasty, satisfying, and keto-friendly.

The other thing to know about this mix is that the chips are very dark chocolate and not very sweet. I rather like the contrast of the barely sweet chocolate chips and somewhat sweeter cookie dough.

Good Dee's Sugar Cookie Mix

Good Dee's Sugar Free Cookie Baking Mix and plate of cookies
A different texture than traditional
sugar cookies, but a similar taste

Like all this brand's products, Good Dee's Sugar Cookie Baking Mix is actually sugar free. Although the texture is coarser and chewier than conventional sugar cookies, the taste is surprisingly similar.

These also make a great base for adding your own flavor mix-ins. I'm thinking of adding some tiny wild Maine blueberries and chopped walnuts or pecans to my next batch. Yum!

Good Dee's Butter Pecan Cookie Mix

Good Dee's Butter Pecan Low Carb Cookie Baking Mix and baked butter pecan cookies
If I had to pick my favorite, it would have to be this
awesome Good Dee's butter pecan cookie baking mix

Of the four keto cookie mix flavors I've tried so far, the Good Dee's Butter Pecan Cookie Low Carb Baking Mix  has definitely turned out to be my favorite. To me, they have an awesome flavor and a less coarse texture than the other flavors, making these extremely similar to old-fashioned butter pecan cookies made with white flour and cane sugar.

My husband, who eats conventional cookies or cake daily for dessert, likes these low carb butter pecan cookies a lot, too—the ultimate compliment for keto baked goods!

Other Good Dee's Low Carb Cookie Mix Flavors

There are a few other Good Dee's Low Carb Cookie Mix flavors that may be seasonal or out of stock, so I recommend keeping an eye out to see which ones are available from time to time throughout the year.

About Good Dee's Low Carb Baking Products

The Dee behind Good Dee's is owner and founder Deana Karim, who finally succeeded in losing weight and adopting a healthy lifestyle after embracing a LCHF (low carb, high fat) approach to eating. She knew that thinking of this way of eating as a diet (and, by implication, temporary), and feeling deprived because she could no longer enjoy cookies and other baked goods, would be a "recipe" for failure. At the time, there weren't any baked goods that met her requirements for being healthy, low carb, gluten-free and delicious, so she started developing her own gluten-free, low carb keto recipes for brownies, cookies, muffins, and cakes.

Understanding that there were many other people following a low carb diet who, like her, had an unmet need for easy-to-make, healthy, and delicious sugar free baked goods, Deana invested her $5,000 savings into launching her Good Dee's low carb baking mix business. A month later, her low carb, gluten free, sugar free chocolate brownie mix was the number one brownie mix (not just low carb) on Amazon!

She continues to expand her line, and has listened to customer feedback to improve several of her baking mixes. She now offers Good Dee's sugar free just add water frosting mix in cream cheese, dark chocolate, and white chocolate flavors, and even sugar free rainbow sprinkles.

Get 15% Off at Gooddees.com!

After I wrote and published this review, I decided to apply for Good Dee's affiliate program and was approved the same day. That's great news for you, as well as for me, because...

I'm excited to be able to offer my readers a 15% discount code for the Good Dee's website

To take advantage of this generous 15% discount, simply:

  1. Use my Good Dee's affiliate link to go to the website
    - and -
  2. Don't forget to enter my 15% off coupon code: GOODDEES15MRS

That's all there is to it. Enjoy!

Tips for Baking With Good Dee's Keto Cookie Mixes

All low carb baking mixes behave differently than their traditional flour- and sugar-laden counterparts. Here are my tips for baking successful keto cookies from a Good Dee's low carb baking mix.

Line Your Cookie Sheets With Baking Parchment

Even if you have a Silpat or other nonstick baking pan liner underneath, I recommend lining your baking sheets with baking parchment, as directed when using these low carb baking mixes. The cookies are extremely fragile when they come out of the oven, and the parchment paper helps them release without breaking. I have switched to using unbleached baking parchment exclusively, and my high quality Fasmov Non-Stick Parchment Paper Baking Liner Sheets are shipped flat, so the edges of the paper don't curl (which I love!).

Prepare and Measure the Wet Ingredients

Bag of Good Dee's chocolate chip cookie mix next to beaten egg, melted butter, and vanilla extract
Setting out and measuring all the ingredients, the mixing bowl,
and a mixing spoon keeps your work space organized

As with any type of baking, ingredients should be at room temperature unless otherwise specified (for example, using chilled fat in pastry dough or biscuits).

  • To bring the egg to room temperature, you can either set it out on the counter or, if you want to start baking sooner, gently place the whole egg (still in its shell) into a bowl of warm (not hot) water and leave it for 5–10 minutes.
  • Either butter (preferably unsalted) or coconut oil will work for any of the Good Dee's cookie mixes. I prefer the taste of unsalted butter for most keto baking. When I've been low on butter or baking dairy free cookies to accommodate another person's dietary requirements, however, I've substituted my favorite unrefined, cold-pressed, organic virgin coconut oil, which adds a very subtle hint of coconut flavor that I quite enjoy. If you prefer a more neutral flavor (or just don't like the taste of coconut), you can use refined coconut oil, but it doesn't offer the health benefits that unrefined, cold-pressed, organic virgin coconut oil does.
  • I find it easiest to melt the butter or coconut oil in a Pyrex measuring cup, covered with wax paper, microwaving it in 15-20 second bursts, and stopping when most, but not all, of the fat has melted. After removing it from the microwave, I gently swirl it in the glass measuring cup, letting the hot melted fat finish melting the remaining solids. If you prefer, you can melt it over simmering water in a double boiler. Set the melted butter or coconut oil aside to cool while you preheat the oven and prepare the cookie dough.
  • In any baking recipe, I always recommend using the best quality, pure vanilla you can find (and afford). Penzeys pure vanilla extract is my favorite.

Stir Dry Mix Before Adding Wet Ingredients

Cookie baking mix in bowl, next to the wet ingredients on countertop
Getting ready to add the egg, butter, and vanilla extract
after stirring the dry cookie mix in a mixing bowl

The directions for all Good Dee's cookie mixes call for pouring the baking mix into a bowl and stirring with a spoon before adding the wet ingredients. I'm guessing the reason is that nut and seed flours are heavier than wheat flour, so they may tend to separate out and settle to the bottom during shipping. If that's the case, they might need to be stirred back into the rest of the mix to redistribute them evenly.

After stirring the dry mix in the bowl, add the egg, melted butter or coconut oil, and vanilla extract, then mix thoroughly.

Use a Cookie Scoop to Portion the Dough Evenly

Twelve scoops of Good Dee's low carb chocolate chip cookie dough on baking parchment lined cookie sheets
I used a medium cookie scoop to divide the prepared
keto chocolate chip cookie mix into 12 equal portions

Dividing dough into 12 equal portions with any accuracy can be a pain. I could weigh the prepared dough in grams, divide the total weight by 12, and then weigh out each portion of the dough. But if I'm using a baking mix, I'm not interested in spending that amount of time and effort just to portion out the dough equally.

Since I still track my daily keto macros and calories, ensuring that dough is divided as evenly as possible is important to me. Most of the mixes call for dropping 1½ to 2 tablespoon portions of dough onto the parchment paper-lined cookie sheet to make 12 cookies. However, the butter pecan cookie mix package says to use 1 tablespoon of dough for each cookie to make "approximately" 12 cookies, yet when I did that, I had used up only slightly more than half the dough. By trial and error, I found that 1/12 of my prepared butter pecan cookie dough measured out to slightly less than 2 tablespoons per cookie.

So, if you track your daily keto macros and calories (for example, on the Carb Manager app), I recommend using a 1.5 to 2 tablespoon stainless steel scoop with a trigger mechanism to help release the sticky dough, such as the Solula Professional 18/8 Stainless Steel Medium Cookie Scoop #40 (with a 1.7 tablespoon capacity) to help you measure out 12 equal portions of cookie dough. You'll quickly find out, through trial and error, whether you need to use a level scoop, a scant scoop, or a slightly rounded scoop of dough for each cookie.

Don't Overbake

I've noticed that keto cookies I've made using a Good Dee's Low Carb Baking Mix tend to progress from underbaked to overbaked fairly quickly. Since every oven is different, I recommend setting your timer for one minute less than the package directions' shortest baking time and then keeping a close eye on the cookies so you can pull them out as soon as the edges turn golden (or, in the case of the double chocolate chip cookies, until the edges have just set).

Let Baked Cookies Cool Completely Before Removing From the Baking Parchment

These keto cookies have a much softer, somewhat coarser, and chewier texture than conventional cookies made with flour and sugar, and they are also more fragile, even after they have cooled. If you try to lift them off the baking parchment before they have fully cooled, they are likely to fall apart. So, don't let the scent of freshly baked cookies tempt you to try to eat one, or even move them to a serving plate, while they're still warm.

In fact, I find that both the flavor and texture of these low carb baked goods are even better after a day or two!

Consider Freezing Some (or Most)

If you think it might be hard to resist eating more of these cookies than will fit within your daily calories and keto macros, or if you don't plan to eat one every day and want to enjoy them as a sweet treat from time to time, you may want to freeze some or most of them, after snugly wrapping them individually in plastic freezer wrap and then placing them inside an airtight freezer-safe food storage container (or, if necessary, inside a heavy, zippered freezer food storage bag).

Wrapping each cookie securely in plastic freezer wrap not only provides another layer of protection against freezer burn, it also makes it easy to remove just one or two cookies, which will thaw fairly quickly after being unwrapped.

Keto Cookies vs. Conventional Cookies

Three different types of Good Dee's low carb cookies
Gluten-free, sugar-free, grain-free, butter pecan,
chocolate chip, and sugar cookie keto cookies,
made with Good Dee's low carb baking mix

Unless you're just starting a keto diet, you've probably discovered that ketogenic cookies, cakes, pies, etc., have a different texture and, often, a somewhat different taste than conventional baked goods made with high carbohydrate ingredients that can spike your blood sugar levels and cause inflammation. So, it's important to have realistic expectations of any keto baking recipes or low carb baking mixes.

That said, I found that my taste buds gradually adapted after several months on a fairly strict ketogenic diet, and since I no longer eat conventional sweet treats, my palate no longer compares very low carb desserts to traditional baked goods. My experience is pretty typical of people who stick to a fairly strict keto diet for at least 8–12 weeks.

So, while these cookies don't taste like my grandmother's cookies (or mine, prior to last May), they make yummy, satisfying keto desserts for those of us following a very low carb lifestyle.

Why Use a Keto Baking Mix Instead of a Low Carb Recipe? 

Ease of Use, Time Savings, and Convenience

Baking is based on chemical reactions between ingredients. And the chemistry that makes conventional baking recipes work involves interactions between ingredients that aren't keto friendly. Even for those of us who have decades of experience as excellent home bakers, there's a significant learning curve in converting old, beloved family recipes for low carb baking. That's a challenge I haven't had an interest in tackling (at least, not yet!), so I prefer to let low carb baking experts do the work of developing delicious, foolproof recipes for keto cookies and other baked goods.

Sugar free, gluten free keto baking also requires stocking the pantry with different ingredients than the ones we're accustomed to using. For example, instead of white and whole wheat flour and cornstarch, we might need to buy almond flour, coconut flour, sunflower seed flour, watermelon seed flour, and xanthan gum. (And it's not as though any of these ingredients can be simply substituted 1:1 in a keto baking recipe!)

So, although I keep those and other low carb baking ingredients in my freezer and pantry, and enjoy making a number of keto baking recipes for rolls, buns, muffins, etc., when I have time and inclination, I also appreciate the convenience of having keto baking mix varieties on hand. I try to buy ones that contain the same high-quality, low carb ingredients I use in my scratch low carb baking, and that produce keto baked goods that taste as good as the ones I bake from scratch (or close enough).

Good Dee's Low Carb Keto Cookie Baking Mix Review by Margaret Schindel

Posts About My Keto Diet Journey

My First Year on The Keto Diet

Preparing to Succeed on the Keto Diet, Part One

Preparing to Succeed on the Keto Diet, Part Two

Low Carb Muffins & Cupcakes: Treats to Enjoy on a Keto Diet

Low Carb Keto Chocolate Yogurt Granola Chip Pudding Recipe

Good Dee’s Keto Cookie Low Carb Baking Mix Review

Hamama Microgreens Growing Kit Review & Success Tips

My Favorite Hamama Microgreens Seed Quilt Accessories

Keto Cheddar Cheese Biscuits With Chives Recipe

The Ultimate Keto Hot Chocolate Recipe

The Best Low Carb Keto Gift Ideas: Keto Gift Guide

The Best Low Carb Keto Cinnamon Muffins

Wholesome Yum Keto Bread Mix and Yeast Bread Recipe

The Good Chocolate 100% Organic No Sugar Dark Chocolate Review

The Best Advice to Maintain Your Keto Diet Weight Loss

My New Irresistibly Delicious Keto Cheese Crackers Recipe

Luscious Low Carb Keto Triple Peppermint Cheesecake Brownies Recipe

Quick & Easy Livlo Blueberry Scones Keto Baking Mix Review

Snack Better With The Best Healthy Keto Cookie Dough Bites

The Best Quick and Easy Low Carb Keto Pizza Recipe

The Best Quick and Easy Low Carb Keto Shortcake Cupcakes Recipe

Comparing the Best Keto-Friendly Chocolate Hazelnut Spreads - No Added Sugars

The Best Low Carb Keto Sandwich and Burger Buns Mix

Blueberry Biscuit Scones — New, Easy, Low Carb Keto Recipe

The Best Keto Pizza Crust Mix With 0 Net Carbs

An Unusual, Delicious Strawberry Chocolate Tea With 0 Calories

Delicious Sugar-Free Keto Cookies That OREO Fans Will Love

Healthy Pistachio Cherry Chocolate Chip Marshmallow Cereal Treats Recipe

Easy, Decadent, High Protein, Sugar-Free Rocky Road Cottage Cheese Ice Cream

The Best Quick & Easy Low Carb Sausage and Ricotta Calzones

How to Make Refreshing Vanilla Italian Soda (With or Without Cream)


Reviews of the Keto Diet by Barbara C. (aka Brite-Ideas)

My Personal Keto Testimonial

How I Stayed Committed to the Ketogenic Way of Eating

Read More Recipe Reviews by Our Review This Reviews Contributors

Read More Product Reviews by Our Review This Reviews Contributors

Read More Reviews About Health and Wellness by Our Review This Reviews Contributors


Note: The author may receive a commission from purchases made using links found in this article. “As an Amazon Associate, Ebay (EPN) and/or Esty (Awin) Affiliate, I (we) earn from qualifying purchases.”


Wednesday, June 22, 2022

The Best Quick & Easy Low Carb Keto Shortcake Cupcakes Recipe

In the heat of summer, most of us enjoy eating lighter desserts featuring sweet, fresh summer fruit and would rather spend as little time as possible cooking or baking in a hot kitchen. Some of us also may be trying to get or stay slim to look our best in lightweight, more revealing summer clothing. 

In this review, I'm sharing my yummy, quick & easy low carb keto shortcake cupcakes recipe, which can be whipped up fast thanks to a keto baking mix, is bursting with sweet, ripe berries and topped with a luscious sugar-free buttercream frosting.

Quick & Easy Low Carb Mixed-Berry Shortcake Cupcakes - Keto-Friendly, Sugar-Free, Gluten-Free, Nut-Free

A Fun Cupcake Twist on Traditional Biscuit-Based Berry Shortcake

I have made delicious keto-friendly strawberry shortcake with biscuits from a low carb baking mix topped with fresh whipped cream and berries. However, since there are only two of us in our household, that means whipping just a few tablespoons of heavy cream and assembling two shortcakes after dinner every time I want to serve them.

Recently, I got the idea to try making shortcake cupcakes, substituting cupcakes for the biscuits and low carb buttercream frosting for the whipped cream, which would let me assemble and refrigerate them in advance. While I'm making dinner, I can just take out two of the refrigerated shortcake cupcakes and set them on the counter so they will be at room temperature when we are ready for dessert.

A Delicious, Quick & Easy, Sugar-Free, Gluten-Free, Nut-Free* Summer Dessert

The cake portion of these cupcakes is made with Scotty's Everyday Keto Cupcake & Cake Mix. This healthy, sugar-free, gluten-free and nut-free boxed keto cupcake mix is a real time-saver that minimizes time in a hot kitchen during the summer months.

The baked cupcakes are paired with juicy, fresh berries, keto berry jam and a super simple sugar-free buttercream that takes just a few minutes.

Scotty's Keto Cupcake Mix + Low Carb Buttercream Frosting + Sugar-Free Berry Jam + Fresh Berries = The Best Quick & Easy Low Carb Keto Shortcake Cupcakes

*Important food allergy note: Although Scotty's Everyday baking mixes are made with no nut flours, their website does not state that their mixes are made in a nut-free processing facility. It is important to contact the company to find out that information if you are thinking about serving these treats to anyone who has a severe nut allergy.

low carb keto shortcake cupcakes batter in silicone muffin pan liners
Just add melted butter, eggs, water and vanilla extract to Scotty's Everyday Keto Cupcake & Cake Mix for the base of these quick & easy low carb shortcake cupcakes, then split, fill, frost and decorate them with sugar-free jam, keto buttercream frosting and fresh berries.

Scotty's Everyday Keto Cupcake & Cake Mix Makes an Ideal Biscuit Alternative for This Low Carb Shortcake Cupcakes Recipe

I have used several keto baking mixes from Scotty's Everyday and like them a lot. Scotty's Everyday Keto Cupcake & Cake Mix is sweetened very lightly, and the baked cupcakes taste a bit like the drop biscuits I sometimes make for shortcake. They are also less crumbly than traditional cupcakes using sugar and wheat flour, which makes them perfect for this recipe.

In addition to the biscuit-like flavor and sturdy structure, each cupcake prepared according to the directions on the Scotty's Everyday Keto Cupcake & Cake Mix package have several other benefits:

  • 0 net carbs (22g total carbs - 14g dietary fiber - 8g erythritol = 0 net carbs)
  • No added sugars
  • Sweetened with erythritol and monk fruit extract
  • 14g dietary fiber
  • 90 calories

This sugar-free, gluten-free, nut-free, low carb keto baking mix is also a cinch to prepare. Just add melted butter, eggs, water and vanilla extract. My product review rating for Scotty's Everyday Keto Cupcake & Cake Mix is 5 stars!

My Favorite Keto Buttercream Frosting Recipes

The Best Quick & Easy Low Carb Keto Shortcake Cupcakes Recipe needs a fast, simple frosting to live up to its name. I recommend the Keto Buttercream Frosting Recipe from Wholesome Yum, which has 205 calories, 16.4g of fat and 0g net carbs per serving (3 tablespoons).

If you want to significantly cut the calories and fat and are willing to spend a bit more time and effort, I highly recommend the luscious Sugar-Free Swiss Meringue Buttercream Frosting recipe from All Day I Dream About Food, which lends itself beautifully to piping and tastes out of this world. A 1/4-cup serving (4 tablespoons) has only 109 calories, 10.7g of fat and and almost zero (0.1g) net carbs.

Use Your Favorite Keto Friendly Berries

Berries are the only fruits low enough in carbohydrates to fit a ketogenic diet. The berries with the fewest net carbs are raspberries, blackberries and strawberries. Blueberries have more than twice the net carbs and half the dietary fiber of raspberries or blackberries, but are still low enough in carbs for you to enjoy a few on one of these keto shortcake cupcakes.

For the keto shortcake cupcakes I photographed for this post, I used fresh raspberries and blueberries. I also added a taste of strawberries by pairing my favorite sugar-free strawberry jam with the buttercream frosting for the filling.

cupcakes being split, filled, frosted and decorated
ChocZero Keto Strawberry Jam is delicious, spreads easily and, like the buttercream frosting, helps hold the fresh rasbperries and blueberries in place while reassembling the filled shortcake cupcakes.

The Best Low Carb Keto Strawberry Jam

I have tried several brands and flavors of sugar-free jams. Most were fairly disappointing. Some were sweetened with artificial sweeteners, which I try to avoid for health reasons. Some were too thin and loose or had big chunks of berries that made them hard to spread in a thin layer.

ChocZero is one of my favorite brands of low carb and keto-friendly products. Recently, they launched a keto strawberry jam, which I ordered immediately. Based on my experience with other sugar-free jam products, I was only cautiously optimistic. (I didn't want to get my hopes up only to be disappointed again.)

I was pleasantly surprised by the new ChocZero Keto Strawberry Jam. It has a thick, "jammy" consistency, spreads easily in as thick or thin a layer as you wish, is sweetened with monk fruit, has no added sugars, and has a delicious flavor from real strawberries. Each serving (1 tablespoon) provides a whopping 10g of dietary fiber and has just 15 calories and 1 net carb.

Unlike the other low carb, sugar-free jams and preserves I have tried, ChocZero Keto Strawberry Jam is also sticky enough to help keep the raspberries, blackberries, strawberries or blueberries in place when sandwiching them between the halves of the split shortcake cupcakes.

Five filled, frosted and decorated low carb keto shortcake cupcakes
Don't these keto-friendly shortcake cupcakes filled with jam, frosting and fresh berries look yummy, despite my messy piping of my melting buttercream? They're one of the best keto desserts to make for summer holiday gatherings including the 4th of July (especially if you use red and blue berries!).

How to Make the Best Quick & Easy Low Carb Keto Shortcake Cupcakes

Recommended Kitchen Tools and Supplies for This Recipe

  • Silicone Muffin or Cupcake Liners
    The Scotty's Everyday Keto Cupcake & Cake Mix package instructions say to "Line one 12-cup standard muffin tin" without specifying the type of cupcake liners to use, I highly recommend Pantry Elements Silicone Baking Muffin Cups. They are made from BPA-, PVC- and phthalate-free, food grade platinum silicone and sturdy enough to use on their own on top of a flat baking sheet, if desired, or you can use them as liners for cupcake or muffin tins. They also come in a clear, reusable screw-top container for storage, which keeps them clean and dust-free and lets you enjoy the rainbow of bright, happy colors even when these nonstick silicone baking cups are not in use. I have used mine frequently for several years for both muffins and cupcakes and can attest to their high quality and durability.

  • Stainless Steel Scoop With Trigger or Spring Action Handle
    I have a large assortment of these stainless steel scoops in different sizes and found that my Norpro 50mm stainless steel scoop (3 Tablespoons) was a bit too small and my Norpro 56mm stainless steel scoop (4 Tablespoons) was a bit too large. You can use a rounded 3 Tablespoon scoop of cupcake batter or, if you make a lot of cupcakes or muffins, you might want to get the Solula 18/8 Stainless Steel Ice Cream Cupcake Muffin Scoop (3.4 Tablespoons), which is just the right size and capacity to portion out nicely rounded scoops of batter into standard size muffin or cupcake pans.

  • Cake Decorating Set or Piping Bags With Decorating Tips
    These low carb keto shortcake cupcakes will be just as delicious if you use a small offset spatula to spread the frosting on the tops, but piping the buttercream into decorative swirls makes for a more festive presentation. As you can see in the photos, I had a hard time piping the frosting onto my cupcakes, partly because I'm decades out of practice and partly because my kitchen was so hot that the buttercream quickly softened too much. Even so, I like the look of the buttercream swirls, messy though they turned out! If you are new to cake decorating and would like to give it a try, I recommend starting with a small, inexpensive, basic set, such as the Wilton Beginning Buttercream 20-Piece Cake Decorating Kit to see whether you enjoy using a piping bag and decorative tips.

Ingredients

For the Cupcakes:

  • 1 package Scotty's Everyday Keto Cupcake & Cake Mix
  • 1 Tablespoon melted butter or ghee (clarified butter)
  • 3 large eggs
  • 1/3 cup water
  • 1 Tablespoon vanilla extract
  • Optional but recommended: Avocado oil, clarified butter or coconut oil for greasing the cupcake liners

For the Keto Buttercream Frosting (Wholesome Yum recipe):

  • 1 1/2 cups unsalted butter, room temperature (Wholesome Yum's recipe recommends Danish Creamery European Style Unsalted Butter, which isn't available where I live; I use Kerrygold Unsalted Butter, a high-quality Irish butter made from the milk of grass-fed cows that are free of growth hormones)
  • 1 cup Wholesome Yum Besti Keto Monk Fruit Sweetener With Allulose 1:1 Natural Powdered Sugar Replacement
  • 1 teaspoon vanilla extract
  • 1/8 tsp fine sea salt
  • 1 Tablespoon heavy cream (approximately)

For the Filling:

Instructions

  1. Preheat the oven to 350 ℉ / 180 ℃. Line a standard 12-cup muffin tin with paper, foil or silicone cupcake liners or place 12 sturdy silicone baking cups on a baking sheet. Although not specified on the cupcake mix package directions, I recommend greasing the liners lightly with a thin film of avocado oil, clarified butter or coconut oil.
  2. Prepare the Scotty's Everyday Keto Cupcake & Cake Mix batter according to the package directions. Use a trigger or spring action scoop to portion the batter evenly among the 12 lined muffin tin wells or silicone baking cups, using approximately 3.5 tablespoons of batter for each cupcake.
  3. Bake for 20–22 minutes, just until they test done according to the standard "toothpick test" (i.e., insert a clean, dry toothpick into to center of one of the cupcakes and pull it back out; if it remains clean and dry, the baked goods are done). Do not overbake! Cool them on a baking rack for 20 minutes, then remove the cupcakes from the muffin pan or silicone baking cups.
  4. While the cupcakes are cooling, prepare the buttercream according to the Keto Buttercream Frosting Recipe on the Wholesome Yum website.
  5. Rinse the berries and lay them on two thicknesses of paper towel to dry. Set aside the best looking ones to decorate the tops of the cakes.
  6. Slice the cooled keto shorctcake cupcakes in half horizontally and turn the halves cut side up. Spread a layer of ChocZero Keto Strawberry Jam on one half and a thin layer of the prepared buttercream frosting on the other half. Arrange the berries on the bottom half of the cupcake and cover them with the top half.
  7. Frost the tops of the cupcakes with the remaining buttercream frosting. You can either spread it on with an offset spatula or put it into a piping bag fitted with a star tip (or your favorite cake decorating tip) and piping it on in swirls or rosettes. Top each frosted shortcake cupcake with one of the reserved fresh berries.
  8. Serve on dessert plates with knives and forks, like traditional berry shortcakes. (These towering, berry-filled cupcakes are too tall to bite into directly!)

A Perfect 4th of July Dessert

Make these shortcakes with fresh raspberries (or sliced or diced strawberries) and blueberries for a festive red, white and blue 4th of July dessert that everyone at your holiday gathering can enjoy, even if they are on a gluten-free, sugar-free, nut-free, low carb or ketogenic diet.

The Best Quick & Easy Low Carb Keto Shortcake Cupcakes Recipe by Margaret Schindel

Posts About My Keto Diet Journey

My First Year on The Keto Diet

Preparing to Succeed on the Keto Diet, Part One

Preparing to Succeed on the Keto Diet, Part Two

Low Carb Muffins & Cupcakes: Treats to Enjoy on a Keto Diet

Low Carb Keto Chocolate Yogurt Granola Chip Pudding Recipe

Good Dee’s Keto Cookie Low Carb Baking Mix Review

Hamama Microgreens Growing Kit Review & Success Tips

My Favorite Hamama Microgreens Seed Quilt Accessories

Keto Cheddar Cheese Biscuits With Chives Recipe

The Ultimate Keto Hot Chocolate Recipe

The Best Low Carb Keto Gift Ideas: Keto Gift Guide

The Best Low Carb Keto Cinnamon Muffins

Wholesome Yum Keto Bread Mix and Yeast Bread Recipe

The Good Chocolate 100% Organic No Sugar Dark Chocolate Review

The Best Advice to Maintain Your Keto Diet Weight Loss

My New Irresistibly Delicious Keto Cheese Crackers Recipe

Luscious Low Carb Keto Triple Peppermint Cheesecake Brownies Recipe

Quick & Easy Livlo Blueberry Scones Keto Baking Mix Review

Snack Better With The Best Healthy Keto Cookie Dough Bites

The Best Quick and Easy Low Carb Keto Pizza Recipe

The Best Quick and Easy Low Carb Keto Shortcake Cupcakes Recipe

Comparing the Best Keto-Friendly Chocolate Hazelnut Spreads - No Added Sugars

The Best Low Carb Keto Sandwich and Burger Buns Mix

Blueberry Biscuit Scones — New, Easy, Low Carb Keto Recipe

The Best Keto Pizza Crust Mix With 0 Net Carbs

An Unusual, Delicious Strawberry Chocolate Tea With 0 Calories

Delicious Sugar-Free Keto Cookies That OREO Fans Will Love

Healthy Pistachio Cherry Chocolate Chip Marshmallow Cereal Treats Recipe

Easy, Decadent, High Protein, Sugar-Free Rocky Road Cottage Cheese Ice Cream

The Best Quick & Easy Low Carb Sausage and Ricotta Calzones

How to Make Refreshing Vanilla Italian Soda (With or Without Cream)


Reviews of the Keto Diet by Barbara C. (aka Brite-Ideas)

My Personal Keto Testimonial

How I Stayed Committed to the Ketogenic Way of Eating

Read More Recipe Reviews by Our Review This Reviews Contributors

Read More Product Reviews by Our Review This Reviews Contributors

Read More Reviews About Health and Wellness by Our Review This Reviews Contributors


Note: The author may receive a commission from purchases made using links found in this article. “As an Amazon Associate, Ebay (EPN) and/or Esty (Awin) Affiliate, I (we) earn from qualifying purchases.”


Saturday, August 10, 2019

Silicone Kitchen Tools & Accessories for Cooking & Baking Enthusiasts

Silicone sponges, potholders, spatulas, baking pan liners, muffin pan liners, food storage bags, cooking utensil rests, chocolate chip molds, ice pop molds and other silicone molds have become some of my favorite and most-often-used items in my kitchen.

Although I love cooking and baking, I don’t enjoy washing dishes, so I appreciate being able to toss my silicone kitchen tools into the dishwasher. It’s often just as easy to hand wash them with just a soapy sponge, since even sticky foods wash off easily.

The Best Silicone Cooking & Baking Tools
Read on for my reviews of the best silicone kitchen tools and accessories!

Silicone Potholders

My hands are very sensitive to hot and cold temperatures, so I've gone through a lot of potholders over the years. The first silicone potholders I tried were the OrkaPlus cotton-lined silicone mitts by Mastrad. These long mitts were like barbecue mitts, providing great coverage that protected my fingers, hands, wrists and the lower half of my forearms. This appealed to me a lot, since I'm prone to burning myself in the kitchen! They also came highly recommended by a respected cooking magazine and had great reviews. Unfortunately, I found them very clumsy and had a hard time getting a good grip on the edges of cookie sheets without smooshing the big silicone thumb part into the cookies (or whatever else was in the pan I was trying to remove from the oven). Next, I tried a pair of small, ribbed silicone pinch mitts, also called mini oven mitts, that just covered my fingers, thumbs and palms. But I found them very awkward to use.

Pair of red oval ribbed silicone potholders
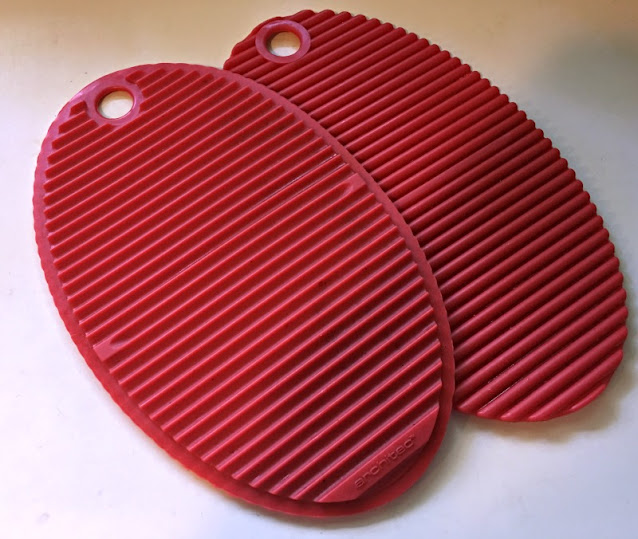
These ribbed silicone potholders protect your hands without getting in the way

Finally, I bought two Architec Silicone HotGrip ribbed silicone potholders that turned out to be the perfect solution. I use them every day, throw them into the dishwasher every evening and they still look like new. They're thick, large enough to protect my hands and grip well, thanks to the ribbed texture. Mine are red, since at the time the pretty teal blue color wasn't available. I can't imagine them wearing out, but if they ever do, I'll definitely be buying the blue ones!

Silicone Spatulas

I frequently use nonstick cookware and bakeware and silicone spatulas help protect the nonstick coating. I’ve added to my silicone spatula collection over time because I use them for so many things.

The first ones I bought (many years ago) had silicone heads attached to handles of a different material (wood, metal or plastic). I soon realized I’d be better off with a seamless, one-piece design. This eliminates the possibility of the business end of the spatula becoming detached from the handle (something that happened to me several times with two-piece designs) and eliminates seams and crevices that can trap food and breed bacteria.

Two years ago, I purchased 4-piece silicone spatula set made by UpGood. I was unfamiliar with the brand but bought it because I liked the shapes and sizes in the set, the reviews were great and the price made them an excellent value. The set includes a long, slim spatula for scraping out jars, a curved spoon spatula and both long and short traditional scraper spatulas with one curved edge and one straight edge, These are very nice quality and they're still going strong in my kitchen a couple of years later, And the charcoal gray color is a neutral that won't clash with your kitchen's color scheme. Here's a photo of the spoon/spatula (AKA "spoonula") from the set.

Black silicone spoonula spoon-spatula
One of the spoonulas in my growing collection!

I find myself using the spoon/spatula shape the most for cooking and baking. Since I rarely have only one pot or pan going on the stove when I cook, I decided to get a couple more in that shape. I was delighted to find one in a pretty aqua/teal, my favorite color, so I ordered the GIR (Get It Right) 11-inch Premium Silicone Ultimate Spoonula in Teal. This high quality, seamless spoon spatula is made of pharmaceutical grade platinum-cured silicone that's heat resistant up to 550 °F. It also has a sturdy fiberglass core that doesn't heat up like the more common iron or stainless steel spatula cores. It's still one of my favorite cooking utensils - I just love the color and using it makes me happy. (It's the little things, right?) It also comes in Red, Orange or Gray.

I use an iSi Slim Silicone Spatula to scrape out my very tall Vitamix blender. It works extremely well for this purpose and I am very pleased with it.

Red iSi slim silicone spatula
This iSi slim silicone spatula is perfect for scraping the bottom of my Vitamix blender

Note: Any silicone spatula that is used to scrape out the contents of a blender will eventually get cuts or nicks from the sharp blades, at which point it should be replaced for sanitary reasons.

Silicone Baking Pan Liners

I've been baking for decades and, as any experienced baker will likely tell you, silicone baking mats are a baking staple. When I was younger, I used baking parchment much more often than I do now. But the older I get, the more concerned I become about the pervasiveness of wasteful habits that wreak havoc on the environment. So, increasingly, I've been trying to switch from disposable to reusable items.

For many years, I've used Silpat baking mats to line my cookie sheets. This French brand is so closely associated with this type of silicone bakeware liner that it's most often used as a generic term for them. But when I lost the use of my full-size double oven, I needed to get some smaller ones that would fit the smaller rimmed baking sheets for my tabletop oven.

I had been planning to buy the iconic Silpat brand again, but the name commands a premium and my income is not what it was when I worked in the corporate world. So, when I looked at a pair of silicone baking mats from an unfamiliar brand that had both great reviews and a great price, I took a chance.

Both my husband and I have been using these Quarter Sheet Silicone Baking Mats by WildCow several times a week. They're great for baking, of course, but we also use them to line our tabletop toaster oven rimmed baking sheets before inserting a rack to oven-bake regular or turkey bacon. We much prefer this method to pan frying, since there's no splatter, no turning and no watchful eye needed. These 11 3/4” x 8 1/4" nonstick cooking and baking mats fit inside the 12" x 10" rimmed baking sheets we use in our tabletop toaster oven (although I may trim the tips of the corners on a diagonal at some point). Despite the excellent price, they're thick and sturdy and have held up great. I can hand wash them quickly in hot, soapy water or just toss them into the dishwasher. (I can't figure out why the mat looks stained in this photo, since it isn't in real life!)

Wild Cow quarter sheet silicone baking mat
This inexpensive silicone baking mat works as well as my expensive Silpat mats

Be aware that these are heat resistant up to 400 °F, so don't use them for something that requires higher heat, such as browning the top of something under the broiler.

If you're using regular 18" x 13" pans — known in  professional kitchens as half size pans — I recommend getting the AmazonBasics Silicone Baking Mat Sheet, Set of 2 in the Standard size. AmazonBasics is one of Amazon's popular private-label "house brands".These silicone baking mats measure 11.6" x 16.5" and can also be used with 11" x 17" baking sheets (although they'll overhang two of the sides slightly). These mats currently have an average customer rating of 4.7 stars based on more than 4,300 customer ratings, are heat-resistant up to 480 °F and are also very well priced.

Silicone Mini Prep Bowls / Pinch Bowls

I've had a set of medium-sized stainless steel prep bowls for years that I still use. But when I set out and prepare all the ingredients before starting to cook or bake (an activity known in the chef / foodie / Food Network world as mise-en-place), it's also nice to be able to prep and measure out small amounts of ingredients, such as seasonings or garnishes.

My Norpro set of 4 silicone mini pinch bowls are perfect for that purpose. The four colorful bowls in the set are bright red, blue, yellow and green, respectively. These cuties are just 2.5" in diameter and 1.5" tall, so they take up practically no counter space, which is a big advantage if you're prepping a lot of ingredients. In the photo, you can see how tiny they are next to a 1-cup measuring cup.

Norpro set of 4 silicone mini pinch bowls next to 1-cup measuring cup
These tiny, colorful silicone pinch bowls are perfect for small amounts of ingredients

The nonstick silicone means I can measure and set out even sticky ingredients, like a couple of tablespoons of molasses or honey, and easily scrape them into a pot, pan or mixing bowl. These bowls are also microwave safe and heat resistant to 500 °F, so I can melt small amounts of butter or coconut oil in them. And because they're flexible, it's easy to pinch the sides of these flexible prep bowls (hence the name "pinch bowls") to control and direct the ingredients as I'm pouring them into my pot or bowl or drizzling melted butter or chocolate or a sauce over a dish.

When I'm through with whatever ingredients I used them for, I just toss these brightly colored mini pinch bowls into the dishwasher.

Reusable Silicone Baking Liners / Baking Cups

I often bake in cupcake or muffin tins, and even more so now that I’ve switched to eating low carb. I love baking batches of low carb, high-protein, sugar-free chocolate muffins made with almond flour or low carb mini cheesecakes that I can keep in the freezer. Baking a recipe in muffin tins rather than full size cake pans helps me with portion control, since I can just grab one serving and defrost it.

While I could just grease the wells of my muffin tins for my protein muffins, that won’t work for recipes like the mini cheesecakes, since they're too soft to turn out onto a rack after they come out of the oven (and since if I chilled them first to firm them up, they wouldn't release easily from the greased muffin tin).

I stopped buying disposable, single-use paper cupcake liners a few years ago, so I decided to look for some reusable silicone baking cups. Also, since our wall oven died a year or two ago*, we’re using a tabletop oven that isn’t wide enough to fit a full-size, 12-cup cupcake or muffin pan. So, I wanted silicone baking cups that were sturdy enough to be used on a baking sheet, without the support of a muffin pan so I could bake a dozen muffins (or mini cheesecakes) at a time in my small tabletop oven. And, of course, they could also be used as cupcake liners for my 6-cup muffin pans, which do fit my tabletop oven.

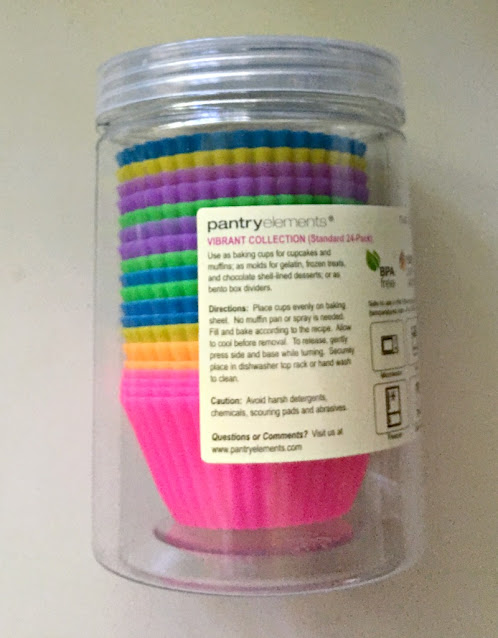
After considerable research, I chose Pantry Elements Silicone Cupcake Baking Cups & Liners. They’re made from high-quality, 100% food-grade silicone with no fillers, as demonstrated by the fact that they pass the “pinch test” perfectly. (According to numerous sources, if you pinch or bend and twist a flat area on a colored silicone food preparation product and the color appears white in that stretched area, it can indicate the presence of fillers vs. 100% silicone.)

Pantry Elements silicone cupcake baking cups & liners in a rainbow of colors
These reusable baking cups work so much better than paper cupcake liners!

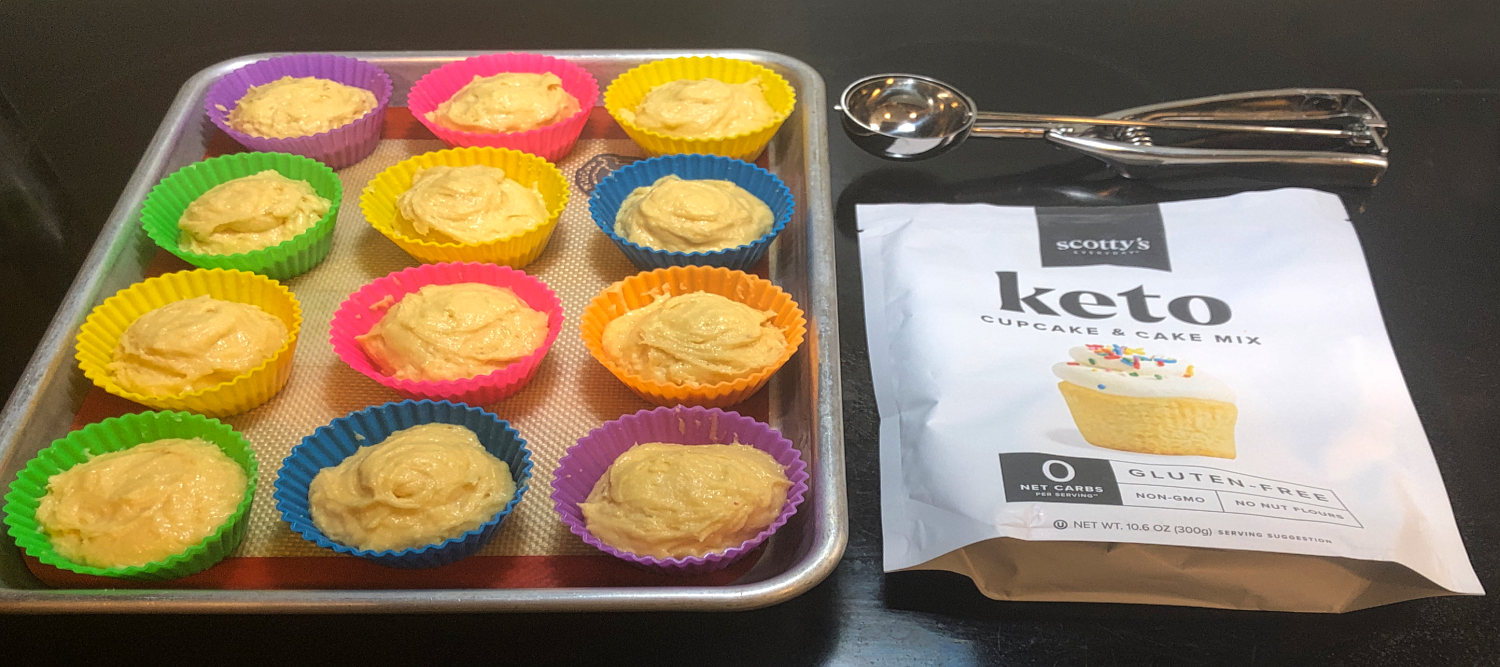
They are also thick and sturdy enough to hold their shape after being filled with thick muffin batter. However, if you use them as stand-alone baking cups rather than as cupcake liners inside a muffin tin, place them on the baking sheet before you fill them with batter. Because they are flexible, moving them to the baking sheet after filling them with batter can be messy. (Ask me how I know, lol!)

Cleanup is easy. Sometimes I let them soak in warm, soapy water for a bit and wash them by hand with my silicone sponge, but they’re also dishwasher-safe. And they come in a rainbow of bright, pretty colors, which adds a nice, cheery pop of color to my kitchen.

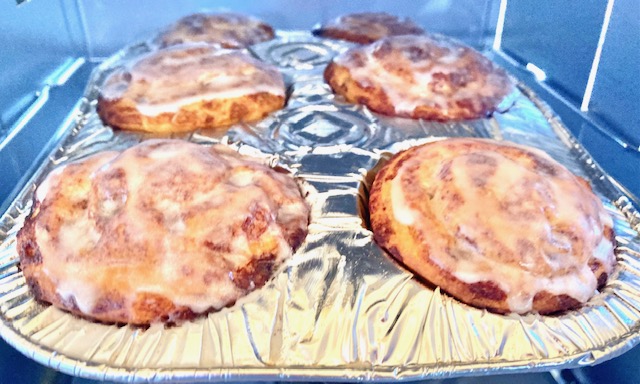
Best of all, unlike paper cupcake liners, they release cleanly, so I don't end up losing the outer layer of crumbs to the trash. Just look at those sharp, crisp ridges on that muffin!

Silicone cupcake liner with very few crumbs after unmolding a baked muffin
See how few crumbs stick to these cupcake liners?

I bake with these silicone cups every week and they still look and act brand new. You get 24 liners for around 50 cents each in a convenient, see-through, lidded storage tube. I can’t imagine ever having to replace them.

*In case you're wondering, our defunct double wall oven, which is original to this 1950s house, is too old to be repaired, according to several appliance technicians who have looked at it. Unfortunately, we also can't replace it because it’s surrounded by built-in cabinetry that runs the entire length of the wall and contemporary ovens don’t fit the opening. Believe me, we've tried!

Reusable Silicone Food Storage Bags

Since I switched to a low-carb diet, I’ve been baking grain-free, sugar-free rolls, bread, muffins and brownies to make it easier for this former carbohydrate lover to stay on track. To make this process less time-consuming, I’ve started measuring the dry ingredients for multiple batches and storing them in freezer bags. Now, I can just pull out a bag of my “baking mix” for that recipe, let it come to room temperature, add the wet ingredients and put the batter in the oven. Easy peasy!

Since I am trying to reduce my use of plastic wrap and food storage bags that end up in landfills. So, rather than using disposable plastic freezer bags for this purpose, I decided to get some reusable food grade silicone food storage bags. The ones I chose originally had bottoms that let them stand up on the counter, which makes them easier to fill. The sliding closure is a bit stiff at first, by design, but loosens up just enough after the first few uses so they’re easier to slide but still airtight. They can also be used in the microwave and for sous-vide cooking and they’re dishwasher-safe for easy clean-up. The one in the photo holds the remaining 1/4 of a psyllium bun from my last batch — time to get baking!

Reusable food grade silicone food storage bag with slider closure
These reusable silicone food storage bags keep disposable plastic bags out of landfills

I have since upgraded to Stasher reusable silicone food storage bags. They're more costly, but they're definitely a worthwhile investment. The seal is airtight so you can even use these for sous-vide cooking, and the best part is that they seal and unseal so easily, they practically do it by themselves. I love them!

Silicone Cooking Utensil Rest

For many years, we’ve kept a marble spoon rest next to the stove. I bought it because I thought it was pretty. However, pretty is as pretty does, and this kitchen gadget has been a thorn in my side for a long time! Marble is absorbent, so the surface frequently stained when I was cooking a tomato-based sauce or dish. Also, I rarely use just one utensil when cooking. So, even though the marble spoon rest was fairly wide, it wasn’t big enough to accommodate multiple cooking utensils.

Silicone utensil rest
This easy-to-clean utensil rest holds up to 4 cooking utensils

I finally got rid of it and replaced it with a multi-slot silicone utensil rest. It’s certainly not the prettiest thing in our kitchen and the only color choices are a medium grey or a bright yellow-green, but both my husband and I love it. The four slots are wide enough to accommodate the handles of any of our cooking utensils, but also narrow enough so that the business ends of the utensils are held at an angle, so four utensils can fit without resting on top of each other. That also allows the base to be narrower than it would need to be if the “heads” of the cooking utensils were lying flat. In addition, there’s a small lip or rim around the edge of the base, so if there’s a bit of liquid that drips off a utensil, it doesn’t spill over onto the stove or countertop. The only cooking utensil we have that it isn’t large enough for is our enormous slotted spatula, which is nearly 5” wide!

Best of all, because it’s made of silicone, it’s stain-resistant, non-stick, heat-resistant up to 450 °F and dishwasher safe.

Silicone Chocolate Chip Molds

Most commercially available chocolate chips aren’t as high quality as those same brands offer in bars or chunks. In fact, many of the best quality chocolate manufacturers don’t make chocolate chips at all. So, if you’re a true chocolate lover like I am, whenever you use chocolate chips in a recipe, you’re usually settling for second (or third) best.

In addition, as I’ve matured, my taste buds have evolved. Now I prefer really dark chocolate, which has the added benefit of being heart-healthy in modest amounts. Unfortunately, it’s hard to find high-quality, very dark chocolate chips. The so-called dark chocolate chips in the grocery store are 60% cacao; but for heart health benefits, dark chocolate should be labeled 70% cacao or higher according to the world-renowned Cleveland Clinic.

If you want sugar-free chocolate chips, it’s even more of a challenge. The darkest I’ve found are Lily’s stevia sweetened chocolate chips which, while delicious, contain only 55% cacao – much too low to improve heart health.

Whether you prefer traditional or sugar-free chocolate, the lower the percentage of cacao, the higher percentage of other ingredients, which increases the number of net carbs per serving.

Sure, you can chop up a sugar-free dark chocolate bar instead, if you’re using them in a recipe. But sometimes you really want real chocolate chips!

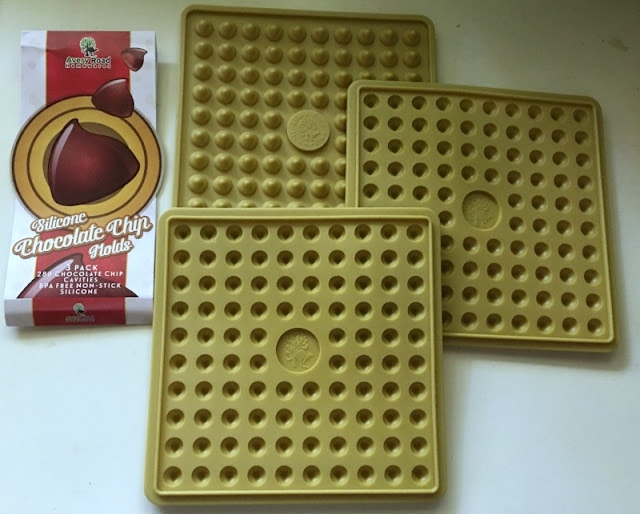
So, I was delighted to find these silicone chocolate chip molds, which allow me to make my own healthy, sugar-free, dark chocolate chips that look as though they came right out of a bag from the store.

Silicone chocolate chip molds
These adorable chocolate chip molds let you make better quality chips for less!

If I’m feeling lazy, I can just melt a sugar-free dark chocolate bar, smooth it into the molds, let the chocolate harden (or chill the molds for a bit during the hot summer months), then invert and twist the molds to release the chips. I store them in one of my silicone food storage bags until I’m ready to use them in recipes (or eat them just the way they are). The molds come in a set of three. I've shown two facing up and one facing down so you can see the shape of the chocolate chips it makes.

If I have a bit more time, however, I make my own sugar-free, melted dark chocolate from scratch and use that in the molds. Homemade chocolate chips are also less expensive for the quality you get. Either way, I can get sugar-free dark chocolate chips with a much higher percentage of cacao than I can buy commercially.

Silicone Ice Pop Molds

Who doesn't love to cool off with a sweet, refreshing ice pop during the dog days of summer? Many years ago I stopped buying them and started making my own at home. My homemade ice pops are healthier, more nutritious and much cheaper than what I can buy at the store. More importantly (to me), I have complete control over the choice and quality of the ingredients. I use organic produce, dairy, coconut milk and other ingredients as much as possible. No food coloring in my food, thank you! Now that I'm eating low carb, I've also cut out not only processed sugars but also organic honey, maple syrup, date syrup and other natural sweeteners. So, pretty much the only way to ensure that the ice pops I eat meet my strict criteria for food quality and nutrition is to make them myself.

One of the low carb ice pop recipes I've really been enjoying is called Creamy Keto Fudgesicles. Personally, I think they taste much richer and creamier than their namesake, more like a chocolate pudding pop. They're made by blending ripe avocado, unsweetened cocoa powder, full fat coconut milk, erythritol, vanilla and a little sea salt, pouring them into frozen treat molds and freezing them. The first time I made the recipe, I discovered that the pudding-like mixture was too thick to go through the silicone funnel that came with my Lebice Popsicle Molds (which are very nice unless you're trying to make a frozen treat such as pudding pops or cheesecake pops that involve a very thick mixture). When I tried spooning the mixture into the molds with a teaspoon, even though I was extremely slow and careful I was unable to prevent some of the mixture from getting on the lip and exterior of the ice pop molds.

Since I knew I'd be making this recipe often, especially during the summer, I decided to look for a set of molds with wider openings. I wanted these new molds to have not only wider openings but also reusable lids and sticks. Ideally, they would be dishwasher safe. They would need to be made of BPA-free, FDA-approved food-grade materials and release the frozen ice pops without a struggle.

Silicone ice pop molds / Popsicle molds for frozen treats on a stick
These brightly colored ice pop molds make nice, big popsicles

The pudding pop recipe makes 6-8 pops, depending on the size of the molds, so I decided to buy a Silicone Popsicle Molds Set with two molds that can make up to 8 ice pops. One of the molds is a deep, bright pink (which the manufacturer calls "rose red" for some reason) and the other is a bright lime green. The set comes with integrated one-piece lids/sticks, two each in pink, lime green, orange and aqua-turquoise. (Kids probably would love getting to choose their favorite color.) And each well holds a generous 3.38 ounces.

Believe it or not, I've got even more silicone kitchen tools, and I'm sure there will be more in my future! If you have some favorites, I'd love to hear about them.

Silicone Kitchen Tools and Accessories for Cooking and Baking Enthusiasts reviewed by 
Margaret Schindel

For more product reviews, visit ReviewThisProducts.com.


Note: The author may receive a commission from purchases made using links found in this article. “As an Amazon Associate, Ebay (EPN) and/or Esty (Awin) Affiliate, I (we) earn from qualifying purchases.”


Most Recent Reviews on Review This Reviews


Search for Reviews by Subject, Author or Title

The Review This Reviews Contributors


SylvestermouseSylvestermouseDawn Rae BDawn Rae BMbgPhotoMbgPhotoBrite-IdeasBrite-IdeasWednesday ElfWednesday ElfOlivia MorrisOlivia MorrisTreasures by BrendaTreasures by BrendaThe Savvy AgeThe Savvy AgeMargaret SchindelMargaret SchindelRaintree AnnieRaintree AnnieLou16Lou16Sam MonacoSam MonacoTracey BoyerTracey BoyerRenaissance WomanRenaissance WomanBarbRadBarbRadBev OwensBev OwensBuckHawkBuckHawkDecorating for EventsDecorating for EventsHeather426Heather426Coletta TeskeColetta TeskeMissMerFaeryMissMerFaeryMickie_GMickie_G


Review This Reviews is Dedicated to the Memory of Our Beloved Friend and Fellow Contributor

Susan DeppnerSusan Deppner

We may be apart, but
You Are Not Forgotten


“As an Amazon Associate, Ebay (EPN) and or Etsy (Awin) Affiliate, I (we) earn from purchases.” Disclosure Statement

X