Showing posts with label mbgphoto. Show all posts

Thursday, June 27, 2019

Visit Missouri-Explore St Louis- Forest Park and the Jewel Box

Forest Park in St Louis photo by mbgphoto
One of my favorite places for photography in St. Louis is Forest Park.  On this page I will be reviewing some of my favorite sites to take photos.

A Bit of Forest Park History and Facts

Forest Park is a public park that covers 1,371 acres in the heart of St. Louis.  It was first opened in 1876.  The park hosted both the 1904 World's Fair and the 1904 Summer Olympics.  An annual balloon race starts in Forest Park and in the summer you can attend wonderful summer theatre at the Muny.
Here are just a few of the wonderful attractions that you can see at Forest Park.
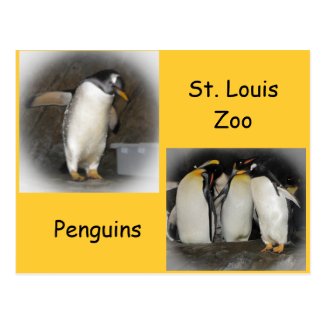
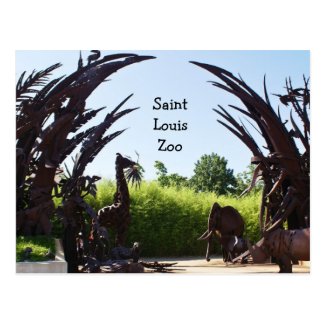
  •  St. Louis Zoo
  •  Science Center
  •  Art Museum
  •  Boathouse
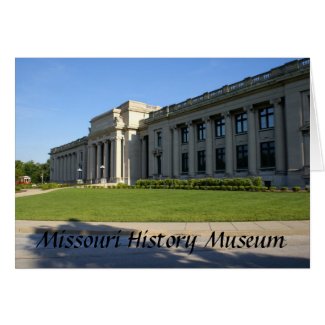
  •  Missouri History Museum
  •  Jewel Box 
  •  World's Fair Pavilion
In addition you can walk or ride the many trails and paths and in the winter you can enjoy the ice skating rink.  

I have many fond memories of Forest Park as a child, as a young Mother bringing my children there and now as a place to bring my grandchildren.  It is also one of my favorite place to take photographs and I will share them with you on the rest of this post.

Jewel Box

Jewel Box in St. Louis photo by mbgphoto
The Jewel Box is located on 17 acres in the park and was first used as a greenhouse.  It has lovely plants, water features and fountains throughout the area and is a great place to take photos.  It is popular with visitors and the building can be reserved for weddings.  Around Christmas the inside of the building is full of poinsettias, which are quite beautiful.

I visited there with my photo club on a recent spring evening and took the photo above and the beautiful daisies that lines the sides of the pond.
white daisies photo by mbgphoto

daisy photo by mbgphoto

Muny

The Muny is a wonderful outdoor amphitheater that holds 11,000 people.  1500 of the seats are free seats making the theatre accessible to people from all walks of life.  Each summer for the past 100 years the Muny has  held a variety of different live productions.  Some of my favorites over the years include: South Pacific, Oklahoma, The Jersey Boys, The Unsinkable Molly Brown, The Beach Boys, and The Wizard of Oz.  I have also enjoyed  taking my two oldest granddaughters to the Muny when they have visited during the summer months.

The first photo on this page and the ones below were taken at the entrance area to the Muny.
Forest Park photo by mbgphoto

Forest Park photo by mbgphoto

The Boathouse

The Boathouse in Forest Park is a favorite gathering place of visitors to the park.  It is located just across the way from the Muny and is especially a favorite place for theatre goers to have a meal before or after the show.  The restaurant has both indoor and outdoor seating.

By the dock is an area where you can rent paddleboats and kayaks to ride around in the great basin. This is a favorite of my granddaughters.
After our photo club outing we met at the outdoor area of the Boathouse to sit by the dock and discuss the photos we took.  Here are a couple of the photos that I took from the docks.
paddle boats at Forest Park photo by mbgphoto

kayaks at Forest Park photo by mbgphoto

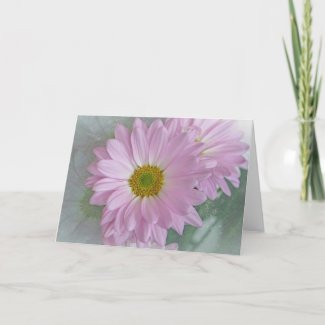
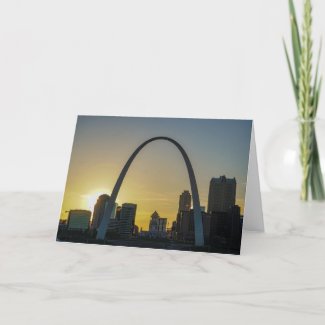
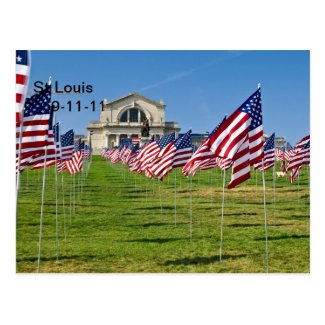
Postcards from Forest Park

Here are some postcards I have made from my photos.


Note: The author may receive a commission from purchases made using links found in this article. “As an Amazon Associate, Ebay (EPN) and/or Esty (Awin) Affiliate, I (we) earn from qualifying purchases.”


Thursday, June 13, 2019

Reviewing - Will That Be Regular or Ethyl?

Will That Be Regular or Ethyl? book cover


My cousin's  husband grew up in a small town in mid Missouri.  He recently published a book he wrote about his growing up years.

Growing Up Along Route 66 in 1950's Missouri

This is a delightful book filled with anecdotes about life in a small town in the 1950's.  Remember when: 

  •  Kids rode their bikes all over town
  •  Members of the opposite sex had "Cooties"
  •  Students got their vaccinations at school
  • To research a subject you used the Encyclopedia
  • Some teachers resorted to paddling to keep kids in line
  • Gas for your vehicle was filled by the attendant who also would sell you needed repairs for the car

Lessons for Life

Small town living gave DeWayne many lessons that were to last throughout his life.  Some of these included a strong work ethic built while working in the family chicken hatchery, a church community that is a big part of every day life, and a large family that looked out for each other. 

DeWayne's father also gained some great insights from his father who was a rather quiet man, but taught through his examples.

A job at a gas station on Route 66 was also full of lots of humorous incidents and some good life lessons.


Humorous Incidents

There are many humorous incidents scattered throughout the book as DeWayne gives us a glimpse into his childhood.  Here are just few of the many you won't want to miss.

      •  Cow Patty Softball
      •  Mishap while fishing in frozen pond
      •  Church organist falling asleep when time to play
      •  Mishaps at the service station on Route 66


So, if you are looking for a walk down memory lane and you want to read a book that is sometimes humorous, sometimes sad, but always realistic be sure to pick up "Will that be Regular or Ethyl?".


Book Available on Amazon


Note: The author may receive a commission from purchases made using links found in this article. “As an Amazon Associate, Ebay (EPN) and/or Esty (Awin) Affiliate, I (we) earn from qualifying purchases.”


Thursday, May 23, 2019

Creative Photography- Combining Techniques

pansies through lensball photo by mbgphoto
In this post I will review two techniques I have talked about in previous posts and give tips on how to combine them to create some fun and creative photographs.

Lensball

A lensball is a fun way to break away from the normal photos and get a bit creative. Here is a photo I took of a friend photographing the St. Louis Arch,  I took his photo through a lens ball that was sitting on a tripod next to him.
photographer through lensball photo by mbgphoto
On this post Crystal Photography Ball , I show you basic techniques on using a lensball.  These basic techniques are the first steps in creating the combined technique you see in the introductory photo.


Textured Backgrounds

Whenever you want the background to be different from your photo it is quite simple to change backgrounds in Photoshop.  Some backgrounds I make myself and others I get online.  Whichever method you choose, the tips in this post will help you to change your background. Photoshop Texturing Techniques
African daisy photo by mbgphoto
The photo above is a shot of an African daisy put on a textured background.

Combining Techniques

Now for the fun and creative part. When you take photos with a lensball first of all the photo is upside down and second the background just never seems to look right. At least mine usually doesn't.  I was contemplating this problem when I thought about my textured background technique I love to use and decided I could apply it to my lensball photos.  Here is a photo I created using these combined techniques and then the steps I followed to create the photo.
dipladenia flower through lensball photo by mbgphoto


  • First I took a photo of my new Dipladenia plant and edited it in Lightroom.  I saved the photo on my desktop.
  • Next I took a photo of the same plant using my crystal photo ball.  I put the photo ball stand on a table right next to the plant and focused my camera on the plant image inside the ball.  I brought the photo into Lightroom and inverted the photo so the image in the ball is right side up.
  • Next I opened the first photo in Photoshop.
  • With the first photo open I clicked on File and Place Embedded in Photoshop.
  • This brought the ball photo into photoshop covering the original photo.  I then used the Lasso tool to outline the ball and I clicked on Create and Mask in the top bar.
  • Now I used the slider to get the effect that I wanted.  I used the transparency and the feather sliders.  I next clicked done.
  • Now I click on the little square mask symbol at the bottom of the layers column and again moved the sliders to get the desired effect.
  • Finally I used Save As and named my file and saved it as a JPeg file.
I do this procedure as second nature now, but it took me a lot of practice before I got any results that I was happy with.  I wish you much fun and success in your quest for Creative Photography.


Note: The author may receive a commission from purchases made using links found in this article. “As an Amazon Associate, Ebay (EPN) and/or Esty (Awin) Affiliate, I (we) earn from qualifying purchases.”


Thursday, May 9, 2019

Review of Photographing the St. Louis Arch at Night

St. Louis Arch at Sunset photo by mbgphoto


I have photographed the St. Louis Arch at sunrise, in the morning and during the day but I had never photographed it at sunset and beyond.  When our photography club decided to take a trip across the Mississippi and photograph the Arch from a park on the east side of the river I was ready to go.  I wasn't sure what I was expecting but when we got there I saw this platform that provided a great overlook to photograph the Arch and the riverfront.

The photos below show the ramp and members of our group lined up at the top of the platform eagerly awaiting the sun to set.
photography platform in St Louis

Photographers in St. Louis


Tips for Nighttime Photography


  • Use a tripod...this will help eliminate camera shake in the low light.  This is particularly important once the sun has set.
  • Don't put the horizon in the middle of the photo.  Try getting it somewhere in the bottom third of the photo.
  • Shoot in aperture priority when the sun is still up and switch to manual once the sun sets.
  • Stay longer ( check next paragraph for reason why).
  • Try changing white balance to shade setting for more stunning colors.
  •  Wait for night clouds.  A partly cloudy sky is the best for sunsets.
  • Watch for birds.  They can add interest to the photo.
St. Louis Arch at Sunset photo by mbgphoto
Sunset in St. Louis
Search tips for night photography online and you will find a wealth of information.  The tips above are a few that I thought were particularly good.


Staying after Sunset

When I am photographing in the evening, I see many photographers wait till sunset, take their photos, and then pack up and leave.  If they do they will miss the beauty of the special lighting that often happens 20-30 minutes after sunset.  

Right after sunset you will see some really pretty colors in the sky.  
St. Louis Arch at Sunset photo by mbgphoto
You will note in this photo, taken about 5 minutes after sunset that the sky has some pretty pinks and yellow's to it.  On some evenings this can be even more pronounced, but I still think it was pretty in the photo above.

If you wait till all the colors have gone in the sky, you will then get to the "Blue Hour" where the sky turns a beautiful dark blue.  Many people miss this because they are in too big a hurry to wait.  It is definitely their loss.  I have seen times where there is only a slight darkening of the blue and other times where it is a fantastic deep blue.  It is worth waiting to see what the evening will bring.

In the case of the arch taken from the east, I also wanted to wait till all the lights were on in the buildings around the arch.  The arch is usually lit up but at this time of year those lights were turned off so they didn't interfere with the migration of birds.  Although I would have liked to see the lights on the arch, I will have to save that for another trip and I do believe it made the other lights on the city appear even brighter.  This photo was taken 25  minutes after sunset.
St. Louis Arch at Sunset photo by mbgphoto

See More on the St. Louis Arch

Here is a Review This post on the Arch showing photography at sunrise and during the daytime.

St. Louis Arch on Zazzle

I have made several of my Arch photos into Zazzle products.  Here are a few and you may find more in my zazzle store at Mbgphoto on Zazzle


Note: The author may receive a commission from purchases made using links found in this article. “As an Amazon Associate, Ebay (EPN) and/or Esty (Awin) Affiliate, I (we) earn from qualifying purchases.”


Thursday, April 25, 2019

Review of Texturing Technique in Photoshop

Pink Daisy with texturing technique applied on photo by mbgphoto

A favorite technique of mine in Adobe Photoshop is texturing.  The photo above shows a photo of a flower with a textured background.  This photo is actually a combination of two different photographs that I shot.  The foreground is the daisy flower and the textured background is a photograph of my windshield with ice on it.  On this post I will review some of the steps needed to create this photo and then show some other photographs I created using this procedure.


Creating a Textured Background

There are many places online that you can buy textured backgrounds, but I like to create my own using parts of photographs that I have taken.  Here are a few from my library.  They include a couple of sky images, a brick wall, fire (from my fireplace) and the icy windshield that I used in the introductory photo.


photo background created by mbgphotophoto background created by mbgphotophoto background created by mbgphoto

photo background created by mbgphoto


Steps to Create Textured Photo Composite

The steps below are the ones I used to create my textured background images.  There are several different ways to do different procedures in PS(Photoshop) but these are the ones I find easiest for me.  I have never taken a class on PS, but rather have taught myself through the use of the tutorials on PS (great for the basics) and YouTube tutorials you can find online for many different specialty techniques.  Here then are the steps used to create the photo like the one at the top of this post.
  •   I first Open a background photo in PS. I used my icy windshield background for the photo at the top of this post. I also always make a duplicate copy of the background photo.
  • Next I click on file and then Place Embedded to select the photo that I want in the forefront.  In this case my daisy photo. The new photo will come in on top of the background photo and I will then stretch or reduce it to make it the same size as the background photo.
  • The next step is to pick out the area of the photo that you want to highlight.  In the case of the daisy photo I use the Quick Selection tool to outline the main daisy.  I then click the  button at the top that says Select and Mask.
  • This will open a new window that will give you the opportunity to use sliders to bring in as much of the background texture as you want.  Play with the sliders till you get the desired effect and click done.
  •   This will bring you back to the main screen where you will now click the little square at the bottom of the layers column that adds the layer mask.(when I first started I always got hung up because I forgot this important step.)
  • Next you will tweak the sliders for the layer mask to get exactly the effect you desire.
  • Now you just save your work and you have created a beautiful photo with a textured background.
  • This took a lot of practice for me to get all the steps right so don't get discouraged if at first you don't succeed.

    Samples of my Textured Background Photos

    pink daisies with brick background photo by mbgphoto
    Daisy  with Brick Wall Texture

    Eastern Bluebirds photo by mbgphoto
    Bluebirds with Sky Texture Background

    candle through lensball with textured background by mbgphoto
    Candle in Crystal Ball with Fire textured background

    Photoshop Texture Book on Amazon


 Zazzle Card with Textured Photo


Note: The author may receive a commission from purchases made using links found in this article. “As an Amazon Associate, Ebay (EPN) and/or Esty (Awin) Affiliate, I (we) earn from qualifying purchases.”


Thursday, April 4, 2019

Reviewing Grill Mat

grill mat

I love to cook out on my deck using my gas grill.  For Christmas I received a pair of grill mats that have made grilling and cleanup so much easier.  These mats are sold in sets of two and can be cut to fit any size grill.  They are also good on any kind of grill.  So, whether you have a charcoal, propane, gas or electric grill you will  want to check out these handy mats.

As you can see in the photo above I put my entire meal on the grill mat.  In the photo above I have hamburgers and a variety of vegetables.  No extra pots or pans needed, just my easy to clean grill mat.

When we are finished eating and the grill has cooled down, I bring the grill mat inside and wash it off with sudsy water in the sink.  It cleans very easily and is quickly ready for use the next time I grill.


Why I Love My New Grill Mat


  • Cook entire meal at one time
  • Vegetables and fruit will not fall through grill slats
  • Easy to use, no preparation needed
  • Food will not stick to mat
  • Very easy cleanup 
  • I no longer need to clean the grill
  • Mat can also double as baking mat
Be sure to click on the link below to buy your own grill mat.  You will love how easy it is to use and maintain.


Note: The author may receive a commission from purchases made using links found in this article. “As an Amazon Associate, Ebay (EPN) and/or Esty (Awin) Affiliate, I (we) earn from qualifying purchases.”


Thursday, March 28, 2019

Reviewing Crystal Photography Ball

candle through lensball photo by mbgphoto

For Christmas, I received a Crystal Photography Ball.  These balls have become quite popular with photographers and  I was anxious to get one and try it out.  The great thing about these balls is that they are a fun way to try different techniques with your photography no matter what type of camera you use.  When I got mine for Christmas my  nephew tried it out with his iPhone with wonderful results.  So whether you use a DSLR, a mirrorless camera, a point and shoot or even a camera phone try out a photography ball to add some new interest to your photos.

Taking Photos with a Crystal Photography Ball

I have found that it takes a bit of practice to get used to shooting with the photography ball, but with a bit of practice you can get some interesting shots.
yellow daffodil through lensball photo by mbgphoto

Here are a few tips that may  help you.

  • Try using a wide angle lens and get close to the ball.
  • For landscapes you may want to try a zoom lens.
  • Be sure to focus on the image in the ball
  • Be careful not to use the ball too long in bright sunlight...you could get burned from the reflection.
  • Take care to keep your  ball free of fingerprints.  Bring a cleaning cloth with you.
  • There are lots of tutorials on You Tube.  Take a look at a few to get additional ideas.


Editing Photos

One of the first things you will notice when  you look at the photos you have taken is that the image in the ball is upside down.  There are several things you can do in editing to correct this.

  • The easiest solution is to simply flip the entire image as you can see I have done in this image.  This works particularly well when the background is blurry and you have lights in the background.  Here is one of my first photos with the photography ball.
Christmas tree through lensball photo by mbgphoto

  • Another solution would be to add a textured background to the photo.  I did that in the photo at the beginning of this post, where I added a fire background to the candle in the ball.
  • A third solution is to flip just the ball in Photoshop or a similar program.  I have not quite mastered that technique yet, but you can find lots of videos on YouTube to take you through that process.


Some of My Favorite Crystal Ball Images

Here are a few more images I have taken with my crystal ball. These are some that I took while on a trip to Jupiter, Florida.  I still have a lot to learn, but I love the challenge.
ocean through lensball photo by mbgphoto

beach grass through lensball photo by mbgphoto

lighthouse through lensball photo by mbgphoto


Purchasing a Photography Ball

A crystal photography ball can be rather inexpensive.  Here is one like the one I have with a clear stand and a pouch to keep it.


Note: The author may receive a commission from purchases made using links found in this article. “As an Amazon Associate, Ebay (EPN) and/or Esty (Awin) Affiliate, I (we) earn from qualifying purchases.”


Thursday, March 14, 2019

Review of Sony A6300 Mirrorless Camera

Red Rose Floral Arrangement photo by mbgphoto


For my birthday my husband bought me a new Sony Mirrorless camera.  I was looking for something lightweight to use when I traveled. But I wanted the same capabilities of my Sony SLR. I had been hearing about the mirrorless cameras from fellow photographers and at a meeting last fall we had a speaker at our photo club that introduced us to mirrorless cameras and I was sold.  A mirrorless camera combines the best of a DSLR(Digital Single Lens Reflex) camera and a lightweight compact body.  It has the features of the DSLR without the mirrors which makes it a lightweight camera without sacrificing the quality.


Features of A6300

There are many features that I enjoy on the Sony A6300.  Here are just a few of the ones that are important to me.
  • 100-25,600 ISO range allowing you to take great photos even in low light settings.
  • 4D focus systems which quickly locks in on your subject, helping to take crisp clear photos.
  • Continuous shooting at up to 11fps(frames per second)
  • WiFi, NFC, QR codes for easy file transfer
  • Tiltable 3inch LCD screen that tilts up or down for capturing high and low framing
  • An eyepiece cup that helps me to see clearly what I am photographing.
  • Settings that allow you to shoot in Auto, Scene, Full Manual and everything in between.
  • Movies in 4K movie recording


Learning to Use A6300

I am finding the A6300 very easy to use.  Most of the features are similar to my DSLR so the learning curve was very easy.  My husband bought me two lenses to go with my new camera a wide angle 16-55 and a telephoto in the 55-210 range.

The photo below was taken during a cloudy day in a room with no lights turned on.  I love the way the camera handles low light situations.  For this photo I just set the camera to aperture priority F7.0 and shot away.  The colors came out perfect with no adjustment needed.
festival mask photo by mbgphoto

On a recent trip to Florida, I was able to photograph birds at the pier with my new camera.  In order to get some nice closeup shots I put on my 55-210 zoom lens.  In this closeup of a brown colored pigeon I again used aperture priority and a F6.3 setting.  I love the sharp photo, great colors and blurred background.
pigeon photo by mbgphoto

For photographs using my photography ball, I switched to a wider angle lens 16-55 mm. I again used aperture priority and was able to capture Jupiter lighthouse in my ball.
lighthouse through a photography ball photo by mbgphoto


Note: The author may receive a commission from purchases made using links found in this article. “As an Amazon Associate, Ebay (EPN) and/or Esty (Awin) Affiliate, I (we) earn from qualifying purchases.”


Thursday, February 28, 2019

Review of Woodpecker Facts and Photography

Downy Woodpecker on a birdfeeder photo by mbgphoto
                                                                         Downy Woodpecker

I have been fascinated by woodpeckers for a long time, but I didn't realize there were so many different types of woodpeckers.  This year I purchased a peanut feeder for my backyard.  When I started to see different types of woodpeckers using the feeder I checked out information about woodpeckers  both online and in my Backyard Birds guide.  In this post I will show you photos and facts about the four types of woodpeckers that have visited my backyard.


Northern Flicker

Northern Flicker perching on a shepherds hook photo by mbgphoto
The Northern Flicker is a very handsome bird.  It has a brown back with black bars and a very distinct crescent of black on the chest. In flight the white rump is very conspicuous.  

These woodpeckers usually forage on the ground for food, but I have also seen them at my suet feeders.

Downy Woodpecker

Downy Woodpecker on a birdfeeder photo by mbgphoto
Downy Woodpeckers are the most common ones that I see in my backyard.  They visit year round and are fairly small birds.  These small tubular looking woodpeckers are very delicate looking.  They have crisp black and white plumage and the males have a red patch toward the back of the head.  They have a larger look-alike cousin the Hairy Woodpecker.

Red-Bellied Woodpecker

Red-Bellied Woodpecker on a birdfeeder photo by mbgphoto
The Red-Bellied Woodpecker is a large bird with zebra type stripes across the back.  The red belly is really just a pink tinge across the white chest.  The really red part is on the head.  The male has a bright red cap that extends from the bill all the way down the nape.  The female is similar to the male except that the red cap is only in the  nape area.

Yellow-bellied Sapsucker

Yellow-bellied Sapsucker on a birdbath photo by mbgphoto
I have only seen this bird one day in my yard.  I was able to capture photos from several angles and posted it on birding sites.  The consensus was that it is a Yellow-bellied Sapsucker.  My bird book says that I probably caught it on its' migration south.

These birds are rather large woodpeckers with a striped face pattern and a long white slash on the wing.  The male has a red throat and forecrown.  The female has white throat and red fore crown, so I would say the photo above is a male Yellow-bellied woodpecker.


Feeders for  Woodpeckers

I have two types of feeders that I use to attract woodpeckers.  The first is a cage like feeder that I fill with suet cakes.  You can see a Northern Flicker enjoying a suet cake in the photo below.
This type of feeder is also visited by several other types of birds.

Northern Flicker on a suet cake birdfeeder photo by mbgphoto

This year I purchased a peanut feeder and it has been very popular with both woodpeckers and nuthatches.  This feeder is filled with unshelled peanuts and it is fun to watch the birds peck away till they get the nut out of the shell.  This keeps them at the feeder longer and helps me to capture them with my camera.  Below is a Red Breasted Nuthatch that visited the peanut feeder.

Nuthatch on a birdfeeder photo by mbgphoto

I purchased my peanut feeder on Amazon.  You can get your own by following the link below.


Note: The author may receive a commission from purchases made using links found in this article. “As an Amazon Associate, Ebay (EPN) and/or Esty (Awin) Affiliate, I (we) earn from qualifying purchases.”


Most Recent Reviews on Review This Reviews


Search for Reviews by Subject, Author or Title

The Review This Reviews Contributors


SylvestermouseSylvestermouseDawn Rae BDawn Rae BMbgPhotoMbgPhotoBrite-IdeasBrite-IdeasWednesday ElfWednesday ElfOlivia MorrisOlivia MorrisTreasures by BrendaTreasures by BrendaThe Savvy AgeThe Savvy AgeMargaret SchindelMargaret SchindelRaintree AnnieRaintree AnnieLou16Lou16Sam MonacoSam MonacoTracey BoyerTracey BoyerRenaissance WomanRenaissance WomanBarbRadBarbRadBev OwensBev OwensBuckHawkBuckHawkDecorating for EventsDecorating for EventsHeather426Heather426Coletta TeskeColetta TeskeMissMerFaeryMissMerFaeryMickie_GMickie_G


Review This Reviews is Dedicated to the Memory of Our Beloved Friend and Fellow Contributor

Susan DeppnerSusan Deppner

We may be apart, but
You Are Not Forgotten


“As an Amazon Associate, Ebay (EPN) and or Etsy (Awin) Affiliate, I (we) earn from purchases.” Disclosure Statement

X