Showing posts with label Recipes. Show all posts

Monday, November 1, 2021

Air Fry Homemade French Fries


Air Fry Homemade French Fries

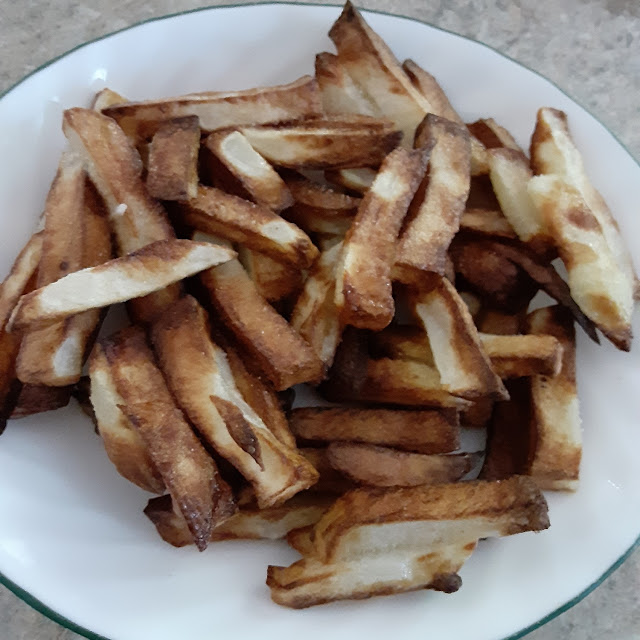
There is nothing like French Fries made from real potatoes. Oh, sure you can buy frozen French Fries, but I like fresh homemade the best. These real fries are so easy to make in your air fryer. They are crispy on the outside and so tender on the inside. My review will show you just how easy they are to make.

The way these French Fries turn out brings back some fond childhood memories for me. Growing up in New Castle a small town in Western Pennsylvania we lived near a small amusement park called Cascade Park.

The Park officially opened in May of 1897 and was a huge attraction. People would come from all over Pennsylvania and Ohio to visit Cascade Park. The park is still in existence today as a nature park.

As you walked through the midway of the park there were several food vendors. I had two favorites, one was the pizza vendor, and the other was the French Fries.

We would get a cup full of fresh real potato French Fries with vinegar and salt, oh my goodness, this was heaven when I was a kid. Now I enjoy that same goodness with my Air Fry homemade French Fries.

How to make the best Air Fryer French Fries:

3 to 4 medium potatoes (washed and peeled)

2 tablespoons of cooking oil

One-gallon plastic storage or freezer bag

Apple Cider Vinegar

Salt

Directions:

  1. Wash and peel the potatoes
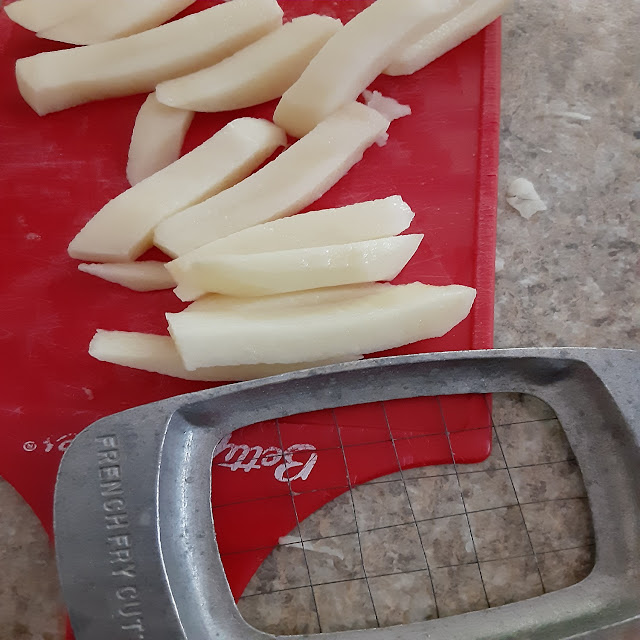
  2. Cut to size (I have a French fry cutter for this you’ll see it below)
  3. Place the cut potatoes in the plastic bag, add the oil and shake
  4. Set your air fryer to 390 degrees
  5. Air Fry for 18 to 19 minutes
  6. When they are finished transfer to a dish or bowl, splash on the vinegar and add the salt while the fries are hot.
French Fry Cutter

This is a photo of our French fry cutter that we have had for years. I must tell you the story about this cutter.

When Fran and I were dating back in high school, yes, that was a long time ago. Fran's father knew how much I loved French fries. So, he went out and bought this French fry cutter just for me. We still use it today.

Just peel your potato, cut a flat spot on the bottom of the potato so the potato stands up. Set the cutter on top and push, Ha!! it's that easy.

We use our Ninja Foodi Grill and Air Fryer to make our French Fries. You can read my review of our Ninja here.

More recipes on Review This Here: ReviewThisRecipes.com

Get your very own French Fry Cutter, and may it last you as long as ours has.

Home Basics Stainless Steel French Fry Cutter, One Size, SilverHome Basics Stainless Steel French Fry Cutter, One Size, SilverHome Basics Stainless Steel French Fry Cutter, One Size, Silver


Note: The author may receive a commission from purchases made using links found in this article. “As an Amazon Associate, Ebay (EPN) and/or Esty (Awin) Affiliate, I (we) earn from qualifying purchases.”


Tuesday, October 19, 2021

Make Fresh Basil Pesto


Make Fresh Basil Pesto
Fresh homemade basil pesto reviewed

It’s easy to grow your own herbs. Every year in the spring, Fran buys fresh basil plants, we re-pot these plants and set them out on our deck.

We enjoy fresh basil all season long and into the fall. The plants just keep reproducing. This basil pesto is so easy to make and can be enjoyed in many ways.

Basil pesto is perfect tossed over pasta, spread on crackers or toast, try adding some to your favorite salad. Try it on Garlic bread or a baked potato. 

I’ve even made pesto pizza you can find my recipe here for Fresh Tomato and Pesto Pizza.

Our grandson Bobby loves to cook, and especially with fresh ingredients. This fresh basil pesto is one of his favorites to make. Bobby makes this basil pesto in about 10 minutes. So, it’s easy to have a meal on the table in less than 30 minutes.

Basil Pesto Ingredients:

2 cups fresh basil leaves

1/4 cup pine nuts

1/2 cup fresh grated Romano or Parmesan Cheese

1/2 cup extra virgin olive oil

4 cloves fresh garlic (We love our garlic so, you can cut this in half if you like)

1/8 teaspoon red pepper flakes (can be omitted)

1/4 teaspoon salt

1/4 teaspoon ground pepper

1 tablespoon lemon juice

Directions:

Add the basil leaves and pine nuts into the bowl of a food processor. Pulse the food processor several times to chop and mix.

Add the garlic, cheese, and lemon juice and pulse several more times

Place the lid on the food processor turn it on and pour the olive oil in a steady stream.

Stop and scrape the sides with a spatula and turn it on again for about 10 seconds.

Add salt and pepper to taste. If you use the red pepper flakes add them now and pulse a few more times to mix it all in.

We served our basil pesto over fresh Fettuccine that we made with our Emeril Lagasse Pasta and Beyond machine.

Read my review here: Emeril Lagasse Pasta and BeyondReviewed.

Basil Pesto

Our basil pesto with homemade fettuccine was on the table in 30 minutes or less for a delightful family meal.

We used our Ninja Food Processor to make this pesto. Any food processor or blender will work. If you don’t have a basil plant, you can buy fresh basil at your local grocery store and have this basil pesto at any time. 

It's easy to freeze the pesto to enjoy anytime on crackers or toast. Pour the pesto into ice cube trays and place them in the freezer. After the pesto freezes place the cubes in a freezer bag.


Note: The author may receive a commission from purchases made using links found in this article. “As an Amazon Associate, Ebay (EPN) and/or Esty (Awin) Affiliate, I (we) earn from qualifying purchases.”


Wednesday, October 6, 2021

My New Irresistibly Delicious Keto Cheese Crackers Recipe

Cheddar cheese crackers are one of the few things I've really missed since I embarked on a healthy ketogenic diet in 2019 (and lost nearly 60 pounds). The only acceptable replacement I've found for those famous, small, square cheese crackers in the bright red box with the cutesy name were Defy Foods' yummy keto cheddar crackers, which were sold only online, cost significantly more than their unhealthy, conventional cheese crackers counterparts and, sadly, are no longer made.

Recently, I began experimenting with my own homemade keto cheese crackers recipe, inspired by recipes from two of my favorite low carb recipe developers. I combined elements of both their recipes and added some powdered, dehydrated, real cheddar cheese for an extra flavor boost. This past weekend, I finally perfected my version. Both my husband and I couldn't be more thrilled with the results!

I am delighted to share my delicious new keto cheese crackers.
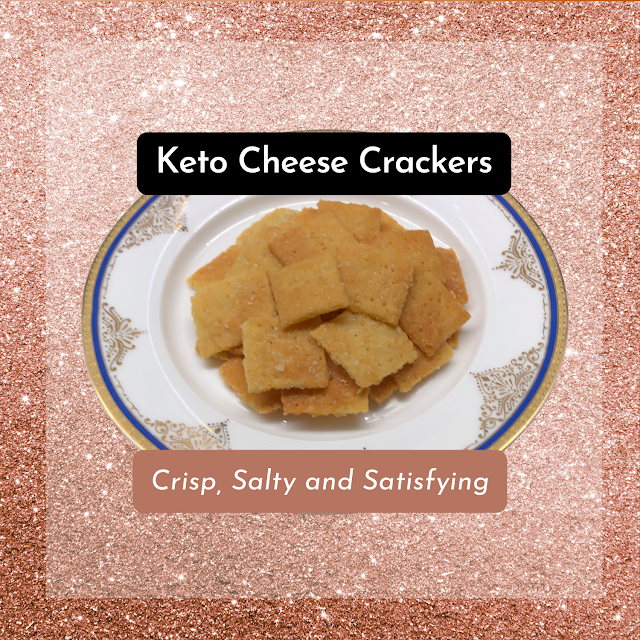
Crisp, Salty and Satisfying Keto Cheese Crackers
My healthy, homemade low carb crackers are bursting with real cheddar cheese flavor

My Inspiration for This Recipe

When I decided to try my hand at making homemade cheddar cheese crackers, I started by searching for recipes on my two favorite low carb keto recipe developers' blogs, Carolyn Ketchum's All Day I Dream About Food</ > and Maya Krampf's Wholesome Yum. Carolyn and Maya are two of my go-to gurus for reliable, delicious recipes that support my low carb lifestyle. 

Carolyn's Keto Cheese Crackers with Pepper Jack looked great, but I'm not a big fan of pepper jack cheese or red pepper flakes. I also wasn't sure that adding garlic powder to the dough would give me the classic flavor I was looking for. The recipe also called for brushing the thinly rolled out dough with melted butter and then sprinkling it with coarse salt before baking. While it sounded delicious, I preferred to start with fewer ingredients and fewer steps for my first attempt.

Maya's Low Carb Keto Cheese Crackers Recipe had fewer ingredients and steps. However, the optional nutritional yeast "for cheesier flavor" wasn't something I had on hand, since I didn't care for the taste the few times I had tried using it as a substitute for grated cheese.

Recipe Experiment #1: Tasty, But Not Quite There Yet

Since I wanted my crackers to have a strong cheddar cheese flavor, I replaced the optional nutritional yeast in Maya's recipe with Vermont sharp cheddar cheese powder. 

The resulting crackers were quite tasty. However, I wanted them to have a stronger cheddar flavor and be a bit more buttery and salty. In addition, the small, fragile squares of thinly rolled dough were quite prone to tearing as I transferred them to the parchment-lined baking sheet.

Recipe Experiment #2: We Have a Winner! 

For my second batch, I changed a few things when I was making Maya's cheddar dough:

  • I substituted twice as much Vermont sharp cheddar cheese powder for the optional nutritional yeast.
  • I increased the amount of salt from 1/4 teaspoon to 3/8 teaspoon. 
  • After stirring together the dry ingredients, instead of combining them with the egg first, I stirred them into the melted cheese along with the egg.

I also made several other changes based on Carolyn's pepper jack cheese crackers recipe:

  • The dough was rolled out on a silicone baking mat sprinkled with almond flour (using parchment paper on top to prevent the dough from sticking to the rolling pin). After pricking and cutting the  dough, it was much easier to just slide the mat onto the baking pan instead of lifting and transferring the fragile squares of raw dough.
  • I used a pizza cutter to slice the sheet of dough into approximately 1-inch squares. (I also didn't worry about trying to cut perfectly parallel and perpendicular lines, since I wouldn't succeed in any event!).
  • Before putting the crackers in the preheated oven, I brushed them with melted butter and sprinkled them with coarse salt.
  • This time, I baked the crackers at 300 ℉ instead of 350 ℉, left them in longer, turned off the oven when they were barely golden brown and left them inside to finish developing their color, cool slowly and crisp up.

Maya and Carolyn are extremely talented, very experienced low carb recipe developers. Combining elements from both their recipes and adding the Vermont sharp cheddar cheese powder turned out to be a winning strategy. This new version produced dozens of perfectly crisp, deliciously salty, buttery cheddar cheese crackers that tasted absolutely amazing! 

My husband adored them, too. (In fact, he might easily have devoured the entire batch on the spot if I hadn't set aside a small plate of these crackers to photograph for this recipe!)

Plate of prepared keto cheese crackers

Wholesome, Homemade Low Carb Cheddar Cheese Crackers That Everyone Will Love

I'm really excited to share my new keto cheese crackers recipe! 

For the many people who follow a low carb or ketogenic diet and have been searching in vain for buttery, salty, flavor-packed low carb crackers that don't cost an arm and a leg, these scrumptious bite-sized savory snacks will satisfy those cravings. Unlike the conventional grocery store kind, these are made with minimally processed, "real food" ingredients. 

These crisp, delicious, high protein cheese crackers are tasty enough for everyone can enjoy, whether or not they are trying to cut back on highly processed foods with empty calories.

They're wonderful to bring to holiday parties or get-togethers with family and friends any time of year. You can indulge without "cheating" on your low carb diet and no one who tastes them will guess that your homemade cheddar crackers are made with almond flour instead of wheat flour.

Who says you can't enjoy holidays treats without gaining weight?

How to Make Keto Cheese Crackers

These irresistible keto cheese crackers are quite easy to make. However, low carb baking is quite different from conventional baking methods. Here are a few important tips to keep in mind, especially if this is your first experience baking with almond flour.

Plate of keto cheese crackers surrounded by recipe ingredients

Choose High Quality Ingredients for the Best Taste and Texture

This recipe calls for only a few ingredients, so the quality of each one will have a major impact on the taste and texture of your homemade crackers. 

For the best flavor, buy a block of good, sharp (or very sharp) Vermont cheddar cheese and grate or shred it yourself just before making this recipe. Cabot Creamery cheddar, which Carolyn Ketchum recommends, is one of my favorite brands, too. 

I used King Arthur Better Cheddar Cheese Powder for these keto cheese crackers, which I had purchased for another recipe and like very much. King Arthur Baking Company (formerly King Arthur Flour) has a a well deserved reputation for excellence and baking expertise. I have relied on their products and recipes for decades. 

It's important to use fresh, finely ground and blanched almond flour for most low carb keto baking recipes. My favorite is Maya Krampf's Wholesome Yum premium almond flour.

You will need two kinds of salt: fine sea salt (or table salt, if you prefer) and coarse or flaked salt. For the dough, I used Redmond Real Salt Ancient Fine Sea Salt, an unrefined, unprocessed sea salt with trace minerals and no additives. It's comparable to pink Himalayan sea salt, but has been "mined in Utah since 1958 from an ancient seabed protected from modern pollution."

After pricking, cutting and brushing the thinly rolled out dough with melted butter, I sprinkled the tops of the crackers with a combination of coarse sea salt and crushed Maldon sea salt flakes before baking. The Maldon sea salt flakes were too coarse to use straight from the package, but crushing them with my fingers and mixing them with the regular coarse sea salt turned out to be the perfect topping.

Use a Silicone Baking Mat and Unbleached Baking Parchment to Roll Out the Dough

Rolling out and cutting the dough on a silicone baking mat and then sliding it onto your baking sheet is much easier than rolling the dough between sheets of baking parchment and cutting and transferring the small, fragile squares to the pan. The best known brand, Silpat, commands a premium price. Fortunately, I've also had good luck with much less expensive silicone baking mats.

It's essential to cover the raw dough with a large sheet of baking parchment paper when you're rolling it out, so that it doesn't stick to the rolling pin. These days, I only use unbleached baking parchment. (Who wants to risk leaching chlorine bleach into their homemade baked goods?) I find the flat, 12" x 16" pre-cut sheets of unbleached baking parchment much easier to use than wrestling with a piece torn from a roll whose curl stubbornly refuses to flatten out. 

Use a Large, Microwave-Safe Bowl and a Sturdy Silicone Mixing Spatula for Making the Keto Cheese Crackers Dough

I often use my 2-quart Pyrex measuring cup as a large mixing bowl, especially for recipes that require melting ingredients such as butter, chocolate or cheese in the microwave. The handle provides a good grip on the microwave-safe glass bowl as you incorporate the dry ingredients and the egg into the melted cheddar cheese.

The best tool for the job is a sturdy, stiff rubber spatula. I prefer the DI ORO Seamless Series Large Silicone Spatula for this purpose, which was named "Winner: Best All-Purpose Spatula" in Cook's Illustrated's March 2017 Silicone Spatulas Equipment Review (paid subscription required)

Roll Out the Dough as Thinly and Evenly as Possible 

The thinner you roll the dough, the crisper your crackers will be. Try to roll out the sheet of dough to as uniform a thickness as possible, which will help the crackers bake at the same rate. (You may want to make the dough near the edges slightly thicker to prevent the outermost row of crackers from browning too quickly.)

Use a Pizza Wheel With a Plastic Blade to Cut the Dough Into Strips and Then Squares

The plastic blade cuts through the dough cleanly without slicing into your silicon baking mat. It's also faster, easier and safer than cutting the small squares with a knife. The OXO 1065872 Good Grips 4-inch Pizza Wheel and Cutter for Non-Stick Pans is very similar to the one I own (which is no longer made) and gets excellent customer product reviews.

If You Are Using a Countertop Oven, Divide the Dough Into Quarters and Bake It in Four Batches

The built-in double wall ovens that came with our 1950s ranch-style house died several years ago. Since then, we have been making do with a countertop oven. (If you are considering one, I encourage you to read Sylvestermouse Cynthia's recent Calphalon Performance Cool Touch Countertop Toaster Oven product review.) 

Unbaked keto cheese crackers on silicone mat in small baking pan

Obviously, having to use a much smaller silicone baking mat and pan (approximately 8.5" x 12.5") that could fit inside my large toaster oven took much longer than using a large silicone mat and baking sheet and baking in a full-size oven. However, as you can see from my photos, it is certainly doable. 

Keto Cheddar Cheese Crackers Recipe

Plate of keto cheese crackers
These buttery, low carb crackers will satisfy your cravings without kicking you out of ketosis. They're yummy enough to share with carb-loving friends and family of all ages, so they're perfect for holidays, football games, parties, kids' lunchboxes and everyday snacks. 

Prep Time   20 minutes

Cook Time  30–60 minutes

Total Time   50–80 minutes

Servings       8–10

Ingredients

  • 6 ounces sharp cheddar cheese
  • 1 ½ cups finely ground and blanched almond flour (plus extra for dusting)
  • 2 Tbsp good quality sharp cheddar cheese powder
  • 3/8 tsp fine sea salt
  • 1 large egg, lightly beaten, at room temperature
  • 1 Tbsp butter, melted
  • Coarse salt for sprinkling

Instructions

  1. Preheat the oven to 300 ℉. Place a large silicone baking mat on your counter, table or other work surface and sprinkle it with almond flour.
  2. Grate or shred the sharp cheddar cheese into a large microwave-safe bowl or a 2-quart (8-cup) Pyrex measuring cup. 
  3. Stir together 1 ½ cups of the almond flour with the cheddar cheese powder and salt.
  4. Microwave the cheese on High at 30-second intervals, stirring with a large, sturdy rubber or silicone spatula until the cheddar is completely melted and has a smooth consistency. 
  5. Stir in the almond flour mixture and the egg and use the spatula to "knead" the dough against the the sides of the bowl. Then, turn out the dough onto a lightly greased sheet of parchment or waxed paper and use your hands to squeeze and finish kneading the dough into a compact ball. The dough should be soft and pliable and feel a bit oily. If it's too sticky to work with easily, you can either chill it for 15 minutes or so or work in another tablespoon or two of almond flour.
  6. Flatten the ball of dough and shape it into a square patty, then place it in the center of the prepared silicone baking mat. Cover it with a large sheet of baking parchment (or wax paper) and roll it out as thinly and evenly as possible (no more than 1/8-inch thick).
  7. Use a pizza wheel with a plastic cutting disc to slice the sheet of dough into small squares or rectangles approximately 1-inch wide (although you can make them wider, if you prefer). You should end up with between 5 dozen and 8 dozen (60–100) crackers, depending on how thinly you roll the dough and what size you make your squares or rectangles.
  8. Prick the tops of the crackers with a fork or toothpick, brush them with the melted butter and sprinkle them with the coarse salt. Then transfer the silicone mat carefully onto a large baking sheet and place it in the preheated oven. 
  9. Bake until the crackers turn a light golden brown and the edges begin to crisp up (approximately 15–30 minutes, depending on the size and thickness), then turn off the oven and allow them to remain inside until they are firm to the touch. Keep a close eye on the color of the pieces around the edges. If they are browning faster than the ones in the center, remove the darker pieces and let them cool at room temperature while the rest of the crackers cool down more slowly inside the warm oven. 

I like to store these keto cheese crackers in single layers, separated by paper towel, inside an airtight tin or large Stasher silicone food storage bags, which are extremely easy to seal and unseal. Layering them with paper towels helps absorb ambient moisture and keep them crisp. However, if they last more than a day or two, you can just pop them back into a 300 ℉ oven for a few minutes. Just be sure to keep an eye on them so they don't get too brown.

My New Irresistibly Delicious Keto Cheese Crackers Recipe by Margaret Schindel

Posts About My Keto Diet Journey

My First Year on The Keto Diet

Preparing to Succeed on the Keto Diet, Part One

Preparing to Succeed on the Keto Diet, Part Two

Low Carb Muffins & Cupcakes: Treats to Enjoy on a Keto Diet

Low Carb Keto Chocolate Yogurt Granola Chip Pudding Recipe

Good Dee’s Keto Cookie Low Carb Baking Mix Review

Hamama Microgreens Growing Kit Review & Success Tips

My Favorite Hamama Microgreens Seed Quilt Accessories

Keto Cheddar Cheese Biscuits With Chives Recipe

The Ultimate Keto Hot Chocolate Recipe

The Best Low Carb Keto Gift Ideas: Keto Gift Guide

The Best Low Carb Keto Cinnamon Muffins

Wholesome Yum Keto Bread Mix and Yeast Bread Recipe

The Good Chocolate 100% Organic No Sugar Dark Chocolate Review

The Best Advice to Maintain Your Keto Diet Weight Loss

My New Irresistibly Delicious Keto Cheese Crackers Recipe

Luscious Low Carb Keto Triple Peppermint Cheesecake Brownies Recipe

Quick & Easy Livlo Blueberry Scones Keto Baking Mix Review

Snack Better With The Best Healthy Keto Cookie Dough Bites

The Best Quick and Easy Low Carb Keto Pizza Recipe

The Best Quick and Easy Low Carb Keto Shortcake Cupcakes Recipe

Comparing the Best Keto-Friendly Chocolate Hazelnut Spreads - No Added Sugars

The Best Low Carb Keto Sandwich and Burger Buns Mix

Blueberry Biscuit Scones — New, Easy, Low Carb Keto Recipe

The Best Keto Pizza Crust Mix With 0 Net Carbs

An Unusual, Delicious Strawberry Chocolate Tea With 0 Calories

Delicious Sugar-Free Keto Cookies That OREO Fans Will Love

Healthy Pistachio Cherry Chocolate Chip Marshmallow Cereal Treats Recipe

Easy, Decadent, High Protein, Sugar-Free Rocky Road Cottage Cheese Ice Cream

The Best Quick & Easy Low Carb Sausage and Ricotta Calzones

How to Make Refreshing Vanilla Italian Soda (With or Without Cream)


Reviews of the Keto Diet by Barbara C. (aka Brite-Ideas)

My Personal Keto Testimonial

How I Stayed Committed to the Ketogenic Way of Eating

Read More Recipe Reviews by Our Review This Reviews Contributors

Read More Product Reviews by Our Review This Reviews Contributors

Read More Reviews About Health and Wellness by Our Review This Reviews Contributors


Note: The author may receive a commission from purchases made using links found in this article. “As an Amazon Associate, Ebay (EPN) and/or Esty (Awin) Affiliate, I (we) earn from qualifying purchases.”


Saturday, September 25, 2021

Cakes and Cupcakes Special Days and Reviews


Cakes & cupcakes

There are a multitude of special days (those wacky, weird, humorous and fun days) throughout the year devoted to various kinds of cakes and cupcakes.  The Contributors to this Review This Reviews site have also reviewed and shared a number of recipes of their favorites.


A compilation of these yummy dessert recipes and the days that are set aside to recognize them are featured in this article.


What is the Difference Between a Cake and Cupcakes?


There are only two differences ~ the type of pan you use to bake them, and the amount of time they spend in the oven.


*Some terms used for cupcakes – snack cake, mini-cake, Fairy Cake, Patty Cake.


Cake Holidays


Red Velvet Cake
Source: Pixabay


List of National Cake Holidays:


  • National Cake Month - February
  • National Chocolate Cake Day  - January 27
  • National Carrot Cake Day  - February 3
  • National Poundcake Day  - March 4
  • National  Blackforest Cake  Day - March 28
  • National Lemon Chiffon Cake Day - March 29
  • National  Coffee Cake Day  - April 7
  • National Hazelnut Cake Day - June 1
  • National Applesauce Cake Day - June 6
  • National German Chocolate Cake Day - June 12
  • National Strawberry Shortcake Day  - June 14     
  • National Spongecake Day  - August 23
  • National Angel Food Cake Day - October 10
  • National Cake Day - November 26
  • National Fruitcake Day  -December 27
  • National Sacher Torte Day  -December 5


Cupcake Holidays


List of National Cupcake Holidays:


  • Hostess Cupcake Day – May 10
  • Chocolate Cupcake Day – October 18
  • National Vanilla Cupcake Day - November 10
  • National Cupcake Day – December 15


Hostess Cupcakes
Source: Pixabay

*NOTE:  One of the most famous and popular cupcakes is the Hostess Cupcake.  Check out this recipe for homemade Hostess Cupcakes.  It is found on the blog Love, Life & Sugar by Lindsay. 


Cake & Cupcake Recipes by the ReviewThisReviews Contributors


One of the RTR Contributors – the leader of the pack we all affectionately call “Mouse” -  SylvesterMouse Cynthia, is our 'go-to' expert on getting fancy and having fun with cakes and cupcakes. In addition to numerous recipes Mouse has shared here on Review This Reviews, she has also featured several on her own blog sites.  See a few below:


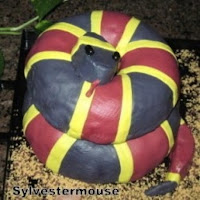
Snake Cake by Sylvestermouse

For an extra fun cake, see this (How to Decorate) Snake Cake by Sylvestermouse on her Cooking for the Holidays website.


Halloween Ghost Castle Cake by Sylvestermouse
Halloween Ghost Cake by Sylvestermouse

Plus, her Halloween Ghost Castle Cake on the Sylvestermouse Halloween Haven website.


Spooky Spider Cupcakes by Sylvestermouse
Photo courtesy of Fun Food


Then there is her Spooky Spider Cupcakes 


And how about making a fancy cake design using cupcakes in the Sylvestermouse review of the Cupcake Cakes Cookbook?


More Delicious Cake & Cupcake Recipes & Reviews on Review This


Summary


So anytime you wish to indulge in a sweet treat in the cake & cupcake family, check out one of the above recipes or have a cake dessert day to celebrate one of the cake/cupcake holidays found all year long. 


Happy 'Cake' Eating!


*Cakes and Cupcakes - Special Days and Reviews compiled for your eating pleasure by Wednesday Elf.


For More Holiday Reviews, see 

ReviewThisReviews: Holidays


For More Recipe Reviews, see 

ReviewThisRecipes.com 


Note: The author may receive a commission from purchases made using links found in this article. “As an Amazon Associate, Ebay (EPN) and/or Esty (Awin) Affiliate, I (we) earn from qualifying purchases.”

Monday, August 16, 2021

Emeril Lagasse Pasta and Beyond Review


Emeril Lagasse Pasta and Beyond Review

There is no doubt that our family loves pasta. We enjoy making our own homemade pasta whenever time allows.

We have had and used, our Atlas pasta machine for years, and with this machine, you can make different types of noodles. With everybody’s busy schedules we don’t always have the time to make the dough, roll it out and run it through the machine.

It was just after Christmas 2020 when I was flipping through the television channels, and I came across Emeril Lagasse’s infomercial for his Pasta & Beyond machine.

I immediately stopped flipping the channels, number one because I like Emeril Lagasse and number two, I love homemade pasta. I’m usually not an impulse buyer, but after watching the infomercial I knew that I had to have this.

I bought the complete system, which includes a shredder, a slicer, a meat grinder, a slow juicer, and a frozen treat maker. This post is about the pasta machine, as I have not tried the others yet. Although, my daughter did use the meat grinder and she liked its performance.

What you get with Pasta and Beyond:

The pasta machine

Liquid measuring cup

Dry measuring cup

Mixing Chamber

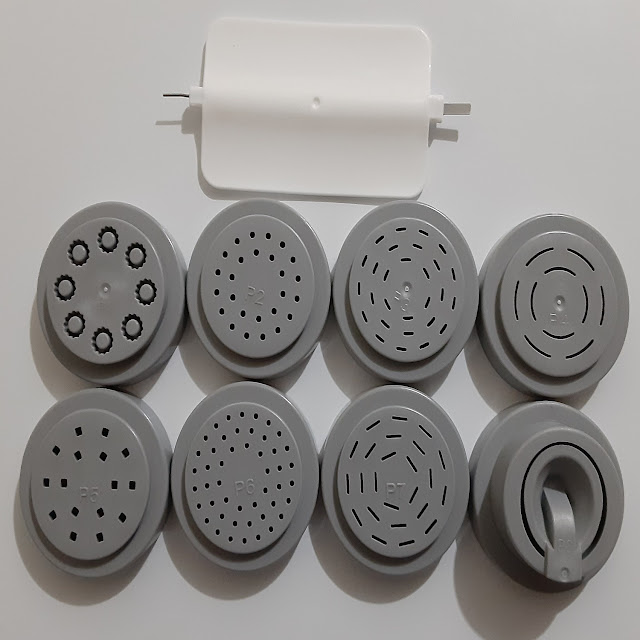
Pasta Discs (8 different types of pasta)

Spatula/cleaning tool

Cleaning brush

A recipe book that includes so many pasta recipes, and there is even a gluten-free pasta recipe.

The different types of pasta that you can make with your Pasta and Beyond:

Pasta Discs

Penne

Spaghetti

Linguine

Tagliatelle

Udon (This is one I haven't had before)

Angel Hair

Fettucine

Lasagna

Making homemade pasta with this machine is so easy. You just add the dry ingredients into the mixing chamber. Prepare the wet ingredients in the provided measuring cup. Turn on the machine according to the instructions. Then, add the wet ingredients slowly through the mixing chamber lid.

The machine will mix for about 5 minutes and then it will go in reverse to begin extruding the pasta. The best part is that you can have homemade pasta on the table in about 30 minutes.

If you are in a pasta-making mood the pasta is easy to freeze. Make a few pounds of your favorite, freeze it, and have homemade pasta anytime. The machine is also very easy to clean.

Wet and Dry Ingredients

In this photo, we are getting ready to make some homemade linguine. We used Emeril's Pasta recipe with all-purpose flour and semolina flour. 

A ten-second video of making our linguine

One pound of Linguine

This is our one pound of linguine that we made in about 30 minutes. This was homemade, and oh so fresh, we enjoyed linguine and clam sauce that day.

I wonder what my grandmother would think of this machine. Growing up I watched her make homemade pasta all the time, only it was all by hand.

There are other pasta machines on the market and I can't speak to their performance. I can tell you that I am 100 percent satisfied with my Pasta and Beyond.

EMERIL LAGASSE Pasta & Beyond, Automatic Pasta and Noodle Maker with Slow Juicer - 8 Pasta Shaping Discs BlackEMERIL LAGASSE Pasta & Beyond, Automatic Pasta and Noodle Maker with Slow Juicer - 8 Pasta Shaping Discs BlackCheck the Price


For more ReviewThis Product Reviews Click here: ReviewThisProductReviews.com


Note: The author may receive a commission from purchases made using links found in this article. “As an Amazon Associate, Ebay (EPN) and/or Esty (Awin) Affiliate, I (we) earn from qualifying purchases.”


Friday, August 13, 2021

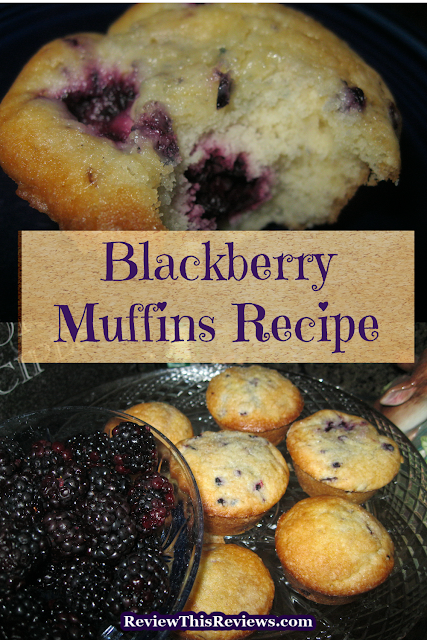
Delicious Blackberry Muffin Recipe Reviewed

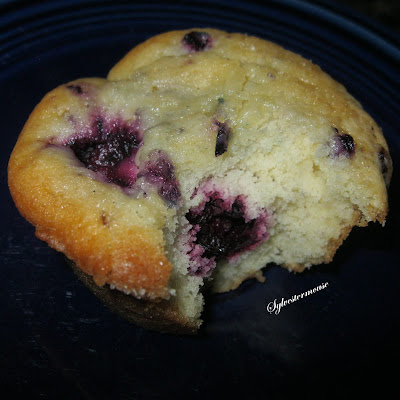
Blackberry Muffin Recipe
Fresh blackberries are always an invitation to bake something delicious!  When I recently purchased some blackberries at our local farmer's market, I made Blackberry Muffins as soon as I got home.  Today, I am sharing my personal blackberry muffin recipe here so you, too, can enjoy this delicious treat. 

My recipe makes 18 muffins which seems like a lot at first glance. However, it didn't take my family long to devour these delicious muffins.  

For either of us, when we pair these muffins with coffee, we are in a breakfast feast heaven.  While I would normally say that the serving size is one muffin, in our home, the serving size is two or more muffins.  They really are that good!
 

The Muffin Batter & Muffin Tins 

This is a muffin recipe, not to be confused with cupcakes.  The muffin batter is thicker and won't pour like a cake batter.  I "spoon" my muffin batter into muffin tins.  I bake them in non-stick muffin tins, therefore paper liners are not required.  I do grease the non-stick tins with Crisco shortening and these muffins turn out easily.


My Blackberry Muffin Recipe

Prep Time Cook Time Ready In Yields
20 min. 20-25 min. 45 min. 18 servings

Ingredients 

    blackberry muffin recipe
  • 1¼ cups of sugar (plus extra for sprinkling)
  • 1/2 cup butter, softened  (extra for brushing tops)
  • 2 cups all-purpose flour
  • 2 teaspoons baking powder
  • 1/2 teaspoon salt
  • 2 large eggs
  • 1/2 cup milk
  • 2 cups fresh blackberries  
  •  

    Directions

    1. Preheat the oven to 375° 
    2. Grease non-stick muffin tins with Crisco shortening
    3. In a large mixing bowl, cream sugar and butter together.  Beat in one egg at a time (adding a total of 2 eggs)
    4. In a separate bowl, combine the flour, baking powder and salt
    5. Gradually mix flour mixture into butter mixture alternating with milk & beating well after each addition.  
    6. Fold in Blackberries (do not use the mixer & beaters here)
    7. Spoon batter into greased muffin tins, approximately 2/3 full in each muffin cup
    8. Sprinkle tops with sugar
    9. Bake at 375° for 20-25 minutes, until a toothpick inserted in the center comes out clean
    10. Using a small silicone pastry brush, brush muffins with melted butter as soon as they are out of the oven and put back in the oven for 2 minutes 
    11. Let Cool for 5 minutes, remove from muffin tins & serve


    Recommended Baking Essentials

     Wilton Non-Stick 6-Cup Standard Muffin Pan, Set of 2Check Price OXO Good Grips Silicone Basting & Pastry Brush - SmallCheck Price LILPARTNER Hand Mixer ElectricCheck Price Tovolo Stainless Steel Mixing (7.5 Quart)Check Price


    Or, Try a Blackberry Fruit Cobbler!

    Easy Blackberry Cobbler Recipe


    Check Out More Recipe Reviews at
    ReviewThisRecipes.com


    Delicious Blackberry Muffin Recipe Reviewed Written by:
    House of Sylvestermouse


    © 2021 Cynthia Sylvestermouse


    Note: The author may receive a commission from purchases made using links found in this article. “As an Amazon Associate, Ebay (EPN) and/or Esty (Awin) Affiliate, I (we) earn from qualifying purchases.”


Most Recent Reviews on Review This Reviews


Search for Reviews by Subject, Author or Title

The Review This Reviews Contributors


SylvestermouseSylvestermouseDawn Rae BDawn Rae BMbgPhotoMbgPhotoBrite-IdeasBrite-IdeasWednesday ElfWednesday ElfOlivia MorrisOlivia MorrisTreasures by BrendaTreasures by BrendaThe Savvy AgeThe Savvy AgeMargaret SchindelMargaret SchindelRaintree AnnieRaintree AnnieLou16Lou16Sam MonacoSam MonacoTracey BoyerTracey BoyerRenaissance WomanRenaissance WomanBarbRadBarbRadBev OwensBev OwensBuckHawkBuckHawkDecorating for EventsDecorating for EventsHeather426Heather426Coletta TeskeColetta TeskeMissMerFaeryMissMerFaeryMickie_GMickie_G


Review This Reviews is Dedicated to the Memory of Our Beloved Friend and Fellow Contributor

Susan DeppnerSusan Deppner

We may be apart, but
You Are Not Forgotten


“As an Amazon Associate, Ebay (EPN) and or Etsy (Awin) Affiliate, I (we) earn from purchases.” Disclosure Statement

X