Showing posts with label Product Reviews. Show all posts

Friday, August 9, 2019

Clean Your Bathtub Without Harmful Chemicals or Fumes

Clean a porcelain bathtub without any fumes or harmful chemicals!  The Mr. Clean Magic Eraser does a better job of cleaning the tub too.
  

Mr. Clean Magic Erasers Reviewed


For many years, actually decades, I knew cleaning day would end with a migraine headache.  Even if I took a pain reliever before I started, I still ended up in excruciating pain.  

I knew the smell of the strong chemicals was to blame, but we had to have a clean home.  Therefore, week after week, I toughed it out, cleaned and suffered.  

Even with fans and open windows, the fumes were just too much for me, until I discovered Mr. Clean Magic Erasers.  No only do they erase dirt and grime, they do it without harmful chemicals.  Therefore, they also erased my cleaning day migraines and I am most grateful!

Though it may no longer be necessary because of chemicals I can smell, I still protect my skin by wearing disposable nitrile gloves when I clean.


The Mr. Clean Magic Erasers


My husband's aunt was the first person to recommend the Mr. Clean Magic Erasers to me.  She shared how they easily cleaned scuff marks off her kitchen floor, baseboards and walls.  I purchased a package for that purpose.  

Then one day, not too long after I started using the awesome erasers on my baseboards, I had an epiphany.  If they work so well on baseboards and scuff marks, why not try them on the bathtub?

Eureka!  I had finally found a way to clean a porcelain bathtub without any fumes or harmful chemicals!!!  What's more, that little eraser does a better job of cleaning the tub, in my opinion.

Clean a porcelain bathtub without any fumes or harmful chemicals!  The Mr. Clean Magic Eraser does a better job of cleaning the tub too.
The Magic Eraser shows the Dirt & Grime Removed From This Bathtub

The bathtub in the photo is used every day for showers, and it is over 20 years old.  This particular tub is in a windowless bathroom.  It was the one I dreaded cleaning the most because I had only a fan to help eliminate the fumes while cleaning, and that simply was not enough to forestall the migraine.   

I have no doubt my body was trying to tell me something, loud and clear, with those migraines.  Believe me, it wasn't that I didn't understand, nor was I ignoring their warnings.  It was simply a matter of necessity.  I had to clean our bathrooms!  Now, I can enjoy a clean bathroom without paying a painful price.


How to Clean a Porcelain Bathtub with the Mr. Clean Magic Eraser


The erasers need to be wet to work.  I leave the bath water running and draining while I rub the entire surface of the bathtub with the wet Mr. Clean Magic Eraser.  Then I swoosh the water around to rinse the residue.  It really is very easy and odorless.  My biggest complaint now when I clean the tub, it won't stay that way for long.  They shiny porcelain beckons one to bathe.

Now, I can sing while cleaning.  I can take deep breaths and hit high notes that are not related to pain and suffering.  

The Mr. Clean Magic Erasers are one of the greatest discoveries in my life!  


 Magic Eraser Scrubber, Extra Durable, 2-Pk.Check Price


Read More Product Reviews On
ReviewThisProducts.com


House of Sylvestermouse


Note: The author may receive a commission from purchases made using links found in this article. “As an Amazon Associate, Ebay (EPN) and/or Esty (Awin) Affiliate, I (we) earn from qualifying purchases.”


Monday, July 29, 2019

Reviewing the Origami Rack: Folding Storage Racks

Reviewing my Origami Rack.
A friend told me that he had a shelf for me. He said he'd bring it over if I wanted it. I said yes with some hesitance. Maybe I am a shelf snob. Because I did NOT want a flimsy plastic rack or one of those ugly metal racks that are often used in workshop spaces. Fortunately, the shelf unit he brought to me is an Origami Rack and it is AMAZING! I couldn't be more thrilled with this storage solution.


Origami Folding Racks


My friend carried the folded shelf up to my third floor apartment. In the living room, he pulled the shelf open with one move and fastened it open with two small latches. My shelf is on wheels, so I easily wheeled it to the corner of my teeny dining room.

These racks are great for indoor use, laundry rooms, garages, and anywhere that extra storage space is needed. 

The folks at Origami Racks state:


If I don't need to use this shelf, it folds flat to approximately 3 inches thick. (Unfortunately, I did not measure it while it was still folded).


My Storage Needs


I need storage in this teeny, tiny apartment. There is barely space to turn around, let alone store things. Even though I'm not looking for "pretty" storage, it helps that this shelf isn't ugly.

My rack measures 63" tall x 2' wide x 2' deep. It is on wheels and has four shelves.

When in use, this shelf is incredibly strong. On one shelf I have two partial 20 lb bags of dog food, the plastic dog food bin (I mix two brands and put the ready-to-use food in the bin) and a 5 gallon bucket that is full of cans of food and bags of rice (we were expecting a hurricane and I stocked up on food). One shelf easily holds these large items. I will need to do some re-arranging and decide exactly what I want to store on these shelves. I just excitedly threw these items on the shelves: glad to get some of these things out from under my table and up off the floor. Also, the cat litter took up a large bit of the space in my bathroom linen closet. I'm glad to have extra space in that closet and thrilled that the Origami shelf holds such heavy items. 

Some of the photos online make the shelves appear flimsy, as though the joint in the shelf would be a weak point. But be assured that these shelves are strong!

Related Links:

Origami Rack has a shop on Amazon - if you are like me and are a prime member and love the free shipping and the delivery (I hate carrying things up my three flights of stairs). On that Amazon page, you can see a variety of items as well as photos of the shelves when folded. 

Visit the Origami Rack website for more information and to see what shelves are currently offered. 


Note: The author may receive a commission from purchases made using links found in this article. “As an Amazon Associate, Ebay (EPN) and/or Esty (Awin) Affiliate, I (we) earn from qualifying purchases.”


Friday, July 26, 2019

Slim Wallet with RFID Reviewed

Slim Wallet with RFID Reviewed

Many years ago, I discovered the convenience of carrying a wallet in my pocket instead of a purse.  I've always hated the "bulge" created by a wallet, but fashion can't always be the priority in life for most of us.

In my teen and young adult years, I always carried a purse.  During those years, it never really occurred to me that there was an alternative.  Handbags were not only a normal accessory for females, they were often a fashion statement.  I enjoyed selecting and changing my purse to match my shoes.  Without really meaning to, I had quite a collection of purses in my closet.  However, motherhood changed all of that for me and the "practical" replaced my business pumps and purses.

I quickly found out that trying to balance a baby on my hip, a diaper bag and a purse, was simply overwhelming for me.  I had to reduce my daily "luggage" and I certainly was not going to leave my child behind.  Therefore, the purse had to go!  

Because I had to have my drivers license, I opted for a small wallet that I could carry in my pants pocket.  I hated leaving behind my wallet of photos, but that sacrifice had to be made.  I remember it really was an adjustment for me at the time.

My children are adults now, but I have never returned to carrying a purse.  In fact, my wallets have been streamlined and the hated wallet bulge has disappeared.   


My Slim Wallet


 Slim Wallet RFID Front Pocket Wallet Minimalist Secure Thin Credit Card Holder (Waterproof Grey)Check PriceAfter a few decades of carrying a thin wallet that resembles a pocket with a flap, I recently changed to a slim wallet.  You wouldn't even notice that I was carrying this flat wallet in my back pocket unless you were intentionally looking.  When we went hiking recently, I actually carried it in the upper pocket of my vest and could barely see the outline of the wallet.  Again, I doubt most people would even have noticed it.  

I admit, I have had to get used to having an "open" wallet, but I definitely prefer the flat construction.  

This slim wallet has built-in RFID blocking material which allowed me to eliminate one card I was carrying in my wallet.  There are 6 card slots and a front clear ID window for my driver's license.  The top loading pocket is perfect for folded dollar bills.

These slim wallets come in a variety of colors.  While I don't think it is necessary to match my wallet to my shoes, it would be possible if I wanted to just for fun!


 kinzd Waterproof Wallet SlimCheck Price Slim Wallet RFID Front Pocket Wallet Minimalist Secure ThinCheck Price Slim Wallet RFID Front Pocket Wallet Minimalist Secure ThinCheck Price Slim Wallet RFID Front Pocket Wallet Minimalist Secure ThinCheck Price


Read More Product Reviews On
ReviewThisProducts.com


House of Sylvestermouse


Note: The author may receive a commission from purchases made using links found in this article. “As an Amazon Associate, Ebay (EPN) and/or Esty (Awin) Affiliate, I (we) earn from qualifying purchases.”


Wednesday, July 24, 2019

Summer's Bounty How to Make the Best of It!

an assortment of vegetables

Reviewing the Gardenmaster Food Dehydrator 


Summertime is here and the abundance of fresh fruits and vegetables is upon us!  Let's review how to enjoy all of this goodness now and later too!   Food Dehydrators are not new, but they may be new to you!

If you are a gardener, I'm sure that your little (or big) plot is starting to show signs that there will be a good crop of some fruits and vegetables coming soon.  If you are anything like me, you can hardly wait for that first ripe tomato.  Everyday you go to the garden to see its growth.  Then it starts to turn red and the excitement is almost palpable.  Okay, I'm a little crazy for my fresh fruits and veggies.

Right now we are in the height of strawberry season, so you know where I will be.  Off to my closest "pick your own" patch to indulge in early summer sweetness.  After I have eaten my fill, made some jam and eaten some more, there will still be strawberries that I need to process somehow.

Now this is where my product review starts!  


Have you ever thought about buying a Food Dehydrator and drying the rest?  There are several ways that you can make the freshness of this seasons fruits and vegetables last through the year.  Making jams, jellies and chutneys are one way.  Preserving and canning is another. But wait, there is still the other option and that is to dry the goodness for use later!  Easy and quick too!  No more wasting your food dollars.
food dehydrator


We purchased a  Food Dehydrator a couple of years ago, when my other half decided to make his own beef jerky.  Yes, you can make your own beef jerky, but that is not what I do.

I use this dehydrator to keep all my herbs, tomatoes, carrots, peppers and all other manner of fruits and vegetables for my winter time cooking.  I get the same flavor as I would if I had just harvested my garden.  I can also take advantage of the farmer's markets and buy more fresh produce, both for use now and for dehydration and use for later.

drying parley and basil in a food dehydrator

These pictures show you how I just finished drying a whole bunch of parley and basil.  It took less than an hour and my parsley flakes are beautiful in color and smell.  The basil dried to a light brown, but the smell is incredible. I will use these throughout the fall and winter in my recipes.


No more buying fruit roll ups with their questionable ingredients.  Make your own and you will know exactly what is in that delicious dried fruit.  To make fruit roll ups you will need to purchase some non-stick sheets that fit into the dehydrator.  This will keep the fruit from falling through the grids in the different layers.  You can make different fruit bars all at the same time.  Fresh and flavorful with no additives and preservatives.  Just plain really good fruit!


vegetables

Save money by letting less of your food dollars go to waste!

We in the West are known for our mishandling of our food dollars.  So much of what we buy ends up in the garbage, wasted and useless.  Don't let this be your story!

Preparing foods for dehydration is not a difficult task.  Just wash your veggies and fruits well, cut them up, place them into the trays and set it on!

Your fruits and veggies will be ready in a few hours depending on what you are drying. Beef jerky takes a little longer, but oh my is the taste ever delicious.  It has store bought beat hands down.


Food Dehydrator and Recipe Book included!


Don't be afraid to try new things.  This food dehydrator will have you saving all those fruits, vegetables and spices without thinking twice.  No more buying fresh herbs for a recipe and then throwing away the rest.  Dry it instead, so that next time you need it, it is there for you!  Once you get the hang of it, you will find that you will waste less and really enjoy the fresh taste of homemade!


The only Accessory you might need:


If you are making fruit roll ups, you will need the non-stick mats that fit right into the trays.  Because of the sugar content in fresh fruit, you will have a sticky mess without these sheets.  They are inexpensive and will help you make better use use of the dehydrator!
dehydrator tray


I hope I have given you something that you can work with and enjoy for many years to come.  Fresh food and flavors that are just out of this world, can be yours, with a little work!  Your family will enjoy the benefits and the healthy snacks that will be made right at home in your kitchen.  


Note: The author may receive a commission from purchases made using links found in this article. “As an Amazon Associate, Ebay (EPN) and/or Esty (Awin) Affiliate, I (we) earn from qualifying purchases.”


Monday, July 22, 2019

Defiant Wireless Motion Sensor Solar Light Review

Need an outdoor light but no electrical outlet? The wireless motion sensor solar light by Defiant can assist. I recently needed to light an outdoor walkway which was marooned between electrical outlets and hard wiring the area was not an option.

Defiant Wireless Motion Sensor Solar Light

I purchased the Defiant Wireless Solar Light to solve the no electrical outlet, need light problem and have been very impressed with its' performance. 


Brightness

Brightness
Motion Sensor

x
This is a bright light! It is not for subtle soft lighting along the deck, patio or home. The solar light has the equivalency of 20 LED lights.

The unit actually has two lights. The main light facing out and an interior back light behind the main light. The two lights are synchronized to provide the full brightness. The motion sensor feature then regulates how the lights are dimmed after activation.


Defiant Wireless Motion Sensor Solar Light


Motion Sensor


I found the motion sensor to be very accurate. The small unit is deceiving as to how quickly it will pick up motion. Activity to trigger the motion sensor is up to 26 feet with a 120 degree radius according the the specifications.

There are two settings for the motion sensor:

1. When motion is detected the front and back light turns on to full brightness. After 10 seconds of no motion both lights turn to low brightness.

2. Standby mode. When motion is detected the front and back light turns to full brightness. After 10 seconds of no motion the front light turns off and the back light turns to low brightness.

The light does not have an option for both lights to be turned off after activation. 


Solar Light & Wireless

The solar light takes eight hours of charging to provide 12 hours of continuous light during the night. 

The wireless feature is perfect for areas of the home, deck, landscape or yard which are not located near an electrical outlet. The unit is easy to install as it is lightweight and requires two wall screws (included.) However I liked the portability of the unit due to its' lightweight and shape so I positioned the unit on the deck stairs to face the sun.


More Home Reviews


Note: The author may receive a commission from purchases made using links found in this article. “As an Amazon Associate, Ebay (EPN) and/or Esty (Awin) Affiliate, I (we) earn from qualifying purchases.”


Saturday, July 20, 2019

Ace Hardware Color of the Year Review

Ace Color of the Year Contest

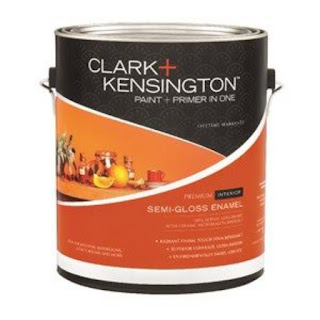
Ace Hardware is known for it's multiple paint products and their paint mixers which are able to give the customers the exact paint colors they desire. In mid-2018, in conjunction with Clark and Kensington Paint, Ace decided to run a consumer-led color contest to select a new batch of colors for 2019. 

Ace held a Neighborhood Paint Party in March, 2018 where consumers were encouraged to hand mix, create and name their own paint color for a chance to be entered into Ace's Color of the Year Contest.


The Winning Color of the Year


Twenty-five finalists were selected from the entries by a panel of Ace color experts and over 35,000 fans voted for their favorite color via social media channels. 


Pineapple Cream Granita is the winning color of the Ace Color of the Year contest

The winning Clark+Kensington color was created by a New Jersey woman who states she was daydreaming about enjoying a delicious dessert while on a relaxing vacation.


“The color is soothing and yet bright; sweet with just a bit of tartness.” 

She named her mellow yellow winning color “Pineapple Cream Granita”. As the winner, she also received a $1,000 Ace Gift Card. 


Runner-Up Winners


Runner up winners in the Ace Hardware Color of the Year  contest

Six runners-up were also selected and these colors are now all available at your local Ace Hardware store.  The six other colors are:


  • Jack Come Back! (a burgundy red) 
  • Shake Your Flipper (a sea blue) 
  • Leroy the Rooster (an orange shade) 
  • Warm Llama (a gray tone) 
  • Tina's Patina (an aqua blue shade)
  • Miracles in D'skies (a deep blue with a turquoise tint). 


The six runner-up winners each received a $250 Ace Gift Card. 

Ace is the Place


For more than 90 years, Ace Hardware has been known as the place with the helpful hardware folks. The paint contest has now made their paint department even more helpful. 


If you need paint, especially a unique color, for any of your household projects, visit the Paint Studio at an Ace Hardware near you and enjoy choosing the one that suits you best. All seven of these new customer-created colors are exclusive to Ace Hardware. 


a can of Ace  paint
Visit ACE online or 
your local neighborhood store and choose your favorite paint color


*Ace Hardware paint color contest article written by (c) Wednesday Elf on 7/20/2019

**Images scanned from a free paint chip flyer obtained at my local Ace Hardware ~ Jerry's Ace in Eldridge, Iowa. 


Note: The author may receive a commission from purchases made using links found in this article. “As an Amazon Associate, Ebay (EPN) and/or Esty (Awin) Affiliate, I (we) earn from qualifying purchases.”


Thursday, July 18, 2019

Paws and Pals Dog Ramp Review

dog on dog ramp
Finn's New Dog Ramp
As I approach the second anniversary of bringing Finn, my special needs/strengths dog, home from the animal shelter, I find myself reflecting on his extraordinary capacity for achieving things he wasn't supposed to be able to do.  Finn has grown well beyond the initial confines of his physical disability, which compels me to provide him with more and more opportunities to do as much as possible through his own initiative and power.  Yesterday, I bought Finn a portable dog ramp that will provide him with more freedom to access his world.  This review shares our first impressions and experiences with the Paws and Pals ramp.

Finn, like all of us, has his own way of approaching new challenges.  I've gotten better at understanding his learning style and anticipating Finn's insecurities (before they kick in), which helps me to be a more effective trainer.  A good starting point today was to take Finn to his favorite park for the first lesson in using a ramp.  I wanted Finn to be relaxed, and for him to associate good things with the pet ramp.

dog on dog ramp
Step One - Explore the Ramp Flat on the Grass
First, to allow Finn to discover the scent, texture, and sound of being on the ramp, I laid it flat on the grass.  This was a very nonthreatening way for him to check it out.  I brought a high-value treat to reward Finn's every success (cheese works magic).  By strategically placing three cubes of cheese on the ramp, it was very easy to entice Finn to take his first steps up onto and across the ramp.  From his second crossing on, I could tell by reading Finn's body language that he was already feeling confident, and even enthusiastic, about this new game.  After the third ramp crossing, I didn't even have to offer a treat.


Having mastered the low-risk, no fear element of ramp exploration, I decided Finn was ready to take it to the next level.  I found a broad tree stump with a height a few inches above ground level.  Because I thought the surface of the plastic ramp might be a little slippery when elevated, and because Finn is very sensitive about his footing, I covered the ramp with some inexpensive rubberized shelf liner.  The new ramps come with sheets of grip tape, but the gently used model I bought did not have that option.  My solution worked perfectly.  Finn climbed the gentle slope with no hesitation.

nonslip dog ramp
Nonslip Liner on Ramp
Since Finn appeared to be having fun with our lesson, was having complete success, and didn't appear mentally or physically fatigued, we forged on.  Had that not been the case, I would have spread these ramp lessons over several sessions on different days.

Next, I used a park bench to elevate one end of the ramp about 14 inches off the ground.  We were now approaching the level Finn would need to master to use the ramp for getting into a low vehicle, or for getting up on furniture.  One great thing about this dog ramp is that it can be used indoors or outdoors.

dog demonstrating dog ramp
Park Bench Height Ramp Elevation
I lured Finn up the elevated ramp by leading him with a piece of cheese.  It was important to keep him on a short leash and to walk alongside him on this first climb up a steeper angle.  I didn't want Finn to be tempted to jump off the side of the ramp.  We took it slow and he had no problems making it up onto the bench.  At that point, I felt Finn had done enough for day one.  As always, Finn accomplished even more than I had planned for him, and he laid to rest any concerns I had about whether or not a dog with only partial use of his rear legs could balance on, and ascend, a fairly narrow elevated ramp (it's thirteen and a half inches wide between the rims).

Finn will mostly use his Paws and Pals ramp inside the house.  My vehicle is not really conducive to having Finn load himself, although I won't rule it out until I let him give it a try.  He's sure to surprise me.  A car, van, or hatchback vehicle would be more ideal for the use of this ramp (nothing requiring too steep an incline).  I mainly want Finn to be able to get up and down off the bed for starters.  From there, we'll work on graduating to ever greater challenges worthy of Finn's capabilities.

dog ramp folded for carry
Light, Compact, Easy to Carry and Store
Given such fast success with the ramp, especially for a cautious dog, Finn and I are giving it a Four Paws Up rating.  I really like all of the main features:

  • Folds up compact for storage (15.5" wide x 10" long x 16.5" high).
  • Lightweight (just eight pounds).
  • Made of a durable, easy to clean plastic.
  • Easy to carry with the attached handle.
  • Simple to use (no assembly required).
  • Long enough for typical uses without being too bulky to handle (60" when fully extended).
  • Strength rated for up to a 110-lb. dog.
  • Multiple applications for indoor or outdoor use.
  • Good value and quality for the price (least expensive ramp I found).
Who could benefit from a pet ramp?  Senior dogs, puppies, injured dogs, disabled dogs, small dogs, convalescing pets, and any weak dog or cat.  It is also a major help to those who care for animals (especially those who are physically unable to carry or load a large, heavy dog).  Even totally healthy animals enjoy using ramps.  It's good, stimulating exercise for a pet to try new ways of balancing and climbing.  

We'll keep you posted and continue to add photos as Finn becomes the master of his domain.  I'm sure he will continue to push the boundaries and to constantly redefine what it means to be a special strengths dog who just happens to have been born with legs that work differently.  Finn acts as though he has no limitations.  I feel it is my responsibility to give him as much rein as possible and to not do for Finn the things he can do for himself.  We're learning together how to be the best versions of ourselves in ways that elevate one another.


Note: The author may receive a commission from purchases made using links found in this article. “As an Amazon Associate, Ebay (EPN) and/or Esty (Awin) Affiliate, I (we) earn from qualifying purchases.”


Monday, July 15, 2019

Reviewing the NuWave Gourmet Accessory Kit

NuWave Air Fryer Accessories
With my recent purchase of the NuWave Brio air fryer I also purchased the NuWave Gourmet Accessory Kit. At first I thought the little pan and cooking rack were over-priced and I felt silly for spending that extra money. But after using them for nearly every healthy meal - multiple times a day - I consider them invaluable.

If you aren't at all familiar with the NuWave Brio air fryer, you can read my review here. The Gourmet Accessory Kit is sold separately here


NuWave Gourmet Accessory Kit


Because I am typically cooking only for myself I purchased the Gourmet Accessory Kit.  It sounds much more fancy than it is. It is really just a 6" x 6" square pan (2 Qt) with a handle and a 6" x 6" cooking rack.  Rather than cook my foods in the pan included with the machine or on it's existing rack, I use the little pan the most often. 

Easy Clean Up: The pan has been keeping mess to a minimum. The juices and splatter stay in the accessory pan. It is non-stick so it is easy to lift out and wash off. 

Portion Control: The Gourmet Accessory Kit also helps with portion control - without leaving me feeling deprived. The pan holds just a small amount. I cook that small amount and after a bit, if I'm still hungry, I can quickly cook a bit more in the Brio air fryer. However, I haven't felt like I needed that second portion very often.

Cooking Items Separately: I can also cook two different items at the same time. I place one item in the pan - sitting on the original rack in the machine - and cook veggies on the original rack next to it. I have not yet cooked a meal large enough to have to use the Accessory rack in addition to the original rack. But it's good to know that I will have that extra space if I need it.  

Weight Loss: After loosely following the eating habits recommended by the Embry family in Living Proof and using the NuWave Brio air fryer, I have lost 4 lbs in approximately 2 weeks. That doesn't sound like much, but I am thrilled with that much loss after just changing what I eat. 


Note: The author may receive a commission from purchases made using links found in this article. “As an Amazon Associate, Ebay (EPN) and/or Esty (Awin) Affiliate, I (we) earn from qualifying purchases.”


Saturday, July 13, 2019

Reviewing Arbonne CleanTox Herbal Tea

Arbonne Essentials Herbal Tea - Arbonne's Detox Tea
Arbonne CleanTox Tea photo by Louanne Cox
I was first introduced to Arbonne's CleanTox Tea  as part of the 30 days to healthy living program which literally changed my life.   Since finishing the 30 days program I have continued to drink this tea every day for two reasons: it tastes good & it's good for me.

This tea is part of Arbonne's Essential range and is just called herbal tea here in Australia, but in some other countries, it goes by the name detox tea as it works on the eliminatory organs.   Let's have a look at exactly what is in this tea -


The combination works really well with the flavor as dandelion root can be bitter on its own and yet the combination of licorice root adds a sweetness and the peppermint stops that sweetness from being too strong while adding a refreshing flavor.   Basically, it works to create a delicious tea that is lovely to drink on its own.

Personally, I drink mine in the morning as I just like to have a hot drink first thing, but as it's a caffeine-free tea many people choose to drink it before going to bed.

A little tip from me - I drink a mug of this tea and I will keep the tea bag and make two mugs out of the same tea bag which means that my box of 20 will last me 40 days if I drink it just once a day.

Dandelion Root - What Are The Benefits


Dandelions are highly nutritious and have been used for centuries,   Dandelion root is dried and used as a tea, in fact, the first time I tried it the root was made into a granular form and you made it up like instant coffee - I found it way too bitter on its own (mind you I was still a teen with a very sweet tooth!).

It is high in a soluble fibre called inulin that supports the growth and maintenance of healthy intestinal bacteria which are essential for your gut health.

It's been promoted as helping to support your liver for many years (one of the reasons I was first introduced to it years ago was as a liver tonic).

There are many other benefits often cited for dandelion root including anti-inflammatory properties, anti-oxidant levels, helping the digestive system, the list goes on.   I personally believe it's been included in the tea because it helps support and protects the liver as well as aiding gut health.

Peppermint Leaf - Benefits


As you may already know I love peppermint tea and used to drink it every afternoon.   I will admit I don't drink it every day now, but I do still have it regularly and it is always in my cupboard.   I talk more about it below.

Why drink peppermint teaWhy Drink Peppermint Tea
I love the taste of peppermint tea, but that's not the only reason I drink it, peppermint tea also has a lot of benefits including aiding digestion and helping with concentration which is why I enjoy it after lunch when working.

Parsley Leaf - Health Benefits


I first tried parsley leaf tea in my early 20s as it was touted as being great for kidney health (its use as a diuretic doesn't appear to have been tested by scientists however so I'm not sure where I got my information from).   It was very easy to make, but at the time I didn't really like the taste and my husband wasn't very impressed with me using the parsley in my tea instead of him using it as a garnish!

It turns out that the dried form of parsley (used in this tea and other commercial herbal teas) contains 17 times more antioxidant properties than its fresh form (reference)

Parsley is high in antioxidant nutrients and is also believed to help regulate blood sugar levels and hormone levels.

Elder Flowers - A Traditional Health Tonic


I must admit I don't recall ever trying elderflower tea although I had heard of it as it was a traditional health tonic drunk in the UK.  I may very easily have been given it without remembering.

This tea is traditionally drunk to keep colds and flu at bay and a study published in the Online Journal of Pharmacology and PharmacoKinetics in 2009 backed up the effectiveness of elderflowers in treating the flu.

It appears that the anti-oxidant levels in elderflowers combined with its anti-viral properties work really well to keep the immune system healthy.

This could be part of the reason why my immunity has been really good for the past 18 months since taking this tea daily.

Sweet Fennel - The Health Benefits


I first came across sweet fennel tea when I was working in a Health shop in my 20s, we used to recommend breastfeeding mothers drank it if their babies had colic and we had very positive feedback on its effectiveness with the local midwives regularly sending new mothers to us.

With this experience I'm not surprised to find that it's known to improve digestion, is anti-spasmodic and can relieve symptoms of IBS.   It also helps keep your liver and kidneys healthy while boosting immunity, reducing inflammation and balancing hormones.

Licorice Root - Sweet & Healthy


Did you know the Egyptians used licorice root tea as a cure-all concoction?   This tea has been used for centuries by the early Europeans and the Chinese for its health benefits.

Today licorice root tea is used to promote digestive, respiratory and adrenal gland health and you will find it included in herbal tea blends that promote both bronchial wellness as well as cleanse and detox.

Summing Up My Daily Herbal Tea


I have taken this tea every day for the past 18 months except for 2 weeks when I was on holiday (I think it's good to take a break occasionally when you're regularly using herbs).   I have made a number of lifestyle changes and have attributed my results to using the whole range of the 30 days to healthy living program that Arbonne has.

When I look at the individual benefits of the ingredients in the herbal tea I can see how they have applied to me.   In all honesty, I don't believe a tea alone can do all this, but in conjunction with other changes, I have found the following has happened to me personally -

My hormones are more balanced (I am going through menopause and the symptoms (crankiness, night sweats, hot flushes, etc) have abated.

I have an autoimmune disease (Rheumatoid Arthritis) and haven't even had a little flare-up, plus I've been able to go back to the gym with no problems for the first time in decades.

My immune system has dramatically improved - I had been getting sick constantly before starting this tea, I can joke now that someone just had to sneeze in a 10 block radius and I'd get the flu, but it actually did feel like that was happening at the time.

There are lots of other things I could say, but I will just mention one thing if you want to try the Arbonne CleanTox Tea and you don't like it Arbonne has a 90 day money-back guarantee, so try it for a couple of weeks and if you don't like it send it back!


Note: The author may receive a commission from purchases made using links found in this article. “As an Amazon Associate, Ebay (EPN) and/or Esty (Awin) Affiliate, I (we) earn from qualifying purchases.”


Tuesday, July 9, 2019

Dorm Storage Bins Reviewed

Maximize Storage In The Dorm

dorm clutter
Dorm Space Is Limited
image courtesy of pixabay.com
A review of dorm storage bins might come in handy for many as the time for young adults to go off to college approaches. The students who are required to live in a dorm room or opt to continue dorm life will quickly find that storage space is at a minimum.

Small spaces shared with at least one more inhabitant can become crowded and cramped very quickly. The old adage "A place for everything and everything in its place" applies particularly well in a college dorm room. For freshmen students, this will be the first time living away from home. Mom or Dad won't be around to pick up after them. If there is a mess, it will be up to them to clear the clutter they created. 

A great solution is to provide your college student with the option of storing much of their necessaries in storage bins. Of course, we need to understand that they may promise to use them but may not for a while. It might take some time for them to tire of tripping over things left on the floor to see the beauty of those bins you so lovingly provided. A few or maybe many times of not being able to find something they need might be the catalyst for them to use those bins. Well, at least, we can hope! Another adage comes to mind, "You can lead a horse to water but you can't make him drink." Some will embrace the concept while others will forever wait for someone else to clean up the mess. At least they will have the option if the storage bins are there waiting for them.

A collection of different sized containers in a dorm room can be so very handy. They can be placed under beds, stacked on the floor, placed on shelving units, or just about anywhere to conserve space and add to the storage dilemma. We as parents and grandparents know the value of having containers to help prevent clutter so we can gently remind out young adults of the value as they leave on the adventure of living away from home.

One option that I found appealing was a collection providing medium, large and jumbo sizes. The fabric is a durable bamboo blend and comes in either a gray and brown color or a dark taupe. Nothing flashy just colors that will blend-in nicely. There is also a sturdy rope handle that will allow for easy moving if heavy items are placed inside. 

What do you think? Would the college student in your life benefit from a storage solution like this for their dorm room?


Note: The author may receive a commission from purchases made using links found in this article. “As an Amazon Associate, Ebay (EPN) and/or Esty (Awin) Affiliate, I (we) earn from qualifying purchases.”


Thursday, July 4, 2019

Olloclip Phone Lens Kit Review

ramshorn snail shell
Ramshorn Snail Shell - Olloclip Macro Lens
Up until this year, I had not done any photography with my cell phone cameras.  When my laptop died a while back, I had to rely on an older iPhone to take the photos for my online blogs, reviews, and social media posts.  That necessitated the discovery and use of a few key photo apps and, just recently, the use of clip-on smartphone lenses.  In the ongoing process of learning as much as possible about iPhone photography, I came across several references to the Olloclip macro, wide angle, and fisheye lens kit.  Today, I am reviewing my initial impression of these lenses (which are available for many different brands and models of phones).

When I purchased my Olloclip lens kit, I was mainly interested in the two macro lenses (magnification times 10 and 15).  I wanted to take some really up close and personal photographs (think flowers, butterflies, bees, dew drops, etc.).  Macro is also great when I need photos of the jewelry I sell online.  The wide angle lens will be used primarily for landscape photography (can't wait to try it out at the Great Sand Dunes).  It is also perfect for group shots, selfies, and videos.  The fisheye lens will be fun for the animal photography—like those cute nose shots—I do to help shelter dogs get adopted.  It is also wonderful for lighthouse photography (spiral staircases especially).

dog through fisheye lens
Rescue Dog Finn - Olloclip Fisheye Lens
As I have been getting into macro photography, I have found it helpful to start indoors, since it takes some patient practice to learn how close to be to the subject, how to get the focus right, how to stage the object for an interesting photo, and, perhaps most importantly of all, how to handle the lighting.  I don't have to deal with the wind indoors, either.  That is a huge plus.

flexible tripod
Flexible Tripod, Olloclip 10X Lens, iPhone
Yesterday, I was experimenting with some shells I had found on the beach.  I used natural lighting by a window.  With macro, a tripod is essential, as is a remote shutter release (or the use of your phone's shutter timer).  I set up some black foam boards and a tiny easel covered in a sheet of black felt for my backgrounds.  With the Olloclip 10X macro lens, I was able to get incredibly close to my subject (just a few millimeters away).  Not much will be sharply in focus with ultra macro photography (but the right kind of blur is the appeal), so the trickiest part is moving the mini tripod around until you find the special effect, and point of focus, that expresses your unique point of view.  It's all about the angle.

measuring the size of a shell
Ramshorn Snail Shell Without Macro Lens
You can see just how small the snail shell actually is in the photo above using a regular camera lens without macro (about half an inch).  

ramshorn snail shell through micro lens
Ramshorn Snail Shell - 10X Magnification
This is the same shell photographed with the Olloclip 10X macro lens.  I used the free Snapseed photo app for cropping and minor adjustments.  

sundial shell
Sundial Shell Without Macro Lens

Next, I experimented with a Sundial shell I found on Padre Island.  Two photos are provided for comparison.  The photograph above was taken with my Nikon D200 with a zoom lens.  The photo below was taken with an iPhone 5s (ancient compared to the latest iPhones) and an Olloclip 10X macro lens.

sundial shell
Sundial Shell - Olloclip 10X Macro Lens
Today, it was time to get outdoors and test the wide angle lens.  I'm sure most of you can relate to the frustration of not being able to get all of your subject into the photo frame.  First, I snapped a regular shot of this historic truss bridge with my iPhone (the Lobato Bridge over the Rio Grande in southern Colorado).  As you can see below, the right side of the bridge was cut off.

lobato bridge
The Lobato Bridge - Built in 1892
The photo below was taken with the Olloclip wide angle lens.  I was able to get all of the double-span bridge in the photograph even when standing much closer to the bridge than in the first shot.  There was plenty of extra margin for cropping.

labato bridge
Bridge Photographed Using Olloclip Wide Angle Lens
One thing I did notice is that this wide angle shot is a bit fuzzy near the edges of the photograph.  I'm told Olloclip has a free app for making image adjustments.  I will check that out and update you.

tree tops through a micro lens
It's not what you look at that matters,
it's what you see.  ~Thoreau
I was lying on the forest floor while pointing the Olloclip fisheye lens directly skyward when I created this photo.  This image reminds me of an eye, with the trees forming the iris.  In a forest devastated by wildfire, I was looking at the emergent green undergrowth and seeing how to embody the Phoenix.

trees through a fisheye lens
Phoenix Rising: Self-Portrait
All of these photos are first attempts.  Once I experiment, and perhaps invest in a newer smartphone with a more advanced camera, I'm sure my photographs will evolve.  You have to start somewhere and learn by trial and error.  In this case, I don't really care if the photos aren't perfect.  For me, photography is a reflective practice.  I photograph things that move me, and I practice photography to learn how to see more clearly, to learn how to pay deep attention, and to immerse myself in beauty and wonder.  

If you enjoy pushing your creative boundaries, you really can't go wrong with Olloclip products.  They offer good quality, affordable tools for the smartphone photography enthusiast.  There are more expensive options, but for just getting started, I suspect most of us like to keep costs reasonable.  This is a good budget choice.  I feel I got my money's worth.


Note: The author may receive a commission from purchases made using links found in this article. “As an Amazon Associate, Ebay (EPN) and/or Esty (Awin) Affiliate, I (we) earn from qualifying purchases.”


Most Recent Reviews on Review This Reviews


Search for Reviews by Subject, Author or Title

The Review This Reviews Contributors


SylvestermouseSylvestermouseDawn Rae BDawn Rae BMbgPhotoMbgPhotoBrite-IdeasBrite-IdeasWednesday ElfWednesday ElfOlivia MorrisOlivia MorrisTreasures by BrendaTreasures by BrendaThe Savvy AgeThe Savvy AgeMargaret SchindelMargaret SchindelRaintree AnnieRaintree AnnieLou16Lou16Sam MonacoSam MonacoTracey BoyerTracey BoyerRenaissance WomanRenaissance WomanBarbRadBarbRadBev OwensBev OwensBuckHawkBuckHawkDecorating for EventsDecorating for EventsHeather426Heather426Coletta TeskeColetta TeskeMissMerFaeryMissMerFaeryMickie_GMickie_G


Review This Reviews is Dedicated to the Memory of Our Beloved Friend and Fellow Contributor

Susan DeppnerSusan Deppner

We may be apart, but
You Are Not Forgotten


“As an Amazon Associate, Ebay (EPN) and or Etsy (Awin) Affiliate, I (we) earn from purchases.” Disclosure Statement

X