Showing posts with label Margaret Schindel. Show all posts

Wednesday, March 24, 2021

Wholesome Yum Keto Bread Mix and Yeast Bread Recipe

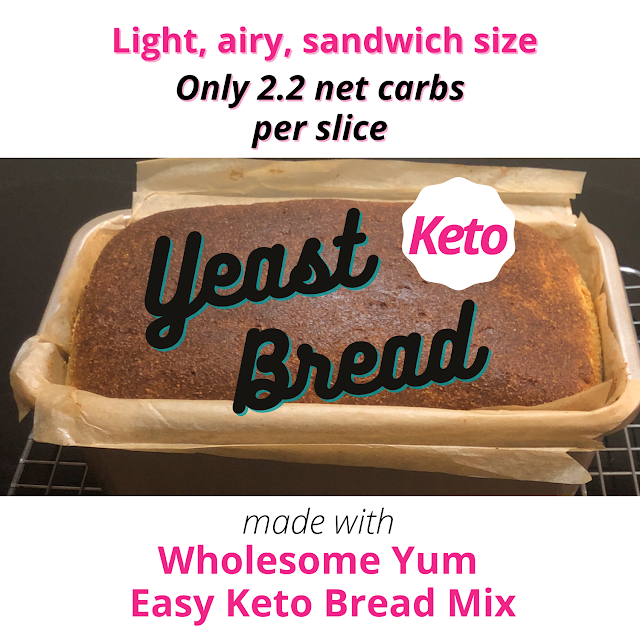
Keto Yeast Bread made with Wholesome Yum Easy Keto Bread Mix
Delicious keto bread that isn't heavy, dense, or crumbly!

When I began my successful keto diet journey in 2019, Maya Krampf's popular Wholesome Yum website and The Wholesome Yum Easy Keto Cookbook (which I have recommended in my Keto Gift Guide and other posts here on Review This Reviews) quickly became two of my go-to resources for quick and easy, healthy keto recipes and reliable information about the ketogenic approach to eating. Maya also has developed a line of high quality, low carb, gluten free, keto food products made with clean ingredients (including her excellent Besti keto-friendly sweeteners), and new products continue to be added to her Wholesome Yum Foods online shop. 

The Wholesome Yum Keto Bread Mix that launched on December 21, 2020 is one of Maya's newest products. I think it's also one of her best!

A few days ago, she also published a new Keto Yeast Bread Recipe for this bread mix that delivers even more impressive and delicious results. I’m excited to share my in-depth product review of this excellent Wholesome Yum mix and compare the differences in between the loaves I've made with original recipe and the new keto yeast bread recipe. 

Wholesome Yum Easy Keto Bread Mix package
This keto bread mix has all the pre-measured dry ingredients for a delicious, fresh-baked loaf

Wholesome Yum Keto Bread Mix, Original Recipe (No Yeast)

The directions currently printed on the bag require just three ingredients in addition to the packaged mix: 6 tablespoons of butter, 4 large eggs, and 3/4 cup (6 ounces) of unsweetened almond milk. 

You can replace the almond milk with a different keto-friendly milk, if you wish.

Line the Loaf Pan With Baking Parchment Paper

The recipe calls for the prepared bread mix to be baked in an 8" x 4" loaf pan lined with baking parchment paper, with the parchment paper overhanging at least the two long sides of the pan. 

However, the 8.5" x 4.5" OXO Good Grips Non-Stick Pro Loaf Pan I have been using (see my product review) has worked fine.

Parchment paper lined loaf pan with box of baking parchment and scissors
Make sure the parchment paper overhangs the long sides of the pan

I have been lining the pan with unbleached If You Care Parchment Baking Paper, which is chlorine-free and compostable. It's also silicone coated, and nothing sticks to it! 

For environmental reasons, the box doesn't have a serrated metal cutting strip. Since the larger, softer cardboard "teeth" don't cut as cleanly as the metal ones, I just use scissors to trim the a sheet of the desired length.

Allow Time to Bring the Ingredients to Room Temperature

All the ingredients should be at room temperature when make the keto bread dough/batter.

Note: Although there is an asterisked line to this effect in the printed directions on the bag, it's easy to miss, not only because the very small type is hard to read, but also because there are no corresponding asterisks attached to the individual ingredients. (A single asterisk with no corresponding reference is meaningless.) It would be helpful if this were fixed during the next packaging print run. 

When a recipe calls for room temperature ingredients, they should be at approximately 70 °F (21 °C), with the exception of butter. Room temperature butter should be a bit cooler, roughly 65 °F (18 °C). It has reached the correct temperature when it is still a bit cool to the touch and retains its shape, but has softened enough to leave an indentation when pressed with a fingertip.
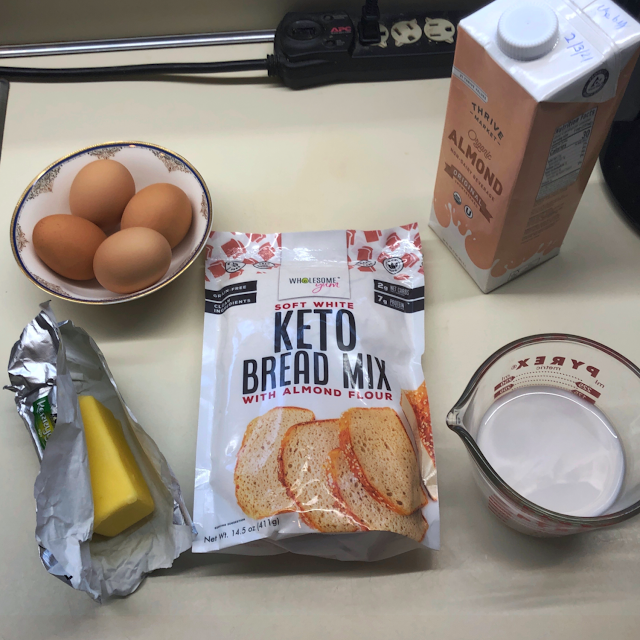
Ingredients to make Wholesome Yum Easy Keto Bread Mix: bag of mix, 6 tablespoons of butter, 4 eggs, and 3/4 cup almond milk
One bag of mix + butter, eggs, and almond milk = quick and easy keto bread!

Why Using Room Temperature Ingredients Matters When Making The Keto Bread Mix Batter

Using room temperature butter, eggs, and almond milk allows the butter to cream properly and the eggs and butter to be fully incorporated into the creamed butter, so there are no remaining clumps of butter after the dry ingredients in the Wholesome Yum Keto Bread Mix are added. 

Conversely, using ingredients that are too warm or too cold will likely produce less-than-optimal results.

When I tried the Wholesome Yum Keto Bread Mix for the first time this January, the New England winter meant that our north-facing kitchen (with its large expanse of windows) was quite chilly. As a result, even after sitting out on the counter for a couple of hours, my "room temperature" eggs, and almond milk were much cooler than 70 °F (21 °C), and even my butter was colder than 65 °F (18 °C) and had very little "give" when pressed with a fingertip. 

As a result, even after being creamed at high speed with my trusty KitchenAid mixer for for nearly 15 minutes, the butter never softened fully, and when I added the eggs and almond milk to it, they wouldn't incorporate smoothly, no matter how long I beat the mixture. 

You can see in following photo that the first batch of keto bread dough/batter didn't come together as smoothly as it should and would have if my kitchen hadn't been so chilly.
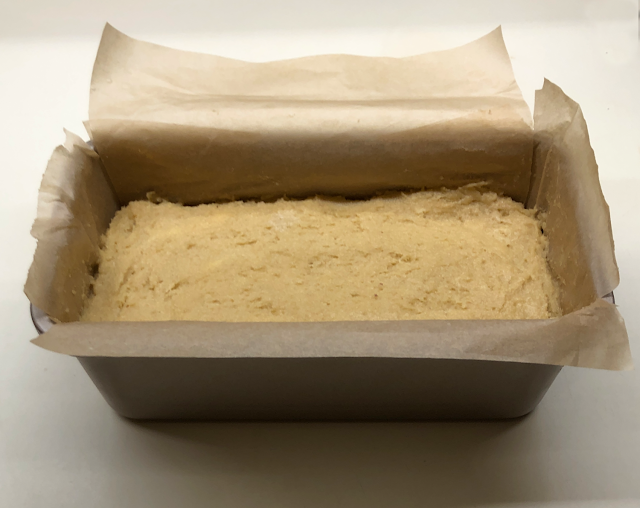
Bread dough in parchment paper lined loaf pan
A cold kitchen made my butter a bit uncooperative!

In retrospect, I could have put the unshelled, room temperature eggs in a bowl of warm water for 5–10 minutes and warmed the almond milk gently on the stovetop or in the microwave. However, the butter still would have been a problem, since using any form of added heat to soften butter without melting it is a tricky proposition.

The Wholesome Yum Keto Bread Mix Recipe Is Pretty Forgiving

Despite my inability to bring the ingredients to "recipe" room temperature, and the fact that we currently have only a tabletop oven (our built-in double oven died a few years ago), the loaf baked quite nicely.
Baked easy keto bread mix loaf in pan on rack
The first loaf I made with this keto bread mix turned out well, even with the too-cool ingredients

Making low carb, gluten-free bread with Wholesome Yum Keto Bread Mix was easy. The hard part was waiting until the next day, as the package directions recommend, before slicing into the loaf so I could taste it!

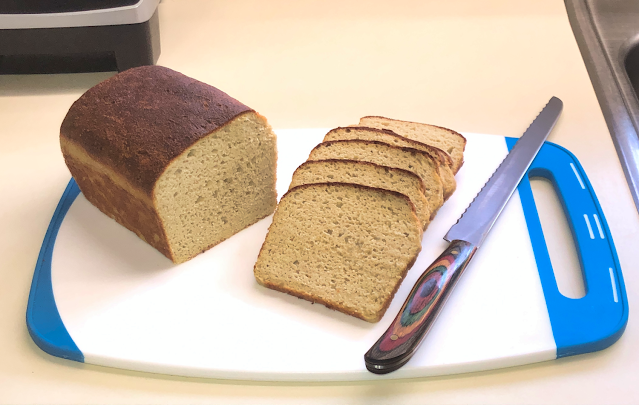
Baked keto bread loaf cut in half on cutting board with bread knife
A lighter, less dense texture than most keto bread

Although it is possible to find low carb bread recipes that don't contain almond flour, most of them do. Ground almonds are heavier than grain flours, lack gluten for structure, and interact differently with leavening agents. As a result, most loaves made from a keto bread recipe are pretty dense, and tend to crumble easily.

So, when I cut into the loaf I made with the Wholesome Yum Keto Bread Mix, I was very pleased to see small air pockets, indicating a somewhat lighter, less dense texture than most low carb bread made with almond flour. (You can see the air pockets better in the close-up photo of my half-sandwich.)

Not only did it make great toast, it also was less crumbly than most other keto-friendly almond flour breads, which allowed me to make a sandwich that didn't fall apart as soon as I bit into it!

Half a sandwich made with keto bread, keto jam, and keto chocolate hazelnut spread
My sweet half-sandwich on keto bread made with the Wholesome Yum mix
(Note: For scale, this is a salad plate.)

After making a great slice of toast, the next thing I tried was a sandwich. I had just received my order of keto-friendly Good Good sweet raspberry jam (which is currently out of stock, but other flavors are available, including Good Good Sweet Blueberry Jam) and ChocZero Chocolate Hazelnut Spread (a keto diet friendly alternative to Nutella), so I decided to cut a slice in half and make myself a raspberry-chocolate hazelnut half-sandwich. (Hey, don't knock it until you try it! I like to think of it as a 21st-century update to the Fluffernutter, a lunchbox favorite back in the 1960s, when I was a kid, that I can't imagine eating today.) 

I was able to eat my half-sandwich without the bread crumbling or breaking, which was a major improvement over most other keto bread recipes or mixes I had tried. 

The New Keto Yeast Bread Recipe Makes an Even Better Low Carb Loaf 

Even though I was pleased with the results I was getting from Maya's new keto bread mix and had already begun to write a product review of it for Review This Reviews, I was extremely excited by her revelation last month in one of the Wholesome Yum Facebook groups I belong to that she had been working on a keto yeast bread recipe for the new mix and thought she was close to perfecting it. 

I knew that adding yeast to the batter/dough would result in a taller loaf with a lighter, airier, more sponge-like texture and might also give the bread some of the flavor characteristics of conventional yeast breads. 

I decided to hold off on my product review of the bread mix until the new recipe had been published, so I could compare it to the original and confirm or correct my assumptions about the effects of adding yeast to the batter. 

Wholesome Yum Easy Keto Bread Mix and other ingredients for the keto yeast bread recipe
Feeding the yeast with inulin allows this keto yeast bread recipe to be 100% sugar free 

The Yeast Bread Version of the Recipe Adds Two Ingredients

Active Dry Yeast

You can use any brand of active dry yeast, such as Fleischmann's or Red Star. I decided to order my favorite from my BK (before keto) baking, SAF-Instant Premium Yeast - Red, which is widely used by professional bakers and consistently produces superior results with any type of bread, pizza, croissant, or other unsweetened doughs. 

I discovered the red SAF-Instant Premium Yeast many years ago on the King Arthur Baking website (a reliable source of baking expertise and a go-to resource for baking enthusiasts). The fact that it's the yeast they use most often in their test kitchens was a good enough endorsement for me! 

In addition to improving bread dough baking results, a 1-pound vacuum-sealed bag/brick of SAF-instant yeast ends up costing much, much less per use than the 4-ounce jars or strips of three individual packets of active dry yeast sold in supermarkets. 

I keep mine in the freezer in an airtight container, where it remains good for years, and unopened packages have a two-year shelf life. 

Tip: If you're not following a low carb or keto diet, use SAF-Instant Premium Yeast - Gold, rather than the one in the red package, for making conventional sweet dough recipes. 

Inulin Powder

In this recipe, the active dry yeast is fed with powdered inulin, a soluble fiber and prebiotic, instead of the sugar or other high glycemic index sweeteners that recipes typically used for that purpose. 

I was in such a rush to order inulin powder for this recipe that I inadvertently ordered a huge 2.2-pound bag of it on Amazon (with free Amazon Prime delivery)! However, since it you need only one teaspoon of it per 2¼ teaspoons (or one packet) of active dry yeast, I recommend buying a smaller package, such as this 8-ounce bag of 100% pure inulin powder that is made in the USA (in Utah) from non-GMO Jerusalem artichokes, sometimes called sunchokes. 

Wholesome Yum Keto Yeast Bread Recipe 

To make the keto yeast bread recipe, you start by mixing the batter according to the original recipe, then fold in active dry yeast bloomed in lukewarm water mixed with inulin powder, and set the covered yeast batter aside in a warm spot to proof. After the yeast bread batter/dough has been allowed to rise for an hour, it is transferred to the parchment-line loaf pan and baked at the same temperature, and for the same length of time, as the original recipe. And, like the original recipe, the baked loaf should be removed to a cooling rack and left until it has cooled completely (overnight, if possible) before you slice into it. 

Here are the ingredients, tools, supplies, and equipment you will need to make Maya's new keto yeast bread recipe. 

Ingredients:

  • 2¼ teaspoons (or 1 packet) active dry yeast
  • 1/4 cup (59 ml) lukewarm water, 105–115 °F (41–46 °C)
  • 1 teaspoon of inulin powder *
  • 1 bag Wholesome Yum Keto Bread Mix
  • 6 tablespoons butter **
  • 4 large eggs ** (not medium, extra-large, or jumbo size)
  • 3/4 cup (6 fl. oz.) unsweetened almond milk ** ***

Tools, Supplies, and Equipment:

  • A hand mixer or stand mixer 
  • A large mixing bowl
  • A rubber scraper (to scrape the bowl and beaters)
  • Plastic wrap (to cover the bowl of prepared yeast dough before setting it aside to proof/rise) ****
  • An 8" x 4" loaf pan
  • Baking parchment paper to line the pan (I highly recommend using unbleached baking parchment)
  • A cooling rack

* The inulin powder is a prebiotic fiber that is used in this recipe to feed the yeast. It is a keto-friendly alternative to feeding the yeast with sugar, honey, or other high-glycemic sweeteners that can elevate your blood glucose and insulin levels. If you follow a strict sugar-free or keto diet and want to ensure that your keto bread is absolutely sugar free, the inulin in this recipe is an essential ingredient that cannot be substituted. However, for people whose dietary requirements and preferences are less strict, the recipe also offers the option to replace the teaspoon of inulin powder with a teaspoon of coconut sugar. 

** At room temperature

*** Use plain, unsweetened almond milk for this recipe. Unless the package specifically says "unsweetened almond milk," assume it contains added sugar, and is not suitable for a low carb, sugar-free, or keto diet.

**** I recommend biodegradable, reusable beeswax food wrap as a more sustainable and environmentally friendly alternative to disposable plastic wrap (aka cling film). It's available either precut or in rolled sheets that you can cut to size, as needed. Although I own and use both types, I'd suggest buying an uncut roll to ensure that you'll have a large enough piece to cover your large mixing bowl while the keto bread batter is proofing.

Directions:

Follow Maya's full Keto Yeast Bread Recipe on Wholesome Yum, which provides not only step-by-step directions with photos, but also helpful tips, refrigerator and freezer storage instructions, and an FAQ that answers questions such as as whether yeast and inulin are keto-friendly ingredients.

This Keto Yeast Bread Recipe Turned Out Even Better The Second Time!

Update 4/8/21: Last weekend, we finally had a warm-ish spring day here in New England (a "balmy" 58 degrees Fahrenheit, lol!). I had just finished the last slice from my first loaf, and hoped that my room temperature eggs, butter and nut milk would be warmer and more cooperative this time. Indeed, they were! I was able to get the butter to cream properly, so it was nicely pale and fluffy. And the eggs and nut milk (I used macadamia nut milk this time) were fully incorporated into the creamed butter, so there were no large lumps of butter in my yeast bread batter, which made it much easier to smooth the top after transferring it to the parchment paper-lined loaf pan.

Second loaf of keto yeast bread on cutting board
My second keto yeast bread loaf 

Comparing Wholesome Yum Keto Bread Mix Original and Keto Yeast Bread Recipes 

Height

When I followed the original Wholesome Yum Keto Bread Mix recipe printed on the bag, the top of the baked loaf remained lower than the rim of the baking pan.

Baked keto bread loaf in pan, made with recipe on bag of mix
The basic recipe without yeast produces a shorter loaf

However, when I followed the new keto yeast bread recipe, the batter's volume increased considerably as it proofed, which produced a baked loaf that was taller than baking pan.

Taller loaf in pan, made with keto yeast bread recipe
Adding yeast to the original batter recipe produces a larger, taller loaf that rises above the pan rim

Size and Texture

The recipe printed on the bag produced slices that were slightly larger, and had more air pockets and a lighter texture, than typical keto breads.

Sliced Wholesome Yum low carb keto bread

As you can see, the slices of this loaf, which was made with the Wholesome Yum Keto Yeast Bread Recipe, were significantly larger and had many more air pockets and and an even lighter texture vs. those cut from previous loaf made with the original Wholesome Yum Keto Bread Mix recipe.

Sliced Wholesome Yum keto yeast bread loaf

Time and Effort

The time it takes to bloom the yeast and fold it into the prepared batter is minimal.

However, the yeasted dough also needs to be covered and set aside to proof before it is transferred to the parchment paper-lined pan, which add 60 minutes to the total time, start-to-finish.

On the other hand, since the batter doesn't need to be monitored while it's proofing, that time can be spent elsewhere, on other activities.

Bottom Line

Unless I'm pressed for time or can't start baking until later in the day, I consider the superior loaf produced with Maya's new Wholesome Yum Keto Yeast Bread Recipe well worth the minimal additional effort and the one-hour delay while the batter is proofing.

However, even without the addition of yeast, the Wholesome Yum Keto Bread Mix is a convenient, time-saving, and delicious option for making freshly baked, keto-friendly bread.

Wholesome Yum Keto Bread Mix and Yeast Bread Recipe by Margaret Schindel

Posts About My Keto Diet Journey

My First Year on The Keto Diet

Preparing to Succeed on the Keto Diet, Part One

Preparing to Succeed on the Keto Diet, Part Two

Low Carb Muffins & Cupcakes: Treats to Enjoy on a Keto Diet

Low Carb Keto Chocolate Yogurt Granola Chip Pudding Recipe

Good Dee’s Keto Cookie Low Carb Baking Mix Review

Hamama Microgreens Growing Kit Review & Success Tips

My Favorite Hamama Microgreens Seed Quilt Accessories

Keto Cheddar Cheese Biscuits With Chives Recipe

The Ultimate Keto Hot Chocolate Recipe

The Best Low Carb Keto Gift Ideas: Keto Gift Guide

The Best Low Carb Keto Cinnamon Muffins

Wholesome Yum Keto Bread Mix and Yeast Bread Recipe

The Good Chocolate 100% Organic No Sugar Dark Chocolate Review

The Best Advice to Maintain Your Keto Diet Weight Loss

My New Irresistibly Delicious Keto Cheese Crackers Recipe

Luscious Low Carb Keto Triple Peppermint Cheesecake Brownies Recipe

Quick & Easy Livlo Blueberry Scones Keto Baking Mix Review

Snack Better With The Best Healthy Keto Cookie Dough Bites

The Best Quick and Easy Low Carb Keto Pizza Recipe

The Best Quick and Easy Low Carb Keto Shortcake Cupcakes Recipe

Comparing the Best Keto-Friendly Chocolate Hazelnut Spreads - No Added Sugars

The Best Low Carb Keto Sandwich and Burger Buns Mix

Blueberry Biscuit Scones — New, Easy, Low Carb Keto Recipe

The Best Keto Pizza Crust Mix With 0 Net Carbs

An Unusual, Delicious Strawberry Chocolate Tea With 0 Calories

Delicious Sugar-Free Keto Cookies That OREO Fans Will Love

Healthy Pistachio Cherry Chocolate Chip Marshmallow Cereal Treats Recipe

Easy, Decadent, High Protein, Sugar-Free Rocky Road Cottage Cheese Ice Cream

The Best Quick & Easy Low Carb Sausage and Ricotta Calzones

How to Make Refreshing Vanilla Italian Soda (With or Without Cream)


Reviews of the Keto Diet by Barbara C. (aka Brite-Ideas)

My Personal Keto Testimonial

How I Stayed Committed to the Ketogenic Way of Eating

Read More Recipe Reviews by Our Review This Reviews Contributors

Read More Product Reviews by Our Review This Reviews Contributors

Read More Reviews About Health and Wellness by Our Review This Reviews Contributors


Note: The author may receive a commission from purchases made using links found in this article. “As an Amazon Associate, Ebay (EPN) and/or Esty (Awin) Affiliate, I (we) earn from qualifying purchases.”


Wednesday, March 10, 2021

Olaplex N°0 Intensive Bond Building and N°3 Hair Perfector Review

I have tried dozens of top-rated hair care products over the years, including pricy salon and luxury brands, that have promised to restore the appearance of my aging, dry, dull, breakage-prone hair. While many have helped to some degree, the only ones so far that have truly delivered on that promise are Olaplex N°0 Intensive Bond Building Hair Treatment paired with Olaplex N°3 Hair Perfector. Thanks to the company’s patented bond building technology that repairs and strengthens damaged hair and improves their elasticity, using this dynamic duo just once a week prior to shampooing, conditioning, drying, and styling with my usual products has helped my tresses look nearly as smooth, shiny, soft, and frizz-free as they do after a salon visit.

Olaplex N°0 + N°3 The Perfect Pair for Damaged Hair
This dynamic duo from Olaplex is an at-home version of the famous salon treatment

Olaplex N°0 and N°3 Have Transformed My Damaged Hair

I have always worn my hair long. In my teens and twenties, my locks were smooth, silky, and frizz-free, even in hot and humid weather. After four decades of being color treated, bleached blonde for highlights, and styled with heated styling tools, however, the cumulative damage has left my tresses dull, dry, frizzy, and prone to breakage. I also have more and more gray hair, which is coarser, drier, more brittle, and more fragile, since the scalp’s sebaceous glands slow down their production of sebum (oil) that helps keep strands from drying out around the same time the number of cells producing melanin (pigment) diminishes. 

The Olaplex N°0 Intensive Bond Building Hair Treatment primer with Olaplex N°3 Hair Perfector made a remarkable difference in the appearance and texture of my mane after just one use, and I’m seeing even greater improvement with consistent weekly use, thanks to the cumulative repair and strengthening benefits of Olaplex’s bestselling product duo. My hair feels softer and silkier, and looks smoother and less frizzy, than it has in many years. It’s also stronger and less prone to breakage, and I’m quite happy to see fewer and fewer strands relocating from my head to my hairbrush!

The Patented, Bond-Building Molecule That Revolutionized Professional Hair Care Products and Services

Olaplex was born when the company’s founder teamed up with two UC Santa Barbara scientists, who discovered a new, single molecule, bis-aminopropyl diglycol dimaleate, that works from inside hair strands. Thanks to this groundbreaking active ingredient, their proprietary, patented active chemistry allows the Olaplex professional salon treatments and companion products for at-home maintenance to work at a molecular level from within the damaged strands. Unlike traditional salon treatments and products that temporarily mask the damage, Olaplex finds and repairs broken disulphide bonds to strengthen the hair and improve elasticity. 

The Olaplex standalone treatment is a salon service that pairs the company’s two flagship, professional-use-only products (Olaplex N°1 Bond Multiplier and N°2 Bond Perfector) to repair existing damage and improve the hair’s strength and elasticity. This proprietary, patented bond building treatment repairs all types of hair damage, whether caused by chemical factors (e.g., coloring, bleaching, perms, chemical relaxers, keratin treatments), thermal factors (e.g., blow dryers, curling irons, flat irons, hot rollers), mechanical factors (e.g., brushing, friction, tugging, pulling on wet hair), or environmental factors (e.g., sunlight/UV exposure, humidity, extremely hot or cold weather conditions, pollution). 

Salons can also add Olaplex to any type of lightening, bleaching, or coloring services (or use it as a perm prep) to mitigate their damaging effects and decrease the hair’s porosity. 

Top hair salons and celebrity stylists, as well as their famous clients (including Taylor Swift, Jennifer Lawrence, Drew Barrymore, Kim Kardashian, Kylie Jenner, and Julianne Hough, to name just a handful) have raved about Olaplex, fueling a social media buzz that turned the once-small startup from a dark horse into one of the global professional hair care market’s key players

The brand's innovative technology was so disruptive to the industry that L'Oréal, the world's largest beauty company, went so far as to essentially steal the formula for Olaplex N°1 (which contains the largest proportion of bis-aminopropyl diglycol dimaleate) and use the stolen intellectual property to develop competing products for three of its own professional hair care brands, L'Oréal Professionnel, Redken, and Matrix! L'Oréal was found guilty of misappropriation of trade secrets and patent infringement, and Olaplex was awarded $91 million in damages. The damages awarded were later amended to $53.5 million

Olaplex No.0 and Olaplex No.3 hair treatment products
Olaplex's "perfect pair" for repairing damaged hair!

N°0 + N°3: A "Lite" Consumer Version of the Professional Olaplex Standalone Treatment?

The professional products used in the Olaplex salon treatments, the N°1 Bond Multiplier and N°2 Bond Perfector, contain the highest concentrations of bis-aminopropyl diglycol dimaleate and deliver the maximum repair and strengthening benefits. 

The products I have been using, Olaplex N°0 Intensive Bond Building Hair Treatment and Olaplex N°3 Hair Perfector, are considered the "hero products" for at-home maintenance between salon treatments. Both products contain significantly more bis-aminopropyl diglycol dimaleate than any of the other consumer products (N°4 Bond Maintenance Shampoo, N°5 Bond Maintenance Conditioner, N°6 Bond Smoother, and N°7 Bonding Oil), which are more nice-to-haves rather than must-haves.

Olaplex introduced N°0, which it calls "a professional-inspired treatment that primes hair for deeper repair," has the highest dose of patented Olaplex technology in any of the take-home products. Designed to be used as "the first step in a two-part system with N°3 Hair Perfector," it rebuilds hair bonds, strengthens, and protects hair integrity. The N°0 "acts as an intensive repair booster, working in tandem [with N°3] to receive your most intense repair" and delivering "68% more repair & 3x stronger hair" after a single use when used together as a two-part system. According to the consumer website FAQ, "OLAPLEX technology works best when the product is wet in the hair. No.0 is a watery liquid that will dry quickly. Using No.3 over it keeps the hair damp, so both products can continue to work during the [at-home treatment] process."

Given the similarity of the product names and the characterization of N°0 as "a professional-inspired treatment that primes hair for deeper repair," I think this new primer was created to work with N°3 as a "lite" consumer version of the professional treatment, with N°0 and N°3 being used at home very similarly to the way N°1 Bond Multiplier and N°2 Bond Perfector, respectively, are used at the salon. 

Even Without a Professional Olaplex Salon Treatment, a Weekly at-Home N°0 + N°3 Two-Part Treatment Can Deliver Impressive Results

The primary purpose of doing a weekly Olaplex N°0 + N°3 two-step treatment at home may be to maintain the benefits of the professional treatments between salon visits. However, I and many others have found that even without having had an Olaplex salon treatment with the full-strength, professional products, the weekly at-home, two-step treatment can still produce unprecedented improvements in the smoothness, strength, and elasticity of our tresses. 

I would love to get the full, professional Olaplex salon treatment experience someday. In the meantime, however, I'm thrilled with how well these two consumer products perform together synergistically to repair, strengthen, de-frizz, and restore elasticity to my brittle, overstressed locks.

Note: Amazon Luxury Beauty is one of the authorized online retailer for Olaplex N°0, Olaplex N°3, and the rest of the brand's consumer products, which are also good for keeping healthy hair strong and resilient.


Olaplex No. 0 Intensive Bond Building Hair Treatment + No. 3 Hair Perfector Product Review written by Margaret Schindel

Read More Beauty Reviews From Our Contributors

Read More of My Product Reviews

Read More Product Reviews by Our Review This Reviews Contributors


Note: The author may receive a commission from purchases made using links found in this article. “As an Amazon Associate, Ebay (EPN) and/or Esty (Awin) Affiliate, I (we) earn from qualifying purchases.”


Wednesday, February 24, 2021

Super Comfortable and Flattering Yoga Pants for Women

I finally discovered the joy of wearing comfortable yoga pants and workout leggings as an alternative to jeans or pants after beginning a successful ketogenic diet journey that culminated in a nearly 60–pound weight loss. After purchasing several different styles and sizes of yoga pants over the past 21 months, there have been three (so far) that I can recommend highly, each for different reasons. The pair I've chosen to feature in this product review, the IUGA high-waisted workout leggings, are by far the most comfortable yoga pants for women I've tried. 

They not only feel wonderful and are available in a choice of several, they're also flattering, even on those of us who aren't blessed with model-perfect bodies. 

IUGA yoga pants - The Most Comfortable Yoga Pants, Super Soft Fabric That Doesn't Bag or Bind for a Flattering Fit
There's no bunching, bagging, or binding with these ultra-soft, ultra-comfy workout leggings! 

Yoga Pants and Workout Leggings Have Become Wardrobe Staples

The fashion experts at Vogue magazine just released this year's Vogue Wardrobe Essentials Guide. and black workout leggings are one of the editors' 34 wardrobe staples for 2021. (Who knew?)

Originally, yoga pants and workout leggings were made specifically for yoga practice and working out, respectively, and had different fabric and design features. But as they have evolved from fitness-only to fashion, those distinctions have gradually eroded, and now the terms "yoga pants" and "leggings" are often used either together or interchangeably in product descriptions.

Yoga Pants Provide Greater Comfort and Freedom of Movement Than Pants or Jeans

My first time buying a pair of yoga pants wasn't until shortly after my 65th birthday, when I began a health-driven weight loss journey and switched to a clean, ketogenic approach to eating. I completely eliminated sugars, grains, and highly processed foods from my diet, and between May 2019 and August 2020, I lost 59 pounds and went from a size 16-18 to a size 6-8. Every two to three months (even less, at the beginning), I was dropping a size, and boxing up my almost-new clothing to donate. Having to buy them again in a smaller size every few months meant limiting my clothing purchases to a few, basic wardrobe staples—underwear, jeans, black pants, shorts, and a couple of tops—until I reached my weight loss goal.

As you may have noticed, neither yoga pants nor leggings were on my initial list of wardrobe staples. I had always associated them with much younger, slimmer women and girls, with taut, toned bodies and cute figures, so they weren't even on my radar at that point! However, my attitude toward this type of clothing changed significantly once I accepted that my commitment to healthier living would require becoming more active, in addition to nourishing my body better.  

One of the most important benefits of losing weight and follow a clean, ketogenic diet was the amelioration, and eventual elimination, of the chronic, acute pain in my knees, hips, back, and feet that I had been living with for decades. Being able to go for a walk or a Segway ride with my husband  without being in agony was not just liberating, but life-changing! As I was searching online for a new, smaller pair of classic, high-waisted, basic black pants (which I wore more often than anything else I owned), I was surprised to see more high-waisted leggings and yoga pants than regular pants in the search results. It occurred to me that it might be a good idea to expand my list of wardrobe staples to include a couple of pieces of activewear, to support and encourage my efforts to make physical activity part of my new, healthy lifestyle. In fact, it might even be time for me to consider a pair of workout leggings a try.

Of course, I could wear them...but should I? Would it be possible for yoga pants to look attractive (or, at least, not unattractive) and age-appropriate, on this out-of-shape senior? I debated with myself for a while, but finally acknowledged that I couldn't see myself objectively, and decided to ask my husband what he thought, knowing he would give me his honest opinion. He encouraged me to order a pair and try them on. 

When I did, I was surprised and delighted at his reaction, which was more positive than I could have imagined! You could have knocked me down with a feather. I also was thrilled to discover how much more comfortable and less restrictive those yoga pants felt, compared to the jeans and tailored pants I had always worn, Before long, I found myself wearing them several days a week, not only for walks and Segway rides, but also for routine, everyday activities, like working, reading, cooking, or watching a movie. They quickly went from being completely off my radar to becoming a staple in my new wardrobe. 

Woman wearing IUGA yoga pants and stretching her leg
I'm pulling my hamstring and calf muscles together as far as I can, the fabric doesn't bind or cut into them, it simply conforms to the compression I'm creating

Since that first pair, I have purchased other pairs from different brands and with slightly different features, and my IUGA high-waisted workout leggings have been the most comfortable yoga pants I've owned to date. 

What I Love Most About My IUGA High-Waisted Leggings

Ultra-Soft, Opaque Fabric

  • The first thing I noticed about these yoga pants was the extremely soft, silky, luxurious fabric, which gave these a totally different feel than any of my other leggings. The best word I can think of to describe it is "touchable," with a lovely, tactile quality similar to that of microfiber. 
  • The "non see through" fabric is completely opaque. 

Flattering Fit

Woman wearing IUGA yoga pants
  • The fiber content blends polyester for shape retention with spandex for excellent stretch and recovery, as well as abrasion-resistance.*
  • The 4-way stretch provides good compression and support. 
  • The high-waisted silhouette, seamed front and back yoke construction, and increased compression around the lower torso are designed to "contour your curves" and "pull in your tum and bum." 
  • They are made in six sizes, ranging from XS to XXL, and there's a size chart to help you determine which one will fit you best. (I followed the size chart when I ordered mine, and they fit me perfectly.)
* Note: The description on the Amazon product page states that the fiber content of these workout leggings is 80% polyester and 20% spandex. However, the fiber content printed inside my light blue IUGA yoga pants is 87% polyester and 13% spandex. Sometimes, a product's fiber content may vary slightly different from one color to another, which is one possible explanation for the discrepancy, but your guess is as good as mine.

Extremely Comfortable

  • The smooth, soft, supple polyester and spandex fabric also wicks moisture away from the body to keep you dry and comfortable while working out.
  • These yoga pants provide less compression around the the legs than around the lower torso, so they don't bind or cut into your legs, but also enough to remain conformed to your legs and prevent the fabric from bunching or sagging as you move, bend, and stretch. 

Waistband Pocket

Built-in pocket in the waistband of the IUGA workout leggings/yoga pants
  • The built-in pocket is completely hidden, and remains undetectable unless or until you decide to place something inside it.
  • Although I haven't had to use it very often, I'd guess it could easily hold a couple of keys, a lip balm, and a few tissues, for example.  
    • According to the product description, "You will be able to stash your phones and keys safely." Keys? Probably. But unless your phone is quite small, I wouldn't consider the waistband pocket a secure place to stash it. 
  • Access is easy and convenient.

Excellent Quality

  • I purchased my IUGA High Waisted Leggings three months ago, and I machine wash and then hang them over a clothes drying rack to dry. After having laundered them quite a few times so far, there appears to have been no fading, pilling, or changes in the fit or performance of these yoga pants. 
  • At the time this post was published, they had more than 5,400 5-star ratings from Amazon customers.

A Choice of Colors and Lengths

  • Currently, these yoga pants come in black, dark coffee (dark brown), dark violet, dark blue, gray, light blue, pale red violet, carnation purple (lilac), maroon, and tranquil green. 
    • Note: The ones I own are the "light blue" shade. In real life, the color is a bit less aqua than it appears in the Amazon product page photos.  
  • Most of the colors (but not all) are offered in both regular and capri lengths. 

Very Affordable

  • These IUGA workout leggings retail for $24.95 and, at the time of publishing, were priced at $19.95 on Amazon with Prime free one-day shipping and free returns for Amazon Prime members.

    Super Comfortable and Flattering Yoga Pants for Women review by Margaret Schindel

    Read More of My Product Reviews

    Read More Product Reviews by Our Review This Reviews Contributors


    Note: The author may receive a commission from purchases made using links found in this article. “As an Amazon Associate, Ebay (EPN) and/or Esty (Awin) Affiliate, I (we) earn from qualifying purchases.”


    Wednesday, February 10, 2021

    Open Jars Easily With Jar Heads Rubber Jar Opener Gripper Pads

    I have always found opening jars with very tight lids to be a challenge, since I have fairly small hands and limited grip strength. Now that I'm over 65 and my hands are weaker, that task evolved from a challenge into a struggle, until I discovered Jar Heads rubber jar opener gripper pads. They make opening jars significantly easier for anyone, and are especially helpful for someone with small, weak, or arthritic hands. They're also thoughtful, practical gifts for seniors. 

    Here is my product review of these terrific Jar Heads jar opener rubber grips, which have become kitchen essentials at our house.

    Jar Heads non-slip textured rubber grip Jar Openers - Made in the USA from 100% post-consumer recycled tires

    Finding the Best Jar Opener For People With Limited Grip Strength or Arthritis Can Be Hard

    There are many types of jar opening tools and gadgets on the market. Many, if not most, claim to be good for seniors and people with weak hands or arthritis. Nearly all of them have mostly 5-star ratings and glowing reviews on Amazon. (It's really unfortunate that Amazon's customer ratings and reviews system seems to be easily "gamed," and isn't nearly as helpful in making purchasing decisions as it used to be.) So, despite having more experience than most with online product research and comparison shopping, I found that picking out a jar opener that had a high probability of living up to those claims was a bit like playing roulette. 

    So, if you are looking for an extremely effective jar opener that not only would be a welcome addition to any kitchen, but could also be a blessing for someone with small or weak hands, arthritis, or limited grip strength, I hope to spare you considerable time and effort by summarizing the most popular types of jar openers available and sharing some of the products I purchased, or seriously considered, before I discovered the awesome Jar Heads rubber jar gripper pads that I have been using, and loving!

    The Most Popular Types of Jar Openers and Rubber Jar Grips

    Traditional Handheld Jar Openers

    In my experience, most traditional jar openers and screw-top bottle openers are only moderately effective, and often quite frustrating. 

    • None of the ones without teeth that I've tried over the years, especially the strap wrench (AKA grip wrench or loop wrench) types, have worked well on very tightly sealed screw-top bottles or glass jars with metal lids.
    • I've found that, for the most part, jar openers with sharp, serrated teeth (like the older version of this OXO Good Grips Jar Opener I've owned for many years) can be more effective than the "toothless" models at breaking the vacuum seals on new, unopened glass food jars. Unfortunately, they often end up skidding around the rim of those stubborn, firmly stuck, tightly sealed metal lids, rather than biting into and gripping the metal securely as you twist the lid counterclockwise. Consequently, the teeth can score a deep, sharp-edged gash around the perimeter of the pugnacious jar lid, whether or not the jaws successfully break the seal and loosen the lid. Sometimes I have had to wrap the sides of those lids with flexible, nonwoven, self-adhesive bandage strips to protect our hands from the sharp, jagged-edged score lines around the rim when we subsequently open or close the jar.
    • All these types of handheld jar openers require not only grip strength in both hands (the one that holds the jar and the one that turns the lid), but also sufficient leverage to twist the jar and lid in opposite directions. 

    Mounted, Under-Cabinet Jar Openers

    Two of the issues with traditional handheld jar lid and screw-top bottle openers are weak grip strength and lack of leverage. A jar opener that is mounted securely to the underside of a cabinet above the kitchen counter(s) and has a V-shaped area with large, serrated metal teeth on one side of the "V," such as the popular and highly rated EZ Off Jar Opener, can help with both these issues, and also accommodate a wide range of bottle cap and jar lid diameters. It enables you to grip the jar more securely with both hands as you turn it counterclockwise, and holds the lid firmly in place as you twist the container.

    When trying to open very tightly sealed jars, however, the large, serrated teeth could bite into the sides of the metal lids deeply enough to cut grooves or gouges with sharp, jagged metal edges.

    Automatic Electric Jar Openers

    Many women (especially those who have limited grip strength), seniors, and people who suffer from arthritis are fans of automatic electric jar openers, and find that these (theoretically) hands-free electric openers give them a greater sense of independence in their daily lives. They can be quite effective at opening straight-sided glass jars (ideally without rounded "shoulders" at the top) that have tightly sealed, hard-to-open, metal screw-top lids.

    However, these kitchen gadgets are more expensive than most manual bottle or jar openers, and have some limitations that manual openers don't. 

    • These automated openers should not be used with plastic jars or on plastic lids. 
    • While it is possible to use this type of automatic opener with tapered glass jars, doing so requires placing a hand on top of the gadget and maintaining firm downward pressure to prevent the plastic arms from slipping. Obviously, that isn't optimal, particularly for someone with arthritic or weak hands.
    • If one of these electric jar openers malfunctions, or just slips off a glass jar with "sloping shoulders" (potentially knocking it over, and perhaps causing it to break), they don't turn themselves off automatically, which I consider a safety risk. 
    • This type of opener operates fairly slowly, and it is important to wait until the entire automated cycle is complete before removing both the gadget and the newly-loosened bottle or jar lid. For someone who either lacks patience or needs to prepare a meal in a hurry may find this wait frustrating, or even be tempted to try to stop or remove their automatic electric jar opener prematurely. If they remove it during the cycle, the opener will continue to operate until the cycle completes, and stopping it mid-cycle would require removing the batteries while it was still running, which would be dangerous. 
    • They are wider and bulkier than most other types of jar openers, and may not fit in a crowded kitchen tools drawer.  
    • Most run on two AA batteries, which will need to be replaced for as long as the product remains in use. 
    Despite those limitations, these electric jar openers are a wonderful option for anyone who is physically unable to grip both a jar and its lid securely and twist it open with the aid of a handheld or under-cabinet jar opener or rubber gripper pads. As long as they can press the enormous button on the top of this tool to initiate the cycle, the process of opening a jar is fully automated and hands-free, except for jars that are tapered or have rounded "shoulders." (As I mentioned, opening those types of jars requires placing a hand on top of the device and holding it firmly in place throughout the entire automated cycle, to prevent it from slipping off the lid, which makes that a hands-on vs. a hands-free operation.)

    Rubber Jar Openers AKA Rubber Jar Grips, Jar Opener Rubber Grips

    I would never had considered buying a rubber jar opener, or even looked at the terrific Jar Heads rubber jar opener gripper pads, if my husband and I hadn't received one as a promotional gift from our favorite local barbecue restaurant many years ago, when we lived in Boston's Back Bay neighborhood. It was a large, pig-shaped cutout made from a thin, pink, textured rubber sheet, emblazoned on one side with the restaurant's whimsical logo and its address, phone number, and website in bold, black permanent ink. At the time, we thought it was a cute idea, but nearly threw it out. How could this flimsy piece of rubber sheet work better than a traditional jar opener with sharp, serrated, stainless steel jaws? 

    Fortunately, we never got around to tossing it. One day, on a whim, I decided to give it a try. I was astonished at how much faster and easier I could open a brand new jam jar with an extremely tight lid by using this silly, pig-shaped, subtly textured rubber "rag" than with any of the traditional handheld jar openers I had owned over the years. When my husband came home from an errand, I was excited to show him how much more securely I was able to maintain a grip on a stubborn lid and twist it open successfully with Porky's help, compared to my usual struggles with hard-to-open jars. Seeing how well it worked for me piqued his curiosity, and he wanted to experience the difference  between using this thin, rubber jar opener pad and using our traditional model, with stainless steel jaws with large, sharp teeth on one of the sides. Even though my husband is very strong, has a powerful grip, and doesn't need the help of a jar opener most of the time, he also was impressed by Porky's performance. He also liked the idea of using this simple rubber jar gripper pad to help him subdue the occasional extra-defiant lid and break the vacuum seal without having to rely solely on brute force. 

    It's ironic that this mildly amusing, but seemingly worthless piece of thin, floppy, lightly textured rubber sheet, which we had nearly thrown in the trash bin, turned out to be by far the most useful, memorable, and appreciated promotional item either of us has ever received from any business. In addition, my husband and I soon figured out that if we could get two of these rubber jar openers, using one in each hand would strengthen my grip on the jars as well as the lids and increase my leverage, so that I wouldn't need as much strength or have to use as much force to open even stubborn jars with tightly sealed lids. 

    At the time, our crazy work schedules and pressing family health issues left us with neither the time or energy to pursue the possibility of acquiring a second Porky. Then, after several years of loyal service, poor Porky met his demise in the line of duty, when the thin rubber sheet tore as grappled with one recalcitrant jar lid too many. Since we were no longer living in the city, I decided to call the barbecue restaurant and ask whether they still had any of their old promotional jar opener rubber grips and, if so, whether they would let me purchase half a dozen (two for immediate use and four more as spares). That's how I learned, to my dismay, that the restaurant had closed the previous year.

    It was it was time to begin the search for a worthy successor to our beloved porcine rubber jar opener. 

    I looked high and low for something similar, but there wasn't much to choose from at the time. I purchased a pair of white, flower-shaped, jar opener rubber grip pads, currently sold as NORPRO 597 Non-Slip Rubber Jar Openers, so I could use one in each hand to help me hold the glass jar securely while I twisted the lid open. I also liked the wider, 5.5-inch diameter of this style, and the rubber was thicker and, presumably, more durable. Unfortunately, that thickness made the rubber much stiffer and less pliable, so it couldn't conform to the lid, and the surface was smooth and almost slick, all of which made it harder to get a good grip with these, despite the "non-slip" marketing claim, 

    A few years later, I found two more possible contenders. One was a set of natural rubber jar openers with an open waffle pattern similar to foam shelf liner, which also had a wider, 6-inch diameter. And, since they came in a set of four, I would have one to hold the jar, one to grip the lid, and two extras for backup. However, I worried whether the soft foam material and open weave might make them less grippy or less durable than I needed (or both), and in reading through the customer reviews, I found several that mentioned those issues. 

    The other contender, the Prepworks by Progressive Jar Grips Multi-Purpose Lid Openers, looked very promising. This set of three rubber jar openers includes one teal blue, square grip pad approximately 5" wide, made from thin, flexible, lightly textured rubber sheet that looks to be very similar in weight, thickness, and flexibility to that the jar opener we had; a somewhat smaller green round sheet made of a slightly thinner material, and a red, 2" wide, rubber grip shaped like a truncated cone for gripping bottle lids, and made thicker and, presumably, somewhat sturdier material. Unfortunately, as I read through the numerous reviews, many of the customers who gave this set 5-star ratings did so primarily because of the bottle opener. People seems much less enthusiastic about the two rubber jar openers, which some considered too flimsy and likely to tear.

    Jar Heads Rubber Jar Opener Gripper Pads for the Win!

    When I felt that my search for Porky's replacement had reached the point of diminishing return, I decided to stop looking for additional candidates and go with options I might have missed, order a set of Jar Heads rubber jar openers, and cross my fingers that they would actually live up to their claims. 

    Lady Luck must have been smiling on me, since the first time I used my new Jar Heads rubber jar opener grippers, I knew at once that I had hit the product roulette jackpot with these well made, easy to use kitchen gadgets!

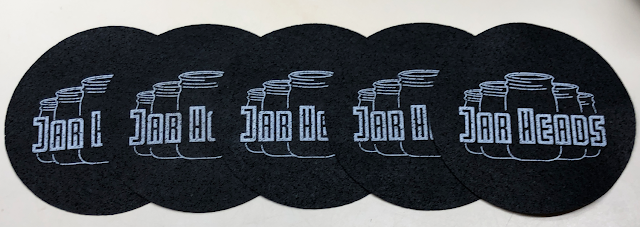
    Row of five Jar Heads rubber jar opener gripper pads

    Here are the main attributes, features, and benefits that led me to choose Jar Heads Rubber Jar Opener Grippers over the other rubber jar openers on my "short list" of contenders. 

    Thin and Flexible Enough to Conform to Jars, Bottles, and Lids, Yet Tough Enough to Hold Up Under Pressure, and Over Time

    • Even though these jar opener pads are only about 1/16" thick, they're also sturdy and substantial.
    • Made from recycled rubber tires, which are designed to withstand much more abuse than twisting open bottle and jar lids! 
    • After 10 months of frequent use, and being squeezed into a drawer crammed with kitchen tools and kitchen gadgets in between uses, all five of our Jar Heads still look, feel and perform the same as they did when I first opened the package. 

    Made From 100% Post-Consumer Recycled Tires

    • Uses sustainable, eco-friendly, recycled material and manufacturing practices.

    Superior Grip Strength Lives up to "Non-Slip" and "Works Great for Weak Hands,...Seniors With Arthritis and Children" Claims 

    • While nearly every rubber jar opener product’s marketing makes these claims, few live up to them.
    • By contrast, Jar Heads take advantage of the powerful grip strength that has been engineered into the rubber tires from which these jar opener gripper pads are made, which also gives them exceptional durability

    Jar Heads rubber jar opener gripper pads next to jar and bottle
    Wide Enough to Grip Large Jars, Flexible Enough to Grip Small Bottles

    • The 5" diameter make these rubber discs are wide enough to grab onto even oversized pickle jars or  party-sizes pretzels sold in bulk at warehouse stores like Costco or Sam's Club.
    • They are also thin and flexible enough to grip a small, slender hot sauce bottle and its extremely small screw-on lid. 

    Made in the USA

    • Buying products made in the USA supports American companies, workers, and their families.  

    Sold in Sets of Five

    • That's enough to share, or use in pairs, and still have spares!

    Strong, High-Quality Jar Openers for $2.50 Apiece

    • At the time this post was published, a 5-pack of Jar Heads was selling on Amazon for $12.50, with free shipping for Amazon Prime members. That works out to just $2.50 each for these excellent jar opener rubber grips! 
    • At that low price, you could give these out as stocking stuffers to everyone on your holiday gift list, or as small "just because I'm thinking of you" gifts any time of year.

    30-Day, 100% Money-Back Satisfaction Guarantee

    • I respect and prefer to buy from companies that have enough confidence in the quality and performance of what they make or sell, and have a strong enough commitment to their customers to stand behind their products with a risk-free, 100% money-back satisfaction guarantee. 

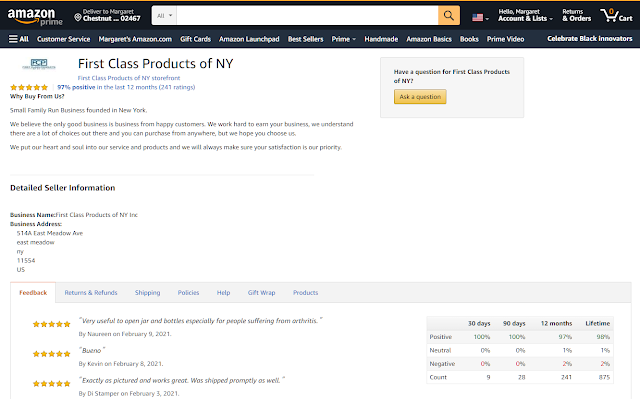
      Jar Heads are sold by First Class Products of NY, which describes itself as a "Small Family Run Business founded in New York" on its Amazon Seller Profile Page, where you can contact them directly with a question or concern, and also read the overwhelmingly positive seller feedback from their Amazon customers. 

    Screenshot of Amazon seller profile for Jar Heads
    A screenshot of the seller's Amazon Seller Profile page 

    Jar Heads Make Great Gifts for Seniors

    Or Anyone With Small or Weak Hands or Limited Grip Strength

    • Gives them more confidence to open jars and bottles by reducing the legitimate fear of losing their grip on glass containers and knocking over or dropping them, potentially causing them to break into dangerous, sharp glass pieces and shards.
    • Reduces the frustration and embarrassment of needing to rely on someone else to take care of this routine task for them, and waiting for someone to be available to help.

    A Helpful, Inexpensive Aid That Makes Anyone, Regardless of Their Grip Strength

    • Even people who have strong enough hands to loosen tight lids or break the vacuum seals on new, unopened bottles and jars will appreciate how much less effort it takes to open them with the help of these Jar Heads rubber grip pads.


    Jar Heads Rubber Jar Opener Gripper Pads product review by Margaret Schindel

    Read More of My Product Reviews

    Read More Product Reviews by Our Review This Reviews Contributors


    Note: The author may receive a commission from purchases made using links found in this article. “As an Amazon Associate, Ebay (EPN) and/or Esty (Awin) Affiliate, I (we) earn from qualifying purchases.”


    Most Recent Reviews on Review This Reviews


    Search for Reviews by Subject, Author or Title

    The Review This Reviews Contributors


    SylvestermouseSylvestermouseDawn Rae BDawn Rae BMbgPhotoMbgPhotoBrite-IdeasBrite-IdeasWednesday ElfWednesday ElfOlivia MorrisOlivia MorrisTreasures by BrendaTreasures by BrendaThe Savvy AgeThe Savvy AgeMargaret SchindelMargaret SchindelRaintree AnnieRaintree AnnieLou16Lou16Sam MonacoSam MonacoTracey BoyerTracey BoyerRenaissance WomanRenaissance WomanBarbRadBarbRadBev OwensBev OwensBuckHawkBuckHawkDecorating for EventsDecorating for EventsHeather426Heather426Coletta TeskeColetta TeskeMissMerFaeryMissMerFaeryMickie_GMickie_G


    Review This Reviews is Dedicated to the Memory of Our Beloved Friend and Fellow Contributor

    Susan DeppnerSusan Deppner

    We may be apart, but
    You Are Not Forgotten


    “As an Amazon Associate, Ebay (EPN) and or Etsy (Awin) Affiliate, I (we) earn from purchases.” Disclosure Statement

    X