|
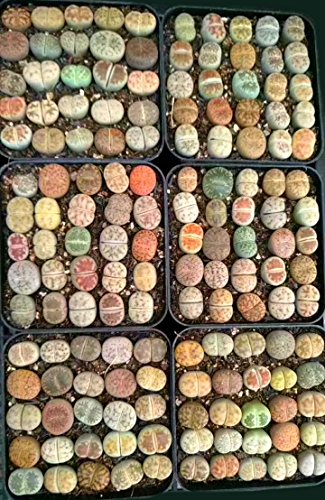
| My Little Living Stone Plant |
I bought a living stone flower or Lithop a few months ago and it is so beautiful! I used to grow these as a child from little plants and from seeds, but most of my adult life since I got my own garden has concentrated on outdoor gardening.
However last winter and this winter I have felt frustrated at not being able to get out in the garden due to poor weather conditions and leaned more towards learning about houseplants -so that I can still garden - even in winter :)
I now love my houseplants as much as my outdoor plants. I take great joy in seeing them grow and I care for and propagate them. However, a return to living stones is a new venture for me. So I am relearning about these wonderful, beautiful, funny little plants.

|
| Lithops Plant |
Why Are Lithops Called Living Stones?
The name Lithops is derived from the Ancient Greek λίθος (lithos), "stone," and ὄψ (ops), meaning "face". As a child, I always knew them as Living Stone Flowers, because well they look like little stones!
They are amazing to me as they have developed a clever strategy of looking like stones in their natural environment of Southern Africa in order to not be eaten by the local wildlife!
They can be hard to see in their native environment as they disguise themselves so effectively which allows this very vulnerable plant, with no defenses to survive and thrive. I find this fascinating and clever!
Growing Conditions For Lithrops
Where living stones grow in the wild in South Africa they receive very little rainfall, often less than two inches a month across the whole year.
This is really important to know because as gardeners we must try to emulate the same or similar conditions a plant would have had in its natural environment. This for me means curbing my natural urge to get out the watering can and being extremely careful not to overwater!
For plants I grow in the garden I always try to grow Right Plant, Right Place, meaning to grow plants that will be happy in my garden conditions and not forcing an acid-loving plant in an alkaline situation or a bog plant in a dry situation.
However, when it comes to houseplants they can never be in a truly natural environment, so we must create the correct environment and give them all they need.
Caring For Lithrops
So what does this mean for us trying to grow and appreciate these fascinating little plants? Here are some aspects to bear in mind.
They do seem to be happier in the company of other Lithops which is of course how they would grow in the wild, so it is best to build up a nice group of them in a container.
The fact they need very low watering requirements does not mean we do not need to water at all. Drought will also hurt these little plants. They simply need a correct watering regime to keep them happy.
Living Stone Flowers must above all else have free-draining soil. This means soil that when you water it will pour through drainage holes quickly and not get heavy, soggy or waterlogged.
You can buy special soil for Lithops which will give it the perfect conditions for growing, or if you can't get that, mix up the compost you have with lots of sand and grit.
I like to top dress with vermiculite or perlite so the leaves do not get splashed with soil. It suppresses weeds, assists drainage and looks good.
The plant must never be in standing water. So if you keep a saucer or container underneath please check that it is always completely dry.
Any potting on should be done around May but is only necessary if the plant is overcrowded. Otherwise, it is best to leave it alone.
Living Stones In Sun And Shade
These little plants require at least five hours of direct but not scorching sunlight each day if possible. Sometimes in my climate in autumn and winter, this is a struggle. However, my little one has survived the winter on much less sunlight than that!
The best conditions are sunlight in the morning and shade in the afternoon. So if you have a position in your home like that it's ideal. Otherwise, if you keep Lithops in a sunny position all day, do provide extra shade in the afternoon. This can be as basic as a piece of folded cardboard, or maybe a drinks umbrella if you like a fun element!
These little plants, just like us can be badly sunburned! Think of yourself sitting in the scorching sun unable to move out the way. It is unbearable for these little plants and can be devastating.
Too much shade is always preferable to too much sun. You will need to monitor yours while you check the correct position in your house. If you ever see whitish scar tissue this is a serious issue and the plant may die. You must get it out of the sun as soon as possible for any chance of recovery.
Watering Lithrops
If we water Lithrops like many other house plants we will undoubtedly kill it quite quickly. We have to remember in the wild natural conditions it receives a minute amount of rainfall and is uniquely adapted to that. Getting the watering right is key to the well-being of this plant.
So all they require is very light watering in late Spring allowing the soil to dry out totally in between. During the summer we do not need to water at all.
By early autumn/fall when they begin growth again, we can start doing deep watering allowing the water to drain right through and for the soil to dry completely in-between times.
Watering over winter is minimal, maybe a very light misting once a month.
When watering I now use a small watering can, or a mister is very good. In fact, using a mister will help those of us who are tempted to overwater! You will see in the photo below that one leaf has been damaged through my overzealous watering, which I remedied very quickly.
If in doubt always water less than you think you should.

|
| A little too much watering left one Lithops leaf damaged |
The Question of Lithrop Flowers.
We need to be patient gardeners for stone flowers. The plant may need to be mature before it will flower.
I love my little plant as it is and flowers are a bonus, but if you are eager for flowers right now do ask how old the plant is when you buy.
If you must have flowers it might be an idea to buy when it is in flower so you can be certain. To encourage flowering I have learned we should add a diluted cactus fertilizer in spring when we start watering again.
Growing Lithops From Seed
Online you may find it easier to buy Lithops in the form of seeds. It is amazing to watch them grow into little plants. You will need to be very patient though. If you buy from a good seller then you should expect most but maybe not all of the seeds to germinate and you will need to take care of them and follow the instructions carefully.
The seeds are really tiny, even dust like in some cases so do not be disappointed. Handle carefully with a toothpick or tweezers and plant ideally in a very sandy-based, light, medium. This should be kept just moist but not damp for several months as the seeds germinate into tiny plants. The caution against overwatering still stands.
Germination should in general take one to three weeks. I take extreme joy in seeing any seeds germinate into those tiny shoots. When it is a plant like a Lithops it is even more exciting!! Once they are little plants you will be so proud!
There is no doubt that growing from seed requires more skill, attention and patience than buying a full-grown plant. However, anyone can do this and if you love to grow plants this can be a great way to have more mini plants and the pleasure of knowing them from day one.
If you are interested in learning more about Lithops there are some good and interesting books on the subject.


Living With Lithops as A Houseplant
I only have one little Lithrop so far in a small pot but I am keen to build up my collection with a mix of seeds and young plants and I feel in a year or two I will have a wonderful display!
I love them best when there is a group of Lithops in a shallow bowl at waist height or above which shows them off at their best and allows us to get close to them. I love the look of them and they are so soft to the touch as well. Now people are never struggling to find a gift for me!
Lithops are perfect little plants, very little trouble really but they do require just enough garden know-how and the willingness to learn and experiment a little with them to make you feel you are a gardener!
Stone flowers are great plants if you do not have much space inside or do not like large houseplants or simply as a fascinating unusual addition to your houseplant collection. From my research, the best online sellers seem to sell out quickly as Lithops are becoming increasingly popular. So do look around and keep checking back if they have sold out.
If you do not have any outside space they are perfect little plants to enable you to develop quite a collection and satisfy your need for a garden and exercise your skills as a gardener. I am certainly still learning a lot about them! I hope if you decide Lithops are interesting, you too enjoy your little "stone flowers".
Here Are More Plant Reviews
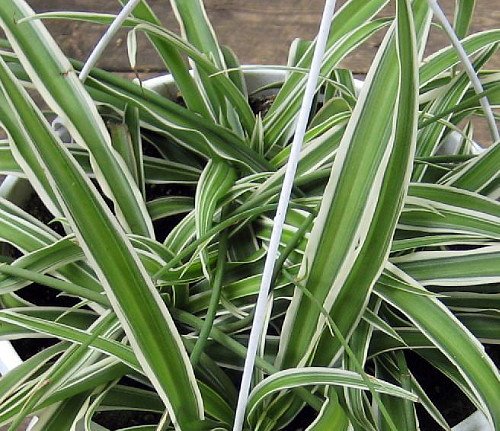
The Spider Plant As A Houseplant Reviewed