One of my husband's holiday gift wish list items this year was a coffee maker
that he could use to brew just one or two cups of really good java. He had
been looking online at small-batch coffee makers that brew and hadn't found a
reasonably priced one that had mostly good reviews. After doing my own due
diligence on his behalf, I chose to buy him a Ninja CE251 Programmable Brewer
with a 12-cup carafe and a small batch setting.
It makes delicious coffee in a choice of two brew strengths, brews at an
appropriately hot water temperature for great flavor without bitterness, can
be programmed the night before (so you wake up to the smell and taste of
freshly brewed coffee!) and comes with a permanent gold-tone filter that you
can use instead of disposable paper filters, if you prefer. It's also easy to
fill and clean.
Most importantly, unlike most of the other coffee brewers I reviewed during my
research, this Ninja programmable coffee maker with a superior-performing
small batch function makes just one to four ups of Joe that's just as rich,
hot and flavorful as when you're brewing a full carafe for up to 12
cups.
Whether you want to brew a full pot for several people or a party crowd, or
prefer to brew just one or two (or three or four) cups for yourself and maybe
someone else, you'll love this
Ninja CE251 Programmable Brewer with small batch settings.
|
|
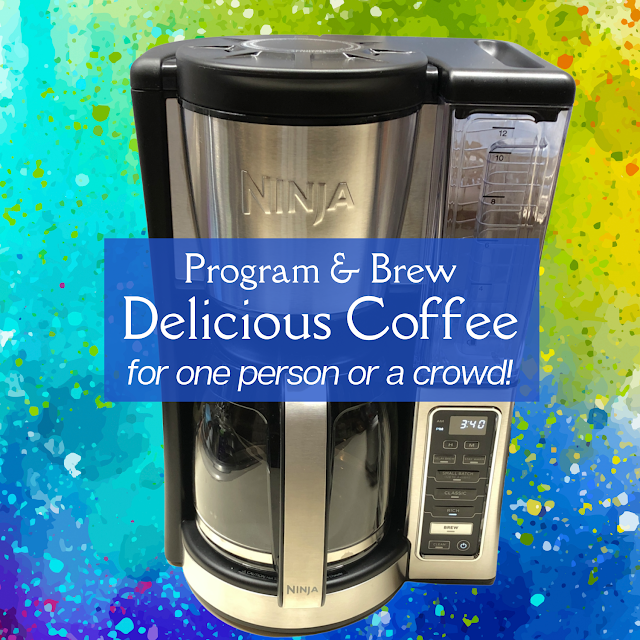
Ninja CE251 Programmable Brewer
|
You Don't Need to Be a Gourmet to Appreciate Good Quality, Hot, Freshly
Brewed Coffee
I grew up with a dad who was a coffee connoisseur (dare I say coffee snob?).
He was fussy about his beans, insisted on buying them freshly roasted and
grinding them just before brewing them in a drip coffeemaker (although, late
in life, he eventually replaced his classic Chemex drip carafe with a
programmable coffee maker) and refused to drink coffee that had been brewed
more than 30 minutes earlier and wasn't practically scalding hot.
To dad's dismay, for most of my life I drank coffee only with sugar and
cream. Even with that dilution, it tended to upset my stomach, so I became
primarily a tea drinker. Even so, however, dad did instill in me an
appreciation for freshly brewed coffee made from freshly ground beans over
coffee that was made with lesser-quality, stale beans or has been sitting in
the carafe on a warmer for an extended period of time.
Then, in 2019, after I adopted a ketogenic diet that helped me lose nearly 60 pounds, my husband and I read "biohacker" Dave Asprey's bestselling book The Bulletproof Diet and I started drinking "bulletproof coffee" most weekday mornings,
using Asprey's official Bulletproof coffee recipe made with freshly brewed Bulletproof brand coffee
frothed in a blender with grass-fed ghee (clarified butter) and
Bulletproof Brain Octane C8 MCT oil. The fat keeps me full and satisfied for hours, and the C8 MCT oil not
only helps burn fat as part of a very low carb or ketogenic diet but also
helps keep my brain and attention more sharp and focused while I'm working,
while the caffeine helps keep me awake and alert. This mixture is so smooth
and creamy and the low acidity of the Bulletproof coffee beans agrees with my
digestive system far better than ordinary coffee beans, so I no longer need to
add cream. Instead of sugar, I sweeten it with one of my favorite keto
diet-friendly sugar replacements, such as BochaSweet granulated or Besti monk
fruit and allulose blend granulated sweetener.
My husband also has been drinking bulletproof coffee twice a day, a cup first
thing in the morning and a second cup mid-afternoon. He finds that it helps
tremendously with maintaining his mental acuity, focus and energy during his
long and stressful workdays without making him feel wired and jittery, which
regular coffee always does but Bulletproof brand coffee does not.
|
|
The Ninja CE251 Programmable Coffee Maker has an integrated coffee
measuring scoop
|
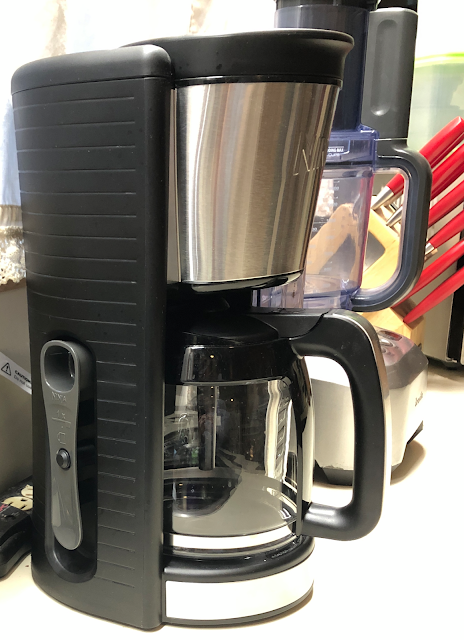
Don't Brew More Coffee Than You Need
Before I bought my husband his new Ninja CE251 Programmable Brewer, we were
using my dad's 20-year-old coffee maker, which also had a 12-cup glass carafe
but no small batch settings. Using it to make a small batch of coffee (4 cups
or less) produced terrible coffee, so he would brew a full carafe's worth.
Unfortunately, that was also the case for most of the coffee makers with
small-batch settings I looked at that didn't cost a fortune, as well as the
single-serve coffee makers that weren't inordinately expensive and didn't use
K-cups or other coffee pods, which he have stopped using as we are trying try
to minimize our consumption of single-use plastic disposable items.
Good Coffee Is Too Expensive to Waste
Good quality coffee, including sustainably grown, Rainforest Alliance Certified coffee beans that have been tested for mycotoxins (harmful mold
toxins), like those in Bulletproof brand coffee, is expensive and a shame to
waste.
So, after brewing a carafe of it, my husband would pour out a cup of the fresh
brew for himself (and one for me, if I was having some that morning), then let
the rest cool in the carafe to room temperature, pour it into a couple of
large hydration bottles and refrigerate them. In the early afternoon, he would
decant and reheat a cup of the refrigerated Joe in the microwave it before
blending it with grass-fed ghee and MCT oil to make his second Bulletproof
coffee of the day.
Coffee Should Be Consumed as Soon as Possible After Brewing
Unfortunately, the coffee oils that give the brew its rich flavor and aroma
oxidize when they are exposed to oxygen, both in the air and in the water used
to brew it, especially when heated. So, the longer the coffee sits after you
brew it, the more the oils oxidize, making the beverage taste more bitter and
smell stale. So, the sooner you drink your coffee after brewing it, the
better!
That's another reason not to make more coffee than you plan to drink in the
next 30-60 minutes.
|
|
The 60-oz. removable water reservoir is easy to bring to the sink to
fill
|
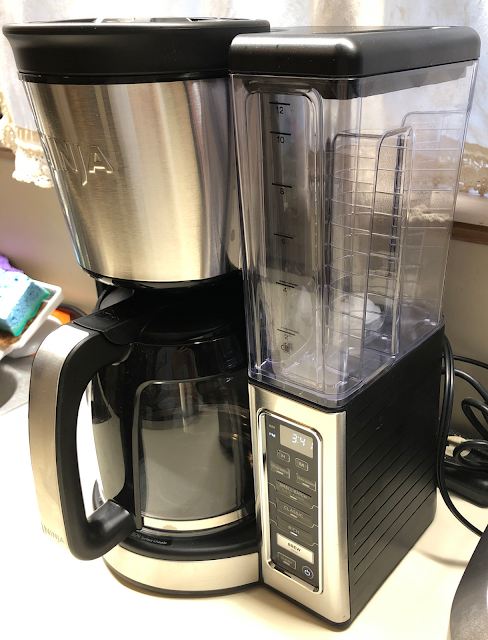
Why the Versatile, Affordable, Programmable Ninja CE251 Is the Best Small
Batch Coffee Maker Option
Here are the features and benefits that make the Ninja CE251 the best
programable coffee maker for brewing both large and small batches without
breaking the bank.
Delicious, Rich Flavor and Aroma, Whether You Make a Single Cup or a Full
Carafe
Unlike most other 12-cup carafe programmable coffee makers with a small batch
option, this versatile Ninja model delivers the same excellent, flavorful,
piping hot brew when you use the small batch settings (for 1–4 cups) as when
you make a larger 6–, 8– 10– or 12–cup batch.
Note: Virtually all electric coffee makers consider a "cup" of coffee to be 5
fluid ounces, not the 8 fluid ounces in a standard US measuring
cup.
Affordable
The Ninja CE251 Programmable Coffee Brewer was available on Amazon for less
than $80 at the time this post was published, a great price for a coffee maker
with such thoughtful design, excellent performance and consistent brew quality
for both large and small batch brewing.
Two Custom Brew Strengths
A choice of Classic or Rich strengths and Ninja's Thermal Flavor Extraction®
Technology produce hot, flavorful coffee with no bitterness. The Rich strength
setting provides a darker, more robust brew and maintains its smooth flavor
when you add milk or cream.
Removable Water Reservoir
One of the things my husband and I really disliked about my dad's 20-year-old
coffee maker that we had been using was the fact that the water reservoir was
permanently attached to the machine, so we had to use the carafe to measure
the water and then pour it into the reservoir, which was hard to do without
spilling any. The water reservoir was also black opaque plastic with a window,
which made it inconvenient to see the water level.
The water reservoir on the Ninja CE251 large and small batch coffee maker is
see through, BPA-free plastic with clear, easy-to-read markings and
indentations that make it easy for even small hands like mine to hold it
securely when pulling it out to fill at the sink and carrying it back to
reattach to the coffee maker.
24-Hour Programmable Delay Brew
You can program your brewer as much as a day in advance, so you can set it up
at night to wake you with the aroma of fresh coffee. One of my favorite
childhood memories waking up to the smell of Dad's strong, freshly ground and
brewed coffee in the morning!
Flavor Straw and Mid-Brew Pause
The "flavor straw" keeps the coffee circulating as it's brewing so the heat
and flavor are uniform throughout the batch, while the mid-brew pause lets you
remove the carafe briefly to pour a cup or two while waiting for the rest of
the batch to brew.
Adjustable Warming Plate
Although I highly recommend drinking your coffee within an hour of brewing it
for the best flavor and aroma, the Ninja CE251 gives you the option of
programming the warming plate to stay on for up to 4 hours.
Permanent Gold-Tone Filter
A permanent gold-tone metal coffee filter is included with this Ninja coffee
brewer. You have the choice to use either the permanent metal mesh filter or
disposable #4 cone paper coffee filters; do not use a paper coffee filter
inside the permanent metal mesh filter.
If you use the permanent metal mesh filter, you will retain more of the coffee
oils for a more flavorful, aromatic brew. If you fill it with ground coffee
with a medium grind in the permanent metal filter, as recommended, there
should be minimal sediment from the "fines" (finely-ground, powdered coffee
too small to be filtered out by the metal mesh).
Alternatively, you can remove the gold-tone filter and use #4 disposable paper
filters instead, which will absorb a lot of the coffee oils and make the brew
less flavorful and aromatic but also filter out more of the fines, if having
even a small amount of sediment bothers you. I highly recommend using
natural, unbleached #4 cone paper filters for both flavor and health and safety reasons.
Twist-Lock Carafe Lid
Unlike the lid to the glass carafe of my dad's old coffee maker that we had
been using, the lid to this Ninja programmable coffee brewer easily locks and
unlocks with a simple twist. Now I don't have to risk breaking a nail to
attach or detach the carafe lid!
Easy to Clean and Maintain
One of the things my husband hated about our old coffee maker was that,
because the water reservoir was not removable, in order to clean it he had to
put the entire machine into the sink, even though the built-in electronics
needed to be kept dry. In addition, the opaque black plastic made it almost
impossible to see whether it was properly cleaned or needed descaling.
The Ninja CE251’s see-through removable plastic reservoir can be carried to
the sink for filling or cleaning while keeping the electronics well away from
any water.
Although it is preferable to hand-wash the permanent gold-tone coffee filter,
the removable water reservoir and the glass carafe, all three are top-rack
dishwasher safe. The manufacturer recommends using a
ball-shaped, soft foam brush for thoroughly cleaning the inside of the
glass carafe.
As with any electric coffee maker, periodic descaling is recommended to remove
buildup from the heating element inside the machine. Although you can use a
special descaling solution made specifically for cleaning coffeemakers, 16
ounces of ordinary white vinegar works fine and is significantly cheaper.
Follow the simple instructions in the
Ninja Coffee CE200 Series Owner's Guide
for pouring the descaling solution or vinegar into the removable water
reservoir and pressing the Clean button on the control panel on the front of
the coffee maker, followed by running a Classic brew cycle with just clean,
fresh water.
You Don’t Have to Be a Coffee Connoisseur to Appreciate the Difference in
Taste!
My husband doesn’t consider himself a serious coffee enthusiast like my dad by
any means, which is why he was surprised and delighted at how much better the
same freshly-ground Bulletproof coffee “The Mentalist” medium dark roast beans
tasted after being brewed in his new Ninja CE251 Programmable Coffee
Brewer compared to the previous batches brewed in our old coffee maker.
A Great Gift for Any Coffee Lover
Although we haven't had our Ninja CE251 Programmable that long yet, so far we
are both thrilled with this purchase. My husband couldn't be happier! It would
make a great gift for yourself or someone else who enjoys a great-tasting cup
of coffee, needs to brew small amounts most days but also appreciates the
ability to brew a full 12-cup carafe when company comes, as well as ease of
use and easy cleaning and maintenance.
|
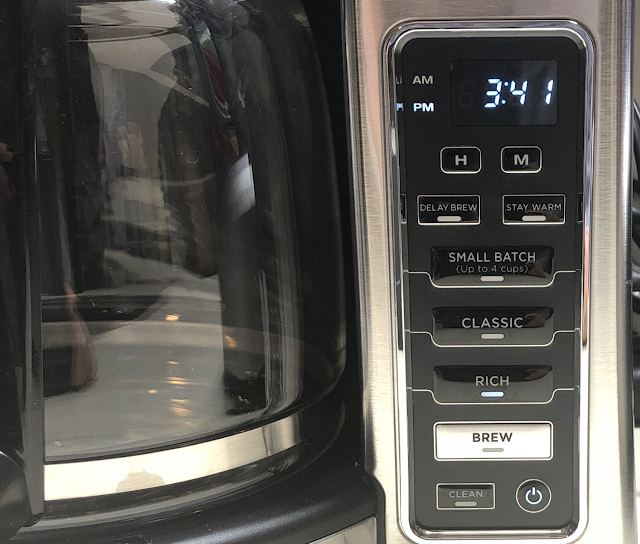
|
The control panel on this programmable large- and small-batch coffee
maker is simple, intuitive and easy to read
|
For those of us who work from home, it's also a treat to be able to brew a
small quantity fresh throughout the day.
The Best Affordable Programmable Large- and Small-Batch Coffee Maker by Margaret Schindel
Posts About My Keto Diet Journey
My First Year on The Keto Diet
Preparing to Succeed on the Keto Diet, Part One
Preparing to Succeed on the Keto Diet, Part Two
Low Carb Muffins & Cupcakes: Treats to Enjoy on a Keto Diet
Low Carb Keto Chocolate Yogurt Granola Chip Pudding Recipe
Good Dee’s Keto Cookie Low Carb Baking Mix Review
Hamama Microgreens Growing Kit Review & Success Tips
My Favorite Hamama Microgreens Seed Quilt Accessories
Keto Cheddar Cheese Biscuits With Chives Recipe
The Ultimate Keto Hot Chocolate Recipe
The Best Low Carb Keto Gift Ideas: Keto Gift Guide
The Best Low Carb Keto Cinnamon Muffins
Wholesome Yum Keto Bread Mix and Yeast Bread Recipe
The Good Chocolate 100% Organic No Sugar Dark Chocolate Review
The Best Advice to Maintain Your Keto Diet Weight Loss
My New Irresistibly Delicious Keto Cheese Crackers Recipe
Luscious Low Carb Keto Triple Peppermint Cheesecake Brownies Recipe
Quick & Easy Livlo Blueberry Scones Keto Baking Mix Review
Snack Better With The Best Healthy Keto Cookie Dough Bites
The Best Quick and Easy Low Carb Keto Pizza Recipe
The Best Quick and Easy Low Carb Keto Shortcake Cupcakes Recipe
Comparing the Best Keto-Friendly Chocolate Hazelnut Spreads - No Added
Sugars
The Best Low Carb Keto Sandwich and Burger Buns Mix
Blueberry Biscuit Scones — New, Easy, Low Carb Keto Recipe
The Best Keto Pizza Crust Mix With 0 Net Carbs
An Unusual, Delicious Strawberry Chocolate Tea With 0 Calories
Delicious Sugar-Free Keto Cookies That OREO Fans Will Love
Healthy Pistachio Cherry Chocolate Chip Marshmallow Cereal Treats
Recipe
Easy, Decadent, High Protein, Sugar-Free Rocky Road Cottage Cheese Ice
Cream
The Best Quick & Easy Low Carb Sausage and Ricotta Calzones
How to Make Refreshing Vanilla Italian Soda (With or Without Cream)
Reviews of the Keto Diet by Barbara C. (aka Brite-Ideas)
My Personal Keto Testimonial
How I Stayed Committed to the Ketogenic Way of Eating
Read More Product Reviews by Our Review This Reviews Contributors
Note: The author may receive a commission from purchases made using links found in this article. “As an Amazon Associate, Ebay (EPN) and/or Esty (Awin) Affiliate, I (we) earn from qualifying purchases.”


