Showing posts with label Dinner Recipes. Show all posts

Monday, April 19, 2021

Reviewing Roasted Pineapple and Habanero Sauce by Robert Rothschild Farm

 Last week I was hungry for something different.  I thought I wanted salmon. No, I was certain I wanted salmon. But I wanted something different. Something flavorful. I went to my local Costco (which is where I buy my preferred frozen salmon) and happened past a large bottle of beautiful, golden Roasted Pineapple and Habanero Sauce. Initially, I walked past it. In fact, I walked the entire grocery portion of the store trying to decide what to make with my salmon. I was drawn back to the Roasted Pineapple and Habanero sauce and after reading the label, I took it home. I am so glad I did!


I really like savory food. I think heat and spices are delicious. Sadly, what my brain thinks is completely different that when my mouth can tolerate. As soon as I arrived home from the store, and had started the rice cooking, I texted a photo of the Roasted Pineapple and Habanero sauce to my sons.  


Their collective response: "Haha, best of luck!" and "Let me know how that turns out for you."

My response: "It is supposedly mild. I read the label and put the jar back several times before I decided to try it."

More skeptical responses from my sons. 

Fortunately, the sauce was truly "mild". It was also flavorful and delicious. I immediately regretted not having made more servings of salmon. And I craved it during my camping trip over the weekend.

My Roasted Pineapple and Habanero Salmon over Rice

Nothing fancy happens in my kitchen. But I love tasty food. In this case I made white rice (following the directions on the bag and cooking for 20 minutes).  

During that time the rice cooked, I thawed a frozen salmon filet in a container of room temperature water (the frozen salmon filets I buy are individual wrapped which is perfect for me).

I baked the salmon per the instructions, adding just a bit of sauce in the baking dish with the salmon (about 3 tablespoons). 

I served the baked salmon over the cooked rice, salt and pepper to taste, and added about another tablespoon of the sauce over the rice.

YUM!

Robert Rothschild Farm

I purchased my large jar of Roasted Pineapple and Habanero sauce at my local Costco.  You can be sure that I am going to purchase a couple more bottles to add to my pantry and keep them in stock!  You can also find this delicious sauce on Amazon from the Robert Rothschild Farm store.

If you want to know more about Robert Rothschild Farm, you can visit their website. I love all of the products they offer (sauces, salsas, dips, fruit spreads, savory spreads, and more) as well as a few recipes that use their products. In short, the Rothschilds moved from California to Ohio in the 1970s and were committed to their land. They produced more raspberries than they needed and that inspired their recipes and flavor combinations.

After visiting their site, I have a "wish list" of several of their items. 

Side Note:

Many years ago I had a wonderful opportunity to visit Charleston, South Carolina. During that trip, we ate at a little island restaurant. I still sometimes talk about the dish I had there; scallops, mashed potatoes, and "some kind of citrusy/spicy sauce". That was the best tasting dish I have ever eaten and have never had anything like it again. This sauce reminds me very much of that long ago dish. You can be absolutely sure that I am going to learn how to prepare scallops so that I can serve them with this sauce and try to cure that 20-something  year old craving. 


Note: The author may receive a commission from purchases made using links found in this article. “As an Amazon Associate, Ebay (EPN) and/or Esty (Awin) Affiliate, I (we) earn from qualifying purchases.”


Tuesday, September 1, 2020

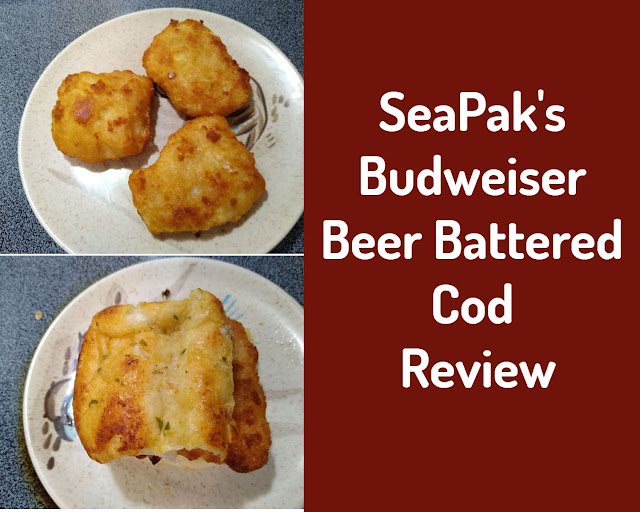
Review of Budweiser Beer Battered Cod by Seapak

Budweiser Beer Battered Cod by Seapak


Mothers everywhere know their children's favorite meal – fish sticks and Mac & Cheese. Frozen fish sticks used to be really good (even adults liked them), but lately it seems they are not as tasty as they used to be.  It seems to me that many of the frozen breaded or battered fish products have changed in recent years to a lesser quality (or my taste buds don't care for them as much).  But recently I discovered a frozen fish product that is not only VERY tasty, but does not have that 'packaged' taste so often prevalent.

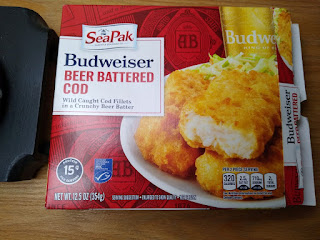
The product is called Budweiser Beer Battered Cod produced by SeaPak, the Shrimp & Seafood Co.  It is wild caught cod fillets in a crunchy beer batter and it is delicious.  

It's like having your kitchen become your new favorite Pub. 

SeaPak


The SeaPak company is known as the Shrimp & Seafood Co. They are known as the #1 retail brand in the frozen specialty seafood category. 

SeaPak has been making great tasting and high quality seafood products for over 70 years. They choose only the best seafood for their products and their signature seasonings, breadings and sauces bring you an authentic coastal seafood flavor right to your home dining table.

They are known for their Shrimp dishes (including Jumbo Butterfly Shrimp, Shrimp Scampi and Popcorn Shrimp), as well as their Maryland style Crab Cakes and Fish products which appeal to seafood lovers of all ages. 


Budweiser Beer Battered Cod


Budweiser Beer Battered Cod Frozen Entree
This beer battered cod is very fresh tasting and delicious.  The product comes from a fishery that has been independently certified to the MSC's standard for a well-managed and sustainable fishery. (www.msc.org) 

Quick and easy to fix in a conventional oven at 425 degrees, cooking in a single layer on a baking sheet for 17-18 minutes. Turn over half way through cooking. 


Ways to Serve:


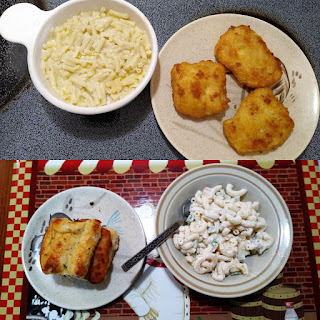
Serving dishes shown with a plate of cod filets
Cod Filets with Macaroni & in a Sandwich

I have had this beer battered cod with Mac & Cheese and also as a fish sandwich on a roll with macaroni salad.  I think it would be good any way you serve it. The combination of Cod and the Budweiser Lager Beer used in the batter is yummy. You will find more serving suggestions and recipes for this product and the other SeaPak selections on the recipe section of their website


Where to Buy:

This Beer Battered Cod and other SeaPak seafoods are available from Target and Walmart and most of your favorite grocery stores (Kroger, Hy-Vee, Publix). 


For a quick and easy meal on no-time-to-cook busy days, these SeaPak seafood selections are a delicious product to keep in your freezer, and a satisfying meal choice. 


A plate of Budweiser Beer Battered Cod by Seapak ready to eat


Available at:


*Images by Wednesday Elf

+Review written by (c) Wednesday Elf 


Note: The author may receive a commission from purchases made using links found in this article. “As an Amazon Associate, Ebay (EPN) and/or Esty (Awin) Affiliate, I (we) earn from qualifying purchases.”


Saturday, August 15, 2020

Bonion Burgers Recipe Review


A Bacon-wrapped burger

Or, our version of bacon-wrapped burgers!

Go ahead, laugh! But Bonion Burgers is the name we came up with to describe the bacon-wrapped burger combination we like best. It consists of a slice of onion and a slice of tomato on a hamburger patty which is then completely wrapped in bacon slices. We tried to come up with a name that included the 'T' for tomato, but nothing seemed to fit.  So we ended up using the 'B' for 'bacon' with onion and burger. It was the closest we could come to a name for our concoction.


A hamburger wrapped in bacon
(c) Elf
We originally wrapped just one slice of bacon around the outside of the hamburger patty a la filet minion. Then we discovered a tastier way! 

There are many recipes online for burgers with bacon. Recipe combinations include cheese and mushrooms and many other ingredients. The recipes are for all styles of cooking, from pan to oven to grill, and all served on some form of bun.  We wanted just bacon-favored hamburger cooked in a broiler oven and served without a bun. Thus, Bonion Burgers. So ~ you may laugh at our name, but the end result is delicious!


Simple Ingredients:


  • Hamburger formed into patties
  • One onion slice each
  • One tomato slice each
  • 4 slices bacon per hamburger patty
  • Seasoning as desired
  • Toothpicks


Very Easy Instructions:


How to prepare our bacon-wrapped burger recipe
(c) Elf


  1. Simply make as many hamburger patties as you need – one per person. Season as desired.
  2. Place a slice of tomato and a slice of onion on each patty.
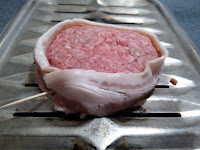
  3. Wrap 4 slices of bacon around each patty – completely covering the meat patty. Secure with toothpicks.


Bacon-wrapped burger in the oven
(c) Elf
Place the oven rack one shelf lower than the rack usually used for broiling so the bacon does not get overcooked or burned while the meat is cooking.

Broil under the broiler in the oven approximately 10 minutes per side  (20 minutes total, turning once). 

    *Cook's Note:  I tend to make my burgers a bit smaller than most people, so I cook mine 8 minutes per side. 


    Serving


    Bacon-wrapped burger ready to eat, served here with rice
    (c) Elf

    *Serve with rice and a vegetable.  We enjoy the combination of long-grain white rice (takes 20 minutes to cook so is perfectly timed with the broiled burgers) and green peas. 


    Bonion Burgers ~ One of our favorite meals! 


    Bacon-wrapped burger ready to eat
    (c) Elf


    For more Recipes

    Check out ReviewThisRecipes.com


    Hamburger Recipes Galore right here on Amazon


    Recipe Review written by Wednesday Elf (8/15/2020)


    Note: The author may receive a commission from purchases made using links found in this article. “As an Amazon Associate, Ebay (EPN) and/or Esty (Awin) Affiliate, I (we) earn from qualifying purchases.”


    Monday, March 2, 2020

    Easy Meal Recipes: Fish Tacos

    I am always looking for easy week night meals that are easy and inexpensive. Thanks to a suggestion from my son, I made these easy and delicious fish tacos. I want to pass this meal idea on to you.


    Easy and delicious Fish Tacos with Avocado Cream Sauce


    My youngest son regularly sends photos of the beautiful and delicious meals he prepares for his family. One recent evening, in response to his mouth-watering food photo, I responded something like: 


    " I'm stopping for frozen fish sticks. Yay."

    He responded that I should make fish tacos. That sounded way too difficult after a hard day at work and an irritating commute home on the beltway. Fortunately, he sent a link for avocado cream sauce. That did it. I stopped for the frozen fish sticks and the 5 ingredients that I didn't have in my kitchen already. And I made easy and delicious fish tacos. I am so glad I did.


    Avocado Cream Sauce


    The link he sent was the Avocado Cream Sauce recipe by Barefeet in the Kitchen. Along with the recipe on the page there are links for many recipes using the avocado cream sauce. But my taste buds were firmly set on fish tacos.


    Avocado Cream Sauce shopping list


    I did not use a blender to prepare my sauce. I was too tired to drag out a blender, wash it, and put it away. So I used a potato masher and mashed the avocados, adding the other ingredients while mashing. I liked the slightly chunky texture and I think it turned out great. But if you prefer a smoother sauce, make sure to use a blender as directed in the original recipe.


    Cheap and Easy Weeknight Fish Tacos


    Of course, these fish tacos would be even more delicious with fresh fish in place of the frozen fish fillets. However, whether you are cooking for yourself or for the family after a hectic day of work/school/activities, frozen fish fillets make this an easy meal.

    Meal Ingredients:

    • small flour tortillas - approximately 6" size
    • frozen fish fillets - prepared per package instructions
    • half head of cabbage - shredded
    • Avocado Cream Sauce - prepared per the recipe instructions
    Directions:
    1. Bake fish per the package instructions
    2. While the fish bakes, make the sauce using the avocados, sour cream, fresh garlic, lime juice, salt and pepper. Set that aside in the refrigerator.
    3. Cut the cabbage into small strips
    4. Allow the fish to cool slightly before assembling the tacos. Then assemble by placing a bed of cabbage onto a tortilla, a fish fillet on the cabbage, and a spoonful of avocado cream sauce on top of the fish.
    Enjoy!

    This recipe was a wonderful change of pace from my normal easy/cheap meal line up. The avocado and lime added a fresh summery flavor in the middle of our mild but dreary winter. The fish, avocado, and cabbage was definitely a healthier alternative to most fast food drive-thru meals. 

    Related Link:

    After looking more closely at the Barefeet in the Kitchen site I learned that the author is Mary Younkin. She has published recipe books that look right up my alley! Ms. Younkin caught my attention with the philosophy of "cooking from scratch as simply as possible".


    Note: The author may receive a commission from purchases made using links found in this article. “As an Amazon Associate, Ebay (EPN) and/or Esty (Awin) Affiliate, I (we) earn from qualifying purchases.”


    Sunday, March 1, 2020

    Roast Pan Steak - Another Family Favorite - It's So Good!

    Roast Pan Steak - A Family Fave
    I'm anxious to share this favorite family recipe with you. Since I've spent approximately the last four Sunday's posting our family faves, why not add another one?

    Roast Pan Steak is a recipe passed along to me from my mom. I'm sure it came from her mother, my grandmother, and her mother before that.

    This recipe is simple, just the way I like them.
    Your house will smell amazing with this cooking in the oven!
    I remember one particular time when we had visitors, I had this dish cooking in the oven. Our visitors kept repeating over and over how amazing the food smelled.

    Roast Pan Steak Ingredients and Cooking Instructions:
    • Steak (cut into bite-sized cubes) - 1 large steak  If you add another steak, double the sauce; 3 steaks, triple it and so on.
    Sauce for the One Large Steak:
    • 1 Cup of Ketchup or BBQ Sauce (I prefer Ketchup)
    • 1/3 Cup of Vinegar
    • 1/2 Cup of Water
    • 1/2 of a Large Onion Chopped - Use more if you like
    • 1 Tablespoon of Brown Sugar
    • 1 Tablespoon of Mustard
    • 1 Tablespoon of Worcestershire Sauce
    Brown the cut-up steak in a frying pan. Once browned, remove it from the steak pan and put it in an oven roast pan.

    Put the water in the steak pan with the steak drippings and steak juice. Mix it up nicely to get all that flavor into the water. Then mix all the other ingredients listed above (water already used) in a bowl and pour it into the frying pan.

    Next, take that finished sauce that's in your frying pan, and pour it over the steak that's in the oven roast pan. Cook it in the oven for about 3 hours at 300 degrees (low and slow). It should fall apart. Each bite should be tender.

    You can cook it with or without the lid, just watch if it's drying out. It should remain relatively saucy. Generally, I cook halfway through the time without the lid and just eyeball it from there.

    If it seems a bit dry (which has never happened to me), add a bit of watered-down Ketchup (1/2 cup), pour it over, stir and put it back in the oven with the lid on.

    NOTES
    •  As mentioned above, you can double or triple the sauce
    • You can use stewing beef, but it's way better with steak!
    • The amount of steak versus sauce is up to you - If you like it saucier, use less steak and more sauce. Or use lots of steak and lots of sauce. 
    • If you're serving a lot of people, I would use more sauce and more steak.

    From Our Kitchen - A Collection of Sunday Shares


    Don't hesitate to give Roast Pan Steak a try, it tastes and smells incredible. Serve it with a salad, veggies, and oven-baked or mashed potatoes.


    Note: The author may receive a commission from purchases made using links found in this article. “As an Amazon Associate, Ebay (EPN) and/or Esty (Awin) Affiliate, I (we) earn from qualifying purchases.”


    Friday, July 28, 2017

    How to Grill the Perfect Steaks - Beginner Tips Reviewed

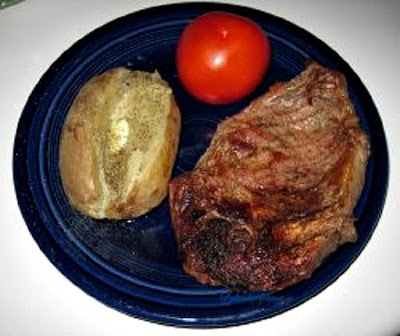
    Learning to Grill the Perfect Steaks

    Easy Instructions:  How to Grill the Perfect Steak
    I decided to learn how to grill steaks myself after reading so many great recipes and ideas for the grill written by my fellow online writers. 

    In our family, it has always been the man's job to cook out.  Previously, I just accepted the gift gratefully and I was content to defer to my dad, one of my brothers, or to my husband's expertise on the grill.  However, with visions of kebabs and grilled pound cake, I was inspired to learn how to use the grill. 

    I photographed all of my husband's steps to preparing the grill and preparing the food.  Now I will be ready to grill our next steaks.   I am willing to share my new knowledge.  Perhaps, this article will help you get started too.  

    So, let's have some fun!


    Choose your Steaks Carefully

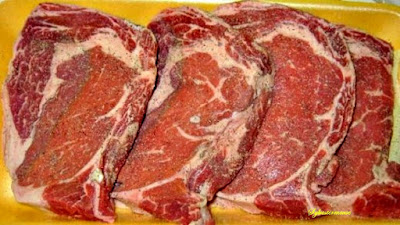
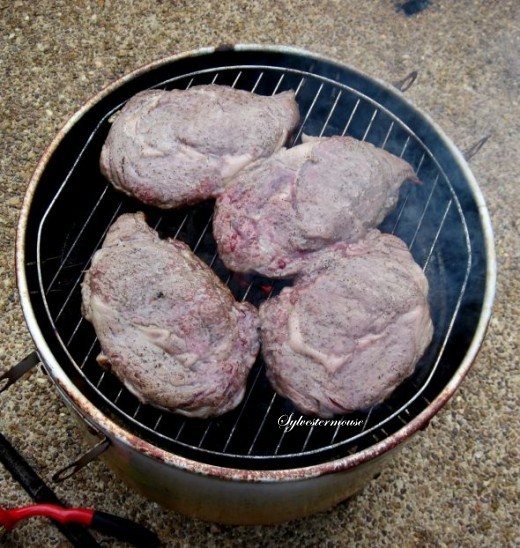
    Although they were expensive, we chose to cook 4 USDA Choice Rib Eye Steaks.  They weighted 3.82 lbs total weight.  They were purchased the same day we cooked them and they were never frozen.  In this photo, they have already been seasoned and are ready to grill, but I have included our steak preparation instructions below


    Selecting the Right Steaks to Grill


    What You Need to Cook the Best Steaks You will Ever Eat!

    In our family, grilling steaks was always man's work. 
    After decades of relying on my father, brothers and husband,
    I decided to learn how to grill steaks to perfection myself. 
    Let me show you how!

      Grilling Supplies for Great Steaks
    • A Grill
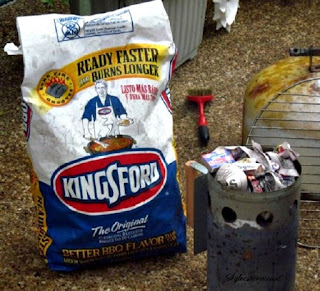
    • Charcoal
    • Chimney Grill Starter
    • A Sheet of Newspaper
    • A Match or Lighter
    • Food ~ We chose 4 Rib Eye Steaks ~ Total weight: 3.82 lbs.
    • Seasonings ~ We only use salt, pepper and olive oil lightly rubbed on steaks 

    Setting up the Grill

    Slide Through the Photos using the Arrows at the Bottom of thia Google Slides Frame


    • Start with a clean grill
    • Stuff a sheet of newspaper in the bottom
      of your chimney grill starter
    • Turn over starter and fill the chimney grill starter with Charcoal
    • Light the paper at the base of the chimney grill starter with a match or long lighter
    • Wait for charcoal to get ready. It will be mostly gray. This takes approx.
      35 - 45 min.
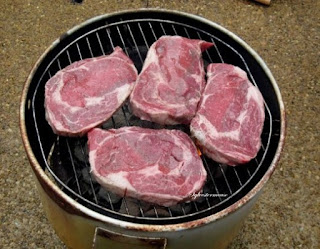
    • When the charcoal is ready, use a pot holder on the handle of your chimney grill starter and dump the charcoal into the grill.
    • Carefully place the grill rack in place over the hot charcoal on the lowest level closest to the charcoal.
    The grill we used is named Maude.  She is my dad's grill and she is over 30 years old - Her handles are gone and her paint is worn, but she still cooks! 

    Using a Chimney Grill Starter

      The Chimney Grill Starter is a lot safer than flicking a lit match at lighter fluid doused charcoal.
    Food tastes better without the use of lighter fluid too!


    Preparing Your Steaks to Grill


    If you do it our way, it is really easy and absolutely delicious!  Do not poke or pierce the steak with a fork, knife or any utensil at any point in the preparation or cooking process.  This will allow the meat to retain all of it's flavor and juices.
      How to Grill the Perfect Steak
    • Rub Olive Oil lightly on both sides of each steak
    • Salt and Pepper both sides of each steak
    • Place seasoned steaks on the grill rack
    • Cover grill and steaks for 9 minutes
    • Turn steaks ~ ONLY ONCE
    • Cover grill again and cook an additional 7 minutes for medium or 12 minutes for medium well.
    • Remove steaks from the grill and wrap in aluminum foil.  Allow to rest in the aluminum foil for 5 minutes before you eat.

    Step by Step Photos of the Grilling Process

    grilling steaks processTurn Steaks Only ONCE
    cooking steaks on the grill Cover grill again and cook an additional 9 minutes for medium rare or 12 minutes for medium well.
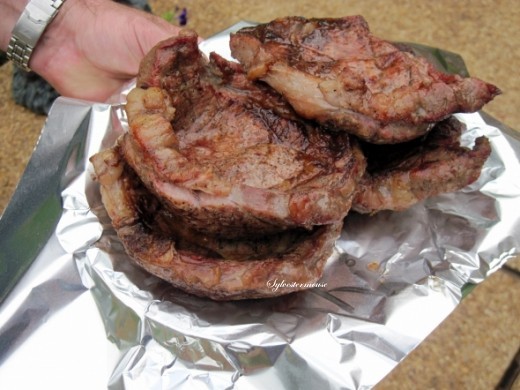
    grilled steaks Remove steaks from the grill and wrap in aluminum foil. Allow to set for 5 minutes before you eat.

    How to Grill the Perfect Steak - Step by Step Instructions for Beginners
    This is my cut steak. I like mine cooked medium well.
    I thought you might like to see the inside color of one of
    our finished steaks.
    This one grilled for a total of 21 minutes.


    Now, Isn't that easy!  These steaks are quite delicious too.  They are best you will ever taste anywhere.


    More Cooking & Grilling Fun

    Join me at Cooking for the Holidays for More Cooking Tips & Recipes


    You may also wish to try Grilling Shrimp on the Grill with this Easy Recipe from Sam's Place
    For a Recommended Grill, check out this review of the Char-Griller Duo 5050 written by Dawn Rae


    Check Out More Recipe & Food Reviews at
    ReviewThisRecipes.com


    How to Grill the Perfect Steaks - Beginner Tips Reviewed Written by:
    House of Sylvestermouse


    Note: The author may receive a commission from purchases made using links found in this article. “As an Amazon Associate, Ebay (EPN) and/or Esty (Awin) Affiliate, I (we) earn from qualifying purchases.”


    Tuesday, January 17, 2017

    TexMex Lasagna Recipe Reviewed

    A Twist On A Classic Recipe

    texmex lasagna
    TexMex Lasagna By Bev Owens
    Typically one thinks of lasagna as a classic Italian dish. Today I want to share a recipe that I created for TexMex Lasagna. It is a  little twist to an old favorite. 

    I was inspired by a commercial that I kept seeing on television advertising Creamette pastas. A young woman finds out that her husband likes her Texmex lasagna even better than his mother's chicken noodle casserole. I kept thinking that it sounded good and what would I put in a dish like that. 

    So, I put my thinking cap on and came up with an idea to try. I will admit that I could never con a panel of judges into thinking that I was a professional chef. On the other hand my cooking is not so bad that I would be invited to the show "Worst Cooks" either. My presentation isn't always the most lovely but usually the meal is pretty good. I think I would be graded as a decent cook with a fair amount of successes and more than enough failures in my lifetime.

    When it comes to this little creation, my husband gave his seal of approval with the comment, "Honey, this is really good! I think it is my new favorite meal!" 

    Momma Bev's TexMex Lasagna Recipe


    Ingredients:

    1 box Creamette lasagna noodles (or your favorite brand)
    1 1/2 lb lean ground beef
    1 16 oz container sour cream
    2 large eggs
    lemon juice
    2 cups 4 cheese Mexican blend
    1/2 tsp chili powder
    1/2 tsp minced garlic
    salt
    pepper

    Directions:


    Pre-heat oven to 350 degrees.

    In a dutch oven size pot boil your lasagna noodles in salted water for 10 minutes. The salt keeps the pasta from getting sticky.

    Brown the ground beef with the chili powder, garlic and salt and pepper to taste. When you add the seasoning to the raw beef the flavors are sealed in better to the meat as it browns. Once browned add the jar of picante sauce and simmer for 5 minutes.

    In a mixing bowl beat the 2 eggs, add a little salt and pepper, lemon juice (about 2 cap fulls) and the sour cream. Blend well. Set aside.

    Grease a 9 by 13 inch baking dish. Cover the bottom with a thin layer of the meat mixture. Place a layer of noodles on top. Pour about 1/3 of the sour cream mixture on top of the noodles. Sprinkle a light layer of the cheese blend. Add a new layer of noodles, thin layer of meat sauce, repeating the layers ending with meat sauce on top. Sprinkle more of the cheese blend on top.

    Bake for 30 to 35 minutes.


    Mildly hot or hotter?


    Depending on what your family likes, you have the option of using a mild, medium or hot version of the picante sauce. We used the medium and that was just right for the two of us. Also, I chose picante sauce instead of salsa because it is better for cooking. Both have the same ingredients it is just that the picante is basically a pureed version of a salsa and will bake better in this recipe. 

    I hope you will give this recipe a try and I sincerely hope that you and your family like it as much as my husband and I did. I know I will make it again! 


    Note: The author may receive a commission from purchases made using links found in this article. “As an Amazon Associate, Ebay (EPN) and/or Esty (Awin) Affiliate, I (we) earn from qualifying purchases.”


    Saturday, December 24, 2016

    Buttery Pasta and Shrimp Recipe Review


    Our Favorite Seafood Meal


    Image of my buttery pasta & shrimp dish
    Having lived in coastal communities a number of times over the years, from the California Central Coast to the Gulf Coast of Florida to (today) Coastal Georgia, seafood dishes are popular favorites in our household. 


    While living on the California Central Coast in 1980, I came across a shrimp recipe put out in a little cookbook leaflet by Land O Lakes, using real butter (yum) in the recipes. This shrimp/pasta buttery combination has become a standard for company dinners and has also become a family favorite for Christmas Eve dinner every year.


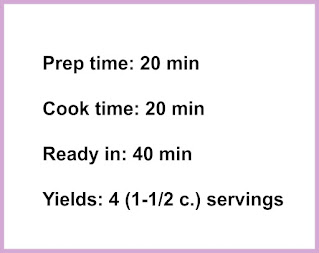
    cooking time on Buttery Pasta and Shrimp Recipe


    Ingredients


    Ingredients for Buttery Pasta and Shrimp Recipe
    Ingredients, prepped and ready

    • 3 cups cooked spaghetti, (7 oz. Uncooked)
    • 1/4 cup Sweet Cream Butter
    •  1 cup chopped green pepper, (1 medium)
    • 1/2 cup chopped onion
    • 2 (12 oz.) packages frozen cocktail shrimp (or fresh shrimp as noted below)
    • 1-1/2 tsp. Garlic powder
    • 1/2 tsp. Salt
    • 1/2 tsp. Oregano leaves
    • 1/4 tsp. Pepper
    • 2 cups cubed fresh tomatoes
    • Grated Parmesan or Romano Cheese 

    *Cooks' Note

    The recipe calls for frozen cocktail size shrimp, which is fine, but living near the coast where fresh seafood is available I naturally substitute fresh shrimp for the cocktail shrimp.

    I take about one pound of medium shrimp, peeled & deveined, cut them in half most times, and sauté them separately in a bit of butter & garlic before adding them to the pot of vegetables simmering in the butter & seasonings. I've also added fresh sliced mushrooms to the original vegetables of chopped onions and green pepper in the recipe. As you can see, your own preferences are easy to substitute in this dish.


    Instructions


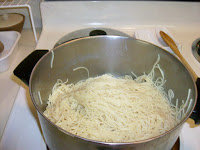
    Image of the cooked Angel Hair Pasta for recipe
    Angel Hair Pasta - Cooked
    • Cook spaghetti; set aside.  I used angel hair pasta in this recipe, but you can use any pasta that you desire.

    Pan holding vegetables sautéed in butter
    Sautéing the vegetables in real butter
    • In a 3 qt. Saucepan melt butter over medium heat (5-7 minutes).
    • Add remaining ingredients, except tomatoes and spaghetti. Stir to blend.
    • Cook over medium heat (5-7 minutes).
    • Add cooked spaghetti; stir to blend.
    • Continue cooking over medium heat, stirring occasionally until spaghetti is heated through (3-5 minutes).
    • Remove from heat; add chopped tomatoes. Cover; let stand 1 minute or until tomatoes are heated through.
    • To serve, sprinkle with Parmesan cheese.


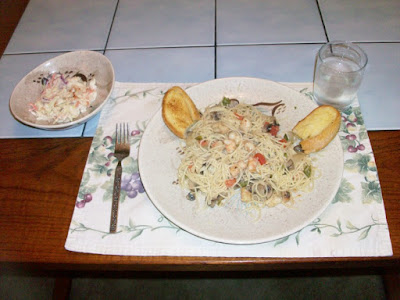
    Dinner photo: Pasta dish with garlic toast & coleslaw
    Pasta dish with garlic toast & coleslaw

    Serve this buttery pasta and shrimp dish with slices of garlic bread or Texas Toast, and either a salad or coleslaw, and you have a very delicious and satisfying meal anytime you crave shrimp & pasta.


    Land O' Lakes Chicken and Seafood Cookbook


    Land of Lakes Cookbook
    Land O Lakes Chicken & Seafood Cookbook

    The buttery pasta with shrimp recipe featured in this review can also be found in this cookbook of recipes for chicken and seafood made using real butter. I've used my copy for years!


    This 44-page booklet from 1980 has recipes for both chicken and a variety of seafood, all using delicious butter.

    Shrimp Lovers Recipes


    Forrest Gump knows ways to eat shrimp - shrimp kabobs, shrimp creole, shrimp gumbo, shrimp cocktail...

    Looking for more shrimp recipes, you'll find them here! 

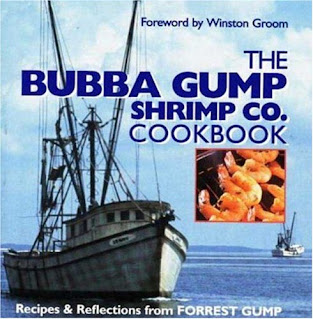
    Bubba Gump Shrimp Cookbook book cover
    Over 75 Shrimp Recipes from Forrest Gump


    For other delicious recipes, shrimp and otherwise, check out ReviewThisReviews Recipes for a variety of yummy dishes from our contributors.


    +Images are personal photographs by (c) Wednesday Elf

    (c) Wednesday Elf. Article originally written in October 2013 on another site.


    Note: The author may receive a commission from purchases made using links found in this article. “As an Amazon Associate, Ebay (EPN) and/or Esty (Awin) Affiliate, I (we) earn from qualifying purchases.”


    Most Recent Reviews on Review This Reviews


    Search for Reviews by Subject, Author or Title

    The Review This Reviews Contributors


    SylvestermouseSylvestermouseDawn Rae BDawn Rae BMbgPhotoMbgPhotoBrite-IdeasBrite-IdeasWednesday ElfWednesday ElfOlivia MorrisOlivia MorrisTreasures by BrendaTreasures by BrendaThe Savvy AgeThe Savvy AgeMargaret SchindelMargaret SchindelRaintree AnnieRaintree AnnieLou16Lou16Sam MonacoSam MonacoTracey BoyerTracey BoyerRenaissance WomanRenaissance WomanBarbRadBarbRadBev OwensBev OwensBuckHawkBuckHawkDecorating for EventsDecorating for EventsHeather426Heather426Coletta TeskeColetta TeskeMissMerFaeryMissMerFaeryMickie_GMickie_G


    Review This Reviews is Dedicated to the Memory of Our Beloved Friend and Fellow Contributor

    Susan DeppnerSusan Deppner

    We may be apart, but
    You Are Not Forgotten


    “As an Amazon Associate, Ebay (EPN) and or Etsy (Awin) Affiliate, I (we) earn from purchases.” Disclosure Statement

    X