Showing posts with label Desserts. Show all posts

Friday, March 25, 2022

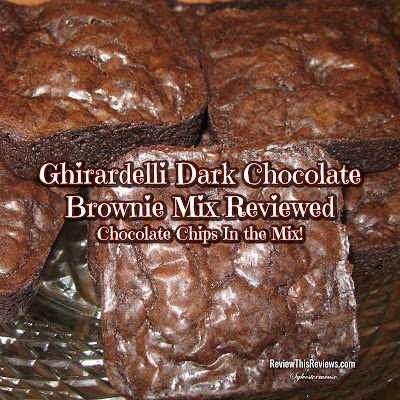
Ghirardelli Dark Chocolate Brownie Mix with Chocolate Chips in the Mix Reviewed

Brown Mix
I recently tried Ghirardelli Dark Chocolate Brownie Mix made with a special ingredient and loved it!  

My sister, sister-in-law and I went shopping together before Christmas.  When I spotted the Ghirardelli Dark Chocolate Brownie Mix, I commented that I would like to try it because it included the chocolate chips.  While I rarely use baking mixes, I thought using the mix might make the Christmas baking a little easier.

The sales associate of the kitchen shoppe offered to make a batch of her brownies so we could taste them.  She had a special ingredient she added that she thought we would want to try.  I am so glad we accepted her offer.  They were the best brownies I have ever eaten.  

Needless to say, we left the shoppe with several gift bags that included the brownie mix and the shoppe's special ingredient, blood orange olive oil.


Ghirardelli Dark Chocolate Brownie Mix

 Ghirardelli Brownie Mix, Dark Chocolate, 20 ozCheck Price The #1 reason I wanted to try the Ghirardelli mix is because it included chocolate chips and required only 1 egg, water and olive oil to make.  Those are ingredients that are always in my kitchen.

Using the newly discovered blood orange olive oil gives these delicious brownies an extra punch with a slight taste of orange. Everyone in my family loves them!  I definitely look forward to using the blood orange olive oil in additional recipes.

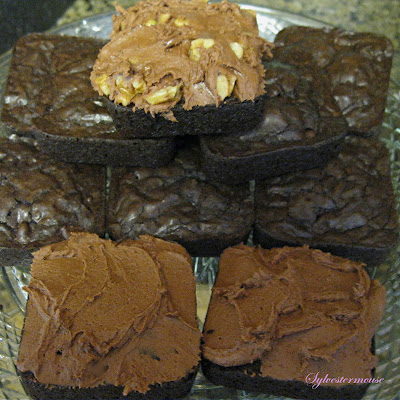
We don't all agree on whether brownies should be iced or not, so I make a small recipe of icing.  Those who want the icing don't agree on whether it should have nuts or not, so I divide the icing in half and mix walnuts or pecans in half of the icing.  Therefore, one batch of brownies makes 3 different treats.  Add a scoop of ice cream and you have the perfect dessert.


Easy Brownie Frosting Recipe

Brownies
*Baking Products are Linked in recipe so you can see recommended product packaging. 
However, prices are based on shipped products. 
Most likely, the items will be much less expensive in your local grocery store.
  1. In a medium mixing bowl, stir powdered sugar and cocoa together.  
  2. Heat butter & milk together in a small saucepan to melt the butter.  
  3. Gradually beat (with a hand mixer) the butter & milk into the cocoa/sugar mixture until smooth.  
  4. Stir in pecans or walnuts, if desired.


Brownies
Pampered Chef Brownie Pan for Perfectly Shaped Brownies


A Note about the Specialty Shoppe We Visited

As far as I know, the Bazaar Orange Olive Oil that we purchased is only sold at the Bazaar store in Collierville, Tn, located in the historic Collierville Town Square.  Sadly, I couldn't find an online resource. 

If you love to cook and are ever in Collierville, Tn, you should definitely plan to spend a few hours in this store.  It isn't a big store, but it is packed with fabulous unique kitchen items, including their specialty oils and vinegars.  I love this kitchen specialty store and their extremely helpful sales associates! 


 Ghirardelli Premium Chocolate Brownie Mix VarietyCheck Price GHIRARDELLI Dark Chocolate Premium Brownie Mix, 20 OzCheck Price GHIRARDELLI Dark Chocolate Brownie MixCheck Price Ghirardelli Chocolate Lovers Dark Chocolate Brownie Mix - Pack of 3Check Price


Check Out More Recipe Reviews at
ReviewThisRecipes.com


Ghirardelli Dark Chocolate Brownie Mix with Chocolate Chips in the Mix Reviewed Written by:
House of Sylvestermouse


© 2021 Cynthia Sylvestermouse


Note: The author may receive a commission from purchases made using links found in this article. “As an Amazon Associate, Ebay (EPN) and/or Esty (Awin) Affiliate, I (we) earn from qualifying purchases.”


Friday, August 13, 2021

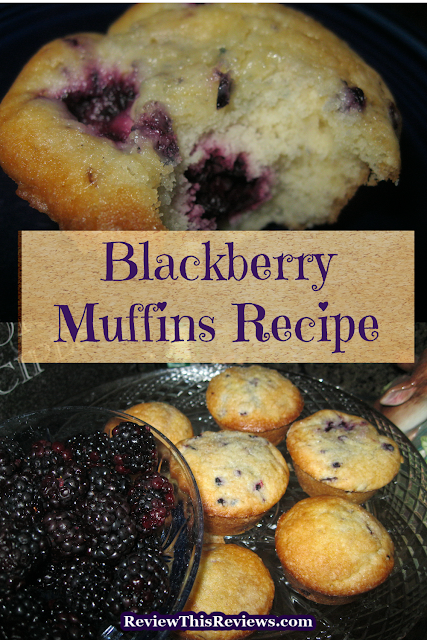
Delicious Blackberry Muffin Recipe Reviewed

Blackberry Muffin Recipe
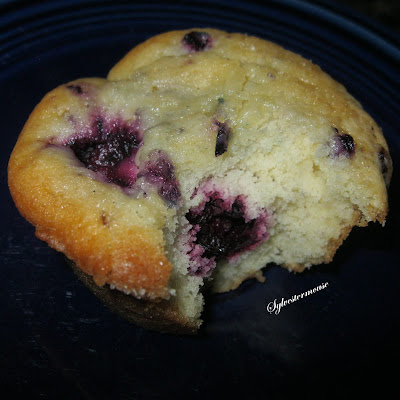
Fresh blackberries are always an invitation to bake something delicious!  When I recently purchased some blackberries at our local farmer's market, I made Blackberry Muffins as soon as I got home.  Today, I am sharing my personal blackberry muffin recipe here so you, too, can enjoy this delicious treat. 

My recipe makes 18 muffins which seems like a lot at first glance. However, it didn't take my family long to devour these delicious muffins.  

For either of us, when we pair these muffins with coffee, we are in a breakfast feast heaven.  While I would normally say that the serving size is one muffin, in our home, the serving size is two or more muffins.  They really are that good!
 

The Muffin Batter & Muffin Tins 

This is a muffin recipe, not to be confused with cupcakes.  The muffin batter is thicker and won't pour like a cake batter.  I "spoon" my muffin batter into muffin tins.  I bake them in non-stick muffin tins, therefore paper liners are not required.  I do grease the non-stick tins with Crisco shortening and these muffins turn out easily.


My Blackberry Muffin Recipe

Prep Time Cook Time Ready In Yields
20 min. 20-25 min. 45 min. 18 servings

Ingredients 

    blackberry muffin recipe
  • 1¼ cups of sugar (plus extra for sprinkling)
  • 1/2 cup butter, softened  (extra for brushing tops)
  • 2 cups all-purpose flour
  • 2 teaspoons baking powder
  • 1/2 teaspoon salt
  • 2 large eggs
  • 1/2 cup milk
  • 2 cups fresh blackberries  
  •  

    Directions

    1. Preheat the oven to 375° 
    2. Grease non-stick muffin tins with Crisco shortening
    3. In a large mixing bowl, cream sugar and butter together.  Beat in one egg at a time (adding a total of 2 eggs)
    4. In a separate bowl, combine the flour, baking powder and salt
    5. Gradually mix flour mixture into butter mixture alternating with milk & beating well after each addition.  
    6. Fold in Blackberries (do not use the mixer & beaters here)
    7. Spoon batter into greased muffin tins, approximately 2/3 full in each muffin cup
    8. Sprinkle tops with sugar
    9. Bake at 375° for 20-25 minutes, until a toothpick inserted in the center comes out clean
    10. Using a small silicone pastry brush, brush muffins with melted butter as soon as they are out of the oven and put back in the oven for 2 minutes 
    11. Let Cool for 5 minutes, remove from muffin tins & serve


    Recommended Baking Essentials

     Wilton Non-Stick 6-Cup Standard Muffin Pan, Set of 2Check Price OXO Good Grips Silicone Basting & Pastry Brush - SmallCheck Price LILPARTNER Hand Mixer ElectricCheck Price Tovolo Stainless Steel Mixing (7.5 Quart)Check Price


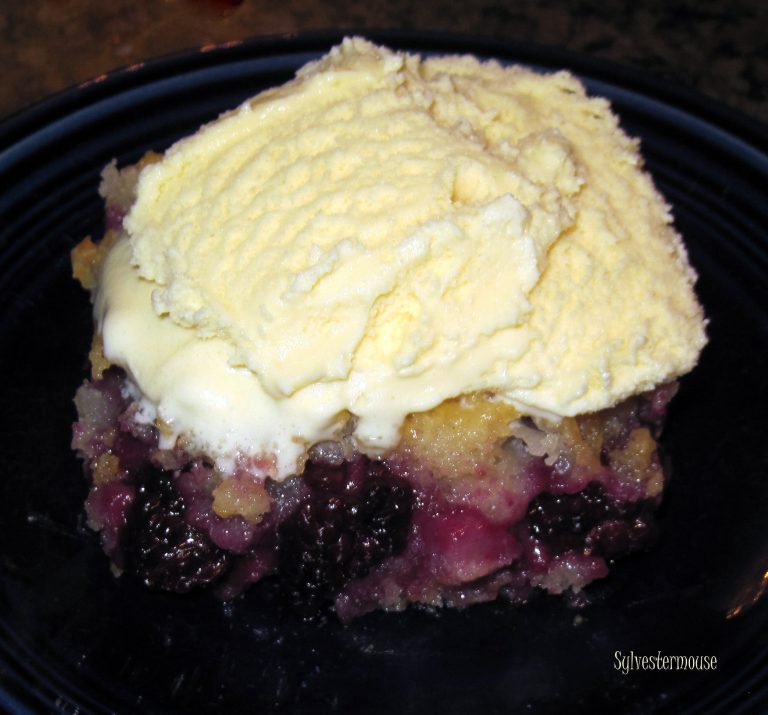
    Or, Try a Blackberry Fruit Cobbler!

    Easy Blackberry Cobbler Recipe


    Check Out More Recipe Reviews at
    ReviewThisRecipes.com


    Delicious Blackberry Muffin Recipe Reviewed Written by:
    House of Sylvestermouse


    © 2021 Cynthia Sylvestermouse


    Note: The author may receive a commission from purchases made using links found in this article. “As an Amazon Associate, Ebay (EPN) and/or Esty (Awin) Affiliate, I (we) earn from qualifying purchases.”


Friday, March 26, 2021

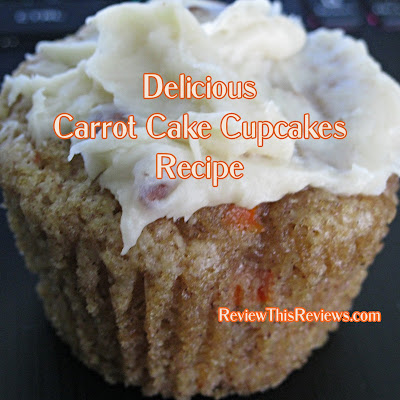
Carrot Cake Cupcakes Recipe Reviewed

Carrot Cake Cupcakes Recipe
Carrot Cake Cupcakes are a delicious treat anytime!  

My mother recently made 2 dozen carrot cake cupcakes using the recipe below.  She was generous and thoughtful enough to share them with me and my household.  I was beyond thrilled to receive this gift. I understand the time commitment and work behind making a few dozen cupcakes. Therefore, I can really appreciate receiving a dozen homemade cupcakes.

Cupcakes are a personal favorite since they are made in single serving portions. That saves serving preparation and clean-up.  You can grab a cupcake, toss the paper liner, and eat it without needing to get out a plate or utensils. So fast & easy!

The carrot cake cupcakes are fabulous for breakfast, a special treat, or dessert.  For 3 days straight, I was able to enjoy a carrot cake cupcake with my coffee for breakfast.  I was rather sad when they were all gone.  But, I have the recipe!  And, I am willing to share it with you so you too can start your day with delicious carrot cake.


Carrot Cake Cupcakes Recipe - Yields 36 cupcakes

Cupcake Ingredients:

2 c. shredded julienne carrots
2 c. granulated sugar
1 c. canola oil
4 large eggs
1 (8-ounce) can crushed pineapple, drained
2 c. all-purpose flour
1 tsp baking powder
1 tsp baking soda
2 tsp ground cinnamon

Frosting Ingredients: 

1/2 c. unsalted butter (softened)
8 oz cream cheese (softened)
4 c. powdered sugar
2 tsp vanilla extract
3/4 c. chopped pecans

________________________________________ 


Instructions for Cupcakes

1. Grate carrots & chop pecans
2. Preheat oven to 350°
3. Line large cupcake pans with cupcake liners (3 pans of 12 each)
4. In a large mixing bowl, combine sugar, oil, and eggs. Beat until well-blended.
5. Add flour, baking soda, baking powder and cinnamon. Beat for about 2 to 3 minutes.
6. (Set aside your mixer) Stir in shredded carrots & pineapple.
7. Fill cupcake tins 3/4 full and bake for approximately 22 - 24 minutes (toothpick test)
8. Set cupcakes on cooking racks and allow to cool completely before frosting
9. While the cupcakes are cooling, set out the butter and cream cheese to soften (about 30 minutes)

Instructions for Frosting

1. Beat softened cream cheese and butter together until smooth.
2. Add vanilla and powdered sugar. Beat until well blended. (Approximately 4 minutes)
3. Stir in chopped pecans (or hold them to sprinkle on top of frosted cupcakes)
4. Frost the Cupcakes


Recipe Substitutions or Additions

I prefer pineapple, but Mom suggests substituting raisins if desired. You may also want to add 1 cup shredded coconut for a more authentic carrot cake consistency & taste.


Baking Notes

I have a double oven, one is a convection oven. My ovens allow me to bake 3 pans of cupcakes at one time. (2 in the convection oven & one in the lower regular oven). 

Mom has one regular oven. Therefore, she makes larger cupcakes divided across two pans, which she bakes separately. Her yield is 24 larger cupcakes that take slightly longer to bake (approximately 26 - 28 minutes). 

Because oven temperatures vary, the toothpick test is required to determine when they are completely baked.


What is the Toothpick Test?

Quickly stick a toothpick down into the center of a cupcake or cake and pull it right back out. If it comes out clean, the cake/cupcake is done. If it has batter on it, you need to bake a little longer. I usually test in 1 – 2 minute intervals. 


Cupcake Baking Needs

There are a few kitchen tools that allow us to bake cupcakes with ease, starting with a large cupcake baking pan & cupcake liners.  Cupcakes are also very hard to transport from place to place.  If you do plan to take them elsewhere, I highly recommend the carrier featured below.

 Wilton Non-Stick Bakeware Cupcake PanCheck Price Wilton Rainbow Bright Cupcake LinersCheck Price Snapware Snap 'N Stack Portable Storage CarrierCheck Price NORPRO Funnel Pitcher, 3.5-Cup, WhiteCheck Price


Just for Fun! Add Edible Carrot Toppers


Orange & Green Fondant

 Wilton Decorator Preferred Neon Fondant, 4-Pack Fondant IcingCheck Price Wilton Decorator Preferred Primary Colors  4-Pack Fondant IcingCheck Price


Check Out More Recipe Reviews at
ReviewThisRecipes.com


Carrot Cake Cupcakes Recipe Review Written by:
House of Sylvestermouse


© 2021 Cynthia Sylvestermouse


Note: The author may receive a commission from purchases made using links found in this article. “As an Amazon Associate, Ebay (EPN) and/or Esty (Awin) Affiliate, I (we) earn from qualifying purchases.”


Friday, March 5, 2021

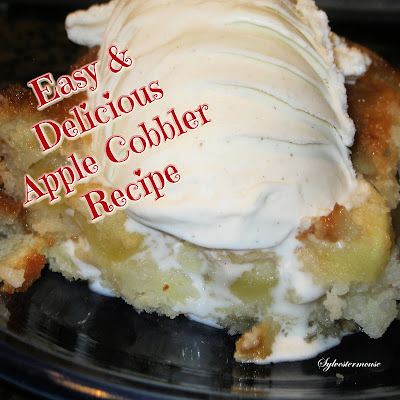
Easy Apple Cobbler Recipe & Review

cobbler recipe
One of my favorite desserts is a fresh baked cobbler.  Fortunately for me, my mother taught me how to make a very easy cobbler when I was a child. 

Over the years, I have made several types of fruit cobbler.  Peach cobbler is my personal favorite (you will find my peach cobbler recipe by clicking here), but my husband's favorite is an apple cobbler.

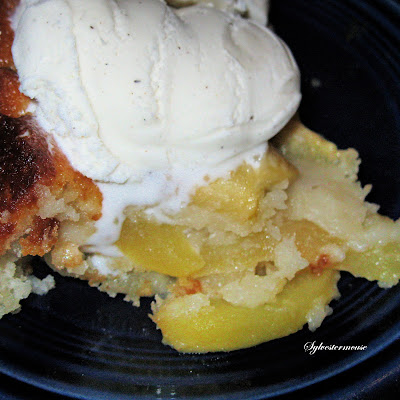
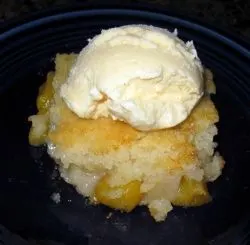
When my mother-in-law sent us a huge box of apples for Christmas, one of the first things I made was an apple cobbler.  Between my husband and son, that apple cobbler disappeared almost before I remembered to take pictures.

This is a very easy and delicious cobbler recipe.  You can use just about any fruit with the basic batter recipe. 


apple cobbler recipe


Apple Cobbler Recipe

Prep Time Cook Time Ready In Yields
20 min. 55 min. 75 min. 12-16 servings

cobbler recipe

Ingredients 

  • 2 cups of sugar
  • 2 cups milk
  • 2 cups self-rising flour
  • 8 Tablespoons butter, melted 
  • 5 or 6 Honeycrisp Apples - pealed & sliced (each apple should be sliced into 16 pieces)   


Directions

  1. Preheat the oven to 350° 
  2. Melt butter in an 9" x 13" baking pan 
  3. In a separate bowl, combine the sugar, milk, and flour. Stir to batter consistency
  4. Pour batter mixture over the melted butter (do not stir) 
  5. Add Apples in a single layer, spread evenly in the batter (do not stir - push apples slices down to make sure they get covered with batter. They will pop back up, but they need batter on top)
  6. Bake for 55 - 65 min. until golden brown (varies due to pan & oven)
 

Note:  You can half this recipe and cook it in an 8" pan for 45 min.  This is a great way to use only 3 apples!


Or, Try a Different Fruit Cobbler!

Easy Blackberry Cobbler RecipeEasy Blackberry Cobbler RecipeQuick and Easy Peach Cobbler RecipeQuick and Easy Peach Cobbler Recipe


Check Out More Recipe Reviews at
ReviewThisRecipes.com


Easy Apple Cobbler Recipe Written by:
House of Sylvestermouse


© 2021 Cynthia Sylvestermouse


Note: The author may receive a commission from purchases made using links found in this article. “As an Amazon Associate, Ebay (EPN) and/or Esty (Awin) Affiliate, I (we) earn from qualifying purchases.”


Monday, November 9, 2020

Tips And Tricks To Make Holiday Fudge

Christmas and the holidays mean one word in this house - Fudge! It was and is the annual tradition to make fudge for the Christmas holidays. Fudge is not difficult to make, but does require strict attention to the recipe for a successful fudge dessert. I have compiled a few tips and tricks to make fool proof successful fudge for the holiday season.


making fudge


The Original Fantasy Fudge Recipe is my favorite fudge recipe. It is tried and true. A smooth and creamy consistency that melts in your mouth. This is fudge made with marshmallow creme in a jar - old school with the original recipe ingredients. The recipe on the jar of today is slightly different from the original and as always, Grandma knows best when it comes to recipes. 

Fudge Tips And Tricks

One cooking tip I have learned through which is now probably hundreds of times making fudge (disclaimer: the annual Christmas fudge tradition has transitioned into making fudge a few times a year, so I am not 100, but have probably made fudge at least 100 times through my fudge career) is the boiling time.

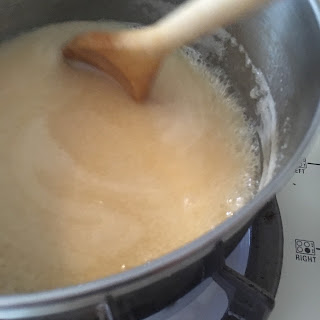
stirring fudge ingredients


Perfect, creamy, melt in your mouth fudge with this recipe requires five minutes of rocking and rolling boiling. Not a second more, not a second less and the fudge comes out perfect. 

The second cooking tip I have learned is to stir stir and stir. While the ingredients are boiling the fudge must be stirred constantly or the bottom will burn on the pan. Not only does this ruin the taste the pan will be absolutely horrendous to try and clean. Just when your arm is exhausted is not the time to walk away from boiling ingredients - keep stirring!

stirring fudge ingredients

The third cooking tip I have learned is to split the cooked fudge into two batches: one with nuts and one without. Fudge lovers are definitely in two distinct groups as to if fudge should be with or without nuts. I prefer fudge without nuts so am very partial to leaving the nuts out entirely. This is a large recipe so there is plenty of fudge to make 3/4 of a batch without nuts and 1/4 batch with nuts or vice versa.

holiday fudge


Fun Fudge Recipes From The Savvy Age

What else can you do with Fudge? Alot! Fudge is such a hit for the holidays with a little experimentation I have found fudge is also quite versatile. The favorites fudge spin off recipes so far: 

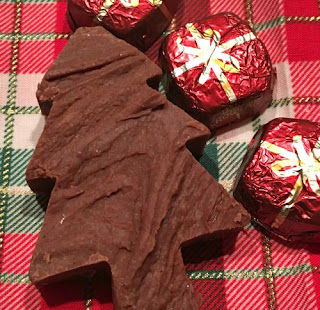
Fudge Christmas Cutouts

shaped holiday fudge


Fudge Cups - Snickerdoodle Fudge

snickerdoodles fudge cups


Fudge Balls

fudge balls


Note: The author may receive a commission from purchases made using links found in this article. “As an Amazon Associate, Ebay (EPN) and/or Esty (Awin) Affiliate, I (we) earn from qualifying purchases.”


Wednesday, April 29, 2020

Fresh Lemon Hand Pies

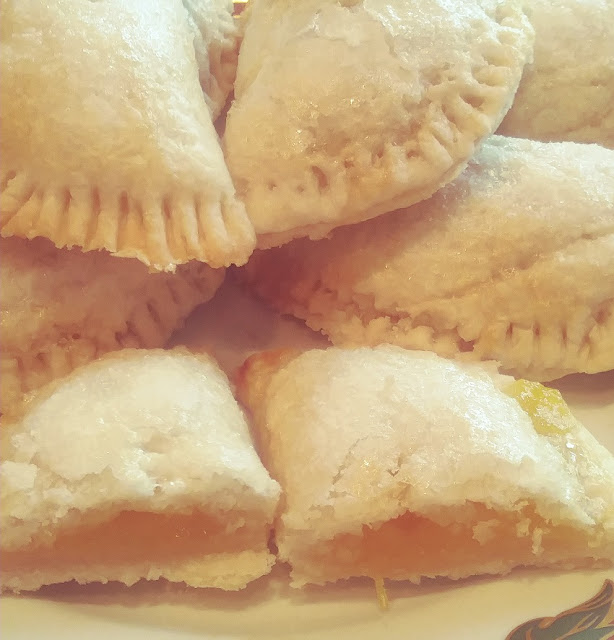
Fresh Lemon Hand Pies


My mother made the best ever lemon meringue pie, it's one of my all-time favorites. Every time she made it I was like, "is it cool enough to cut yet mom".

Anyone else in the house was lucky enough to get a slice with me around. Today I'm reviewing how easy it is to enjoy that lemony taste that brings back some wonderful childhood memories.

Hand pies are so easy to make with store-bought pie crust and lemon filling, or any fruit filling for that matter. This perfect snack or dessert could be ready in 40 minutes or less.

Every year my cousin sends me these giant lemons for his backyard in Arizona. This weekend I decided to make homemade fresh lemon hand pies. The first thing that I did was make the lemon filling.
Homemade Lemon Curd

Lemon curd is really so easy to make. I made this and refrigerated it overnight, but you can make this and let cool for a couple of hours and use it for whatever your making.

Lemon curd is so versatile it can be used for cakes, cupcakes, donuts, or spread it on top of a scone of crackers.

Fresh Lemon Hand Pies Ingredients (Lemon Curd)

1 cup of sugar
1/2 cup fresh lemon juice (4 to 5 lemons)
zest of 2 lemons
5 large egg yolks
1/2 cup salted butter (Cold)

Instructions
  1. You will need a double boiler for this, add some water and bring it to a boil.
  2.  Whisk together the sugar and egg yolks, continue to stir.
  3. Add the zest of the lemons and the lemon juice. Continue to stir the mixture for about 10 minutes, it will begin to thicken.
  4.  After 10 minutes remove the mixture from the heat, and add the butter one tablespoon at a time.
  5. Continue stirring, the mixture will become nice and thick. Once all the butter is melted into the mixture pour it into a bowl and let it cool for 2 to 3 hours before using it.
Pie crust ingredients

2-2/3 cups all-purpose flour
1/2 teaspoon salt
1 cup Crisco (Cold)
6 to 8 tablespoons of Ice Water

  1. Cut the Crisco into smaller pieces
  2. Add flour and Crisco into a mixing bowl
  3. Mix until Crisco begins to fold into the flour
  4. Add ice-cold water one tablespoon at a time 
  5. Mix until a ball of dough forms
Divide the pie crust into two equal parts wrap each with plastic wrap and refrigerate for about a half-hour. I used my KitchenAid Stand Mixer to make the pie crust.

Making Lemon Hand Pies

Now, it's time to assemble and bake these little sweet treats. I rolled each ball of the pie crust out to about a 10-inch circle between two sheets of parchment paper.

Tip: Lay the parchment paper or wax paper on a kitchen towel. This prevents it from moving all over the counter while rolling.

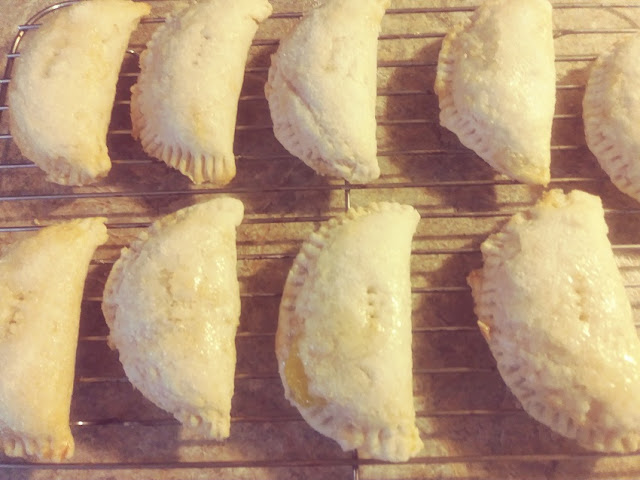
Cut the crust with a 4-inch cookie cutter, place a tablespoon of the lemon curd in the middle. Then, fold them over and pinch the edges together. Press a fork around the edges to seal.

Hand Pies


Poke the middle of each hand pie with a fork. I made 12 hand pies, six out of each half of the crust. You will have to re-roll some of the crust to get the other 2 out of each half.

Baked Lemon Hand Pies

Now you will need two egg whites and a couple tablespoons of sugar. Beat the egg whites in a small bowl.

 Brush the hand pies with the beaten egg whites and sprinkle the sugar over the top. Or you could skip the sugar and dust them with powdered sugar right out of the oven.

Bake on a cookie sheet lined with parchment paper at 350 degrees for about 18 minutes. Set them on a rack to cool and enjoy.

You might enjoy some of my other fresh lemon recipes


Note: The author may receive a commission from purchases made using links found in this article. “As an Amazon Associate, Ebay (EPN) and/or Esty (Awin) Affiliate, I (we) earn from qualifying purchases.”


Sunday, February 16, 2020

White Cake with Coconut Topping - Another Family Favorite

White Cake with Baked Coconut Topping - A Family Fave

I don't know what's with me lately, but here I am again this week talking about another recipe my family loves.

As I mentioned in the other recipe articles, of course, I can cook, it's just not my favorite thing to do. What the heck, I'll keep the recipe sharing going until this phase wears off.

Here's this Sunday's recipe for y'all: It's the most amazing simple white cake evah!

Much like the simplicity of my previously shared recipes, this one only has six ingredients, and it's so good! It has a topping as well, so the total ingredients are actually nine. You've done the math, so I guess you've figured out that the topping has three.

We actually don't have a name for this recipe, we just call it 'White Cake with Coconut Topping.'

Cake Ingredients:

  • 2 Eggs
  • 1 Cup of White Sugar
  • 1 Cup of Flour
  • 1 Teaspoon Baking Powder
  • 1/2 Cup of Milk
  • 1/4 Cup of crushed Walnuts (optional)
(Did you notice these ingredients are similar to making pancakes?)

Mix all the ingredients together, but don't put the walnuts in, they go on top. Don't over mix. Just get everything nicely blended. Pour the ingredients into an ungreased 8.1" square baking dish (2 quart). Sprinkle the top of the batter with the crushed walnuts. Bake the cake for approximately 25 minutes at 350 degrees. However, check it at 20 minutes.

The Topping

  •  6 Tablespoons of Butter
  • 10 Tablespoons of Brown Sugar
  • 4 Tablespoons of Cream or Canned Milk
Melt all ingredients in a pot on low heat. Once melted, add 1 Cup of baking coconut (the coconut you buy in the baking section of a grocery store).

Finishing the Cake


I usually poke about ten or so tiny holes into the cake using a toothpick. Pour the topping over the cake. Put the cake back in the oven under the broiler until the coconut on top turns into a nice golden color. It doesn't take long, watch it the whole time, don't walk away!

This is one of my favorite cakes. When my mother makes this cake, I cannot resist it. Although, yes I have resisted it for 10 months since I've been on Keto. Before my commitment to the Keto way of eating, I was all over this cake! I'll have to find a way to make this one Keto friendly.

Previous Family Recipes


Here are those other recipes I was speaking about:


Note: The author may receive a commission from purchases made using links found in this article. “As an Amazon Associate, Ebay (EPN) and/or Esty (Awin) Affiliate, I (we) earn from qualifying purchases.”


Sunday, February 9, 2020

Man's Birthday Cake - A Family Favorite Recipe

Man's Birthday Cake - An Easy Family Recipe
Passed Down from Generation to Generation

For the past several reviews I've shared family favorite recipes and today I'd like to share another.

Some people love to cook or bake, however, I'm not one of them. Don't get me wrong, I can cook; it's just that it's not my favorite thing to do. Because of that, I tend to stick with recipes I'm used to and that have been proven from generation to generation.

Most of us have favorite go-to recipes that we whip up when we need something quick. Here are my previous family baking favorites:
  1.  One-Bowl Chocolate Cake
  2.  Homemade Chocolate Icing
  3.  Easy Banana Loaf
In the chocolate cake recipe, you'll notice that the ingredients are very basic, but I point out which ingredient I believe makes the cake taste so good. Be sure to check it out.

A Man's Birthday Cake - What Is It?


Man's Birthday Cake is a raisin spice cake. I suspect the name of the cake was given generations ago because that's what we've always called it. The men in our family do like it, but so do the kids and women!

This recipe comes from my maternal grandmother's family, is a family favorite, and is simple to make.

What's Different About This Cake?


Like the banana loaf featured above, this recipe doesn't use milk. This raisin spice cake is made with raisin water instead.

Man's Birthday Cake Ingredients & Instructions


1 Cup of Raisins
2 Cups of Water, Keep the Water
1/2 Cup of Butter
1 Cup of Sugar
1 Egg
1 and 3/4 Cups of Flour
1 Teaspoon of Baking Soda
1/2 Teaspoon of Salt
1 Teaspoon of Cloves
1 Teaspoon of Allspice
1 Teaspoon of Cinnamon

Boil the raisins in two cups of water. Keep the water. (Note: Bring it to a boil and let it boil for five or six minutes).

Mix the butter, sugar, and egg in a medium-sized bowl. Once mixed, add the raisins and water. Give it a stir to blend it all together. It's ok if the water and raisins are hot.

In a separate bowl, mix the flour, baking soda, salt, cloves, allspice, and cinnamon. 

Then combine the two bowls of ingredients together. Stir until blended.

Place the cake mix into an ungreased baking dish (9 by 13). It will be a thin-looking batter and may seem like there's not much for such a large pan. However, when you use a pan this size, you can cut it into nice bite-sized squares for individual serving if you prefer.

You can use other sized pans of course.

Bake at 375 degrees for 20 to 40 minutes depending upon your oven. Check it after 20 minutes, if it's still not done, leave it for another 10 minutes. Keep doing that until it's fully baked. In my oven, it cooks in 20(ish) minutes.

When it cools I cut it up into squares and stack the squares in a covered cake dish for the family to grab and go. 

I rarely ice this cake, however, my grandmother used to top it with a cream cheese icing. Yum. If you decide to ice the cake, of course, you know you need to let the cake completely cool first.

By the way, without icing this is a delicious cake, when hot, with a bit of butter melting on it. Yum.

If you're making it as a birthday cake, you'll want to put the icing on it.


Note: The author may receive a commission from purchases made using links found in this article. “As an Amazon Associate, Ebay (EPN) and/or Esty (Awin) Affiliate, I (we) earn from qualifying purchases.”


Sunday, February 2, 2020

The Best One Bowl Chocolate Cake According to My Family

Easy One-Bowl-Chocolate Cake - a Family Recipe

My grandmother used this recipe, then mom, and now me. It has been handed down from generation to generation, and I suspect that trend to continue in our family.

My family always requests this chocolate cake. In fact, for birthday celebrations, store-bought cakes are not an option; this home-made cake is always preferred.

What Makes this Cake So Good?


It's not difficult to make a cake, and I'll bet the ingredients for this recipe are standard to most cakes. However, if I had to pull out one ingredient that makes this cake taste amazing, I'd say it's the Cocoa. 

I've always used Fry's Cocoa. I use it for our home-made chocolate icing as well. See below for a link to that recipe.

I've tried other baking Cocoa, but my family always says that 'the cake doesn't taste the same.' So I stick to Fry's Cocoa. Maybe they're just used to it? However, their friends also comment on how good the chocolate cake is - so yah, maybe it's the Cocoa?

You can get Fry's Cocoa in the USA; it's imported from Canada and is available here via Amazon. Canadians can visit Amazon's Canada site to order it, or head to the grocery store; it's easy to find.

Chocolate Cake Recipe Ingredients:

  • 1 and 1/2 Cups of White Sugar
  • 1/2 Cup of Cocoa (Fry's Cocoa if you have it - I pack it a bit to get a little more)
  • 1 and 3/4 Cups of White Flour
  • 1 and 1/2 Teaspoons of Baking Soda
  • 1 Teaspoon of Salt
  • 1/2 Cup of Softened Butter (not melted)
  • 1 and 1/2 Cups of Milk
  • 2 Eggs
  • 1 Teaspoon of Pure Vanilla Extract
Put everything in one bowl and lightly beat the ingredients until they're mixed together. Never over beat a cake. Once the ingredients are mixed and blended, that's good enough.

I bake this cake in a three-quart oblong glass baking dish or cake pan (9inches by 13inches).
How to Make the Best Home-Made Icing

You can use a non-stick spray if you like; however, I never use that. I'll rub the bottom and sides of the dish with butter, then lightly coat it with flour. To coat it with flour, put about a teaspoon of flour in the middle, then pick-up the cake dish and tilt it in all directions until the flour spreads very thinly over the bottom and sides. If there's too much flour, dump out the excess.

You can use different shaped cake pans as well. I've used two round ones before, then stacked them to make a round cake.

Bake the cake in a preheated 350-degree oven for 1/2 hour to 45 minutes depending upon your oven. Check it at the half-hour mark, then judge the length of time left at that point. With my oven, it's usually 40 minutes or so.

Let your cake cool, and then ice it with delicious home-made chocolate icing; here's the recipe. I've also linked the above photo to the Icing recipe. My grandmother taught me how to make it, so be sure to check it out; it also uses Fry's Cocoa. 


Note: The author may receive a commission from purchases made using links found in this article. “As an Amazon Associate, Ebay (EPN) and/or Esty (Awin) Affiliate, I (we) earn from qualifying purchases.”


Saturday, January 5, 2019

Yummy, Gooey, Chocolate, Vanilla, Delicious Dessert - Recipe Review

Serving of chocolate dessert
Reviewing a Delicious Dessert 

I imagine that this dessert has an official name in a cookbook or an online cooking or recipe website somewhere.  But when I first acquired the recipe from a co-worker who had brought the dessert to work to share, she called it 'yummy, gooey, chocolate, vanilla delicious dessert'.  And that's how it has been known in our household ever since! We have made it many times and always enjoy it immensely.  

If you are looking for a non-fattening dessert, you won't find it here among the cream cheese, powdered sugar, Cool Whip, butter, puddings and milk. Not to mention the walnuts and Hershey Bar. But for a delicious dessert, it is unparalleled in taste!


Recipe for Delicious Dessert 


CRUST:
Image of ingredients for the crust of chocolate delicious dessert


  • 1-1/2 stick of margarine or butter – melt
  • 1-1/2 c. chopped walnuts (or pecans)
  • 1-1/2 c. flour


Dessert crust baked

Mix & press into bottom of oblong pan.  Bake at 350◦ for 20 minutes or until lightly brown.

LET COOL COMPLETELY

FILLING #1
Image of ingredients for filling #1 of delicious dessert recipe


  • 1 8 oz package cream cheese
  • 1 c. powdered sugar
  • 1 c. Cool Whip (buy 9 oz carton – more goes on top)


Filling #1 for delicious dessert recipe

Spread on cooled crust.

FILLING #2
Ingredients for Filling #2 of delicious dessert recipe


image of spreading filling #2 on delicious dessert

Step two finished for filling #2 of delicious dessert recipe

TOPPING:


  • Spread remaining Cool Whip.
Spreading cool whip over dessert

  • Shave Hershey bar over the top.

Shaving a Hershey Bar over top of delicious dessert

CHILL

SERVE
Delicious Dessert Finished


SUMMARY NOTES


The most interesting part of this dessert (which makes a WHOLE lot, filling the 12 x 10 x 2 inch pan I use as seen in these photos) is that it KEEPS really well and tastes even better the longer it is kept chilled in the refrigerator. Of course you could make a smaller batch, but we most often make it for a larger gathering or a party occasion. And this yummy dessert seldom lasts long enough to store more than one or two days around us! 


Delicious pudding dessert serving


More Puddling Desserts


Recipe Reviews on ReviewThisRecipe.com 


(c) Wednesday Elf 1/5/2019

#All images are personal photos by (c) Wednesday Elf


Note: The author may receive a commission from purchases made using links found in this article. “As an Amazon Associate, Ebay (EPN) and/or Esty (Awin) Affiliate, I (we) earn from qualifying purchases.”


Most Recent Reviews on Review This Reviews


Search for Reviews by Subject, Author or Title

The Review This Reviews Contributors


SylvestermouseSylvestermouseDawn Rae BDawn Rae BMbgPhotoMbgPhotoBrite-IdeasBrite-IdeasWednesday ElfWednesday ElfOlivia MorrisOlivia MorrisTreasures by BrendaTreasures by BrendaThe Savvy AgeThe Savvy AgeMargaret SchindelMargaret SchindelRaintree AnnieRaintree AnnieLou16Lou16Sam MonacoSam MonacoTracey BoyerTracey BoyerRenaissance WomanRenaissance WomanBarbRadBarbRadBev OwensBev OwensBuckHawkBuckHawkDecorating for EventsDecorating for EventsHeather426Heather426Coletta TeskeColetta TeskeMissMerFaeryMissMerFaeryMickie_GMickie_G


Review This Reviews is Dedicated to the Memory of Our Beloved Friend and Fellow Contributor

Susan DeppnerSusan Deppner

We may be apart, but
You Are Not Forgotten


“As an Amazon Associate, Ebay (EPN) and or Etsy (Awin) Affiliate, I (we) earn from purchases.” Disclosure Statement

X