Showing posts with label Decor. Show all posts

Friday, September 14, 2018

How to Easily Paint & Refinish Metal Outdoor Furniture

How to Easily Paint & Refinish Metal Outdoor Furniture
Renew Your Outdoor Furniture with Rust-Oleum Spray Paint

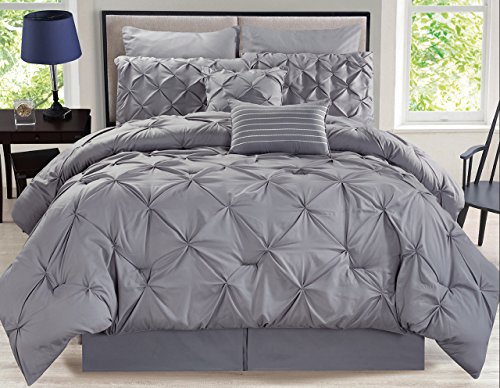
For the last few seasons, our outdoor furniture has started looking worn and tired.  Metal outdoor furniture is too expensive to throw away and replace, but it was definitely time to restore the beauty of the pieces.  

Last spring my husband started refinishing our outdoor furniture one piece at a time.  He choose our wrought iron table as his first project.  With a few cans of black Rust-Oleum and less than an hour, our outdoor table looked brand new again!  

Since then, he has refinished the chairs that match that table and the whole set is beautiful again. 

Last week, he refinished our wrought iron glider.  I love all of our outdoor furniture and appreciate its durability.  But, that glider is the one I use the most.  I am thrilled to have it restored to its original beauty.

My new slogan for wrought iron metal outdoor furniture:  Restore, Don't Replace!


Refinish Metal Outdoor Furniture
Refinished Wrought Iron Patio Table & Chairs
He also painted my little ghost  in the background with a can of White Rust-Oleum - Getting him ready for Halloween


How to Refinish Wrought Iron Outdoor Furniture

Time:  45 mins
Cost:  $25.00

Compared to the Cost of a New Glider:  $300.00

Because the refinishing of the metal table and chairs had been so successful, when my husband said he was going to refinish the glider, I grabbed my camera.  I wanted to make sure I had everything I needed to tell you exactly how to repaint your metal outdoor furniture too.

  How to Easily Paint & Refinish Metal Outdoor FurnitureItems Needed:
  • Cans of Rust-Oleum
  • Plastic Drop Cloth 
  • Tent Pegs
  • Plastic Gloves
  • Long Sleeve Shirt
  • Old Shoes & Old Painting Clothes
Step 1:  Clean the piece - remove all dust & dirt

Step 2:  Cover an area in the yard with a large, thick plastic drop cloth  (2.0 mil preferred)

Step 3:  Use tent pegs to hold the drop cloth down.  We used old army tent pegs at all four corners, but you could use bricks instead to weigh down the corners.

How to Easily Paint & Refinish Metal Outdoor Furniture Step 4:  Shake up the Rust-Oleum spray paint

Step 5:  Turn the piece over and start spraying the underside

Step 6:  Turn the piece right side up and spray the entire surface from every angle in order to cover it completely and evenly

It took about 45 minutes and 4 cans of Rust-Oleum to spray paint the glider.  That short amount of time spent renewing our glider will give us many more years to enjoy the beloved glider.  Plus, the Rust-Oleum spray paint helps to prevent rust.


Restoring Wrought Iron Metal Outdoor Patio Furniture


Additional Spray Painting Tips: 


Wear disposable gloves  (see products below)

Wear long sleeves to protect your skin

You may need to wear protective eyewear and disposable masks

Keep the spray can moving as you are painting to avoid runs.

You should do all of your painting on any individual piece within an hour.  

This spray paint, in our experience, tends to self- level any heavy areas of application as it drys, within reason.

Let the furniture piece completely dry for 24 hrs. before use.

 
How to Easily Paint & Refinish Metal Outdoor Furniture
My Wrought Iron Glider Beautifully Restored


Project Items Needed for Refinishing Metal Outdoor Furniture

 Rust-Oleum 245196 Universal All Surface Spray Paint, 12 oz, Gloss BlackCheck Price Trimaco 04301 Slip Resistant Dropcloth Stay Put Vinyl Drop Cloth, 9' x 12'Check Price 12 Pack Tent Stakes, 7075 Ground Metal Camping Aluminum Tent PegsCheck Price Dealmed Brand Nitrile Medical Grade Exam Gloves, Disposable, Latex-Free, 180 Count, Size Extra LargeCheck Price


 See More Crafts & DIY Reviews On
ReviewThisCrafts.com!


House of Sylvestermouse


Note: The author may receive a commission from purchases made using links found in this article. “As an Amazon Associate, Ebay (EPN) and/or Esty (Awin) Affiliate, I (we) earn from qualifying purchases.”


Sunday, September 2, 2018

How to Position Twin Beds to Create Separate Areas in a Room

Reviewing How to Layout Twin Beds So They're Separate from Each Other

The standard room layout for twin beds, is to place them side by side with a nightstand in-between.

However, there are creative ways to define areas in a shared room.

Below are three typical bedroom shapes you'll find in most homes: Rectangular, Square and L-Shaped.

Furnishings for a room with twin beds tend to be two beds, two nightstands, two desks, one or two dressers and or storage trunks and accessories.

Tip: If the room has a decent sized walk-in closet, put the dressers inside of it. You can place dressers under a section of clothes, and use the area above the dresser to hang smaller items.

1. Suggested Layout for Twin Beds in an L-Shaped Bedroom:

An L-Shaped room is the easiest floor plan to distinguish separate sleeping areas.

This floor plan makes the twin beds appear almost hidden to each other. Both areas have a nightstand, a desk and in this design a shared dresser. Again, if possible, put the dresser in the closet.

Floor Plan Layout by Funkthishouse

2. Suggested Layout for Twin Beds in a Rectangular Shaped Bedroom:

With a rectangular shaped room the tendency is to assume the beds have to be positioned side-by-side. That's absolutely not the case.

If the room is narrow, and doesn't allow for a lot of furniture, then use twin sized beds with drawers built in the bottom. That way you've eliminated the need for a dresser. Or again, if there's a walk-in closet, put the dresser in the closet.

When space is very tight, choose beds with built-in drawers. Here are a few examples:


Remember, if you decide to get beds with drawers, a nightstand positioned incorrectly can block the opening of those drawers. Twin beds with storage can also come in a large number of designs including some with storage in the headboard. If the headboard doesn't offer built-in lights, add creative strip lighting.

Floor Plan Layout by Funkthishouse.com

3. Suggested Layout for Twin Beds in a Square Shaped Room:

This layout will depend upon where the doors and windows are positioned in the room. However, you can still create defined areas by thinking outside the box.

In a square room, our design instinct is to place twin beds side-by-side. But don't let that thinking stop you from setting up defined areas. Even square rooms can have separate areas for twin beds.

In the floor plan below you'll notice the room was split in half. The position of the main door allowed for that. Essentially one half of the room is allocated to one twin bed area and the other half for the second bed.

In this design there wasn't room for a dresser, but as mentioned above, there are multiple ways to accommodate storage. Here you'll see a storage trunk at the end of each of the beds. The beds can have drawers, or a dresser can go inside of a large closet.

Floor Plan Layout by Funkthishouse.com

BONUS TIP: Small Bedrooms and Selling Your Home

During my real estate years frequent comments were about bedroom size. Most people feel that an empty room is larger than a furnished room. It isn't.

An empty room looks small.

People tend to need a visual to gage what will fit into a space. If the room is small, use bed and wall storage to illustrate how efficient the space can be.

Measurements to give you a sense of bed sizes and space:
  1. Standard king size beds measure 76 inches wide by 80 inches long. (6.33ft by 6.66ft)
  2. California king size beds measure 72 inches wide by 84 inches long. (6ft by 7ft)
  3. Standard queen size beds measure 60 inches wide by 80 inches long. (5ft by 6.66ft)
  4. California queen size beds measure 60 inches wide by 84 inches long. (5ft by 7ft)
  5. Standard double size beds measure 54 inches wide by 75 inches long. (4ft by 6.25ft)
  6. Standard twin size beds measure 39 inches wide by 75 inches long (3.29ft by 6.25ft)
  7. Extra long twin size beds measure 39 inches wide by 80 inches long. (3.29ft by 6.66ft)
Next, learn how to affordably convert twin sized beds into a king bed...


Note: The author may receive a commission from purchases made using links found in this article. “As an Amazon Associate, Ebay (EPN) and/or Esty (Awin) Affiliate, I (we) earn from qualifying purchases.”


Sunday, August 12, 2018

How to Get Your Bed to Look Like a Professional Decorator Made It

Photo Design by Funkthishouse.com
photos via Pixabay
The problem for most of us is that our bedding lacks style, quality and most probably, fluffiness!

If we're being honest, we tend to keep our Comforter/Duvet Sets for much too long without changing them. When we're stuck with the same bedding, we're stuck with the same drab look.

Beyond the bedding color, pattern and design, there are certain items that can give your bedroom a pick-me-up.

Below are a list of basic items or variations of them that you'll need in order for your bed to look like a high priced decorator assembled it.

Duvets Versus Comforters - Which One is Better?

With a Duvet, you buy the fluffy insert separately and it's the quality fluffiness that gives your bed it's professional look. The benefit of buying an insert separately is that you can choose one that's long lasting and of higher quality: The higher the quality the longer it will stay fluffy.

Since it's an insert, you can change the actual duvet cover, and thus the look of your room, anytime you want.

Next you'll want duvet clips to secure the Insert to the Cover so it's free of lumps, bumps and wrinkles.

Comforters are all-in-ones, in that the comforter and insert are one piece thus eliminating the need to buy an insert or duvet clips. Also, they usually come with pillowcases, a comforter, a bed skirt and sometimes bed sheets.

However, the downside to a comforter is that if the quality is lower (and many times they can be), it will lose it's fluffiness and start to look flat on the bed (like a bed sheet does).
Here's an 8 Piece COMFORTER Set (Not a Duvet Set) Rochelle Pinched Pleat Gray Comforter Set QueenHere's an 8 Piece COMFORTER Set (Not a Duvet Set) Rochelle Pinched Pleat Gray Comforter Set Queen
A flat comforter will take away from that professional look you're going for, unless of course you're aiming for a simple almost Japanese look to your room.

Pillows Finish the Bed's Look:

Have you noticed that a bed with a duvet or comforter looks decoratively unfinished with only two pillows on the bed? Especially on a king size bed.

To give a bed that professional decorator look, you'll want to have at least four standard or king size pillows, and then finish the pillow-look with a few decorator pillows.

Bolsters also work. They're a long oval pillow you can use against the bed frame or the wall for the other pillows to lean against.

They do exactly what their name says, 'they bolster' the pillows in front so you have a fuller look of pillows on the bed. If you don't have a bed frame, they're also a way to get pillows off the wall. However, even if I have a bolster, and I do, I still use 4 pillows.

Make sure the pillows are fluffy as well. Flat, over-used pillows will make the bed look drab. So if your pillows aren't fluffy and you can't go out and buy more, put two old pillows, or even three old pillows inside one pillowcase. I've done this several times and it works well.

I've overstuffed the pillowcases at the back, and put two new fluffy pillows at the front. That way I only had to buy two new pillows instead of four, saving a bit of cash while still maintaining that fluffy full look.

Pillowcases, Don't be Afraid to Mix and Match:
With pillowcases you can go two ways. 
Either they can exactly match the duvet or they can be complimentary in pattern and color to the duvet. 
If you have a lot of extra pillow cases, you may already have some that are complimentary with your new duvet thus saving you the expense of having to purchase extra pillowcases. 

Bed Skirts for Duvet and Comforter Sets:
Some people like bed skirts, and some don't. 

My mom isn't a fan of bed skirts, so rather than a duvet or comforter, her bed has a bedspread. A bedspread goes right to the floor to hide the box spring, thus removing the need for a bed skirt. 

However, if you don't like to see any part of the box spring when the bed is unmade, then even with a comforter, you'll want a bed skirt.

Bed Sheets - They Don't Have to Match the Duvet or Comforter
This is misunderstood by many bed makers.

If you already own bedsheets that are complimentary to the duvet/comforter set you purchased, then use them!

That way you can focus on buying the most important elements to making your bed look professional: A high quality duvet insert, duvet clips and at least four pillows, decorator cushions and a bed skirt if you don't already have one.

Use an existing bed skirt if you have one that's complimentary! Again, it doesn't have to match exactly.

Pull it All Together:
  1. You have your fluffy bedding - either a comforter set or a duvet set with a quality insert and duvet clips
  2. You've got a bed skirt to hide the box spring
  3. You've got at least four standard (or King) pillows and a couple of decorative pillows.

However, Making the Bed is Where it Will Get that Final Professional Look:
  1. Fold down the top part of the duvet so the reverse side is showing by about six to twelve inches. You can even fold it down a couple of feet if you have a lot of pillows and you want some of the bed sheets exposed because of their design and quality. However, the standard fold down of the top portion of the duvet/comforter is about one foot.
  2. Pull the wrinkles out of the comforter/duvet
  3. Make sure the comforter/duvet is even all the way around
  4. Details matter, don't let the bed sheets hang past the duvet cover/comforter on the sides or ends. If they're too long, tuck them in

There you have it! Think fluffy and you'll nail it.


Note: The author may receive a commission from purchases made using links found in this article. “As an Amazon Associate, Ebay (EPN) and/or Esty (Awin) Affiliate, I (we) earn from qualifying purchases.”


Sunday, July 29, 2018

Egyptian Cotton Sheets Really Are THAT Awesome!

Photo by Funkthishouse.com - A Personal Review
100% Egyptian Cotton Sheets are Incredible to Sleep In

I've never been one to fuss about the quality of our bed sheets. If the sheet set was on sale, then it likely made it's way into our home.

However this past weekend my mother gifted me a set of 100% Egyptian Cotton Sheets and my husband and I are shocked at how amazingly comfortable they are.

The thread count on these sheets is quite high: If I had to guess I'd say approaching 1000tc.

If you've ever stayed in a quality hotel with those Hotel Bed Sheets, these sheets fall into the same category.

Mom purchased the sheets a few years ago, but because she didn't like the way they wrinkled after washing, she never used them. In fact, she had them dry cleaned and kept them hanging in her closet unused.

When I arrived home from my visit with Mom, I washed and dried the sheets, and yes they did wrinkle, but once on the bed, they were fine.

The wrinkles really don't bother me. Of course I googled how to get the wrinkles out, but have no intention of doing any of the suggestions. For my taste, they really don't wrinkle enough to worry about it.

Crisp and Cozy

That's how I'd describe these sheets. In my opinion they're worth every penny. 
Thread Spread True Luxury 100% Egyptian Cotton 1000 Thread Count 4 Piece Sheet Set Dark Grey QueenThread Spread True Luxury 100% Egyptian Cotton 1000 Thread Count 4 Piece Sheet Set Dark Grey Queen, King, & California King
The crisp feeling of the sheets make you want to stay in bed and never get out. Even my husband who could care less about bed sheets has been going on about how comfortable they are.

Apparently the sheets will get softer as they go through additional wash and dry cycles. However, I prefer their new and 'crisp' feeling on my skin. 

If you want to soften them quicker, you can always try these suggested tips from WikiHow.

Flannel and Jersey Bed Sheets - Also Awesome

Although we're not terribly fussy about our sheets (until the Egyptian Cotton Sheets!), we have always liked Flannel Sheets and Jersey Sheets for the winter months. 

There's nothing more comfy cozy than crawling into a bed with flannel sheets on a cold winters night.

Jersey sheets are similar to flannel, just a little thinner. Their bonus feature is how the fitted sheet easily stretches over the mattress ends. If you've never tried jersey sheets, you should, they're pretty awesome, and not that expensive.

So in summary, all the hype you've heard about 1000 Thread Count Egyptian Sheets, in my opinion, is justified; total comfort!


Note: The author may receive a commission from purchases made using links found in this article. “As an Amazon Associate, Ebay (EPN) and/or Esty (Awin) Affiliate, I (we) earn from qualifying purchases.”


Monday, July 9, 2018

Reviewing Handmade Rag Rugs

Handmade denim rag rugs by StudioAtRedTopRanch
I love rag rugs and have always loved rag rugs. Occasionally, I have made my own using strips of recycled cloth (bed sheets) and a super large crochet hook. Recently, I have learned about the hand-woven rag rugs made by StudioAtRedTopRanch. They are such beautiful rugs that I wanted to share with you.


StudioAtRedTopRanch on Etsy


This Etsy shop offers hand-woven placements, table runners, and rugs. The rugs are my personal favorite. 

Tracy is the owner/artist at StudioAtRedTopRanch.  About the rugs, she writes:


"I began making handmade rag rugs as a way to use up leftover and unloved fabric. As I studied rugmaking, it became a way to learn and preserve an art developed by women who made-do by repurposing clothes and curtains because they had no other materials available..."

One of the reasons I love her rugs is because they look a little more "finished" than my crocheted rag rugs do. I guess because hers are woven they lay flatter and looked more finished than my lumpy, thick rugs.

Another reason I really like these rugs is because they are handmade - but didn't take me weeks to make!  I enjoy making my own crafts but I just don't make much time for crafts and I have the attention span of a flea. 

One more reason I like these handmade items is because I like to support women who have small, home businesses. Besides, when someone is making something they love, and something that is meaningful to them, the quality is so much better. 

These rugs, runners, and placements are perfect gifts for people who have a country farmhouse or rustic cabin living style. Or a perfect gift for yourself - adding a touch of "home" in your favorite room. My favorite "color" (and style) is the denim rug but she offers many colors to choose from.


some of the color options at StudioAtRedTopRanch


Note: The author may receive a commission from purchases made using links found in this article. “As an Amazon Associate, Ebay (EPN) and/or Esty (Awin) Affiliate, I (we) earn from qualifying purchases.”


Sunday, May 6, 2018

8 Creative Flower Planter Ideas for Inside or Outside

Have a lot of broken down cars? Or just one?
There it is, a car planter, with the body as Art
Bring out your inner artistic side to display flowers and plants.

If you're stuck in a rut on the way you feature plants in and around the home, this list is designed to trigger an artistic spark so you can break that chain, and try something different this year.

1. Use An Old Wooden Toolbox
Old Shoes as a Planter?
Hmmm Yes? No?

If you have an old wooden, distressed toolbox - the ones with the handle across the top are especially nice - fill it with dirt, flowers, plants or spices. Place it anywhere you choose. Move it around from time to time.

2. Use Window Boxes Indoors

You've seen window boxes on outdoor railings, porches and the exterior of windows, however you can use a window box inside as well.

Find the window box that works best for your space, and simply duplicate what you would do outdoors. You can also spruce it up with decorative rocks and variety of rock garden plants. 

3. Old Tea Cups or Mugs

Old tea cups and coffee mugs are a creative way to display small plants or spices. If your kitchen has an area to display a set of cups or mugs, use them as a decorating accent or a place to hold your kitchen spices. Get each mug in a different color to add a little funk to your plant area.

A Large Cup of Flowers
4. Old Metal Boxes

You can use a new metal box as well. Any metal container in your home, that's the right size for your needs, can be filled with dirt, rocks, flowers, spices or plants. 

5. Ladder Plant Display

There are a number of ways to display plants on a ladder. You can secure the plants to each rung, or rig it so that each rung can hold a planter box. If doing it yourself isn't an option, you can get an already made free standing ladder that's designed to hold planter boxes. 

6. Drawers from Old Furniture

Rather than toss out your old dressers, use a drawer or two or three to plant flowers in.

Put the dirt directly in the drawer and plant what you want, or use it as a holder to place smaller pots already planted.

If you're able, turn it into a family affair by letting the kids paint a drawer and take care of their plants in their drawer.

7. The Top of a Birdhouse

Create edging around the roof of your birdhouse, fill it with dirt, then plant what you want in the area. It will look lovely, and the birds will appreciate it.

8. An Old Bicycle as a Home for Plants and Flowers

Position an old bike against a wall, tree or in a garden and use it as a prop for planting flowers and other plants. If it has a basket, fill it with hanging flowers. Use the wheels to grow flowers and plants that need a support to tie onto.


Note: The author may receive a commission from purchases made using links found in this article. “As an Amazon Associate, Ebay (EPN) and/or Esty (Awin) Affiliate, I (we) earn from qualifying purchases.”


Sunday, April 22, 2018

3 Easy Ways to Cover Wall Imperfections Without Painting

3 Easy Ways to Cover Wall Imperfections Without Painting


Imperfect walls can be frustrating. We see them where others may not, and they drive us crazy!

When painting isn't an option or something you feel like doing, you can employ several other techniques to solve your flawed wall issues.

Wall Murals & Decals

Today's wall murals come in many materials; most commonly, you'll find vinyl and paper.

You can get full wall coverage with a vinyl wall decal. However, it can be expensive to cover a large wall. In fact, most of the large wall decals approach the five hundred dollar mark. But remember the advantage of a vinyl decal is that it can be easily removed.

If you're renting, vinyl decals are much easier to take down when the rental period is up. Depending upon the quality of vinyl you choose, you may or may not have to repair the paint underneath after removing it. However, higher-quality decals are removable without worrying about wall or paint damage.

If you have an overly flawed wall, another tip is to choose a geometric design in either paper or vinyl. The three-dimensional look helps to hide any obvious boo-boos that might otherwise peek through a plain or solid design.

If a wall has quite a few flaws, wallpaper (not vinyl) may be the wiser choice.

In fact, if the walls have apparent marks or flaws to cover, then a durable wallpaper, like Grass Cloth, should be considered.

You can get any pattern, scenery, or design in vinyl or paper, creating virtually any artistic look you want.

Faux Wall Treatments - Faux Brick, Faux Wood

You don't have to spend a fortune to cover an unattractive wall. Faux vinyl materials exist in various styles, including faux brick and wood. Or, if you're willing, you can put up actual wood panels. Today's decorating choices essentially give you any design, look, or color in faux or real wood.

Creating a feature wall can change the look of a room. A flawed wall gives you the chance to put your inner artist to the test. The wall that was once painful to look at can become your home's Picasso.

Getting started is the hardest part. Look around your room and decide what design would look best on your wall: geometric, bricks, or wood ... and then find the look you want in easy-to-install faux art.

Use Three Dimensional Drapes to Cover a Flawed Wall

When you're not into painting, and you're not into vinyl decals, and you're absolutely not into wallpaper, but you need to do something to fix that eye-sore, then three-dimensional drapes are the way to go. 

You don't need a window to put up drapes!

Put up the drapery rod and add the artistic scenery drapes to cover your wall, floor-to-ceiling, and wall-to-wall, and you've solved your problem! Easy peasy, lemon squeezy. 

Oh, and the best part is that you can get two or three designs in three-dimensional draperies and switch them up when you get tired of them! Go seasonal in your designs: spring, summer, fall, and winter. 

There you have it, three easy ways to fix up your walls without painting; have fun!


Note: The author may receive a commission from purchases made using links found in this article. “As an Amazon Associate, Ebay (EPN) and/or Esty (Awin) Affiliate, I (we) earn from qualifying purchases.”


Sunday, April 1, 2018

Three Unique Kids Bedroom Decor Ideas - Unconventional, Practical and Fun

Glow in the Dark Area Rugs Here
Something for the Wall, the Floors and the Bed - Unique Items that Serve a Useful Purpose and Add a Decorating Element to the Room

For the Floor - A Glow in the Dark Area Rug

A glow in the dark area rug is a fantastic way to add ambient lighting to a child's room without having to use electricity or batteries.

Depending upon the size you choose, add several glow in the dark rugs to a bedroom. If your child's room is quite large, position the rugs so that they safely lead the way out in the dark, or place them at various ends to provide soothing lighting to the entire space.

You could also place the rug in a hallway near a washroom. Again, it's an evening lighting solution without using electricity. 

For the Walls - A Picket Fence Wall Decal 
Picket Fence Wall Decals Here

Adding color and interest to the walls of child's room helps to finish off the space.

Today there are an endless supply of wall decals to choose from. Decorating unconventionally is much easier these days than it was twenty or so years ago. 

Today there's no need to stencil art on the wall, or have murals painted when you can just buy them, ready made, in the form of vinyl. 

A picket fence wall decals can be featured in a number of ways. Install it all the way around the room, on one wall, or even as a faux headboard for a bed. If the room has a number of corners or alcoves, use wall decal picket fences as a way to create areas of interest, such as a gaming or reading corner.

Zip Up Bedding
For the Bed - Zip-Up Bedding

Zip-Up bedding is perfect for kids who don't like to make their beds.

If you're tired of going into a room with a messy bed, then get the kids zip-up bedding. They're easier on mom or dad, as the kids can easily do their own beds.

Zip bedding is also an option for kids who may fall out of bed or who tend to kick the covers off at night.

Hard to make beds like Bunks or Lofts are an ideal choice for zip up bedding. The top sheet and fitted sheet are joined together making them easy to go on and off as one piece. You never have to worry about tucking sheets in, especially hard-to-get-at sides.

Since zip-up bedding comes in many designs and colors you can use them as the main bedding by just adding some decorative pillows, or put a comforter set over top. You could also fold a lovely comforter at the end of the bed making the designs in the zip-up sheets the main decorative print for the room.


Note: The author may receive a commission from purchases made using links found in this article. “As an Amazon Associate, Ebay (EPN) and/or Esty (Awin) Affiliate, I (we) earn from qualifying purchases.”


Sunday, March 25, 2018

Five Easter Home Decor Ideas

Easter Home Décor Product Items Here - by Funkthishouse.com
Decorating for Easter can be as simple as changing the centerpiece on the table, to a more dramatic change, such as changing out the art on the wall with a seasonal Easter/Spring piece.

Let's review five Easter home décor ideas that are both traditional and unconventional.

1. Be Unconventional and Decorate a Dollhouse for Easter

Heads-up Grandparents, this is for you! Mom and Dad too of course. It's a great idea for parents (Grand and all) who don't have time to decorate the 'real' house for Easter.

Get a dollhouse and decorate it, it gives the kids something to play with and something to decorate.

Place the dollhouse in a central location, perhaps on a table in the foyer, and decorate it with Easter related characters, eggs, fun dollhouse lights, or have the kids make items for it. Get Easter cut-out books for the kids to decorate with, or just make décor items from scratch.

2. Decorate the Table for Easter

Our dining room table or kitchen table sits ready to be used as the focal point for the special occasions yet we tend to avoid using it.

The problem with using a table to decorate is ensuring it's still usable for eating. But hey, no problem, just keep it simple.

Cover your table(s) with an Easter themed tablecloth or Easter placemats and feature a lovely Easter centerpiece.
More Easter Fun by ReviewThis

3. Place Easter Bouquets or Easter Ornaments in the Main Rooms - Add an Easter Wreath

The easiest way to add a touch of Easter, is to include a bouquet or ornament in the room. You don't have to go with a standard flower bouquet (although that's always lovely) ... try an Easter egg tree or a lighted Easter display ornament.

Add an Easter wreath to the front door or add several inside the house. Place one or two in the foyer and of course find a place for one in the living or dining rooms. Again be sure to scroll down and view some examples.

4. Easter Wall Art - Add Fun Creative Pieces to the Wall for Spring

The nice thing about Easter wall art is that it works for both spring and summer. Get a piece or two and put it up in the foyer, living room or dining room for both seasons. You'll have Easter covered and the fun continues through all the warm weather.

5. Easter Pillows and Throw Blankets

The standard décor pieces for a seasonal change are pillows and blankets. They're easy to display and easy to put away. If you have pillow covers, you can just cover your existing pillows. That's a particularly popular way to change out pillows, as pillow liners are easy to store.

Changing your throws and pillows to pastels or soft tones also helps to lighten up a room giving it that fresh, airy appeal.

See the Products Here

Happy Easter :)


Note: The author may receive a commission from purchases made using links found in this article. “As an Amazon Associate, Ebay (EPN) and/or Esty (Awin) Affiliate, I (we) earn from qualifying purchases.”


Sunday, March 18, 2018

5 Ways to Brighten Up Your Home - Get Ready for Spring and Summer the Easy Way

Brighten Up Your Space - Blonde Wood Flooring Opens Up the Room- Photo Via Pixabay
Where fall and winter had us craving darker, richer tones, spring and summer reverses that and brings out our need for a cleaner, leaner, brighter, fresher environment.

Go From Drab to Fab

When a total renovation is out of the question, you can still try any one of these five simple ideas to lighten and brighten your home:

1. Update Your Light Bulbs

You can acquire light bulbs in various shades. If you haven't tried 'Daylight' bulbs you'll want to give them a go. They emulate natural outdoor lighting and come in a number of styles, such as traditional, candle, spotlight, miniature and more. They're also useful for those who suffer from seasonal affective disorder (SAD).

2. If Your Room is Already Lighter in Shades, Add Some Black or Charcoal Accents

Sounds weird doesn't it? However the darker accents help the lighter aspects to pop and become front and center in the room. Add them in subtle areas, not as major pieces. As example the book spines in a very white cabinet could be black (or darker colors), subtle wood trim in the room could be black or charcoal, as well as a few black picture frames. However the most effective use of this darker shade is in items that are thin or long - chair legs, long arms on lamps, or the pole of a floor lamp.

3. Wall Mount Lamps

These work well in bedrooms above the end table. Choose lamps with a light cheerful lamp shade and a dark base that attaches to the wall. The light lamp shade on a slightly contrasting wall can help encourage that blended feeling a bright room often exhibits. As an example, a coastal blue wall color and lovely large white lamp shade with a black arm and mount can look outstanding.

4. If Draperies Aren't Needed, Skip them, or Use them to Frame the Window

If you live in an private area and can leave your drapes open most of the time, then do that. If you plan on never or rarely ever closing the drapes, then you can either place a light drapery panel on each end, or go ahead and put a full set of drapes, essentially left open. Choose black or charcoal drapes to frame the window ends .... with white trim and black panels on each side, you'll add to that linear look of dark accents explained in point number two.

5. The Most Obvious: Decorate Using White

White reflects light back into the room. It doesn't absorb color. If you want to have the lightest room possible, paint the walls and ceiling white, keep the floors as light as possible and kick it up to another level of brightness by using white accents, lamps and even furnishings. In the case of a bedroom, this is a fairly easy project to tackle; white bedding, white rugs, white dressers, white end tables, and white lamps. Once you've tackled the main areas, then add light pops of color in metallic, gold or chrome.

There you have it, five simple ways to brighten up your home. Scroll to view these white items to add to a home:


If you decide these suggestions are too complicated, or too much work, just change the light bulbs, open the drapes and give the room a good clean. You could also temporarily remove dark area rugs for spring and summer. Exposed floors provide a lovely consistent flow through a space, and thus removing rugs can add to that open, crisp, bright design.


Note: The author may receive a commission from purchases made using links found in this article. “As an Amazon Associate, Ebay (EPN) and/or Esty (Awin) Affiliate, I (we) earn from qualifying purchases.”


Sunday, March 11, 2018

20 Easy Ways to Get Your Home Ready for Spring

Photo via Pixabay - Flowers, Gardening - Clearing the Yard for Spring
Winter and hibernation tend to go hand in hand. However, we've 'sprung forward' and it's time for another change in our predictable routines.

For many of us, spring brings on an itch that's not allergy related; the itch for change. Even if you're nodding your head in the negative right now, think about it ..... you've more than likely made small changes at the start of spring without knowing it; cleaning closets, washing bedding ... you know, our automatic routine that's inspired by fresh air and open windows. There's something healing about spring changes.

Here are 20 Changes You Can Make (or have made) to Brighten Your Home for Spring - Most Don't Cost a Dime (See them below the photo)
Photo Via Pixabay - Minimalism for Spring

  1. Wash and freshen up the bedsheets, bedspreads and or curtains
  2. Change the bedsheets from flannel to cotton
  3. Clear out your closets
  4. Put away the winter clothes and pull out your summer wear
  5. Clear out your yard and garden - tidy it up
  6. Wash your windows
  7. Open your windows to do an air exchange
  8. Lighten up the room by removing area rugs to expose the wood floors. This simple technique will give you that fresh open feeling for the spring.
  9. Remove your usual accessories and replace them with simple fresh spring accents
  10. Think Green - add an abundance of plants - not just one - put multiple plants in multiple areas
  11. Freshen the home with new scents - replace winter cinnamon candles with lemon, citrus and laundry candles
  12. Dress up your table (kitchen, sunroom) - Bring out a bright and cheerful table cloth and feature a lovely arrangement of spring flowers, vases and candles
    Photo via Pixabay - Add Fresh Flowers
  13. Cover your existing pillows with spring themed pillow covers
  14. If changing your bedding set to a spring theme is possible, go for it
  15. Add one new spring themed fun focal point piece to a room for the spring - a light fixture, a piece of art, new pillows, an oversized floor plant
  16. If you're planning to re-do a room, go lighter in textures, wall colors and furnishings
  17. If you're a lover of color, find a small room (an entry way or a washroom) and paint it in a bright lacquered color. Be sure you know how powerful this will be before tackling the project. If you have a room with high ceilings - even better! Also, in a larger room you could paint one wall in a bright lacquered paint. However, if your wall has a lot of flaws, stay away from this kind of paint, it tends to show every flaw!
  18. Paint a small area in your kitchen with chalkboard paint to help create an outdoor café feel
  19. Add floral prints! Don't be afraid of floral - it's not just your grandmother's favorite. Floral prints can work in moderation, especially as an accent
  20. Work to make your rooms more open and inviting - move your furniture around - a tip to remember - ensure there's a clear pathway through the room, to the doorways. With that in mind, you'll consider the rooms flow without thinking about it.
We seem to go into cleaning-clearing mode as soon as the weather gifts us with fresher, warmer air.

Breathing in the spring air gives us a cleanse inside and out but most of all, is motivating. So don't miss the moment and the mood - make those changes while you still have that itch!


Note: The author may receive a commission from purchases made using links found in this article. “As an Amazon Associate, Ebay (EPN) and/or Esty (Awin) Affiliate, I (we) earn from qualifying purchases.”


Sunday, March 4, 2018

5 Ways to Bring Happiness and Positive Energy Into a Room - Harness the Good

by Funkthishouse
When the world outside feels darker than usual and you want to create a sanctuary of happiness and positive energy, start with your home and personal space.

Since we can't control gravity or other people, controlling ourselves and the environment we live in can give us a sense of taking back our mind and heart.
"We are shaped by our thoughts, we become what we think. When the mind is pure, joy follows like a shadow that never leaves" Buddha
The Emotion Code by Dr. Bradly Nelson talks about how emotions are so powerful they can literally define and determine the experiences we bring into our life. We need to take the power of the energy in our home and enhance it for good.

Lets review 5 Ways to Bring Happiness and Positive Energy into a Room:

1. Open the Window or Clear the Air in the Room

An air exchange can do wonders for a space. Even in the dead of winter go ahead and open the window for a few minutes. Fresh air reinvigorates a space and there's a sense a power in knowing you can change the energy of a room with something you can't see. If opening a window isn't an option, add a Salt Lamp. Just like the goodness of negative ions that fill the air after a thunderstorm, a salt lamp also emits negative ions. However, the radius of negative ions from a salt lamp is quite small, generally surrounding the area immediately around the lamp itself. That's a good reason to have a couple of salt lamps positioned throughout a room - especially a windowless room.

2.  Remove Items that Have Bad Memories

If there are people or items in your life that have negative energy or thoughts attached to them, be brave, and remove photos or items relating to them from your space. You're not erasing what has happened, you're simply taking back the things you CAN control; your space and your mood. If there are linens, pillows or furnishings that have bad memories attached to them, replace them. Add a little humor to the situation and have a small cleansing ceremony with Sage as you box the items up. Pass them onto the Good Will. If getting rid of your furniture isn't in the cards, try slip-covers for couches and taking on a DIY re-do project for the dressers and tables.

3.  Add Plants and Flowers

Plants freshen and clean the air in a room. For more detail on which plants do what, take a look at this list of room cleaning plants. Think in terms of volume. Add several plants in a room; floor plants, plants in plant wall holders, plants on end or corner tables, or multiple plants displayed in plant stands.

4.  Add Music to the Room

Even if you have a TV in the room to play music from the Music Channel, there's something special about listening to music the old fashioned way; from a stereo or radio. Leave the TV off - for less magnetic energy being emitted. The benefits to music are abundant; it promotes good health, helps you sleep, reduces depression and more. Keep a radio running in the kitchen with music playing all the time. We do this in our house. In fact, I can hear the music softly playing while typing this. It's incredibly uplifting to walk into a quiet kitchen that has the life of music filling the background. It brings in positive energy especially when it's a bit lonesome.  Best of all, song lyrics tell a story, and provide a lovely calming, creative visual while preparing meals or tidying up.

5.  Use the Power of Color to Enhance the Emotions You Want to Bring into a Space

Every color has a group of traits and emotions attributed to them. Understanding these traits can help you harness the mood you want your room to evoke. Here's a summary of a few of the traits associated with some of the most basic colors.
  • Orange: Boosts your energy, is fun, and adds excitement
  • Blue: Calming, relaxing, trusting, professional
  • Yellow: Moderate amounts - joy, happiness, encourages thinking/learning
  • Purple: Luxury, spirituality, creativity, royalty
  • Red: Energetic, Love - but peace and tranquility in a bedroom
  • Green: Nature, well being, refreshing, clean, simple, calming and growth
You don't have to go wild wondering how the heck you add color to your room. If you're not into painting, just add your colors via small accessories such as wall art, throw blankets, lamps, rugs, pillows and table décor.

Go ahead, take control of your home's energy and create a space that reflects happiness and positive energy.


Note: The author may receive a commission from purchases made using links found in this article. “As an Amazon Associate, Ebay (EPN) and/or Esty (Awin) Affiliate, I (we) earn from qualifying purchases.”


Most Recent Reviews on Review This Reviews


Search for Reviews by Subject, Author or Title

The Review This Reviews Contributors


SylvestermouseSylvestermouseDawn Rae BDawn Rae BMbgPhotoMbgPhotoBrite-IdeasBrite-IdeasWednesday ElfWednesday ElfOlivia MorrisOlivia MorrisTreasures by BrendaTreasures by BrendaThe Savvy AgeThe Savvy AgeMargaret SchindelMargaret SchindelRaintree AnnieRaintree AnnieLou16Lou16Sam MonacoSam MonacoTracey BoyerTracey BoyerRenaissance WomanRenaissance WomanBarbRadBarbRadBev OwensBev OwensBuckHawkBuckHawkDecorating for EventsDecorating for EventsHeather426Heather426Coletta TeskeColetta TeskeMissMerFaeryMissMerFaeryMickie_GMickie_G


Review This Reviews is Dedicated to the Memory of Our Beloved Friend and Fellow Contributor

Susan DeppnerSusan Deppner

We may be apart, but
You Are Not Forgotten


“As an Amazon Associate, Ebay (EPN) and or Etsy (Awin) Affiliate, I (we) earn from purchases.” Disclosure Statement

X