Showing posts with label DIY. Show all posts

Tuesday, March 17, 2020

DIY Hand Sanitizer Reviewed

Make Your Own Hand Sanitizer

Chances are you can't find hand sanitizer on your local shelves. Let me review how to make your own to use when soap and water aren't available to you. It is much easier than you might think!

hand sanitizer
DIY Hand Sanitizer
image courtesy of pixabay.com

We are all in the same boat with the flu & various viruses that terrorize the world. The importance of keeping our hands clean and the surfaces around us goes without saying. When it comes to being able to keep a bottle of hand sanitizer with us on those occasions that we have to go out for supplies is pretty much impossible. The hoarders and the opportunists have cleared the shelves across the nation. Not to worry, you can actually make your own.

What You Will Need:

  • 1 empty hand soap or sanitizer dispenser
  • Isopropyl alcohol (rubbing alcohol) 99% alcohol volume
  • Aloe Vera Gel
  • Essential Oil or lemon juice to make it smell nice (optional)
  • Large measuring cup with spout to mix and pour from

Hand Sanitizer Recipe:

3/4 cup isopropyl (rubbing alcohol)
1/4 cup aloe vera gel
10 drops of essential oil or lemon juice

Pour all of the ingredients into a large bowl or a measuring cup with a spout. Mix together with a spoon first and then whisk the solution to form a gel. Pour the mixture into an empty bottle for easy use and transport and then label it with the words "Hand Sanitizer".

That's it, it is that easy. Just a reminder that it is still better to wash your hands with soap and water for at least 20 seconds. Use the sanitizer when you are out and can't wash your hands. I like to place a dab on a tissue to wipe off the handle of the grocery cart before I place my own hands on it. 

Not sure how long the 20 seconds is? Sing the Birthday song through two times while washing your hands. Remember to pay attention to the tips of your fingers and between your fingers. 

Stay safe, follow the guidelines and we will all get through this together as a nation. 


Note: The author may receive a commission from purchases made using links found in this article. “As an Amazon Associate, Ebay (EPN) and/or Esty (Awin) Affiliate, I (we) earn from qualifying purchases.”


Thursday, November 7, 2019

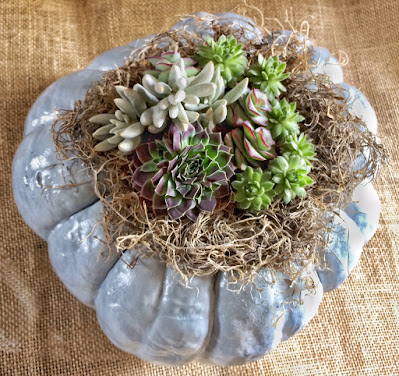
DIY Pumpkin Succulent Centerpiece


diy Pumpkin Succulent Centerpiece

It's pumpkin season!  Now is the perfect time to round up some pumpkins and create unique centerpieces as a festive touch for your holiday celebrations.  A DIY pumpkin succulent mini garden will be the perfect addition to your Thanksgiving decor.  Not only will it be a real attention-getter when you host guests for the holidays, but you will have the benefit of enjoying your new container garden long after you finish all those turkey left-overs.

Here's What You Need:
  1. One large flat pumpkin 
  2. A variety of succulents
  3. Clear gel glue
  4. Spray adhesive
  5. Moss
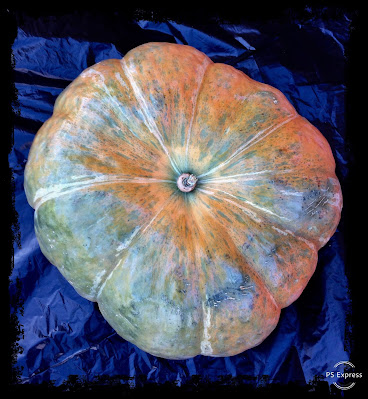
real pumpkin
It's best to use a flat pumpkin with a slightly indented center .
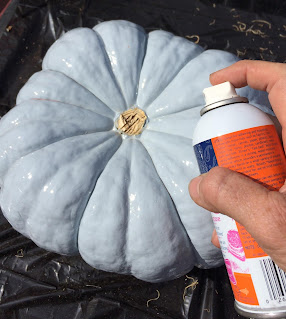
While I prefer to use a pumpkin in its natural state, I chose to paint mine for this demo project.  I used a lovely Solstice Blue paint color (a subtle blue-gray) that will blend in with the woodland theme I am using for my holiday decorations.  It reminds me of the beautiful shadows you see on fresh snow.  A neutral colored pumpkin better accents the succulents.

removing a pumpkin stem for diy project
Removing the Stem

Once the paint was dry, I used my Dremel with a cut-off wheel to remove the pumpkin stem. 

spraying on craft bond
Spraying on Elmer's Craft Bond 
I then sprayed adhesive on the center top of the pumpkin where the moss will be placed. 

pressing and gluing  moss on pumpkin
Press Moss Into the Adhesive
While the adhesive was still fairly wet and tacky, I pressed a nest of moss onto the sticky surface.  It seems I got a little moss happy.  Could have used a bit less moss, but it would have made a big mess to attempt to remove it.  I let the adhesive set for several minutes before moving to the next step.

cactus with roots showing
Preparing the Roots for Planting

While the adhesive was setting up, I gently removed the soil from the cacti roots in preparation for planting them on the surface of the moss.  I also separated the succulent clusters so I would have more options for spreading out individual plants.

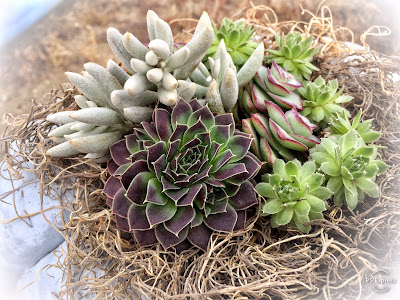
Pumpkin Succulent Centerpiece
Vary Succulent Colors, Textures, and Heights
Start your succulent placement with your largest plant.  Visually, it is most pleasing to the eye to position the first cactus off-center and toward the edge of the pumpkin.  It is also a good idea to group your taller cacti near that first featured plant.  You will use clear gel glue to fasten your succulents to the moss.  Don't worry!  The glue won't hurt your succulents.

mist the moss on a pumpkin centerpiece
Time to Lightly Mist the Moss
Once your pumpkin succulent centerpiece is complete, carefully give the moss a light misting of water.  You will provide moisture to the moss about once a week.  It's important not to let water pool under your plantings.  It will lead to premature rot.  Simply tip your pumpkin slightly to the side to drain any excess water after each misting.  

To extend the life of your pumpkin, and to give your succulents what they need, carefully choose a location away from heaters.  Try to situate your succulent container garden such that your cacti get the sunlight they need without getting too much heat on the pumpkin.  Likewise, take care to protect your succulents from freezing if you will be displaying your centerpiece on a porch or outdoors.

One last tip:  Place your pumpkin on a piece of cork or thick cardboard to keep the bottom from early decay (especially if placed in a location where surface dampness occurs).  Take care to protect your indoor furniture with the use of a waterproof planter mat.

With proper care, your pumpkin succulent centerpiece should last several weeks.  Once the pumpkin has reached the end of its season of life, you can either cut off the top of the pumpkin and plant it on top of appropriate cacti soil, or transplant the newly rooted succulent cuttings to another container.  Of course, you may also choose to use a faux pumpkin to eliminate this step.

It's easy to see why these pumpkin centerpieces are so popular.  Besides being unusual and visually stunning, they let you take your creativity to a whole new place.  This DIY centerpiece is sure to be a fun conversation-starter at your next gathering.  Why not make one to share for a hostess gift?  Who wouldn't love such a thoughtful gesture? 

Enjoy this project and my best wishes to you for a blessed holiday season.


Note: The author may receive a commission from purchases made using links found in this article. “As an Amazon Associate, Ebay (EPN) and/or Esty (Awin) Affiliate, I (we) earn from qualifying purchases.”


Wednesday, March 27, 2019

What You Need to Know about Basic Birdhouse Construction

birdhouse on a tree

Basic Birdhouse Construction, What you Need to Know.


For years I have built birdhouses for friends and family and for myself.  Why?  Well let's just put it this way, I love my garden and I love nature.  When I'm working outdoors there is nothing more special than being able to watch the birds and the bees while taking a short break.

To say that I enjoy their antics would be an understatement.  You will find me out in the garden at almost any hour of the day, just to see what there is to see.  Most of the time it is the birds and the insects that I purposely attract to my garden that give me the thrills of the day.  And because I love them so much, I want my friends to enjoy them that much too!

I want to focus on birdhouses in this review, because, while everyone loves birds, enticing them into your garden is a special thrill!   Seeing them rear their babies is even more fun.  If you have children or grandchildren, it is also a wonderful time to teach them some nature lessons and life lessons too.


Birdhouse Basics

If you have a yard, you have a great place to start.  Flowers, shrubs and a tree or two would be ideal as well.  A water source or a bird bath will surely entice some lovely feathered friends to come for a visit.  After that, if you want to build some birdhouses, that will help them to target you for their next place to live!

It is said that if you build it, they will come! (Taken from the movie ............The Field of Dreams.)  This may be true for birdhouses and it may not be true.  Some birds really don't care what their homes look like, but they are particular about the size and the placement.  Other birds will readily nest in any dry and sheltered spot, Robins in particular will nest in a dry space and not really need or want a birdhouse.

If you are hoping to attract certain kinds of birds to your yard, you need to build a house that they will really like.

Placement of that birdhouse will also be important.  Some birds require homes set at a certain height and proximity to other essentials  for their welfare.  Water and food sources being the most important ones.

Some birds are solitary nesters and others need to live in community.  So again depending on the birds you want to attract, you will need to take these things into consideration as well.

I have found this book on Amazon will help you build birdhouses, but also takes into account each different species likes and dislikes.  Working with an ornithologist, these plans have been made for specific birds.  It doesn't help you to build a house that no one wants to occupy.  So build something that you know they will appreciate and you will be rewarded with the lovely sounds of birds thanking you.


Here you will find plans to make up to 19 different types of birdhouses. Each one can be executed by the novice as well as the expert woodworker. These are great projects for Moms and Dads to make with their children.  The basic houses are wooden and can be left plain or dressed up with colors.

Three things that you should never do!

While we are on the subject of attracting birds to your garden, I want to make absolutely sure that you don't do these things:
  1. DO NOT put out lengths of yarn for birds to use as nesting material.  
  2. DO NOT put out dryer lint for the birds
  3. DO NOT put out pet hair for their use either.
You may ask WHY NOT!
Here are the reasons,  yarn, unless it is cut up into tiny (less than an inch long) pieces, can actually act as a noose that works it's way around baby birds necks.  When they try to fly out of the nest, they strangle.  Birds are used to  scavenging for nesting materials and they know what they want in there.  If you feel inclined to help them, rake up your grass and leave little piles of dried grass for them to find.  

Dryer lint is also a definite no-no.  Most people use fabric softeners of some sort with  their dryers and the chemicals in those sheets or liquids also ends up in the lint.  These chemicals may harm the babies either by contact, or by ingestion.  Don't do it!

Pet Fur is also a no-no.  If your pet is taking medications, or you use flea powders or flea shampoos on them, their fur is also "contaminated".  Baby birds are naked (just like human babies) when they are born.  Anything that cause a reaction to their tender little bodies should be avoided at all costs.
baby birds
Naked baby birds!


It would be much better for you to spend your time reading a little about what they would appreciate and then building a nice house for them to enjoy.  The most perfect part of this whole idea is that you will build one house, but that two families will get to enjoy it.  The bird family and your family too!

More about Birds from the writers at Review This Reviews:


You can read more about the life cycle of a Robin at Tracey's Review of that incredible sight at her home.
Birdwatching and Photography go hand in hand.  One of Review This Reviews writers, Mary Beth Granger, has shown and taught us how to capture some beautiful pictures of the birds in her area. If you love Bluebirds you can read up right here!  Or if Woodpeckers tickle your fancy, you can check out some great pictures and facts Review of Woodpecker Facts and Photography 


Note: The author may receive a commission from purchases made using links found in this article. “As an Amazon Associate, Ebay (EPN) and/or Esty (Awin) Affiliate, I (we) earn from qualifying purchases.”


Tuesday, November 13, 2018

DIY Floor Cleaner Recipe Reviewed

Works on all floor types

diy floor cleaner
Make your own cleaning solution
I would like to review a DIY floor cleaner recipe with you today. It is perfect to use on all hard floor surfaces, it is non-toxic and it is easy on the budget. What more could a gal ask for?

Since purchasing my Kray Spray Mop I have been looking for good cleaning solution recipes to use. I can use just plain water and white vinegar but I wanted something a little more robust. One that would clean well, not streak and be environmentally friendly. I found one that I love and just about all of the ingredients were already in my pantry. 

All Purpose Floor Cleaner Recipe

  • 2 cups warm water
  • 1/2 cup white vinegar
  • 1/4 cup rubbing alcohol
  • 3 drops dish washing soap
  • 5 to 10 drops of essential oil
You will also want a container to keep your solution in for future use. I use an empty 1 gallon vinegar bottle to store mine in. It is a good idea to store the floor cleaner away from any heat. 

This particular formula works well because each ingredient serves a purpose in the cleaning process. The water acts as a base for the other ingredients and it helps to loosen any grime on the floor. The white vinegar acts as a disinfectant and a degreaser. I might add that even though vinegar is acidic this diluted mixture should not harm stone floors. The rubbing alcohol also helps to degrease and disinfect but its main purpose in this floor cleaner is to help the floor dry quickly and not leave any streaks. The dish soap will dissolve any bonds between the dirt and the floor, it cleans, and it also breaks down any greasy residue on your floor. Use a basic dish soap that is not oil based (causes streaking and smearing). The dish soap should not have moisturizers, bleach or antibacterial substances. You might think that the added anti-bacteria would be helpful but you don't need it because you already have the vinegar and alcohol for that purpose. The essential oil just works to offset the smell of the vinegar and rubbing alcohol. Watch carefully which essential oil that you use because the ones that are compounds are usually oil based. The oil will cause smears and streaks just like it would if there is oil in your dish soap. 

And that is it! This floor cleaner is that easy to make and you will love the cleanness of your floor plus this solution leaves a nice shine, too. So, if you are looking for a floor cleaner that is economical, safe for children and pets, cleans super well and is easy to make try this do it yourself recipe for mopping your floors. I really don't think that you will be disappointed!


Note: The author may receive a commission from purchases made using links found in this article. “As an Amazon Associate, Ebay (EPN) and/or Esty (Awin) Affiliate, I (we) earn from qualifying purchases.”


Sunday, October 21, 2018

5 Creative Household Pillowcase Hacks

Review of Multiple Ways to Use Pillowcases for Sorting, Storing, and Decorating

1. Use Pillowcases to Cover the Backs of Chairs

Last week I featured how to use a pillowcase to make a No-Sew Halloween Chair Cover

You can also use it to cover the backs of ratty or damaged armless desk chairs.

The worn faux leather desk chair in my son's room started to shed some of it's material. The pieces were making a mess on the floor. 

So not being in the mood to buy a new chair, I covered the back of it with a pillow case. The width of this particular chair was perfect. The pillowcase fit snuggly keeping all the worn pieces neatly inside. I simply tucked the excess pillowcase at the bottom of the chair into the seat.

2. Use Pillowcases to Line Baskets and Boxes

Have you ever been to the store and thought you'd love one of those lined hampers or decorative storage baskets but after seeing the price, changed your mind? 

You can make your own.

This no-sew pillowcase hack is very easy. Put the pillowcase inside the basket and pull it over the sides. For smaller baskets, just tuck the excess pillowcase up the side up and create a thicker border edge. If you want, use sticky double sided velcro strips under the pillow case border edge to keep it in place.

You could also put the excess in the bottom part of the basket.

3. Use Pillowcases to Cover Your Clothes

Instead of using plastic garment bags, cut a hole in the top of a pillowcase and pull it over your clothes on a hanger.

It's a handy way to store kids clothes. Place three or four items together under one pillowcase, tie it at the bottom. When you're ready to pass them down, they're neatly together in the closet.

Pass them down in a decorative way: Use pretty pillowcases and tie the bottoms with a satin ribbon.

4. Use Pillowcases to Organize Bed Sheets

How many times have you had to look for the sheets matching pillowcases? This hack is the best, it's my personal favorite. 

Put your sheets and other matching pillowcases that go with the set, folded inside one of the matching pillowcases! Best of all, your linen closet looks super organized. When you need your bedding, it's all together.

5. Use Pillowcases to Cover Stools and Create a Skirt

For taller stools this is especially simple. Pull the pillowcase over the stool. Take a ribbon or other decorative piece of material and tie it just under the seat part. The excess material will create a skirt. If there's room under the seat, you could also attach the material by using a heavy duty staple gun.

If the stools are small, use the smallest pillowcases you have. You may have to cut and hem them, or use a bit of creativity to pull the excess material up and then tie the tie below the seat.

These make a lovely decorating hack for parties and special events.

Have fun!


Note: The author may receive a commission from purchases made using links found in this article. “As an Amazon Associate, Ebay (EPN) and/or Esty (Awin) Affiliate, I (we) earn from qualifying purchases.”

Thursday, October 4, 2018

Bagster Review

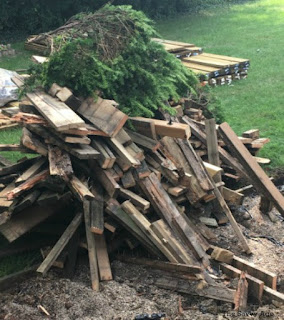
Have you ever started a home improvement project and found the debris begins taking on a life and area of its' own?  Improving one's home can be like opening Pandora's Box; one never knows what you will find lurking in, under, or behind an older home which brings the inevitable problem of how to dispose of construction debris.

We recently demolished an old and small wooden deck. Somehow the little deck turned into a very large pile of debris which seemed to keep growing and growing. Remodeling can be like cutting your own bangs; once you start it is hard to stop. Since we were demolishing the deck... well, of course we should cut down the old unwieldy bush and then could not ignore the well worn railroad ties around the garden bed which had outlived their usefulness.
the bagster


Where and how to dispose of all these goodies? Even though the pile kept growing the size did not warrant renting a dumpster. At the suggestion of the carpenter the Bagster was investigated to help unload our pile of construction debris.


What Is The Bagster?

The Bagster is a disposable bag which can hold up to 3,300 pounds of debris or waste. The purchase of the Bagster allows access to the Bagster Pick Up and Disposal Service operated by Waste Management. It is an on demand debris removal also referred to as a dumpster in a bag.
the bagster


Dumpster or Bagster

In my area it is difficult to rent a small dumpster due to the booming construction industry for both pros and DIYers. Small dumpsters are difficult to rent and one must also have the room to park the dumpster.

It was clear when the deck (it looked so small) was being removed and parked on the lawn this was more construction debris then anticipated. The pike kept growing ! Who knew such a little deck could produce so much construction debris? The dirt was also filled with concrete from the original construction of the house over 50 years ago.

Now what? Enter the Bagster.

the bagster


Where To Find The Bagster

I purchased the Bagster from Amazon  for $29.95. For our project we needed 1.5 Bagsters so of course not wanting to pass up the opportunity to clean out the garage we made great use of the remaining area in the Bagster.

the bagster


Note: Review the Do’s and Dont's as to the type of materials accepted in the Bagster. We had old pieces of odd shaped concrete which had been hanging around the garage for years we happily filled up the remainder of the Bagster. Actually everything we wanted to put into the Bagster was on the Do list for our area.

Schedule The Bagster Pick Up

The system worked flawlessly. I used the online scheduler at approximately midnight on a Monday. I received a confirmation email of the order and subsequent emails throughout the progress of my order through the process.On Wednesday morning at approximately 5:30 am I heard a rumble outside and it was the very large crane/truck arriving to pick up the 2 Bagsters. Shortly after the pick up I received an email completing the process.

Pricing Of the Bagster Pick Up

The pricing of the Bagster and debris removal is two fold: the cost of the Bagster plus the cost of the removal by Waste Management. The cost varies per area and the flat rate can be obtained on the Bagster website. Two Bagsters plus the pick up charge was lower than the cost of renting a small dumpster and so much more convenient!

The Yellow Bagster Handles

The Bagster deceptively indeed holds ALOT of debris.It is critical the yellow handles “touch” for the Bagster to be picked up by the truck as a large crane must be able to lift the
Bagster up by grabbing the handles.


This information is clearly stated on the Bagster bag instructions and the website and do not ignore! 

Coupons

Online scheduling allows a customer to take advantage of a discount off the pick up price of more than one Bagster. Coupons are also available online by searching Bagster coupons.

Recommendation 

I highly recommend the Bagster. It worked flawlessly from start to finish. I’m still surprised how much construction debris can fit into one Bagster. Quick, convenient and on demand debris removal fit our construction project perfectly.


Note: The author may receive a commission from purchases made using links found in this article. “As an Amazon Associate, Ebay (EPN) and/or Esty (Awin) Affiliate, I (we) earn from qualifying purchases.”


Friday, September 14, 2018

How to Easily Paint & Refinish Metal Outdoor Furniture

How to Easily Paint & Refinish Metal Outdoor Furniture
Renew Your Outdoor Furniture with Rust-Oleum Spray Paint

For the last few seasons, our outdoor furniture has started looking worn and tired.  Metal outdoor furniture is too expensive to throw away and replace, but it was definitely time to restore the beauty of the pieces.  

Last spring my husband started refinishing our outdoor furniture one piece at a time.  He choose our wrought iron table as his first project.  With a few cans of black Rust-Oleum and less than an hour, our outdoor table looked brand new again!  

Since then, he has refinished the chairs that match that table and the whole set is beautiful again. 

Last week, he refinished our wrought iron glider.  I love all of our outdoor furniture and appreciate its durability.  But, that glider is the one I use the most.  I am thrilled to have it restored to its original beauty.

My new slogan for wrought iron metal outdoor furniture:  Restore, Don't Replace!


Refinish Metal Outdoor Furniture
Refinished Wrought Iron Patio Table & Chairs
He also painted my little ghost  in the background with a can of White Rust-Oleum - Getting him ready for Halloween


How to Refinish Wrought Iron Outdoor Furniture

Time:  45 mins
Cost:  $25.00

Compared to the Cost of a New Glider:  $300.00

Because the refinishing of the metal table and chairs had been so successful, when my husband said he was going to refinish the glider, I grabbed my camera.  I wanted to make sure I had everything I needed to tell you exactly how to repaint your metal outdoor furniture too.

  How to Easily Paint & Refinish Metal Outdoor FurnitureItems Needed:
  • Cans of Rust-Oleum
  • Plastic Drop Cloth 
  • Tent Pegs
  • Plastic Gloves
  • Long Sleeve Shirt
  • Old Shoes & Old Painting Clothes
Step 1:  Clean the piece - remove all dust & dirt

Step 2:  Cover an area in the yard with a large, thick plastic drop cloth  (2.0 mil preferred)

Step 3:  Use tent pegs to hold the drop cloth down.  We used old army tent pegs at all four corners, but you could use bricks instead to weigh down the corners.

How to Easily Paint & Refinish Metal Outdoor Furniture Step 4:  Shake up the Rust-Oleum spray paint

Step 5:  Turn the piece over and start spraying the underside

Step 6:  Turn the piece right side up and spray the entire surface from every angle in order to cover it completely and evenly

It took about 45 minutes and 4 cans of Rust-Oleum to spray paint the glider.  That short amount of time spent renewing our glider will give us many more years to enjoy the beloved glider.  Plus, the Rust-Oleum spray paint helps to prevent rust.


Restoring Wrought Iron Metal Outdoor Patio Furniture


Additional Spray Painting Tips: 


Wear disposable gloves  (see products below)

Wear long sleeves to protect your skin

You may need to wear protective eyewear and disposable masks

Keep the spray can moving as you are painting to avoid runs.

You should do all of your painting on any individual piece within an hour.  

This spray paint, in our experience, tends to self- level any heavy areas of application as it drys, within reason.

Let the furniture piece completely dry for 24 hrs. before use.

 
How to Easily Paint & Refinish Metal Outdoor Furniture
My Wrought Iron Glider Beautifully Restored


Project Items Needed for Refinishing Metal Outdoor Furniture

 Rust-Oleum 245196 Universal All Surface Spray Paint, 12 oz, Gloss BlackCheck Price Trimaco 04301 Slip Resistant Dropcloth Stay Put Vinyl Drop Cloth, 9' x 12'Check Price 12 Pack Tent Stakes, 7075 Ground Metal Camping Aluminum Tent PegsCheck Price Dealmed Brand Nitrile Medical Grade Exam Gloves, Disposable, Latex-Free, 180 Count, Size Extra LargeCheck Price


 See More Crafts & DIY Reviews On
ReviewThisCrafts.com!


House of Sylvestermouse


Note: The author may receive a commission from purchases made using links found in this article. “As an Amazon Associate, Ebay (EPN) and/or Esty (Awin) Affiliate, I (we) earn from qualifying purchases.”

Saturday, July 28, 2018

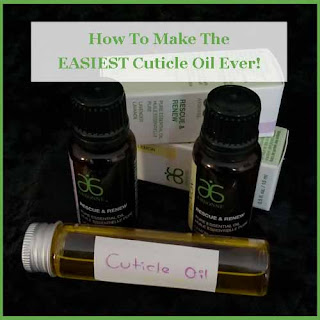
How To Make The Easiest Cuticle Oil Ever

How to make the easiest cuticle oil ever
Photo's by Lou16
Today I'm going to review how to make the easiest cuticle oil ever. Once you see how easy it is you'll wonder why you haven't always made your own DIY cuticle oil!

Don't use a cuticle oil? You're not alone, it's a step many people miss out when they do their nails at home. I must admit, but cuticles were in pretty bad shape and I would just rub my hand cream into them and think 'oh well, that's just my cuticles!'

This year I've decided to treat myself my getting my nails done once a month (well it's about every three weeks, but my husband thinks it's a monthly thing LOL!) and I do love it when they pop on the cuticle oil at the end. My cuticles are looking much better, but they would look even better if I used it a little bit more often.

Now I like the idea of using natural products and not having some of the additives that you find in some skincare/personal care products being present. I also know that lemon oil is great for softening cuticles, I just had to look for some cuticle oil recipes ...

There are so many recipes for DIY cuticle oil that they would make your head spin, but many of them used so many ingredients that it just seem such an effort. Using sweet almond oil, jojoba oil, vitamin E oil and about 5 different essential oils just seemed a lot for me to recommend to people, after all we don't have all these ingredients just lying around the house do we?

Well I found a recipe that used olive oil and just two essential oils and I changed the essential oils (based on my own aromatherapy knowledge, and on what I had on hand) and I've come up with the easiest cuticle oil ever -

How to make the easiest DIY cuticle oil ever - every thing ready to begin - olive oil, lemon oil, lavender oil, bottle and funnel

Easy DIY Cuticle Oil That Your Nails Will Love!


4 tbsp extra virgin olive oil
2 drops pure lemon essential oil
2 drops pure lavender essential oil.

Simply mix the ingredients together and keep in a bottle, I recommend seeing if you can find a nail polish style of bottle with a nail polish brush to keep it in (they didn't have any at my local store) or even a roller bottle.

These type of bottles will made it easier to apply, but aren't essential.   As you can see from my photo I just used a test tube style bottle (as I had it on hand) and I use a Q-tip to add the oil around my nails. I will let you know, however, that I have some roller bottles on order.

Lemon oil is fantastic for softening hard skin which is why it's a perfect addition to a cuticle oil. Lavender oil is a very nourishing oil, softening and just great for skin. The combination of these two oils works fantastically to help keep your cuticles looking fabulous and as an added bonus, using a cuticle oil after a manicure actually helps it stay looking beautiful for longer something I've only just found out!

                                                                                                                                                              
EXTRA TIP - if you take vitamin E capsules then simple pierce one of them and squeeze the contents into the cuticle oil.  It will make the oil even more moisturizing and rich (a much cheaper alternative to adding vitamin E oil!).
                                                                                                                                                                                                                                                                                                                             
It's very important that you use pure essential oils and not synthetic ones when making your own skincare as each essential oil brings it's own benefits and fragrant oils don't have these benefits.

I love to use Arbonne's essential oils when available, if I'm after an oil that they don't have then I make sure that the one I buy is 100% pure essential oil.

Aromatherapy Isn't Just About DIY Skincare!


You can use essential oils for lots of different things, here's a few articles that you might find interesting ...

How Aromatherapy can Help StressHow Aromatherapy Can Help Stress
Aromatherapy has proven to be very successful at helping to relieve stress, simply by using certain essential oils stress and conditions caused by stress can be alleveiated.

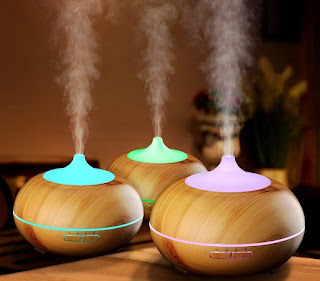
Essential Oil Room Humidifier and DiffuserEssential Oil Room Humidifier and Diffuser
Using essential oils in a humidifier or diffuser can add a lovely atmosphere to a room as essential oils can really help to work on your emotions from relaxing you or making you more upbeat.

Reviewing Uses for Tea Tree OilReviewing Uses for Tea Tree Oil
The herbaceous fragrance of tea tree doesn't begin to hint at how many uses there are for this essential oil from medicinal to beauty to household uses this is one very versatile essential oil.


How to make the easiest cuticle oil with only 4 ingredients
PIN ME


Note: The author may receive a commission from purchases made using links found in this article. “As an Amazon Associate, Ebay (EPN) and/or Esty (Awin) Affiliate, I (we) earn from qualifying purchases.”


Thursday, June 21, 2018

DIY Mercury Glass


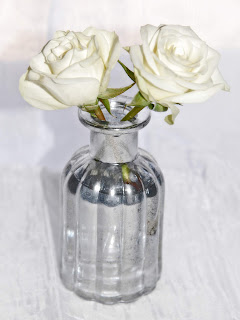
diy mercury glass vase
It's time for a DIY project for the true romantics out there.  Is there anything lovelier than fresh cut flowers in an antiqued mercury glass vase?  Perhaps the reason mercury glass is such a popular centerpiece at weddings is the nostalgic effect it has on us.  I absolutely love the understated beauty and elegance of silvered glass.  The look, and the effect, is way too wonderful to save only for special occasions.  

I invite you to follow along with me and transform your own gorgeous flower vessels.  It takes very little time and money to create the beautiful mercury glass effect presented here.  In less than an hour, you can be enjoying your own timeless centerpiece.  If you're like me, you'll get hooked and create any number of these mercury glass vases for yourself and for gifting to friends and family.  This is a gift you can be sure will be used and appreciated.


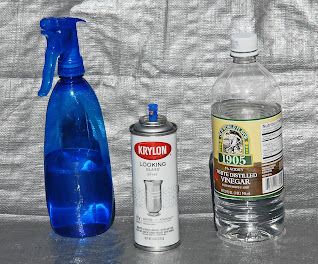
products needed for diy mercury glass
What You Will Need
* Glass vase
* White vinegar
* Water
* Misting pump bottle
* Paper towels

Optional
* Tarp or plastic drop cloth
* Wooden dowel rod
* Gloves

Steps 1-5
  1. Mix one cup of white vinegar with one cup of water.  Pour into misting bottle.
  2. Use a paper towel or soft cloth to wipe your glass clean.
  3. Protect work surfaces with a tarp, newspapers, or a drop cloth.  
  4. Test mister to ensure you will get a very fine spray.
  5. Shake up your spray paint for two minutes.
glass container vase

Step 6
Depending on the type of glass container you are painting, you may find it very helpful to use a dowel rod.  Supporting your vase with a dowel makes it easy to mist and spray all of the surfaces at the same time (without getting paint on your hands or fingerprints on your vase).  It also enables you to spray the bottom of the vase without waiting for the paint to dry on the sides of the container.

When I was painting the test tube vases, I used short dowel rods that I stood on end in an old piece of wood.  All I did was drill some holes in a two-by-four.  Then, I stacked each test tube on a dowel, leaving enough space in between to give me room to maneuver with the mister and spray paint.


spray painted

Steps 7-8
Spray a very fine mist of the vinegar water on your vase.  The key to success is to start with a very light coating of the mist.  If you get large, running droplets, go ahead and wipe it down with a paper towel and start again.

Immediately spray over the mist with a light coat of the Looking Glass spray paint.  You will repeat these steps two to three times, so it is important not to try to get all of the silvering done all at once.  Light layering is essential to getting the desired vintage look of mercury glass.


painting progress diy mercury glass

Step 9
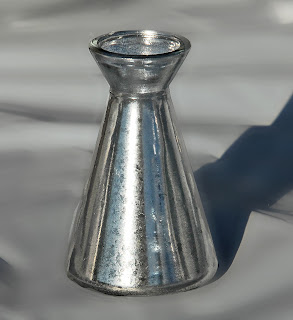
Very gently dab all over the misted and painted surface of the glass with a clean and dry paper towel. You want to blot up all spots of water and any larger droplets of paint.  This step creates the aged look of the silvered glass.


diy mercury glass vase

Step 10
Repeat the misting, painting, and blotting process until you are happy with the final effect.  I repeated the process three times on the vases pictured in this tutorial.

diy mercury glass vase with flowers

Step 11
Once the paint is dry, experiment with arranging your favorite flowers in your gorgeous mercury glass vases.  They look really nice in groupings of various sizes and shapes.

diy mercury glass holders with flowers
In this example, I placed three mercury glass test tubes in an antique bed spring.  The addition of a beveled mirror base created stability and an interesting reflective quality.  Peonies seemed just right for this type of vintage floral arrangement.


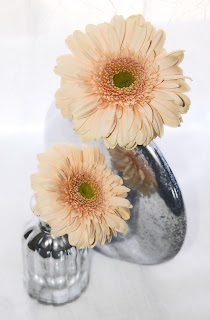
diy mercury glass vase with flowers

Mercury glass centerpieces don't have to be expensive to look like you spent big bucks at a floral shop.  Use the glass you already have at home.  It is so easy to upcycle any ordinary jar or cheap vase into something extraordinary.  There is something incredibly satisfying about giving a face-lift to a common, plain item.

We all hold the power of transformation in our hands.  Let's go create and share some beauty today.


Note: The author may receive a commission from purchases made using links found in this article. “As an Amazon Associate, Ebay (EPN) and/or Esty (Awin) Affiliate, I (we) earn from qualifying purchases.”


Saturday, June 9, 2018

A Review of Creativity on Review This!

Painting of a kitchen scene by artist Kimberly Austin Daly
(c) Kimberly Austin Daly, Artist*
Creativity Lives in Everyone!

My daughter is an artist.  She studied art in college, graduating with a degree in Fine Arts. But her creativity in this field has been present since she was old enough to hold a crayon.  All her life she has been compelled to draw & paint.  I've always admired her artistic ability because I can't draw a straight line with a ruler! :-)

*Artwork is the property of Kimberly Daly, Artist/Illustrator.  Copyright: Do not copy.  Permission granted for display in this story.


Bob playing the guitar
My hubby was a fine musician, having studied the violin for 14 years, then played the guitar for many more years and even had his own 'trio' during the 'folk music' era of our college days.
Greg playing guitar
Today my son plays guitar and several other instruments and has his own local band with a group of fellow musicians.  I can't play any instrument and have no musical ability.

My brother sings and plays guitar.  My mother and sister could sing up a storm. I can't carry a tune in a bucket!  

Crocheted plush animals
Coastal Crochet Crafts on Etsy

I used to say to my talented family that I had no 'talent' for anything, until they reminded me that my crochet and needlework crafting was MY creative ability.  


Creative Talent is in Everyone


You don't have to be able to sing or dance, play an instrument or draw to be talented.  Creativity in ANY area is a talent all its own.  It was a nice reminder that we all have some form of creative talent, whether its in the arts & crafts field, music or dance, or simply being a wonderful cook.  Being able to express ourselves in writing is also a creative endeavor.  


Highlighting a Few Reviews Written by Our Talented Contributors on Review This!


Our team of contributors who write for Review This! review many products and do music, book and movie reviews, in addition to a wide range of other topics.  They are also very creative, sharing a variety of crafts, tutorials of DIY projects, cooking and baking recipes, and photography and gardening tips.  The following are a few examples of this team's creative talents.


Crafts Reviews


Image of DIY Christmas Tree Ornaments
(c) Dawn Rae
How to Make Easy Christmas Tree Ornaments by Dawn Rae.  Dawn gives us easy step-by-step instructions on how to create with your children these simple, yet lovely, ornaments for your holiday tree.


Crochet poncho pattern
(c) Bev Owens

For crochet crafters, Bev Owens tells us about this easy pattern you can use to create your own handmade poncho in her review titled Reviewing A Crochet Poncho Pattern.


Crochet bluebird sitting on a branch
(c) Wednesday-Elf

Wednesday-Elf loves to crochet, particularly stuffed animals.  Handmade crafts are her favorite, as shown in this A Bird in the Hand-i-Craft article.  In addition to her own crochet crafting, she enjoys sharing the creative talents of many other fiber art creators on Etsy.


DIY Projects


DIY Mason Jar Bird Feeder
(c) RenaisanceWoman2010)
Clever & creative Diana (RenaissanceWoman2010) gives us a tutorial for a DIY Mason Jar Bird Feeder using a regular canning jar, a pretty plate or bowl, and a few other simple supplies (glue, wire, and a chick feeder base). Then just add bird seed and watch the local feathered friends in your area flock to your new bird feeder. 


Photography Tips


Lighthouse photo
(c) mbgphoto
Several of the Review This contributors are photographers, but Mary Beth Granger (mbgphoto) goes one step further with sharing her fabulous photography tips for all of us to learn to take even better photographs. She shares the tips she's learned from taking photography classes and doing LOTS of practice. I would imagine Mary Beth seldom goes anywhere without a camera. Her favorite subjects are lighthouses! Check out her Review of Photography Tips for some helpful advice for your own photographs. 


Recipe Reviews


Cupcake Cake Cookbook book cover
(c) Sylvestermouse

Sylvestermouse is our creative baker here on Review This! She loves to put together fancy cakes and cupcakes.  A quick look at one of her favorite cookbooks for baking (the Cupcake Cakes Cookbook) will give you an idea of some of the fun and clever ideas she often incorporates into her baking.


Gardening Tips


image of flowers
Olivia Morris is one of our resident gardeners.  In her How to Grow Your Way to Happiness and a Great Garden, she shares some tips for your spring planting. 


Articles on Creativity


For more articles on these creative reviews, click on each subject below:


What do you consider your 'creative' talent?  


(c) Review of Creativity by Wednesday Elf


Note: The author may receive a commission from purchases made using links found in this article. “As an Amazon Associate, Ebay (EPN) and/or Esty (Awin) Affiliate, I (we) earn from qualifying purchases.”

Most Recent Reviews on Review This Reviews


Search for Reviews by Subject, Author or Title

The Review This Reviews Contributors


SylvestermouseSylvestermouseDawn Rae BDawn Rae BMbgPhotoMbgPhotoBrite-IdeasBrite-IdeasWednesday ElfWednesday ElfOlivia MorrisOlivia MorrisTreasures by BrendaTreasures by BrendaThe Savvy AgeThe Savvy AgeMargaret SchindelMargaret SchindelRaintree AnnieRaintree AnnieLou16Lou16Sam MonacoSam MonacoTracey BoyerTracey BoyerRenaissance WomanRenaissance WomanBarbRadBarbRadBev OwensBev OwensBuckHawkBuckHawkDecorating for EventsDecorating for EventsHeather426Heather426Coletta TeskeColetta TeskeMissMerFaeryMissMerFaeryMickie_GMickie_G


Review This Reviews is Dedicated to the Memory of Our Beloved Friend and Fellow Contributor

Susan DeppnerSusan Deppner

We may be apart, but
You Are Not Forgotten


“As an Amazon Associate, Ebay (EPN) and or Etsy (Awin) Affiliate, I (we) earn from purchases.” Disclosure Statement

X