Showing posts with label Crafts & DIY. Show all posts

Thursday, November 7, 2019

DIY Pumpkin Succulent Centerpiece


diy Pumpkin Succulent Centerpiece

It's pumpkin season!  Now is the perfect time to round up some pumpkins and create unique centerpieces as a festive touch for your holiday celebrations.  A DIY pumpkin succulent mini garden will be the perfect addition to your Thanksgiving decor.  Not only will it be a real attention-getter when you host guests for the holidays, but you will have the benefit of enjoying your new container garden long after you finish all those turkey left-overs.

Here's What You Need:
  1. One large flat pumpkin 
  2. A variety of succulents
  3. Clear gel glue
  4. Spray adhesive
  5. Moss
real pumpkin
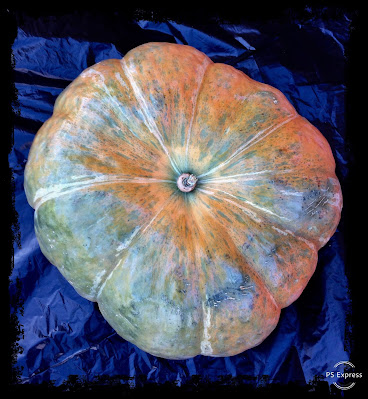
It's best to use a flat pumpkin with a slightly indented center .
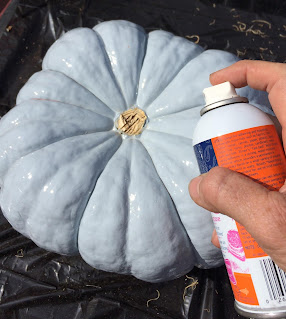
While I prefer to use a pumpkin in its natural state, I chose to paint mine for this demo project.  I used a lovely Solstice Blue paint color (a subtle blue-gray) that will blend in with the woodland theme I am using for my holiday decorations.  It reminds me of the beautiful shadows you see on fresh snow.  A neutral colored pumpkin better accents the succulents.

removing a pumpkin stem for diy project
Removing the Stem

Once the paint was dry, I used my Dremel with a cut-off wheel to remove the pumpkin stem. 

spraying on craft bond
Spraying on Elmer's Craft Bond 
I then sprayed adhesive on the center top of the pumpkin where the moss will be placed. 

pressing and gluing  moss on pumpkin
Press Moss Into the Adhesive
While the adhesive was still fairly wet and tacky, I pressed a nest of moss onto the sticky surface.  It seems I got a little moss happy.  Could have used a bit less moss, but it would have made a big mess to attempt to remove it.  I let the adhesive set for several minutes before moving to the next step.

cactus with roots showing
Preparing the Roots for Planting

While the adhesive was setting up, I gently removed the soil from the cacti roots in preparation for planting them on the surface of the moss.  I also separated the succulent clusters so I would have more options for spreading out individual plants.

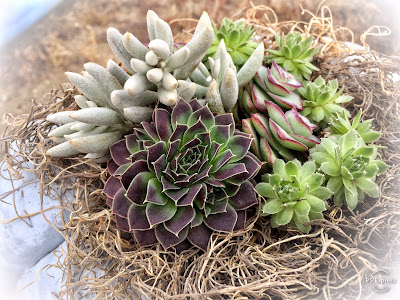
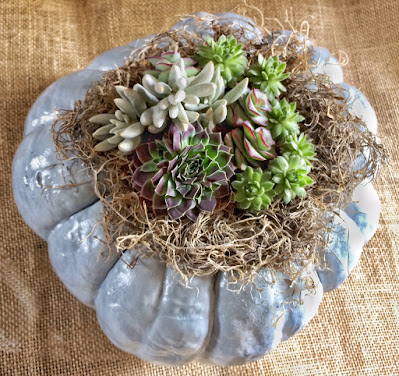
Pumpkin Succulent Centerpiece
Vary Succulent Colors, Textures, and Heights
Start your succulent placement with your largest plant.  Visually, it is most pleasing to the eye to position the first cactus off-center and toward the edge of the pumpkin.  It is also a good idea to group your taller cacti near that first featured plant.  You will use clear gel glue to fasten your succulents to the moss.  Don't worry!  The glue won't hurt your succulents.

mist the moss on a pumpkin centerpiece
Time to Lightly Mist the Moss
Once your pumpkin succulent centerpiece is complete, carefully give the moss a light misting of water.  You will provide moisture to the moss about once a week.  It's important not to let water pool under your plantings.  It will lead to premature rot.  Simply tip your pumpkin slightly to the side to drain any excess water after each misting.  

To extend the life of your pumpkin, and to give your succulents what they need, carefully choose a location away from heaters.  Try to situate your succulent container garden such that your cacti get the sunlight they need without getting too much heat on the pumpkin.  Likewise, take care to protect your succulents from freezing if you will be displaying your centerpiece on a porch or outdoors.

One last tip:  Place your pumpkin on a piece of cork or thick cardboard to keep the bottom from early decay (especially if placed in a location where surface dampness occurs).  Take care to protect your indoor furniture with the use of a waterproof planter mat.

With proper care, your pumpkin succulent centerpiece should last several weeks.  Once the pumpkin has reached the end of its season of life, you can either cut off the top of the pumpkin and plant it on top of appropriate cacti soil, or transplant the newly rooted succulent cuttings to another container.  Of course, you may also choose to use a faux pumpkin to eliminate this step.

It's easy to see why these pumpkin centerpieces are so popular.  Besides being unusual and visually stunning, they let you take your creativity to a whole new place.  This DIY centerpiece is sure to be a fun conversation-starter at your next gathering.  Why not make one to share for a hostess gift?  Who wouldn't love such a thoughtful gesture? 

Enjoy this project and my best wishes to you for a blessed holiday season.


Note: The author may receive a commission from purchases made using links found in this article. “As an Amazon Associate, Ebay (EPN) and/or Esty (Awin) Affiliate, I (we) earn from qualifying purchases.”


Tuesday, September 10, 2019

Flower Art For Kids Reviewed

Kids Making Flower Art

I found some flower art for kids to give to my youngest granddaughter for her birthday this year. She enjoys doing all sorts of crafty things so after reviewing some options, the kit that I purchased just seemed like a perfect match for her age and her personality.

flower-art
Flower art by mother nature
image courtesy of pixabay.com

The kit is called Random Acts of Flowers and fits my little sweet pea (pun intended) to a "t". I can see her making a small bunch of flowers to give to someone in a random act of kindness. She is so in tune with the emotions people are experiencing around her and would delight in making someone smile with a little gift.


Teaching Kindness With Crafts


The kit includes 75 sheets of tissue paper, 12 floral stems, 12 gift tags, a hanging vase and a bandit mask. Why the mask? This is supposed to be random and anonymous...besides kids love it. What is not included is a pair of scissors and you will also have to supply the kind soul of a child or adult. It is the most important ingredient in the mix!

So, making these flowers and then finding a place to hang them so that people can smile as they take one from the hanging bouquet is only part of the fun. Those gift tags that can be attached to a flower are supposed to have a message on them. The encouraged message is that whoever takes the flower is supposed to go do something nice for someone else. Don't you just love that?

Added to the benefit of spreading kindness one little action at a time is the fact that every purchase of one of these kits pays it forward a little more. A donation is made to a charity that takes re-cycled flowers along with words of encouragement to health care facilities to promote the emotional well-being to residents. I love that!


A Gift that Keeps Giving


Another thing I loved about this flower art for kids kit is that it plants that seed of kindness but it doesn't have to stop once the original supplies are used up. It is so very easy to buy more tissue paper. The children can make their own little gift tags and flower stems can be replenished. The hanging vase might be taken away but they can use their imagination to make another one. 

What do you think? Would you give a child a gift like this?


Note: The author may receive a commission from purchases made using links found in this article. “As an Amazon Associate, Ebay (EPN) and/or Esty (Awin) Affiliate, I (we) earn from qualifying purchases.”


Sunday, May 19, 2019

Five Fabulous Fairy Coloring Book Reviews

Five Fabulous Fairy Coloring Book Reviews
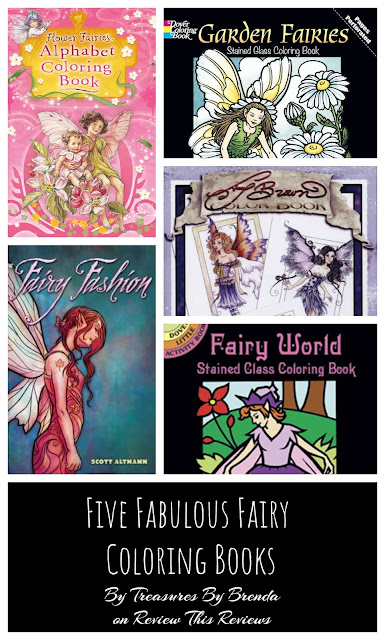
Fairies are so enchanting and the coloring books gathered here on this page are lovely. They will please both the children and adults in your life who love to color. They will not just please your child but will also let her develop her imagination while she has fun coloring the drawings. Some of these books will keep the user occupied for hours; others for a lesser time frame.

Any one of the coloring books on this page would be a great idea for Christmas gifts and stocking stuffers or even for birthday party favors at a fairy themed birthday party. There is bound to be a faerie coloring book here that your child will love and there are even some here that you will love. If you're giving one as a gift, be sure to include a box of crayons.

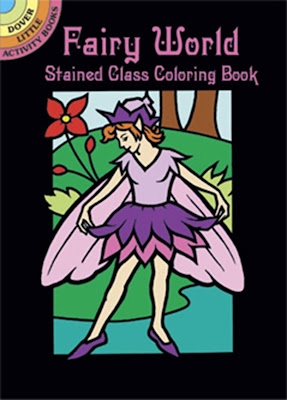
Fairy World Stained Glass Coloring Book


The first book shown here, Fairy World: Stained Glass Coloring Book, is a Dover Little Activity Book. It's a cute little book with thin pages that is recommended for individuals who are between the ages of Kindergarten and Grade 5. The pages are thin so that when you hold them before a light source, the light shines through, giving a stained glass effect.

As a Dover Little Activity Book, it is indeed a small book and not a full-size coloring book and it only has a few images. There is nothing wrong with that as long as you are aware of the fact and don't expect a full-size book.  It's also very affordable at just under $2, making it perfect for those stocking stuffers and party grab bags. Click here to find this Fairy World Stained Glass Coloring Book from Amazon.

Fairy World Stained Glass Coloring BookGarden Fairies Stained Glass Coloring Book

Garden Fairies Stained Glass Coloring Book


Darcie May has created this second beautiful Dover coloring book with fairies nestled among the garden. Once again once they are colored in you can take them to a light source and the stained glass will come to life. Beautiful and bound to be a huge success.

The Garden Fairies Stained Glass Coloring Book is suitable for children over 6 years of age. It has 16 pages done in black and white on parchment paper. Click here to find the Garden Fairies coloring book online.

Amy Brown Fairies Coloring BookFlower Fairies Alphabet Coloring Book

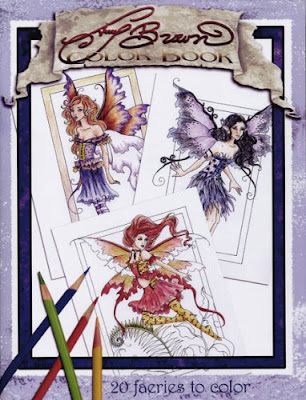
The Amy Brown Fairies Coloring Book


Amy Brown has been painting fairies for more than 20 years. Her artwork features detailed illustrations of fairies. Whether you are a little girl or a grown-up girl who is interested in fairies, you will enjoy this fairy coloring book, which is suitable for children of all ages. It has twenty one-sided pages that measure 8.5 by 11 inches. Click here to find Amy Brown's coloring book on Amazon.

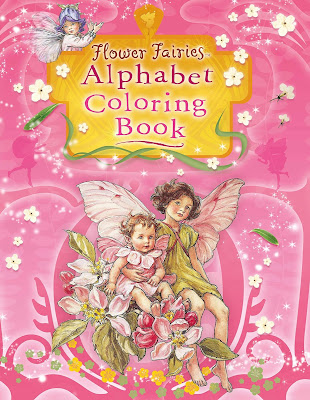
Flower Fairies Alphabet Coloring Book


Your youngster will learn her alphabet and the names of 24 of the most popular flower fairies as she colors in the beautiful pictures presented in the Flower Fairies Alphabet Coloring Book, which features the artwork of Cicely Mary Barker. This book has 24 pages and is recommended for children from Kindergarten age to Grade 2.  Click here to find the Flower Fairies Alphabet coloring book on Amazon.

Fairy Fashion Coloring Book

Fairy Fashion Coloring Book

The Fairy Fashion colouring book presents pretty fairies dressed in the height of fairy fashion. Your fan will love spending time bringing these images to life with color. There are also plenty of cats, squirrels, birds and their friends keeping them company.

The artwork in this book is by Scott Altmann. The Amazon customer reviews bounce around a bit so make sure to check them out before you buy. Many of the issues are with varying tastes for the style of the illustrations.

The Fairy Fashion Coloring Book is recommended for individuals 5 years of age and up. It is a Dover Coloring Book and has 32 pages. Click here to find the Fairy Fashion coloring book on Amazon.

Do you believe in fairies? Do you like fairies? What about coloring books?

See you
at the book store!
Brenda
Treasures By Brenda

More Fairy Reading:


Fairy Tale: A True Story Movie Review
A lovely family-friendly movie about fairies.

Were The Cottingley Fairies Real or Fake?
In 1917 in Cottingley, Yorkshire, England, a pair of young ladies named Elsie Wright (16) and Frances Griffiths (10) believed that there were fairies in their garden...

Abby Cadabby: Create A Sesame Street Fairy Gift Set

A Few Fairies on eBay
Discover a few select fairy-themed items in my eBay store, Treasures By Brenda.

Fairy Coloring Book


Note: The author may receive a commission from purchases made using links found in this article. “As an Amazon Associate, Ebay (EPN) and/or Esty (Awin) Affiliate, I (we) earn from qualifying purchases.”


Friday, March 29, 2019

Needle Minders for Needlework & Sewing Enthusiasts Reviewed

Needle Minders for Needlework & Sewing Enthusiasts
A few years ago, I was gifted with a beautiful needle minder.  At the time, I had no idea what a needle minder was, but I quickly learned what a fabulous aid a needle minder can be for those of us who love to sew and do needlework.

The best description of a "needle minder" that I can think of would be to refer to it as a needle magnet that attracts and holds needles.  

I couldn't begin to guess at how many needles I have dropped, and lost, over the years.  I have even been know to wash them simply because they were attached to a blouse I was wearing while sewing.  Let's face it, when we sew, we get interrupted.  The needle is stuck quickly into "something".  We may not get back to our work within the hour, or even on the same day and we have totally forgotten what we did with our needle.

Therefore, I now consider a needle minder an essential sewing & needlework tool. 


My Needle Minder


Needle Minders for Needlework & Sewing Enthusiasts Reviewed
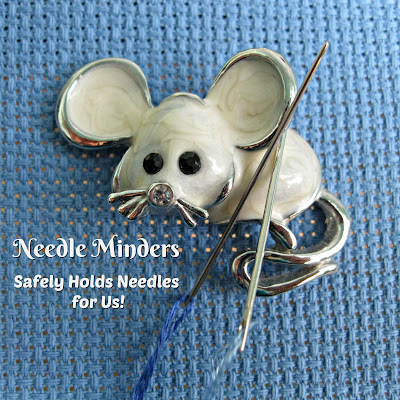
My needle minder is a lovely mouse, which is totally appropriate to me.  Clearly, the gift giver knew me well.  

When I am sitting behind the sewing machine, I attach my needle minder to my shirt like a brooch.  When I am cross stitching, I attach it to the aida cloth itself.  

Magnetic needle minders do not damage clothing or fabrics.  They are ingenious designs with a strong magnet that holds the needle minder from the back side.  

The magnet "attracts" needles and holds them for us.  When we return to our work, we know exactly where to look for our needles. So much better than randomly poking them somewhere and finding them later, often by surprise, when they stick you.  

I am currently working on a cross stitch design that requires dozens of different floss colors.  I frequently thread several needles in different colors so I can continue cross stitching without having to change the floss on one needle too often.  As you can see in the photo, my mouse needle minder hangs onto the multiple needles nicely, and all in one place.


Needle Minders Available Online


There are several places online that offer needle minders.  I happen to know that mine came from True North Needleminders on Etsy because it arrived attached to the store's business card.  She has a large variety of choices available so you can select the character that best reflects your preferences and personality.

Here are a few that are currently available at True North Needleminders, but you can click the store link above to see the entire collection. 

I can tell you from experience, they make awesome gifts for needlework and sewing enthusiasts.  I am most grateful to Olivia for giving me mine.


 See More Crafts & DIY Reviews On
ReviewThisCrafts.com!

  and

More Gift Ideas for Needlework & Sewing Enthusiasts


House of Sylvestermouse


Note: The author may receive a commission from purchases made using links found in this article. “As an Amazon Associate, Ebay (EPN) and/or Esty (Awin) Affiliate, I (we) earn from qualifying purchases.”


Wednesday, March 27, 2019

What You Need to Know about Basic Birdhouse Construction

birdhouse on a tree

Basic Birdhouse Construction, What you Need to Know.


For years I have built birdhouses for friends and family and for myself.  Why?  Well let's just put it this way, I love my garden and I love nature.  When I'm working outdoors there is nothing more special than being able to watch the birds and the bees while taking a short break.

To say that I enjoy their antics would be an understatement.  You will find me out in the garden at almost any hour of the day, just to see what there is to see.  Most of the time it is the birds and the insects that I purposely attract to my garden that give me the thrills of the day.  And because I love them so much, I want my friends to enjoy them that much too!

I want to focus on birdhouses in this review, because, while everyone loves birds, enticing them into your garden is a special thrill!   Seeing them rear their babies is even more fun.  If you have children or grandchildren, it is also a wonderful time to teach them some nature lessons and life lessons too.


Birdhouse Basics

If you have a yard, you have a great place to start.  Flowers, shrubs and a tree or two would be ideal as well.  A water source or a bird bath will surely entice some lovely feathered friends to come for a visit.  After that, if you want to build some birdhouses, that will help them to target you for their next place to live!

It is said that if you build it, they will come! (Taken from the movie ............The Field of Dreams.)  This may be true for birdhouses and it may not be true.  Some birds really don't care what their homes look like, but they are particular about the size and the placement.  Other birds will readily nest in any dry and sheltered spot, Robins in particular will nest in a dry space and not really need or want a birdhouse.

If you are hoping to attract certain kinds of birds to your yard, you need to build a house that they will really like.

Placement of that birdhouse will also be important.  Some birds require homes set at a certain height and proximity to other essentials  for their welfare.  Water and food sources being the most important ones.

Some birds are solitary nesters and others need to live in community.  So again depending on the birds you want to attract, you will need to take these things into consideration as well.

I have found this book on Amazon will help you build birdhouses, but also takes into account each different species likes and dislikes.  Working with an ornithologist, these plans have been made for specific birds.  It doesn't help you to build a house that no one wants to occupy.  So build something that you know they will appreciate and you will be rewarded with the lovely sounds of birds thanking you.


Here you will find plans to make up to 19 different types of birdhouses. Each one can be executed by the novice as well as the expert woodworker. These are great projects for Moms and Dads to make with their children.  The basic houses are wooden and can be left plain or dressed up with colors.

Three things that you should never do!

While we are on the subject of attracting birds to your garden, I want to make absolutely sure that you don't do these things:
  1. DO NOT put out lengths of yarn for birds to use as nesting material.  
  2. DO NOT put out dryer lint for the birds
  3. DO NOT put out pet hair for their use either.
You may ask WHY NOT!
Here are the reasons,  yarn, unless it is cut up into tiny (less than an inch long) pieces, can actually act as a noose that works it's way around baby birds necks.  When they try to fly out of the nest, they strangle.  Birds are used to  scavenging for nesting materials and they know what they want in there.  If you feel inclined to help them, rake up your grass and leave little piles of dried grass for them to find.  

Dryer lint is also a definite no-no.  Most people use fabric softeners of some sort with  their dryers and the chemicals in those sheets or liquids also ends up in the lint.  These chemicals may harm the babies either by contact, or by ingestion.  Don't do it!

Pet Fur is also a no-no.  If your pet is taking medications, or you use flea powders or flea shampoos on them, their fur is also "contaminated".  Baby birds are naked (just like human babies) when they are born.  Anything that cause a reaction to their tender little bodies should be avoided at all costs.
baby birds
Naked baby birds!


It would be much better for you to spend your time reading a little about what they would appreciate and then building a nice house for them to enjoy.  The most perfect part of this whole idea is that you will build one house, but that two families will get to enjoy it.  The bird family and your family too!

More about Birds from the writers at Review This Reviews:


You can read more about the life cycle of a Robin at Tracey's Review of that incredible sight at her home.
Birdwatching and Photography go hand in hand.  One of Review This Reviews writers, Mary Beth Granger, has shown and taught us how to capture some beautiful pictures of the birds in her area. If you love Bluebirds you can read up right here!  Or if Woodpeckers tickle your fancy, you can check out some great pictures and facts Review of Woodpecker Facts and Photography 


Note: The author may receive a commission from purchases made using links found in this article. “As an Amazon Associate, Ebay (EPN) and/or Esty (Awin) Affiliate, I (we) earn from qualifying purchases.”
Thursday, March 21, 2019

DIY Pallet Book Nook

decorative wall and window seat
Pallet Wood Feature Wall and Window Seat
When I purchased my current country home, many of the features that most appealed to me were the quirky, whimsical touches that made it so unlike all of the other cookie-cutter properties.  After moving in, though, I discovered a few things that were just a little too different for my taste.  Still, in renovating those oddities, I wanted to remain true to what had drawn me to this house in the first place: the use of character wood (weathered wood that captures your imagination).

In today's post, I am sharing part one of a two-part series focused on creating a DIY pallet book nook from a previously unused space in my upstairs bedroom.  We will start with the woodworking elements of the project and then finish with handcrafted decorating touches (a homemade cushion, pillows, rug, and other decor to cozy up the space).

Because I have poured so much of myself into my master bedroom renovations, it has become my favorite room in the entire house.  One last improvement remained to make this space visually and functionally cohesive.  There was a funky "hallway" in the room that housed my exercise bike (because it didn't lend itself to much else).  The thing that really bugged me about that long, narrow space was a weird, uneven application of drywall.  I couldn't knock that wall down because it housed my closet and was most likely structural (helping support the roof).  And, hanging, mudding, texturizing, and painting new sheetrock just wasn't on my bucket list.  Been there, done that.  Not my idea of a good time.  So, what to do?

drywall before finishing
Funky Drywall Before Renovation
Recycled pallets are the answer to most of the truly pressing needs in my world.  Seriously.  Pallet wood can right most wrongs.  It just requires a little—well, okay, a lot—of elbow grease.  I'm good with that.  The finished product has always proven worth it.  We'll just skip over the less than scintillating details of finding, hauling, deconstructing (pulling a massive number of ornery nails), and refinishing (cutting, sizing, planing, and sanding) a tall pile of pallets.  On to step eight.

marking the drywall
Tape Marks Studs Where Planks Will Be Nailed
With the feature wall pallet planks ready for installation, I prepped the wall by finding and marking the studs.

adding wall strips
Leveling Wall Sections With Lath
Next, I applied thin strips of wood lath to level the two sections of drywall, which will provide a more solid backing when nailing in the pallet planks.  The wainscoting pictured above consists of three framed pieces of corrugated metal topped by a chair rail.  It provides a nice contrasting texture, as well as adding a reflective surface to lighten up the space.

pallet wood on walls
Oh the Tales This Wall Could Tell
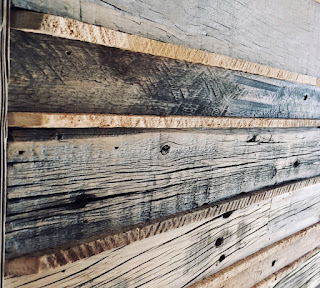
When I nailed in the rows of pallet wood, I decided to alternate different widths and colors.  I left all of the wood in its natural state, as the original saw blade marks, nail holes, knots, and checking is what adds personality.  As I started working on this step, I got the inspiration to separate rows of planks with horizontally placed strips of recycled lath removed from inside the plaster walls of an old ranch house.  The definition of the chiseled edges of lath created an effect similar to the chinking seen between bricks.  Really, though, it is the history of that lath, and the story it tells, that adds so much value and interest to the feature wall.

wood pallet window seat
Rustic Pallet Window Seat 
No book nook would be complete without a window seat.  Again, I used rustic pallet parts, purposely choosing planks with nail streaks, and then trimming the bench with pallet skids.  Where there was fresh wood from making the cuts, I applied chalkboard spray paint, and then sanded off most of it to blend the color with that of the naturally weathered surfaces.

feed and seed sign
Books Feed and Seed the Mind
Above the window, I created a decorative king post truss trim that matches the actual support truss on the front of my house.  I like the way it ties everything together.  While working on this truss, I happened to find the metal  Feed & Seed sign at Tractor Supply Co.  It seemed like the perfect message for my new space, as books certainly do feed and seed our minds.  When I got home with the sign, I was amazed that it fit exactly in place between the truss and the window.  That never happens.  I knew then that it was meant to be.

finished book nook window seat
My Nook is Ready for Accessorizing
With the construction work done, I am now in the process of accessorizing my new nook.  I have selected fabrics and will soon start sewing the window seat cushion and pillows.  Stay tuned for part two of this DIY series when I post the final reveal.  So, what do you think?  Could you see yourself curled up with a book in this sunny space?


Note: The author may receive a commission from purchases made using links found in this article. “As an Amazon Associate, Ebay (EPN) and/or Esty (Awin) Affiliate, I (we) earn from qualifying purchases.”

Monday, March 11, 2019

Reviewing Jeans Yarn by Lion Brand

Stonewash Jeans yarn by Lion Brand.
Lion Brand Yarn Company sells some of my favorite yarns. While I'm waiting for my order of Comfy Cotton Blend yarn to arrive, I'm using some Jeans yarn that I had on hand. I had forgotten how much I love this yarn for hats. The super soft yarn, in blue jean colors, was perfect in a hat for my grandson. I think it'll also be awesome for making my Jenny Hats.

I've started crocheting chemo hats. I call them my Jenny Hats. If you'd like to know more about why I started making chemo hats the link to that article is listed below.

I've been using Lion Brand Comfy Cotton blend yarn for my Jenny Hats. Because cotton is so comfortable and because the Comfy Cotton yarn is so soft. But this weekend I did not have enough Comfy Cotton blend on hand. So I started a hat with the Jeans yarn. My goal is to make the most comfortable hats that I am able to make. 

I LOVE the Jeans yarn. It is 100% acrylic yarn - not cotton as I had guessed. It is machine washable and dryable. And the colors are awesome. "Stonewash" is the color pictured. Doesn't it look like a favorite pair of broken in jeans? 

The yarn is labeled as a size 4. In my opinion, it is on the small side of size 4. It is working up in this Jenny Hat just like the size 3 Comfy Cotton blend worked up. The Jeans yarn does not split or fray easily making it very easy to work with.

At the largest yarn store in my area, I can easily find Jeans yarn in 3 shades of blue, black and 2 shades of brown.  As I was preparing to write this, I see that Jeans yarn is being made in other colors; shades of pink, turquoise, red, and burgundy. These are labeled "Jeans Colors"

Jeans Colors - pink


Related Links:

Read about Jenny and why I began making chemo hats. I also shared photos of the Jenny Hats made with Comfy Cotton Blend yarn here

Another Lion Brand yarn that I rave about is the Wool Ease Thick and Quick. An excellent chunky yarn for neck warmers and other projects that call for a thick, soft yarn. 


Note: The author may receive a commission from purchases made using links found in this article. “As an Amazon Associate, Ebay (EPN) and/or Esty (Awin) Affiliate, I (we) earn from qualifying purchases.”

Monday, March 4, 2019

Reviewing Flexible Tunisian Crochet Hooks

Using the appropriate hook for the project. 
With a great deal of skepticism, I recently bought a 24" Flexible Tunisian Crochet hook. It is the recommended hook for larger Tunisian (also called "afghan") crochet projects. I fully expected to not like my purchase. I expected it to snag and not feel as comfortable as my preferred aluminum crochet hooks. Not only was I pleasantly surprised at the smoothness of this wooden hook, I was very happy with the longer length. I should have purchased more than just the one. I can imagine using a variety of sizes of these hooks in the future.

A friend at work asked me if I would try to crochet a scarf for her - from a pattern she found on Etsy. I told her that I'd try, but I was very new to Tunisian crochet. 

I started on the first practice attempt with regular, aluminum Tunisian Crochet hooks. I wanted to first test the pattern. I found that I could work it correctly for the most part. Then the project became wide enough that handling the straight hook was difficult. As the yarn gathered on the hook, it became bunched and too bulky to manage. 

So I ordered the ChiaoGoo 24" Flexible Tunisian Crochet Hook size H8. 

The flexible Tunisian crochet hook is a wooden crochet hook. It has a thick synthetic "cord" that ends in a wooden bead. The bead works as a stopper. The length of the hook with the length of the cord allows you to work on a longer project comfortably. As you can see in the photo, as I add stitches, my scarf easily moves on and off the hook. The bulk does not gather and bunch under my hand.

As I mentioned, I was concerned that the transition between the hook and the cord would snag my yarn. It does not. The metal cap is smooth and makes a smooth transition.

Initially, that stiff cord (think of super thick fishing line) flopped around while I crocheted and it distracted me. But after just 2 or 3 rows, I no longer noticed that naturally curled cord. 

My longer Tunisian crochet projects are much easier with this flexible hook.


Related Links:

This is the third project I've made using the Sweet Roll yarn by Premier Yarns. The color is Wild Cherry Swirl. While they offer many colors in this yarn the wild cherry is my favorite by far. 

I only began learning Tunisian crochet just a few months ago (October/November) and I'm enjoying it very much. See my first Tunisian crochet project here.

I've been taking more time to crochet and as a result I'm gathering a sizable collection of crochet hooks. This Teamoy Tunisian Crochet Hook Case is very helpful in keeping my supplies organized. 


Note: The author may receive a commission from purchases made using links found in this article. “As an Amazon Associate, Ebay (EPN) and/or Esty (Awin) Affiliate, I (we) earn from qualifying purchases.”


Friday, February 22, 2019

DIY Upcycled Drawer Pet Bed

cat drawer day bed
Grizzly was quick to call dibs on this new drawer daybed.
One of the ways I express love for my animals is by making them things.  I'm always on the lookout for fun DIY projects for my kittens and pups.  While cruising Pinterest for inspiration, I came across something I could not wait to try: making a cozy pet bed by upcycling a drawer.  At the time I didn't have any old drawers, but then, like it was meant to be, I came upon a dresser that someone had abandoned.  Just like that I had four oak drawers that needed to be saved from a premature trip to wherever unloved drawers go.  I'd like to share with you how I took those vintage discarded drawers and gave them a new purpose in life. This is a simple weekend project that anyone can enjoy.

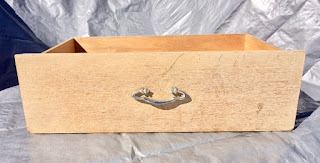
empty drawer

First, pick up a used drawer that will fit your pet.  You may find one at a garage sale or thrift store.  Since my pups are too big for a drawer, I'm making these beds for my kitties.   Given that they sleep most of the time—well, except for my wild child, Minnie—a custom bed is the gift they will use more than anything else.

painted drawer

Next, remove the hardware and sand the surfaces in preparation for your choice of finish.  At the moment, I'm in love with chalkboard paint, so I primed my drawer with it (Tip: Use the spray paint.  It goes on much smoother.).  Though a chalky soft black color may seem like an odd choice, I knew that I wanted to cover it with a white paint that would give it a stylish grunge look.  The nice thing about a dark primer is that it immediately enhanced the drawer's imperfections.

mini trellis and glass candle holders

Now it's time to use your imagination to come up with a unique twist on decorating your pet bed.  When I came upon this cute mini trellis at Dollar Tree, I knew exactly what I wanted to do.  It became the muse for a kitten daybed.  On the same shopping trip, I found these fluted glass candle holders.  They gave me the idea for an unusual set of legs for the daybed.  This is my MO as a maker: using things in unexpected ways.  Never one to be a copycat, I get my thrills from coming up with something really different.

mini trellis

Here's where sizing adjustments happen.  After determining the desired height of the daybed ends, I used my cordless Dremel with the cut-off wheel to shorten the trellis.  If you don't have a Dremel, you can use a hacksaw for this step.  I tried it both ways and the Dremel is definitely the easier and faster method.

drilling holes in drawer sides

Time to drill some holes to insert the trellis into the drawer's side panels.  I used a 1/8th inch bit to drill holes that are 3 1/2 inches deep.  This step required some care, as the wood panels are pretty narrow (about 1/4th inch wide).  I didn't want to accidentally drill through the side of the drawer.  By taking it slowly, I kept the holes where I wanted them to be.

white caulk

So, let's get back to those glass candle holder/wannabe legs I mentioned earlier.  After spray painting them with chalkboard paint, I used white chalk to highlight the fluted edges, creating a kind of pinstriping.  An important last step is to spray the containers with a clear matte sealer to keep the chalk from smearing or wearing off.

canning jar lid

At this point, I needed to screw lids for the jar legs onto the bottom of the drawer.  I replaced the candle holder insert with a regular mouth canning jar lid.  Because drawer bottoms are very thin, I bolstered the thickness by attaching strips of wood lath.  This ensured that the sharp points of the screws wouldn't poke through inside the drawer and pose a hazard to my kitten.  Once the lids were in place, it was just a matter of attaching the fluted legs.

cat drawer day bed

The final steps included creating a name plaque for my kitten and placing luxurious bedding inside the drawer.  I chose a silky faux fur rug for the mattress.  It will be easy to clean by just tossing it in the washer.  As for the pillows, I simply rolled up a comfy fleece blanket.  Easy peasy.

cat in cat drawer day bed

I was anxious to get up this morning to see who might be snuggled up in the drawer daybed.  Though I created the bed for Minnie Pearl, the kitten I rescued last August, I didn't think I would find her snoozing.  I haven't actually ever seen her sleep.  She is way too busy with her kitten shenanigans.  I was very happy to find my senior cat, Grizzly Girl (aka Miz Grizz), curled up in Minnie's place.

cat and mouse game

All throughout the day, my girls have been vying for a spot in the new bed.  Mission accomplished.  My heart is full.  I decided I better get a head start on converting another drawer.  While I was working on it this afternoon, Sugar Bear was "helping" me.

cat in cat drawer day bed

This bed has a cathedral theme.  I found a gothic garden fence for the headboard, which reminds me of stained glass windows, and experimented with an antique crackle finish for the front of the drawer.  I'm actually using plant hangers for the legs.  Go figure!  I invite you to stop back by for updates and additional photos, as I still have two more drawers to go (and two more lovely felines to feature).  Crazy cat lady?  Nah.  I'm still one cat short of crazy.


Note: The author may receive a commission from purchases made using links found in this article. “As an Amazon Associate, Ebay (EPN) and/or Esty (Awin) Affiliate, I (we) earn from qualifying purchases.”


Monday, February 11, 2019

Reviewing Lion Brand Wool-Ease Thick and Quick Yarn

Reviewing Wool - Ease by Lion Brand Yarn Company
I have always loved to crochet. Recently, I have mindfully taken more time to crochet. As a result, my skills are improving and I've been creating things that people really enjoy. During this time I've begun to use a new yarn: Wool-Ease Thick & Quick by Lion Brand Yarns. Outside of using Bernat Blanket yarn in a couple of patterns, I've never branched out to the Bulky and Super Bulky yarns. But I stepped out of my comfort zone and I'm so glad I did. I am thrilled with this acrylic/wool blend yarn by Lion Brand.


Lion Brand Wool-Ease Thick & Quick


I've never been a fan of wool - with the exception of work socks that have a small percentage of wool. I love those. But anything that has a larger percentage of wool I imagine as scratchy. I don't know why, but I do. I just always assume that wool is going to be uncomfortable.

During shopping trips down the yarn aisles, I am a toucher. I want yarns that feel good. One day I touched a skein of yarn that was so thick and soft that I bought a few skeins. I did not realize they were an acrylic and wool blend yarn until I got home. 

Wool - Ease Thick & Quick comes in two skein sizes: a regular skein size at 5 oz (87 yards) or the bonus bundle at 12 oz (212 yards).  Be aware if you are shopping online. It appears the some outlets show the regular skein size as the "bonus bundle". Be sure to read the weight/length if ordering online.


It is in the Super Bulky category (which is #6 on the label). And the recommended crochet hook size is "N" (knitting needle size 13).

Wool-Ease Thick & Quick is 80% acrylic and 20% wool. 

It is machine washable and dryable using cool temps. Do not bleach or iron.

I bought this yarn as I was experimenting - trying to crochet a very small neck warmer that someone had suggested. I ended up with the wrong pattern or the wrong size yarn during my experimenting. Then I gave this yarn and a "N" hook a try. And ta-dum, I have great neck warmers that people are enjoying.


Related Links:

My neck warmers on Etsy
If you'd like an acrylic/wool blend neck warmer and don't feel like making your own, keep your eye on my Etsy Store. I will offer these neck warmers with button closures at DawnRaeCrochet as I get them made.

If you'd like to make your own scarf from this yarn, you can check out the crochet patterns on Lion Brand Yarn Company site. If you are a beginner, this "Brunch With Friends Scarfie" would be a good pattern to try. 

I am not good at writing patterns. So I cannot give you an actual pattern for my neck warmers. But for those of you who do crochet this may make sense to you:

  • chain 9 to 11 (depending on the desired width)
  • turn and single stitch in each stitch; continue for 6 rows (beginning each row with a ch 1 and turn)
  • ch 3 and turn, DC in each stitch
  • continue for desire length (mine are around 27")
  • end with a row of single crochet for a finished edge
  • attach a button (or 2 buttons) near the end of 6 rows of SC
  • the button holes are the spaces between the DCs (making the scarf able to be worn in a variety of ways/lengths).


Note: The author may receive a commission from purchases made using links found in this article. “As an Amazon Associate, Ebay (EPN) and/or Esty (Awin) Affiliate, I (we) earn from qualifying purchases.”


Sunday, December 23, 2018

DIY Battery Gift Storage Hack

DIY Battery Gift Storage Hack
When You Have to Add Batteries to a Gift but Don't Want to Put Them Inside the Item, Try This Hack

During the holidays or special occasions, we purchase gifts that require batteries once in a while.

Purchasing batteries in bulk is convenient and affordable. However, when you have to include four or more batteries in a gift, batteries purchased in bulk must have a package to put them in.

It's not recommended to put batteries inside the item you've purchased, as the batteries can begin to lose their charge from that point. Also, it's always best to keep the batteries separate if you're buying a gift months before you plan to gift it.

Of course, you could individually tape each battery onto the inside of the box. However, that's only sometimes convenient.

You can use another easy hack to store batteries inside a gift. Check out this hack I used to include batteries for a remote control car purchased for a grandchild:


DIY Battery Gift Storage Hack
Gift Card Holders - A DIY Hack to Store Batteries for Gifts
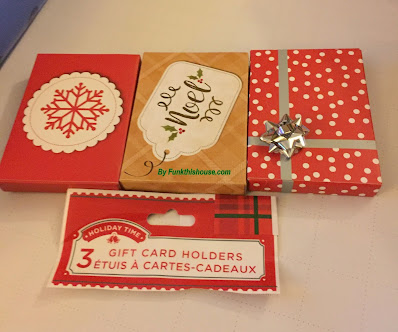
At the dollar store, purchase a package of gift card holders. You'll typically be able to find them for multiple occasions throughout the year. In this case, the batteries are for a Christmas Gift.

DIY Battery Gift Storage Hack
This Gift Card Box Holds Six Batteries
This remote control car needed six batteries. I lucked out in that one gift card box that holds six batteries. If you want to give extra batteries for future use, simply fill another gift card box with six more batteries.

DIY Battery Gift Storage Hack
Tape the Gift Card Box filled with Batteries Inside the Item's Box.

Depending on your gift, find a place to tape the gift card box filled with batteries inside the actual gift item's box. Tape the gift card box to the item's box to prevent it from flying around inside.

So go ahead and get batteries in bulk and add them to gifts whenever your heart desires. Get your gifts early, add the batteries, wrap them, and keep them until that special occasion comes along.


Note: The author may receive a commission from purchases made using links found in this article. “As an Amazon Associate, Ebay (EPN) and/or Esty (Awin) Affiliate, I (we) earn from qualifying purchases.”


Most Recent Reviews on Review This Reviews


Search for Reviews by Subject, Author or Title

The Review This Reviews Contributors


SylvestermouseSylvestermouseDawn Rae BDawn Rae BMbgPhotoMbgPhotoBrite-IdeasBrite-IdeasWednesday ElfWednesday ElfOlivia MorrisOlivia MorrisTreasures by BrendaTreasures by BrendaThe Savvy AgeThe Savvy AgeMargaret SchindelMargaret SchindelRaintree AnnieRaintree AnnieLou16Lou16Sam MonacoSam MonacoTracey BoyerTracey BoyerRenaissance WomanRenaissance WomanBarbRadBarbRadBev OwensBev OwensBuckHawkBuckHawkDecorating for EventsDecorating for EventsHeather426Heather426Coletta TeskeColetta TeskeMissMerFaeryMissMerFaeryMickie_GMickie_G


Review This Reviews is Dedicated to the Memory of Our Beloved Friend and Fellow Contributor

Susan DeppnerSusan Deppner

We may be apart, but
You Are Not Forgotten


“As an Amazon Associate, Ebay (EPN) and or Etsy (Awin) Affiliate, I (we) earn from purchases.” Disclosure Statement
X