Showing posts with label spring. Show all posts

Sunday, April 14, 2024

10 Essential Steps to Prepare Your Yard for Spring: A Guide to Yard Cleanup and Flower Preparation

10 Essential Steps to Prepare Your Yard for Spring

Spring is just around the corner, and it's time to prepare your yard for the vibrant blooms of the season. 

As the snow melts away and the days get longer, your garden awaits a rejuvenation after the winter slumber. 

To ensure your yard is ready to burst with color and life, here are 10 essential steps to focus on yard cleanup and prepare for spring and summer flowers, including perennials and annuals.

10 Steps to Prepare Your Yard for Spring

  1. Clear Away Debris: Start by giving your yard a thorough cleanup. Remove fallen branches, dead leaves, and other debris accumulated over the winter months. This step not only enhances the aesthetics of your yard but also helps prevent pests and diseases.

  2. Inspect and Prune: Look closely at your trees, shrubs, and perennial plants. Trim back any dead or damaged branches to encourage healthy growth. Pruning also stimulates flowering in many plants, so don't be afraid to trim where necessary.

  3. Prepare the Soil: Good soil is the foundation of a healthy garden. Turn over the soil in your flower beds to loosen it up and remove any weeds or old plant debris. Consider adding organic matter such as compost or aged manure to enrich the soil and provide essential nutrients for your plants.

  4. Divide Perennials: Periodic division rejuvenates perennial flowers and promotes better growth and flowering. Spring is an ideal time to divide overcrowded clumps of perennials such as irises, hostas, and daylilies. Replant the divided sections in your garden or share them with friends and neighbors.

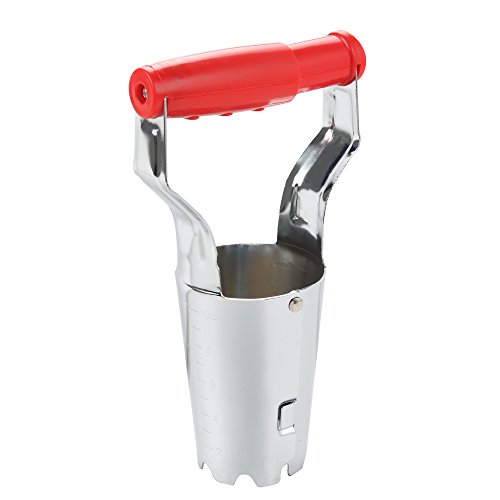
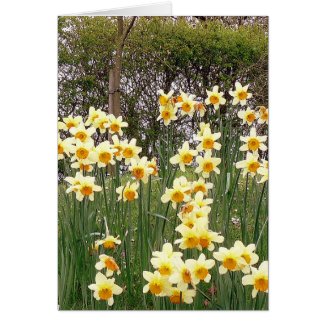
  5. Inspect Bulbs: If you planted bulbs such as tulips, daffodils, or hyacinths in the fall, now is the time to check on them. Look for signs of growth and remove any debris covering the emerging shoots. Consider adding a layer of mulch to help retain moisture and suppress weeds around the bulb beds.

  6. Plan and Plant Annuals: Annual flowers add instant color and variety to your garden. Research which annuals thrive in your climate and soil conditions, and plan your flower beds accordingly. Consider factors such as sunlight exposure, water requirements, and bloom times to create a harmonious display throughout the season.

  7. Prep Flower Beds: Before planting annuals or transplanting seedlings, prepare your flower beds by amending the soil and adding any necessary fertilizers or soil amendments. Remove weeds and cultivate the soil to create a loose, well-draining planting environment.

  8. Start Seeds Indoors: For certain annuals and vegetables, starting seeds indoors can give you a head start on the growing season. Invest in some seed trays, potting soil, and grow lights, and begin sowing seeds for flowers such as marigolds, zinnias, and cosmos. Transplant the seedlings outdoors once the danger of frost has passed.

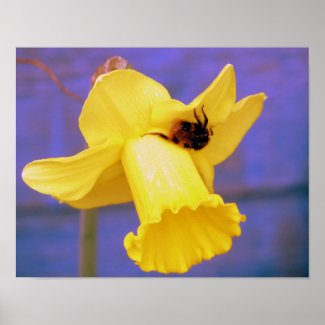
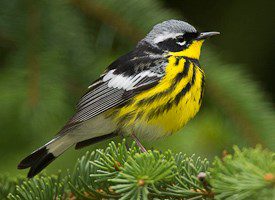
  9. Plan for Pollinators: Remember the pollinators as you design your flower beds! Choose various flowers that attract bees, butterflies, and other beneficial insects. Incorporate native plants and flowers with different shapes and colors to provide pollinators a diverse and inviting habitat.

  10. Mulch and Water: Finally, after all your hard work, mulch your flower beds to help conserve moisture, suppress weeds, and regulate soil temperature. Water newly planted flowers thoroughly, especially during dry spells, to help them establish strong root systems.

By following these 10 steps, you'll be well on your way to a vibrant and flourishing garden that will delight you throughout the spring and summer months. With proper yard cleanup, soil preparation, and thoughtful plant selection, your outdoor space will become a haven for colorful blooms and buzzing pollinators. So roll up your sleeves, grab your gardening tools, and let the beauty of spring unfold in your yard!

ReviewThisReviews Gardening Guru:

Check out Raintree Annie's informative articles for more tips and advice on yards and gardens. She's always very helpful - You can scroll through many of them here.


Note: The author may receive a commission from purchases made using links found in this article. “As an Amazon Associate, Ebay (EPN) and/or Esty (Awin) Affiliate, I (we) earn from qualifying purchases.”


Tuesday, March 19, 2024

Reviewing the Beautiful and Cheerful Daffodil.

Yellow Daffodils In The Garden

Daffodils are abundant in my garden right now and I love to see their beautiful vibrant colours  and gently swaying trumpet shaped heads bringing sunshine to a cold day.

Daffodils are native in Europe and North Africa and although the name Daffodil is most commonly used, the botanical  name is Narcissus and they are part of the Amaryllidaceae family. 

Regarding the name there is also a link with the Greek myth of Narcissus. The story goes that he was renowned to be very beautiful  and he fell in love with his own reflection, so much so that he pined away until he died and turned into the flower narcissi or daffodil. 

Tall Yellow Daffodils
 

Daffodils In The Garden 

Even though it has been very cold here ever since they flowered, their appearance symbolising  rebirth and new beginnings gives me hope and joy. Although it has not been a particularly harsh winter this year, it has been very cold, damp, grey and very rainy so it is lovely to see some colour and brightness in the garden which certainly lifts the spirits for warmer weather and Spring. 

Most of mine are golden yellow colours but some are white and some are fragrant which is lovely. There are also orange flowers and combinations of yellow and white or orange and yellow. 

 Daffodils are very versatile in planting schemes for the garden. I like to plant little Tete a Tete daffodil in pots and troughs where their delicate looking blooms can be easily seen. The bigger daffodils are planted in the borders of the garden. Daffodils can also be naturalised in grass. 

 As we have a lot of daffodils, some can be spared to be used as cut flowers and brought inside to place in a vase. This is lovely to bring Spring into the house. They look lovely in a vase by themselves or mix very well with other flowers perhaps white, purple or blues being my preferences. 

 Daffodils come in a wide variety of shapes and sizes from the tiny to the large and different colours from yellow gold, white and orange.  Many have the classic strong trumpet shaped flower head and others have multi petaled varieties.


Looking After And Planting Daffodils 

Daffodils are bulbs and hardy perennials. This is lovely as they come back every year once planted. 

While planting bulbs in borders can be a little tedious, once it is done you will have daffodils every year with little effort involved.


Planting Daffodils

We can plant daffodil bulbs in the autumn/fall around September to November time. This gives them time to establish roots before winter cold sets in. Before planting check to make sure that the bulbs are  clean and firm, discard any that are mouldy or very soft as these may be too old or diseased. It is best to buy and plant bulbs in the same season so that they do not get hence to get any mould or go soft. 

Daffodils prefer full sun or partial shade and they do appreciate a well-drained soil so it is ideal to plant in an area that will get a decent amount of sunshine. We have an area of heavy shade and I never plant daffodils there as they will not do well. Other flowers fair better there. All my daffodils planted in the soil are in sunny spots and I move the ones in pots into sunny places as soon as I see shoots coming up.

I put a grit and compost mix in my containers for the bulbs. For planting in the garden we do have heavy clay soil which although I have improved over years is still less than ideal but the bigger ones have managed to thrive in it. So if you have a sunny spot but perhaps less than ideal soil give it a try with a small number of the bigger bulbs to see if they can be successful.  

Bulbs should be planted  approximately 6 inches or 15 centimetres deep below the soil surface. For this you can simple dig a hole with a trowel or use a bulb planter. Having done a lot of this I would advise if you are planting a lot, to invest in a bulb planter to make the job easier and quicker.  


When planting in the soil space bulbs about four to six inches apart, it will not be too long before  you will have daffodil clumps.

If planting in a container you can space them much closer together, just ensure that none of the bulbs are touching each other.

It might be a good idea to protect the bulbs from squirrels and rodents who may try to steal them! A wire mesh over the top of containers usually deters most of them.

Water them immediately after planting. Do also water them in dry spells,  but they do not usually require any special feed or much other attention.


Care Of Daffodils

All that you need to do is enjoy the blooms then allow them to die down naturally. The flowers will fade and at that point you can cut off the flower and its stem down to the base and then allow the leaves to die down naturally. Some people just cut off the heads of the daffodils and that is fine too, I just prefer to take the whole stem down as I think it looks better. 

 Some people tie up the leaves, I believe so they look neater as the plant fades, but there is no need to do that and I prefer to allow them to die down naturally which is also a lot less work.

If you have naturalised in grass, you must wait to cut the grass until the leaves have completely died down as they are feeding the bulb for flowers next year. Do it too early and you will have no or limited flowering next year. 

I always like to have daffodils in pots and troughs so that when they are blooming I can display them where we can see them and even up on tables. Then as they fade we move the pots to an unnoticed area of the garden. Then I can plant annual seeds in the pots and bring them out again when those flowers bloom, thus not wasting the space in the containers. 


A Word Of Warning About Daffodils.

 While daffodils are beautiful flowers and so cheerful, they do contain toxins and are not edible in any of its parts. I do tend to wear gloves when planting them and handling the bulbs a lot.

 It is important to teach children not to eat them. If you are concerned then it is easy to plant bulbs in a pot and put them high up out of reach of small children. 

My parents always had daffodils in the garden and I was trained to respect the plants in the garden and only to eat what my parents said was safe and never came to any harm.


Daffodils Inspiring Artists

Daffodils have long inspired poets and artists and you can see why.  The most famous example of poetry  is probably the ode to daffodils is William Wordsworth’s poem “I Wandered Lonely as a Cloud,” where he describes the wonder of happening across a field of stunning golden daffodils dancing in the breeze.


In terms of art, the one that springs to mind immediately is Van Gough's  "Daffodils". The painting is in oils with vibrant colours and thick brush strokes and is hanging in the Norton Simons Museum in Pasadena California.


Read More Gardening Articles


Essential Wildlife Gardening Gifts


Note: The author may receive a commission from purchases made using links found in this article. “As an Amazon Associate, Ebay (EPN) and/or Esty (Awin) Affiliate, I (we) earn from qualifying purchases.”


Monday, April 3, 2023

Easter Cactus: Enjoy Early Spring Blooms with this Easy Care Houseplant

I have only just learned that there are beautiful houseplants currently in bloom called Easter (Spring) Cactus. The blooms of this plant can range from white, red, orange, peach, purple, and pink. The one I chose to bring home has delicate, light pink petals with dark pink and light yellow stamens. During this time of year, when forsythia are in bloom and not much else, it is wonderful to have a bright splash of color announcing spring.


Easter Cactus

Easter (Spring) Cactus

The Rhipsalidopsis is a red-flowered native to southeastern forests of Brazil in altitudes of 1,100 - 4,300 feet. It seems that at some point, the Rhipsalidopsis was crossed with the R.rosea which resulted in the popular Rhipsaldopsis gaertneri which created the variety of flower colors. These colors include pink, orange, purple, white, and orange.

Plant Care

The Easter (Spring) Cactus does well in temperatures of around 77 degrees fahrenheit in the summer and around 45 - 55 degrees fahrenheit in the winter (November to January) to help with bud formation.

From their origin in Brazilian forests, they are plants that do not prefer strong sunlight. They prefer partial sunlight. 

Easter (Spring) Cactus does not like over-watering. It is best to allow the soil to dry between waterings then water so that it drains out of the bottom of the planter. It needs loose, nutrient-rich potting mix soil. Soil mixes with coco coir, peat moss, perlite, or orchid bark are preferred.

Easter (Spring) Cactus propagation can be done by removing stem segments in the late spring, allowing the cut surface to dry a bit, and placing the stem in moist soil. Another method of propagation is removing a single leaf from the plant, place the end of the leaf into moist soil, place bags over the plant in order to hold moisture in until the roots begin to sprout.

What I Wanted was a Christmas Cactus but I'm Thrilled with this Easter Cactus

I had the most beautiful, prolifically blooming Christmas Cactus at my previous office.  For the past year, including over the holidays, I watched for a Christmas Cactus to replace the one I left behind when I moved. I did not see any at the usual stores where I usually find a large selection of seasonal plants.

This past week I was at a nursery to look for Crape Myrtle trees and there I spotted a large selection of what appeared to be Christmas Cactus. But they were labeled Spring Cactus. I loved them and brought one home without knowing quite what they were. 

It seems that the Christmas Cactus, a different species than the Easter Cactus, is called Schlumbergera and is also native to Brazil. There are two cultivar groups called Truncata and Buckleyi. And that is about the extent of my new knowledge of the taxonomy of these plants.

I still hope to find a Christmas Cactus to add to my household plants. Blooms during the dreary, cold winter months add something wonderful to a northern indoor space. In the meantime, I will enjoy the gorgeous pink blossoms of my Easter Cactus while I wait for Mother Nature to allow other plants to show off their flowers.


Note: The author may receive a commission from purchases made using links found in this article. “As an Amazon Associate, Ebay (EPN) and/or Esty (Awin) Affiliate, I (we) earn from qualifying purchases.”


Wednesday, March 31, 2021

Spring Into the Garden, Give Nature a Helping Hand! A Garden Review

Spring has sprung!  Gardeners and Conservationists are all jumping for joy! 

But wait a minute, before you get all excited about getting your hands dirty and your gardens in shape, let's take a few minutes to think and see what Mother Nature would have us do instead!

Many gardeners are just itching to get their gardens cleaned up and looking tidy and I can't say that I blame them.  After a long cold winter, making things (garden beds) look nice is a job that many gardeners love to do.  Why wait?  Well, would it help for you to know that many bees are still hibernating within the leaves and debris that is in your garden?  We have a serious problem with declining bee populations, so anything you can do to help them would be a welcome thing to do.

I'm not advocating that you leave your gardens in a messy state, but rather wait just a few weeks before getting to the "mess".  That will be time enough for the bees to wake up from their winter slumbers and start looking for those first dandelions for food.

That brings up to the second thing that gardeners should really stop doing in the springtime.  Did you know that dandelions are one of the first spring flowers to come up in your gardens?  Well they are and they are full of good nutrition for the bees who wake up hungry.  Leave those flowers alone, let them bloom and welcome the sight of those bees that are doing the hard work!  If you don't want a proliferation of dandelions in your lawn, just watch the flowers and when they have all been pollinated, and start to produce their seeds heads, go out then and cut them off and dispose of them so no seeds are flying around the garden!  The parent plant will produce another flower for the bees and then you can do the same thing again.  Pluck the spent flower head before it sends it's seeds everywhere.  This way you will be providing food for the bees without dandelions taking over your gardens.  Easy peasy!

Spring comes on quickly, so you need to be ready for all kinds of wonderful things that will happen during this time.  Number three on my list of things to do (or not do) is check for migrating birds in your area.  Hummingbirds are the Number One bird everyone is looking forward to seeing.  They too will come to your gardens hungry from their travels north!  You can check out this Hummingbird Migration Map to see when they will arrive in your area!  

So what can you do to help those Hungry Hummers?


Have your hummingbird feeders out a week or so before they are due in your area.  Keep them clean and available with fresh nectar that is changed weekly!  Why do you need to change the nectar?  Well as with anything left out to the elements, nectars can go "bad".  That means they will get moldy and rancid.  The idea is to feed those hungry hummers, not to harm them!  So clean fresh nectar is a MUST!  (p.s. nectar is simply four parts water to one part sugar, NO DYES)  In the early days of their migration you can make up nectar and keep it in the fridge.  Just put a small amount in the feeders until you know they have found you!  Once you know they are around, then you can fill up those feeders to a cup of nectar and again keep the nectar fresh!
 
hummingbird
                                                                                  Ruby Throated Hummingbird


Migrating Birds, what you need to know!

 
Along with the bees, migrating birds are also having "human" problems!  What are those, you might ask?  Well in large urban areas where skyscrapers and really large windows are the norm, many migrating birds fly into those windows and drop like stones onto the pavement below! They suffer broken necks, wings and sometimes are just so stunned that they don't recover.  This is truly a sad situation for birds that fly so far to get to their northern nesting areas.  Large windows are almost invisible to the birds, so their tracking is off!  How can we help them?  It's easy, first is awareness and then there is something as easy as placing "cling decals" on the windows so that they will see them and avoid crashing into them.  You can easily purchase these decals in many styles, some are transparent to the human eyes or others are decorative and produce an ambience in your homes as you look out those windows.  It's a small price to pay for the benefit of the birds and possibly for you to enjoy them as they make their homes in your yards. 

Did you know that there are several species of migratory birds in North American?  Quote taken from All About Birds.org:
  • Magnolia Warbler by Gerrit Vyn"Long-distance migrants typically move from breeding ranges in the United States and Canada to wintering grounds in Central and South America. Despite the arduous journeys involved, long-distance migration is a feature of some 350 species of North American birds."


Learn More About Bird Migration

 
If you want to know more about Bird Migration, there is a wonderful website by Cornell University that follows and updates information on all kinds of migratory birds!  You can find it RIGHT HERE!  This is excellent reading material for any bird enthusiast!  Don't stop with dedicated Birders, get your young ones involved in becoming Bird Ambassadors, they will learn and do so many things in a fun and really rewarding way.  
 
There are great books available for children and adults too!  Easy to read and understand, they will teach you everything you need to know and look for when searching the skies and yards for those feathered friends.
 
bird in blossoms


bird
Yellow Rumped Warbler

This Easter, instead of just filling our children with chocolate and candy, let's feed their minds with some easy and interesting ways to keep their future in balance. Add some of those window decals or a bird feeder to their Easter basket for an Eco-Friendly alternative to chocolate or candy! 

Happy Easter to Everyone!


Note: The author may receive a commission from purchases made using links found in this article. “As an Amazon Associate, Ebay (EPN) and/or Esty (Awin) Affiliate, I (we) earn from qualifying purchases.”


Wednesday, March 4, 2020

Spring Forward, Renewal, Rebirth, Revival and Joy!

March 8th is Spring Forward Time! A Garden Review!


orange crocus bud
Image from Pixabay

Yeah, for all our Naturalists/Gardeners/Backyard Enthusiasts and those who are patiently (or not so patiently) waiting for Spring's arrival.  From my own personal experience I know how most of us are feeling right about now.  We can't wait for longer days and warmer temperatures and getting our hands back into the soil.  We want to poke around to see what's about to spring up out of the ground.  We also look up to see where the birds are too.  That first robin or yellow finches just make us so happy.  Our time is coming quickly!


Things Outside are Changing Quickly!

 
Now that it's March, we can look forward to longer daylight hours (it's already light at 6:00 in the morning)!  The bugs and the bees are waking up from their long winter slumber and looking desperately for a food source.  Even the birds are making a comeback.  

Those of us who love hummingbirds will be watching the Hummingbird Migration Maps for 2020!  They are already in parts of Florida and coming to your neighborhood soon!  Be the first one in your neighborhood to mark the map with the first sighting in your area. 


Spring, so much to do and so much pleasure in doing it too!


If you hang out bird feeders, now is the time to get them ready.  Clean and disinfect them all carefully.  We want to feed the birds and not harm them.  Clean feeders are a must!  Pathogens that can harm them can and might live over in the winter months.  There is need to be extra vigilant in making the birds source of food a safe source.  

Wash down all bird feeders, clean out birds nests from last year and give this years birds a really good chance of thriving and surviving.  Clean them out with a mild bleach solution (1/2 cup bleach to a sink full of hot soapy water).  Make sure you rinse them well and let them air dry before setting them out again.  


Special Care for Hummingbird Feeders!


Many people give up on putting out hummingbird feeders because they do require extra care.  It may seem wasteful, but their nectar needs to be changed every week.  Spoiled nectar in feeders can cause their death.  No one wants to be responsible for that!  So in the early spring, before you even see them, you need to change that nectar every week.  

Make only a cup of nectar at a time, so as not to waste all that sugar water.  And remember, red dyes are NOT NECESSARY  to attract those little flying gems.  Your hummingbird syrup should be roughly 1 cup of sugar to 4 cups of water.  The measurement does not have to be exact, but close is good.  Use only 1/2 to 1 cup of syrup in your feeders (keep the rest in the refrigerator) until you are sure the hummingbirds have found you!  Once you know they are coming to your feeders, go to town and fill it right up.


Maybe this is the year you decide to help the birds and the bees.

 
You can easily do this with bird feeders, bird houses and even bee houses.  The birds and bees give us so much enjoyment, it's the least we can do to make them welcome in our yards.  Our own Renaissance Woman will even teach you how to make your own bird feeders if you feel so inclined.  It would be a great spring time activity for your children or grandchildren.  Check it out right here: DIY Mason Jar Bird Feeder!

Building bird houses is also a lot of fun and an easy craft to share with your family as well.  The most important thing to remember is that certain birds require different housing.  Some are solitary breeders, while others love to be in community.  You might have to do some research to find out what kinds of birds come to your neighborhood, before you start building.  This review might help you get started! What you need to know about  Basic Bird House Construction!


The Bees are Getting a Lot of Press Lately!  The Key to Success

 
Science has let it be known that the bee population is in trouble.  If we don't have them as pollinators our whole food sources are at risk.  So let's help those pollinators by growing gardens that feed them all spring, summer and fall.  It's not hard to do and I'm sure you will enjoy the efforts that you put into making a beautiful "bee" friendly garden. 

There are a few guidelines that will help you to help the bees!  
  • Plant a garden that will give lots of blooms all season long.
  • Plant single flowered species rather than the big double and triple flowers.  The singles produce more nectar and the bees can easily get to it.
  • Plant lots of different annuals as well as perennials.
  • Build a bee house.
  • Have a water source available too!

Do you need more information?  I like this website for all inclusive information about bees and keeping them happy!  The  Honey Bee Conservancy  I like to keep my family happy, so, with my son-in-law being a beekeeper, this is for him!  I try to do my part in helping him help the bees and I get to enjoy some of the honey too.

Spring is a time of Renewal, Revival, Rebirth and Joy!  Let's make an effort to help Mother Nature in all of this,  by doing something to help all her little creatures.

bee on a orange flower
Image by jggrz from Pixabay


Note: The author may receive a commission from purchases made using links found in this article. “As an Amazon Associate, Ebay (EPN) and/or Esty (Awin) Affiliate, I (we) earn from qualifying purchases.”


Wednesday, February 22, 2017

How to Grow Your Way to Happiness and a Great Garden A Review

Growing My Way to Happiness!  A Review!


Many studies have shown that Growing a Garden reduces stress and increases your happiness with just getting your hands dirty. As I review this idea of growing seeds for the garden, I agree that these studies are true.  I know that in my own life, as February is coming to a close, I start to look for those little signs that spring is indeed on it's way.  Little sprouts coming out of the ground are cause for me to jump for joy!  My husband still doesn't understand that completely.  Oh well, I can't explain it any more than to say my heart does indeed leap with joy, and I know that better days are ahead.  No more Seasonal Affected Disease and no more need to sit under lamps to get us out of our "funk".  The countdown is on for when we can really get our fingers into the ground and just feel wonderful.

galanthus bulbs, snow bells, spring bulbs
Snow Bells in Spring
https://pixabay.com/en/flower-rod-snowdrop-garden-nature-2080981/


So now that February is almost done and we can honestly say that Spring is just around the corner, it's time to get those seeds started that we saved from last year.  Just to be on the safe side though,  don't start just yet.  It is still February!

Preparation is the Key to Successful Spring Seed Growing

All of my die hard gardening friends have already been to at least one "Seedy Weekend".  What is that, you might ask?  Well, for anyone who lives in an Urban area with either Greenhouses or a Botanical Garden nearby, most of these will have a late winter get together called a "Seedy Saturday or Sunday".  The whole point of the weekend being that gardeners get together to share the abundance of seeds that they have saved from their own gardens and share with others for seeds that they might have.  It increases the number of seeds any gardener has and let's them share stories of their own particular gardens with like minded people.  It really is a social for gardeners who have missed being outdoors during the winter months.  If you are in the Toronto area for a visit, this weekend is the Toronto Botanical Gardens Seedy Saturday(Feb. 25),  so come on over for some fun and some great new seeds.

Back to preparation for Seed Sowing

Make sure you have purchased new seedling soil for your seeds. You never want to reuse soil from previous years, as they might be harboring bacteria that will be harmful to new seedlings.  This special seedling soil is composed of  a mix that contains very little "soil or dirt",  rather it is made up of moss, vermiculite and perlite.  These can be purchased separately and mixed together one part of each, or you can purchase it premixed.  You can fill up your home made containers, using newspapers, or half egg shells, or half a toilet paper tube.  All of these would be perfect for seed starts and are bio-degradable. It also makes it so much easier to plant in the garden afterwards because you just plant the whole thing into the ground.  No need to disturb young forming roots.

seedlings, starter tubes, repurposing toilet paper tubes
https://pixabay.com/en/macro-nursery-plants-seedlings-1840261/

Have whatever containers you choose to set up for your seeding, on heat mats. You are trying to make the seeds think it's May with nice warm soil to grow in.  Warm soil and lots of light are the two most important things you need to start your indoor seeds off right.  If you just plant seeds into little pots and set them on a window sill, you will surely get the seeds to grow, but they will suffer in a few weeks time.  Why?  Well it's really just too early for them to growing without some added help.  Warming the soil with heat mats is akin to being outdoors in May.  The sun warms up the soil outdoors so that seeds will germinate and grow.  The days are getting longer with more hours of sunshine available than in March, so that the seedlings that are growing in the ground will be hardy and strong.  Indoors we need to mimic the garden in May as much as possible if we want strong seedlings.  Without the added attention of heat and light, your seedlings will be tall, lanky and very spindly looking.  Most often they will fall over because the stalks are not strong enough to hold them upright.  Once that happens you can almost count the days to total death of the seedling.  All that work is gone and you have to start over again, if you have enough seeds.  If you don't you will be buying more seeds in short order to start all over again.  

Indoor Gardening Done Right

If you decide that you really want to grow your seeds from scratch in the early months of March and April, then be prepared to have the right set up in place.  Yes there is a bit of effort involved, but  the end result will be well worth the effort.  You can purchase an indoor garden set up with shelves, heat mats and lights all in one unit.  This is usually more than enough for your average home gardener.  You are not going to become a commercial greenhouse operation, but you will have lots of seedlings for your garden and maybe some friends too.  Doing it this way is a little expensive, but you would have the unit for years to come.  I prefer the doing my seeds with heat mats and grow lights that I have purchased separately.  For my garden needs, this is more than enough space to grow seeds.  You have to decide for yourself which set up is right for you!


With some of these choices you can start your own indoor gardening center and have some really good success with it too. The heat mats are inexpensive and will provide that much needed warmth at the soil level. The grow lights are also inexpensive and will help to keep your seedlings compact and strong.  The additional light with at least 8 to 12 hours of light, will mimic the days in May and June. Or if you really want to guarantee success, you can try one of the Areo Grow Systems for indoor herb gardens.  They have the lights and warmth built right into the unit, so that your success with these is almost a given.  Gardening is a joy especially for us northerners.  We love our changing seasons, but the change from Winter to Spring is the one that we seem to love the best.

Happy Gardening and Seed Sowing to all of you!


Note: The author may receive a commission from purchases made using links found in this article. “As an Amazon Associate, Ebay (EPN) and/or Esty (Awin) Affiliate, I (we) earn from qualifying purchases.”


Monday, March 14, 2016

Spring Forward and Spruce Up that Balcony

My springtime sunset view
Our clocks have just sprung ahead and spring becomes official in a matter of days. Whether you live in an area that is celebrating the end of blizzards and ice storms or an area that remains mild all year, the sun shinier days of spring bring on a desire to embrace the outdoors. And there is no better way to celebrate spring than to include your outdoor living space in your spring cleaning and redecorating.  Here are five inexpensive ways to spruce up your small balcony or patio areas.

If you gift yourself a comfortable and personalized place to relax, your outdoor living area will become an extension of your home.  As you can see, the experience and the views while sitting outdoors can be priceless. 


Low-Cost Outdoor Seating


Patio and balcony seating does not have to cost a small fortune. Neither does it have to be large and bulky.  You can create seating no matter how small your outdoor area.


I wish I had a slightly larger balcony so that I could DIY my own furniture.  But because my balcony is so small, and because I want to make sure to save sufficient space for plants, I tend to use an assortment of ever-changing rugs and cushions to keep my space comfy. 

The best part about using cushions is that they are easily changed to suit the season or your mood. My textiles on the balcony have changed from animal prints, to bright florals, to very earthy/neutral colors, and back again. Go ahead, spruce up your balcony with a few new cushions. 


Beautiful Bird Pillow


Indoor/Outdoor Loveseat-sized Cushion

Outdoor Flooring


I love the coziness of a rug on my balcony. Rugs add so much comfort to an outdoor area.  People are right to be concerned about the deterioration of indoor rugs that are exposed to the elements and the damage that can be done by wet carpets on balconies.

I have wooden flooring on my deck. During blowing rain, my rugs are sometimes soaked. But that does not stop me from using rugs (especially runners) to add color and comfort. I am careful to use rugs that are suitable for the outdoors. Sometimes, I use thinner indoor rugs but am sure to watch for moisture gathered under them and hang them over the rail to dry when necessary.


Indoor/Outdoor Floral Runner


Green Space: Morning Glories and Other Suitable Greenery


We know this world needs more green space. Not only for the health of our earth, but I fully believe for our own health.  No matter how small your outdoor space, you can certainly find some suitable greenery.  


My green privacy screen
Over the years - through trial and error - I have found that marigolds, morning glories, tomatoes, mint, lavender, and rosemary flourish in my third floor balcony garden.  I had some success with blueberries, believe it or not, and would have likely had better success had I remembered to have someone water my blueberry bushes during a period of time that I was away.

My favorite part of having a living balcony is my morning glory privacy screen. Each year, my morning glories twine up the railing and provide a living green screen that delights me with the increased protection from the prying eyes of neighbors and provides the visiting hummingbirds and bees with an extra snack. 


Soothing Sounds - Water Features and Wind Chimes


Two very popular items for outdoor areas are water features and wind chimes.  

I gravitate toward wind chimes. Listening to them tinkling in the wind is something that soothes me.  Small wind chimes can tinkle like tiny bits of glass and large wind chimes can sound like distant church bells on a country Sunday morning.  Bamboo chimes have a natural, "woodsy" sound. Some chimes including shining and sparkling bits that reflect prisms as they move in the breeze.  Frankly, wind chimes and the different varieties deserve their own article.

I have found a great many people who have "desktop" water features on their small balconies. What a great idea!  I am tempted to make room in my outdoor space for one of these so that I too can listen to running water while just steps outside of my livingroom.  I think the Alpine Tabletop Leaf Fountain would be a great addition to my balcony garden. 


Going to the Birds


Balconies and Bird Feeders go together like peanut butter and jelly. At least they do around my place. I love bird feeders. I have kept seed feeders on my previous balconies and enjoyed the many feathered friends who came to visit.

My current balcony is not as suited to a seed feeder. So I stick with a hummingbird feeder.  These winged miracles are so fun to watch and to listen to as they flit around.


Related Links: 

Cheap Seats: Cushions and Poufs -- Photographs that include examples of cushions and poufs being used for seating on tiny balconies. And a sample of a DIY couch made of cinder block, post, and cushions. You may feel limited by the size of your outdoor space but as some of these photos show; the sky is the limit. You can turn your small outside space into a pretty, useful, and comfortable living area.

FUNK'N Practicality with Reversible Patio Mats -- These mats are too large for my teeny balcony but I'd still love to have one. I have friends that use these mats for outdoor gatherings. They are durable, beautiful, and portable. 

Morning Glory - The Beautiful Privacy Screen -- For the past two or three years, I've grown morning glories on my balcony rail.  But this article shows a floor to ceiling green screen. And an important warning about pets and morning glory seeds.

Tuned Wind Chimes Review -- If you love wind chimes but have never heard of tuned wind chimes, this article is a must-read. The lovely sounds of good wind chimes playing music in the wind is something I enjoy very much.

First Hummingbird of 2015 -- The story of how I finally attracted hummingbirds to my balcony for two years in a row. This was after years of unsuccessful attempts. It's as easy as homemade sugar water and an inexpensive hummingbird feeder.


Note: The author may receive a commission from purchases made using links found in this article. “As an Amazon Associate, Ebay (EPN) and/or Esty (Awin) Affiliate, I (we) earn from qualifying purchases.”


Tuesday, May 6, 2014

On Belonging, Astonishment, and Becoming Spring


white flower
Each Petal a Heart... My Heart
“Every spring is the only spring—a perpetual astonishment.”  ~Ellis Peters

There are mornings, such as these, when I am baptized by astonishment.  And in these moments of breathtaking wonder, I belong—I belong to the land, to the first wildflowers of the season, to the mountain chickadee and bluebirds, the oriole, the purple martins, and the mighty hummingbirds.

What is the purpose of green living if not this—to belong to that which is a perpetual astonishment?  Without that sense of surprise and sheer delight, the days would merely be hours.

I’m supposed to be writing reviews, but my spirit wants to sing a different song as this glorious day unfolds.  To deny the song would render my writing moot.  One can only write what one feels deeply, madly, and truly. 

On what feels like the first day of spring I have ever truly known, the words that want to be written are tender, unfurling leaves.  To stand under a young elm tree, witnessing buds giving birth to green... how does one review that? 

Perhaps, if I get still, and quiet, and deeply absorb all this green, it will become embedded in my DNA and I can be a perpetual spring. Wouldn't that be something to write on my heart?


Note: The author may receive a commission from purchases made using links found in this article. “As an Amazon Associate, Ebay (EPN) and/or Esty (Awin) Affiliate, I (we) earn from qualifying purchases.”


Sunday, April 20, 2014

Easter Craft Egg-Citement!

Easter Blessings!

diy bird nest filled with chocolate eggs and crocheted chicks

It's not too late to get crafting for Easter - we have been busy making little chicks, coloring in Easter bunny paper dolls and even making some little chocolate eggs of our own with a chocolate mold.  

The past week we have also made baskets for an egg hunt, and were lucky enough to attend a willow weaving workshop at our local zoo, where we learned how to make these bird nests pictured! These make a lovely Easter gift, with a knitted bird or two and some pretty foiled eggs. 

This time of year is a haven for crafty ideas - spring is in the air, nature is abundant with bits and bobs to use in crafting, and we have Easter and Earth Day to inspire us! Tomorrow we're going to combine the two events by recycling the pretty colored foil that my children's Easter hunt eggs were wrapped in (below), and using them to create some kind of object or collage. We've not decided yet! 

chocolate eggs in a paper basket
Hubpages is the perfect place to find Easter craft ideas, or to write your own how-to's and reviews! Whether you want inspiration for a craft, or want to see how you can share your own ideas, take a look at some of these terrific pages

Older preschoolers might like to help (or receive!) these Resurrection Easter Eggs, demonstrated by ideadesigns. And if you're all out of painting and decorating eggs enthusiasm by now, why not try something different, such as this great idea by prosperity66, who shows you how to make Easter Bells from plant pots!

Finally, I love this tutorial from KyraB. Now spring is here, we are itching to get gardening, and have been looking at making a fairy garden in a barrel and a terrarium. So her lens on How to Make a Christian Easter Planter seemed like perfect timing for getting crafty with planting, with an Easter theme!

I was delighted to see my Chick in Egg Easter Cards tutorial selected as Lens of the Day today! This is a great craft for little ones as you can keep it simple (a colored chick in a plain egg) or have fun decorating, coloring or painting it to the hilt! 

I am also delighted to have been blessed with the new regular position of Saturday poster for Review This, so from next weekend you will be able to find reviews, tips, inspirations and ideas from Little Crafty Kids here every week! 

Once again, have a Happy Easter, and happy crafting!  


Note: The author may receive a commission from purchases made using links found in this article. “As an Amazon Associate, Ebay (EPN) and/or Esty (Awin) Affiliate, I (we) earn from qualifying purchases.”


Most Recent Reviews on Review This Reviews


Search for Reviews by Subject, Author or Title

The Review This Reviews Contributors


SylvestermouseSylvestermouseDawn Rae BDawn Rae BMbgPhotoMbgPhotoBrite-IdeasBrite-IdeasWednesday ElfWednesday ElfOlivia MorrisOlivia MorrisTreasures by BrendaTreasures by BrendaThe Savvy AgeThe Savvy AgeMargaret SchindelMargaret SchindelRaintree AnnieRaintree AnnieLou16Lou16Sam MonacoSam MonacoTracey BoyerTracey BoyerRenaissance WomanRenaissance WomanBarbRadBarbRadBev OwensBev OwensBuckHawkBuckHawkDecorating for EventsDecorating for EventsHeather426Heather426Coletta TeskeColetta TeskeMissMerFaeryMissMerFaeryMickie_GMickie_G


Review This Reviews is Dedicated to the Memory of Our Beloved Friend and Fellow Contributor

Susan DeppnerSusan Deppner

We may be apart, but
You Are Not Forgotten


“As an Amazon Associate, Ebay (EPN) and or Etsy (Awin) Affiliate, I (we) earn from purchases.” Disclosure Statement

X