Showing posts with label publish a book. Show all posts

Sunday, November 8, 2020

Basic Tips I Learned on My Self-Publishing Journey

Self-Publishing Tips for Newbies

Let me start by saying that I'm NOT a self-publishing guru. I'm just a work-from-home-self-taught woman who decided to jump in and tackle some of those dreams left dying on the table.

I've written quite a bit here on ReviewThisReviews about self-publishing books. You'll find a list of the links below.

To date, I've self-published eight books and am currently writing the ninth. 

The topic of the books are Riddles, Poetry, and Sayings for Cards. Currently, I'm focussed on building a series of Riddle Books. There are five riddle books in the series and the sixth should be published in one to two months.

A General Overview of What to Do When You Self-Publish (According to my Personal Journey)


Note: To date, I've only published via Amazon's KDP self-publishing platform

  • Amazon Author Page: Once you've published your book, complete a detailed page about yourself on Amazon's Author Central Page. Here's Amazon's author central page for the USA. When publishing my books, I had to create author central pages for the UK and USA separately. Perhaps, Amazon will amalgamate things at some point, so we only have to do it once. Here's the UK author central page in case you need it.

  • Amazon Author Page Photo: Decide whether your Author Central page will feature a Logo or your personal photo. At first, I put up my logo but changed it to my personal photo. I prefer to emphasize that I'm just a regular person, not a 'big company.' 

  • Build a Website that Relates to Your Books: If you've never built a website or can't, you can hire someone or just build a blog related to your books. I've built websites (I'm not a website building guru either!), so I was able to create a website to coincide with my Riddle Books. You can take a look at my StumpedRiddles.com website here. Think about how you want people to navigate your site before you build it; write it out, give it a lot of thought. The ease at which people can work their way through your website is important. The top navigation bar on my riddles website features these tabs: Home, Riddles, Answers, Riddle Books, About/Contact. Within those headings are subheadings. Don't forget to include all the legal jargon you need on the site.

  • Facebook Business Page: Build a business Facebook page that features a Shop with your books. It takes a little learning, and you need a certain amount of products before you can build a shop. I chose to link my books back to each of their product pages on my website; that way, when you publish your book on multiple platforms (not just Amazon), you don't have to worry about changing links - since each product/book will direct back to your own product page on your own site.

  • Social Media Main Photo & URL Names: Create social media pages for your business/books. Decide whether you want to use your logo or your personal photo. I decided to use my Riddles logo for my social media pages, Twitter, Facebook, and Instagram. However, I created a Promo-Video and included that video at or near the top of each social media site: It features my personal photo and personal story. You'll have to choose your social media URL based on what's available; I wasn't able to get "Riddles" - it was taken. However, I choose URL's that were close: Twitter, Instagram, and Facebook.

  • Promo-Video: Create your promo video using your favorite video platform. I used Animoto. If your book/business dictates it, I would suggest being personal while describing your books' purpose. You can take a look at the promo video I created here.

  • Your Tag Line and Book Purpose: If you're able to establish a "purpose" for your books, create a consistent tag-line that describes your purpose and includes that tag line on your social media, website, and books. The tag-line I came up with is "Turn the World Off With a Smile." It's a twisted variation of a lyric line in the Mary Tyler Moore theme song. I know, I'm aging myself! That lyric was "she can turn the world on with her smile." Given the craziness of the world today, I decided my riddles are created for the distinct purpose of helping people to "turn the world OFF with a smile."
Here are some additional articles I've written relating to self-publishing - Again, I'm not a guru, just learning as I go!

As I learn more, I'll add more articles here on ReviewThisReviews. My next learning journey will be how to self-publish on platforms other than Amazon. That should be challenging.

Here's the first riddle book I created - I went through several cover designs before finally deciding on this one:

#StumpedRiddles - Riddle Book
#Stumped - Riddle Book - First Volume


Note: The author may receive a commission from purchases made using links found in this article. “As an Amazon Associate, Ebay (EPN) and/or Esty (Awin) Affiliate, I (we) earn from qualifying purchases.”


Sunday, July 26, 2020

12 Step Summary of Preparation Tips for Creating a Niche Book Series

Preparation Tips for Creating a Book Series

In October of 2019, I decided it was time to tackle one item on my bucket list: To publish a book featuring a collection of my personally written poems.

I've written several articles on my experience as a newbie self-publisher. Here's my most recent article that talks about Glossy versus Matte Finish Book Covers.

In the beginning, self-publishing wasn't easy! In fact, it took perseverance, patience, and a bit of holy water followed by soap to wash my mouth out with!

Creating My Series of Riddle Books

Once the poetry book was under my belt, I decided to create a series of Riddle Books. I have this crazy knack for writing riddles, so I decided to use this quirky ability for books.

My driving force for writing riddle books is to create something light, fun, and distracting. It turns out 2020 needs a lot of that!

I started with one book, then decided to create a series under the same topic. I'll keep adding to this series until my mind runs out of ideas.

To date, I've written and self-published four riddle books. I've just completed the content for Riddle Book number five, Halloween Riddles, which is scheduled to be published in August 2020. I also have a sixth riddle book halfway completed but don't have a date planned for that release yet.

Although I'm not a guru-self-publisher, I'd like to share my own process for creating a series of books for a niche. Note that as of this date, I've self-published via Amazon's Self-Publishing platform; however, I plan to expand to other writing platforms in a few months. I'll write about that learning process later.

Note: These are summary tips. I didn't delve into the detail of each. The tips are meant to give you a mental picture of the entire thought process before you dive into the process. In other words, things to consider if you're truly serious about your endeavor.

My Personal Twelve-Step Summary Guide to Creating Your Own Niche Series of Self-Published Books:
  1. Choose a topic for your series of books.
  2. Write and self-publish your book in both eBook and Paperback format. 
  3. Don't rush, take it one book at a time and don't limit yourself to a specific number of books.
  4. Decide if the format for each book will be the same: For example number of chapters, introductions, closing pages, and structure.
  5. Be willing to change your covers several times in the beginning if needed - I did this a lot.
  6. Create a website that reflects your book's topic.
  7. Design and decide upon a Logo for your series.
  8. Create a business Facebook, Instagram, and Twitter page for your book's topic.
  9. Create engaging posts about your book's topic on these social media business accounts.
  10. Create a video that speaks about who you are and put that video on your website and your social media accounts.
  11. Include your social media links and website links at the back of your ebooks and paperback books. Be sure to follow Amazon's rules on links in eBooks.
  12. Create and set-up your Amazon Author page - be sure to link to your website's RSS feed to your Author Page so that the new posts on your websites are updated automatically to your author page. 

Here's a Four eBook Series of My Riddle Books

Amazon automatically created an eBook Series for me. In other words, I didn't have to create the amazon page that offered my eBooks as a series. They put two and two together and created the page. However, for a paperback series, I'll have to assemble that offer to the public myself. I'll let you know how that goes - I still have to learn how to do it!

My About Me Video

Here's the video I created for my Website and Social Media Websites. It's intentionally not 'guru-professional.' My goal was to introduce myself to my followers - to be real - to be who I am, nothing more. There are several video services you can use online, I used Animoto.


Again, these tips are meant as an overview to help you consider the big picture before you start writing your book series.

Happy Creating!


Note: The author may receive a commission from purchases made using links found in this article. “As an Amazon Associate, Ebay (EPN) and/or Esty (Awin) Affiliate, I (we) earn from qualifying purchases.”


Sunday, June 28, 2020

Matte or Glossy Covers on a Self Published Book? Which One To Choose?


That is the question, matte or glossy?

Let me start off by admitting that I'm not a self-publishing guru! The entire self-publishing process has been self taught.

In 2019 I made a decision to tackle a bucket list item; publish my personally written life's collection of poetry. Since then, and to this date, via Amazon Self-Publishing (KDP), I've self-published a total of seven books, and am in the middle of writing my eighth and ninth book.

I've written multiple times about the learning curve to self-publishing. I have to admit it wasn't easy. However, now that I have a few books under my belt, I'm learning more about the nuanced details that make a difference in a book's appearance and presentation.

As an example, I learned how to create professional-looking book covers, and have changed my covers multiple times to what they are as of this date. I actually made another slight modification to one of them again today! I'm planning on stopping these changes soon - Nah, probably not lol - but hopefully I'll get the covers to a place where I'm completely satisfied! Building book covers from scratch is tough at first, but after you get the hang of it, it's a ton of fun and very addictive!

A Matte or Glossy Finish on the Cover of Your Self-Published Book - Which Should You Choose?

I googled the crap out of this. Watched videos - you know, the usual stuff we do when we have questions. However, I didn't get a suitable answer. So, when I published the first editions of each book, I decided to go with a matte finish for the covers.

Guess what? For my books, a glossy finish is much nicer and more practical. So, I'm in the process of changing them all to glossy. I'll do all future books in a glossy cover format from now forward.

Why a Glossy Cover Works for This Genre of Books

I write riddle books, books about sayings for cards, and of course, a poetry book. I haven't written, nor plan to write novels. Novel covers may be better in a matte finish, but honestly, I can't give you advice on that.

For Activity Books (Like My Riddle Books & Saying Books and Poetry Books), Here's Why I Believe a Glossy Cover is Best
  1. These types of books are picked up and put down often, and a glossy cover is more durable. The matte cover actually ended up with smudged fingerprints on it from too much handling. 
  2. They look way more professional with glossy covers! My husband put it this way - he said, 'the matte finish made it look like it was purchased at the dollar store, and a glossy finish gives it a bookstore feel' - Yikes!
  3. A glossy cover feels nicer to hold in your hands (a personal thing)
  4. The shiny cover helps the colors to pop more. With fun activity books, the colors are essential, so yah ... glossy all the way for that reason alone.
  5. The matte finish looks more like a school book, the glossy finish gives it an 'author feel.'
The Cellphone Photos of the Books Below Don't Really Capture the Difference Between Matte and Glossy However There is A Big Difference:


Both of These Riddle Books Have a GLOSSY COVER
 #STUMPED - A Party Game

The Book on the Left is a MATTE Finish
The Book on the Right is a GLOSSY Finish
Boredom Buster Riddles - #Stumped Volume 4

The final vote of approval came from my adult kids and my husband, they all agreed that the glossy covers were superior to the matte covers. Sorry matte.

My Non-Guru Self-Publishing Journey in Articles:
1. How to get started on that eBook you've been meaning to do for decades
2. Confessions of a Newbie Self-Publisher
3. 5 Helpful Tools from a Newbie Self-Publisher
4. 3 More Tips from a Newbie Self-Publisher


Note: The author may receive a commission from purchases made using links found in this article. “As an Amazon Associate, Ebay (EPN) and/or Esty (Awin) Affiliate, I (we) earn from qualifying purchases.”


Sunday, November 3, 2019

3 More Tips from a Newbie Self-Publisher

3 More Tips From a Newbie Self Publisher
3 Additional Newbie Self-Publisher Tips
From a Fellow Newbie's Experience

In the previous few articles, I reviewed my newbie experiences with self-publishing. Since I've published my third book and still have some hair left, there's more to share.

Again, I'm not a publishing guru; I'm just sharing tips as I go through the process.

If you've published paperbacks, you understand that your book can be uploaded in digital format as an eBook.

I started in reverse. My first book was an eBook. After publishing an eBook, I learned to publish paperbacks.

However, once I mastered (yeah, right) the ability to publish a paperback, I changed the order in which I publish books:

  •  My books are written for Paperback publishing first
  •  Then, that same book is uploaded as an eBook

I prefer doing paperback books first. The physical copy is more detailed and takes more care in its design.

When doing an eBook, you upload your completed book document to KindleCreate. Again, read this article for a little bit about KindleCreate and eBook preparation.

Three Tips to Pass Along: 

1. Kindle Create - What I Learned the Hard Way with the Third Book

If your manuscript/book document has anything in List Format, for example, 1, 2, 3, etc., when you upload it to KindleCreate, KindleCreate doesn't let you modify Lists. You have to have it exactly as you want before uploading or not using a list format. 

My book had 160 items in List Format. To get around the lists for the eBook version, I typed the numbers in brackets and put them above the typed item. I didn't use the auto-format of 1.2.3. in the toolbar. However, beware; even if you type 1. versus using the word processing numbering format in the toolbar, you still won't be able to modify that list in KindleCreate.

Oh, and the same goes for Tables in KindleCreate: They can't be modified once uploaded to KindleCreate.

Maybe KindleCreate will change these restrictions down the road?

2. Get Your Amazon Author Page Completed

Read the general instructions on the Amazon help page here to get started. It's easy to understand.

I decided to wait until I completed three books before doing my Author page. However, there's no need to wait. If you only have one book, go for it.

The Author page has five key elements:

  •  Upload your photo or any photo(s) you prefer for the page
  •  Add your books to the page (easy, automatic process)|
  •  Write a Bio on yourself - Take some time to do this (see the tip below)
  •  Upload any videos you have that relate to you or your books
  •  Add an RSS feed from your blog, Pinterest, or another place that connects to your Business


Regarding the Amazon Bio, take advantage of this article; it's filled with excellent tips. It provides guidance on how your Bio should sound and what you should say. You can follow me on my newly created author pageIf you prefer a video tutorial on how to complete an Author Page, this one is helpful:


3. The Size of Your Book as it Relates to the Book's Spine

I have yet to use a professional graphic artist to create covers. For now, Amazon's Cover Creator is still my go-to tool. What I learned from this third book is that size matters. If you want your book to have written details on the Spine, you must ensure it's approximately 100 pages. This last book was less, about 65 pages, and thus couldn't have the title on the Spine. 

I'll keep most of my books to at least 100 pages to avoid this. You don't have to if you don't want to; it's up to you.

Here are my article tips to date:


Here's my completed third book, and yep, I'm working on the fourth.


Note: The author may receive a commission from purchases made using links found in this article. “As an Amazon Associate, Ebay (EPN) and/or Esty (Awin) Affiliate, I (we) earn from qualifying purchases.”


Sunday, October 27, 2019

5 Helpful Tools from a Newbie Self-Publisher

5 Helpful Tools Discovered by a Newbie Self-Publisher

In the past two weeks, I've talked about lessons learned as a newbie self-publisher. My first attempt was an eBook and the second a Paperback. Like I said in those articles, I'm not a guru! I'm learning the ropes and sharing the climb.

Was it easy, no way! I can honestly say I'm lacking sleep, and this so-called brain of mine has been reduced to mush. But I love the feeling: You know when you've overcome something and earned a sense of moving forward.

In this article, I'd like to share some of the convenient tools I've found online to help you with your own self-publishing journey. I spent a lot of time researching various aspects of the writing and publishing process and have saved my favorite tips and tools for future projects.

Here are five handy tools/tips I discovered along the way:

1. Choosing a Title for Your Books

I'll start by saying that my titles aren't genius. Lol, but as most of you know, a title is vital. My second book is all about fun, it's a party riddle gamebook. Yah, I know, who writes riddles, right? It's a crazy freaking knack that I have, go figure?

I wanted to create interest with my title and have the title say precisely what the book was about, and what the book could be used for.

I researched some of the most potent action words for marketing and tripped on several helpful articles. The article I ended up saving for future reference was "277 Action Words to Supercharge Your Writing."

2. Kindleprenuer - Be Sure to Check it Out

Kindleprenuer is filled with handy writing tidbits. It's written in a straightforward format, and the tips are easy to implement. They also suggest useful tools to help you along your learning process.

Don't miss their article on 'How to Title a Book,' it's worth your time!

3. Title Generators - These are Handy

A title generator auto-generates suggested title ideas based on your entry. I'll admit, the title for my latest book didn't come from a title generator; however, the title generator did inspire my final decision for the title.

This title generator is a ton of fun and a little addictive! Go ahead and put in the details and see the choices it spits out. It's also a recommended tool by Kindleprenuer.

Here's another helpful title generator. As I mentioned above, it did inspire the title creation process.

4. Setting Up Your Amazon Author Central Page

Since I only have two books published, I haven't set my page up yet. However, you guessed it, I've researched the topic already.

When you're ready, check out this article on how to set your Author Page up, it's helpful.

5. Choosing Your Subtitles - Bold, Clear, and Specific

No, I didn't come up with that criteria. It's part of the excellent advice you'll get from Kindleprenuer. I mentioned them above. They also offer a helpful article on 'how to select a subtitle that sells'.

______________________

Here were my challenges:
  •  It's a riddle book
  •  The book is designed and suggested as a fun game for parties
  •  The riddles are geared towards teens and adults (all clean of course)
  •  I needed a branded name to use on future riddle books
As I researched naming my book, I had quite the challenge trying to get these points established on the cover: A party game book, a riddle book, for teens and adults as well as finding space for an action word.

Here's what I decided:
  •  "A Party Game" stated at the top since that's the point of the book
  •  #Stumped is my branded name that will be on future riddle books
  •  'Instant Party Riddles for Teens and Adults" is the sub-title
  •  The word "Instant" is my action word
  •  The back of the book features an actual riddle 
I'm not saying my choices are the right ones, or that they can't be improved. In fact, I may change the cover down the road. What I learned is that the process for choosing a title, sub-title, and design is time-consuming and crucial to the overall final product.

That's enough for today on my journey into self-publishing, here's my second book. There's an eBook version as well, but it's in the approval stage. It should be showing in a day or so. 

Oh, and yes, I've started the third book: It's not poetry, it's not a riddle book, it's not a novel, oh what could it be?

Here's book number two. Available on Amazon.
Note: I'm an Amazon Associate, but the above link
does not have my Associate ID in it.


Note: The author may receive a commission from purchases made using links found in this article. “As an Amazon Associate, Ebay (EPN) and/or Esty (Awin) Affiliate, I (we) earn from qualifying purchases.”


Sunday, October 20, 2019

Confessions of a Newbie Self Publisher

Confessions of a Newbie Self Publisher


To help you dreamers out, I'm writing this review about my experience of self-publishing my first paperback book through Amazon.

First off, I'm absolutely a newbie at this; the piles of pulled-out hair beside my desk rests as evidence. 

I'm going to go point-by-point with some of the major issues I faced during the learning process.

Again, this article isn't meant to come across as all-knowing, because I'm not all-knowing on this subject!

However, I did spend hours, and I do mean hours researching and learning and doing and swearing just to get that first paperback book up on Amazon. So from that perspective, I know a little bit more than I did a month ago.

What was most daunting was learning the technical aspects of getting that book up on Amazon.

You writers out there would probably agree that writing the book is the easy part! A few weeks back, I posted an article on getting a Kindle eBook up and running. You can read about that swearing event here. Again, I'm not a guru!! Just sharing my newbie nightmares.

So here we go, point by point on some of the things I learned about self-publishing a paperback book through Amazon:

1. You Need the Paperback Book Templates from Amazon

First, if you haven't already, sign up for KDP Self-Publishing.

Before you get started, go to the Amazon self-publishing help area to get those templates.

Download them, unzip them, then decide on the size you want your book to be. Choose the Template that reflects the size you want. You need the Template because it has all the borders and guidelines you have to follow when writing. While you're in that help area, watch their videos and read all their tips. Good stuff there.

Note: Standard size seems to be 6X9 - For my poetry book, I went with 7X10. There are a lot of sizes to choose from.

2. What Word Processing Program Should You Use to Write Your Book?

There's a loaded question. I must have landed on fifty different answers during those google searches from hell.

I don't have the full version of Microsoft Word on my computer, and I wasn't about to frigging buy it.

So I researched alternatives to Word. I found the common ones people use; one is a free download called OpenOffice.org, and the other freebie word processing download I found is LibreOffice.

I've used OpenOffice in business before but based on some of the comments I read from the LibreOffice users, I thought, what the heck, let's try that one.

So to answer the question, you can use Word, OpenOffice, or LibreOffice - maybe there's more? I dunno.

3. What About Writing and Preparing Your Book in Google Documents

That's the first thing I did before even starting the 'technical aspects of what to do after it's typed." I typed the book in Google Docs. At least I had it there for safekeeping until I knew what the heck to do next!

From what I've learned so far, you can type your book directly into your word processing program using the Template from Amazon KDP, of course! Can you skip the google docs part? Well, I still plan to write my books in google docs and then copy and paste them into the word processing program with the book Template.

4. LibreOffice - Using the Amazon Paperback Templates

I have no idea whether you can upload the Amazon paperback templates into Microsoft Word or OpenOffice. However, I'm going out on a limb and saying, yah, of course, you can.

With LibreOffice, the first thing I did was upload the Paperback Template I needed for the size of the book I wanted to do. At that point, it was a matter of learning the LibreOffice program. If you're familiar with word processing programs, you'll probably be able to muddle through. When in doubt, google those questions, that's what I did in spades.

Since my book was already written in Google Docs, I simply copy and pasted it section by section into the template.

LibreOffice: What I Like About it

When you open the program, your books are there, individually listed as nice sizeable Icons. It was fairly easy to learn, but I'm not a pro at it by any stretch of the imagination (yet).

LibreOffice: What I Don't Like About it

Holy Hannah, who designed the Footer Page Count area - YUK! Very difficult to use. Yes, my mouth needed to be washed out with soap a few times. Some of the comments I made (whilst hubby was laughing) "who designed this part of the program! Are they so self-absorbed with their intelligence that they had to make it complicated?."

Other word processing programs have easy-peasy-lemon-squeezy Footer Page Counts, but not LibreOffice! Yes, the table of contents auto-generates and the pages count properly, but it's the number system in the Footer and where the counts start that cause you to drink lots of wine!

Will I use LibreOffice again for my next book? Yep, I learned so much; I don't want to switch now. But I don't have that page count thing in the Footer sorted out yet! And yes, I watched a lot of YouTube videos on it - still not clear.

5. Prettying Up that Book as You're Putting it in the Template

I decided on font styles, headings, and font sizes. From what I read, consistency was important. However, my book is a Poetry Book, so it's different than a novel. A novel, I would imagine, is more straight forward.

I did quite a bit of research on what the best fonts are to use in books, particularly poetry books. After my research, I ended up choosing the Garamond font. I used that font throughout the whole book. I didn't choose it because it was the best for poetry. I preferred the look of it for easy reading on the page.

My paperback poetry book has chapters and sub-chapters, and also a few graphics throughout. So yah, more convoluted to lay it out.

6. How Should the Sections of Your Book Flow and in What Order?

I googled this over and over. You guessed it, different answers from different people. Being that I wrote a Poetry Book, I didn't follow the traditional page designations that a novel would. Here's how I laid out my poetry book:
  •  First Page inside the Book - Title Only

  •  Second Page inside the Book - Title, Sub Title, Author

  •  Third Page inside the Book - Copyright Page (I googled some content and modified it to suit my book). On the copyright page, you'll include your ISBN number - more about that below.

  •  Fourth Page - The Dedication

  •  Fifth Page - A Summary of the Books Contents (that's optional)

  •  Sixth Page - Acknowledgments

  •  Seventh to Eleventh Page - Auto-Generated Table of Contents (my table of contents ended up being 4 pages)

  •  Twelfth Page - A Chapter Page that summarizes the poetry content for Chapter One

  •  Thirteenth Page to page 136 - The content of the book with all chapters in there (I have six chapters)

  •  At the End: About the Author, with sections on 'Why I Decided to Write a Book of Poems' and 'What's Different About This Book of Poems'

  • My Personal Favorite poems are also listed at the end

  • "Thanks for Reading" was next. The gurus say to ask for a review - um, no I didn't do that

  • Closing Message to My Kids

7. Book is Done, Sitting in Your Word Processing Program - What the Heck is Next?

Logging into KDP Publishing is next. Start your engines. 

Select the type of book you're uploading (Kindle eBook or Paperback). 

Go through each of the areas to fill in the information they ask for (this is before any uploads). Honestly, I just watched a lot of tutorials and tips on how to fill everything in. 

Uploading Your Book:

If you're confident that your book is the way you want it, you can upload it. 

However, to upload your book it has to be in a format that's conducive to Amazon's format. LibreOffice extensions are not. After searching out how to do this, I discovered that you can upload the book to amazon in PDF format. (There are other acceptable formats as well). 

In LibreOffice, to get a pdf extension on your file, you simply go to - FILE - EXPORT AS - and CHOOSE PDF. Save it to your computer. Bingo, you're ready for uploading.

Don't worry if you upload the book and you need to change it for some reason - you can overwrite that upload easily if you're not live. Just don't approve it until you're sure. I ended up re-uploading mine a few times as I discovered some errors. I'm sure there are more I missed, being my first time and all.

Note: The Gurus strongly stress hiring a professional editor to check your book for errors. Yah, I didn't do that either. Are they right about that? YES. It's the smart thing to do. Hire a professional. But again, this is Newbie territory I'm in so of course, I'm not listening. Lol. Down the road, yes, that's something I will consider.

8. WAIT! You Need a Book Cover! OMG

Ok. The gurus say, 'get your cover professionally done.' They're right, did I do that, no. Why? Because it was my first book of poems and, well, I had to be the opposite. Plus, I wasn't ready to spend money on that until I felt more confident about what I was doing.

If you're a graphics guru, by using Amazon's KDP Cover Page Templates (you can download those - google search), you can make your own personally designed professional cover. 

There's no way on God's green earth I could possibly do this in a timely fashion. Yes, I tried. More booze. However, I am thinking of hiring a graphics professional down the road for other books I plan to write. 

Oh, I did create my own cover for the eBook version using the online program, Adobe Spark. But that's not useful for actual paperback books that need high-quality digital print.

Inside KDP, there's a Cover Creator Section.

The gurus say, don't use this! So I did the opposite, and for this book, I used it. It's better to hire someone, but I'm not there yet. Play with Cover Creator; you're not obligated to any design until you finally hit save. Even then, you can still change it if you want. You need a high-quality photo of yourself if you're putting it on the back of your book (at least 300 DPI - that was challenging!).

9. ISBN Numbers

Both eBooks and Paperbacks need them. They're different for each book, and every book. Yes, you can ask Amazon to generate one for you. 

The downside to having Amazon generate one for you is that you can only use that particular book with that particular ISBN number for Amazon. In other words, if you're going to offer your book elsewhere, you would have to get your own ISBN number for those.

So you're wondering, how do I get ISBN Numbers? Right?

Canadian ISBN Numbers:

If you're in Canada, you can go here, a Government of Canada page, and register to have the ability to generate ISBN numbers. It could take a few weeks before you're approved. I thought, what the heck, so I registered. 

I used my own self-generated Canadian ISBN number for my eBook Version. Easy. 

However, what I discovered with the Paperback Version is that along with the ISBN Number, the book needs a Digital Code thingy on the back, and I had no idea how to get one of those through my Canadian ISBN account. I'll learn later. 

So for the Paperback Version, I used Amazon's auto-generating ISBN number. Easy. Just be sure that when you get that number from your KDP Account, you put it inside your book on the Copyright page. Best to do that before you actually upload the book.

United States ISBN Numbers:

Since I'm Canadian, I didn't research this very much. However, from what I read, it seems Americans have to pay for those? Don't quote me on that though; I'm not sure. But, again, you can have Amazon auto-generate the numbers for you.

There's more, but that's enough for today.

In closing, my guiding principle while doing this was that famous quote, "don't let the perfect be the enemy of the good." My goal was to get one done.

I'm already onto my next book (It's not poetry, it's not a novel, oh what could it be?) Just a tad addicting.

I hope this helps other newbies, because wow. :)

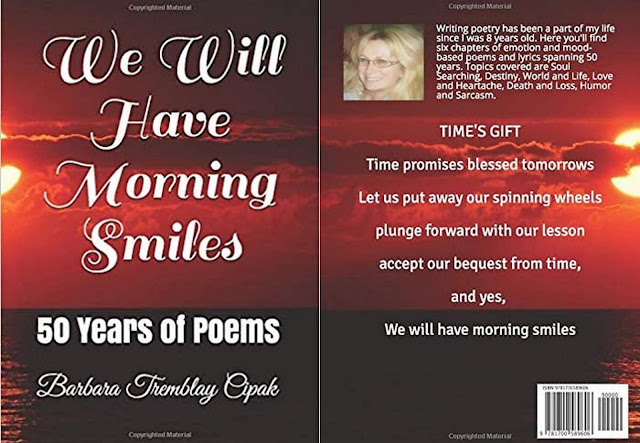
Here's what my newbie-book looks like - front and back covers.

Available on Amazon (Note: I'm an Amazon Associate, however
the link under this particular photo does not contain my AssociateID)


Note: The author may receive a commission from purchases made using links found in this article. “As an Amazon Associate, Ebay (EPN) and/or Esty (Awin) Affiliate, I (we) earn from qualifying purchases.”


Sunday, October 6, 2019

How to Get Started on that eBook You've Been Meaning to Do for Decades

How to Get Started on that eBook You've Always Wanted to Do

Have You Ever Wanted to Write an eBook But Didn’t Know Where to Start?  

That’s where I was. For decades I kept saying, "I want to do a book of my lifetime poems," and kept putting it off. Finally, I took the plunge and just recently completed the book. The poems were already written, and it took me about a month to learn the ropes and put the book together. It’s a book of personally written poems and lyrics from the age of 8 to 58, entitled "We Will Have Morning Smiles."

As a newbie self-publisher, I’d like to share a few of the tools I researched and used to get this first book on the market. These are just the basics, to learn from the guru’s you’ll have to Google and find the ones you like. I did watch multiple YouTube Videos from various people, and the advice I found most helpful was Self-Publishing with Dale. I tripped on his videos after endless Google research. Compared to some, his video presentations were the easiest to follow. 

My First eBook of Poems
The advice in his videos are helpful, but to be honest, I didn’t follow all of it. One bit of information was that you should use a professional to create the cover of your book (if you can). I didn’t do that; I created my own. However, I do agree that a professional is a better way to go. 

The other is that you should, if you can, hire a professional to ‘Format’ your book. Yep, you guessed it; I didn’t do that. I formatted my own. Formatting isn’t easy, especially with a poetry book, but you can do it if you’re willing to read and learn.

Here are Three Quick Points to Help You Get Started:

1. Create Your KDP Publisher Account on Amazon - This is Where You'll Upload Your Book for Publishing

That part is easy. However, when you start filling all the information in, you'll have a lot of questions. The good thing is, KDP has a terrific help section, and customer service answers questions very quickly.

2. Google Documents or Microsoft Word - Where You'll Write Your Book

I wasn’t sure how to get a book written, formatted, then uploaded to Amazon or any other sellers platform.

After reading multiple articles on how to get started, I was more confused. 

What I found was that most people use Microsoft Word to write their books. Since I don’t have the full paid version of Word on my Laptop, I decided to use Google Documents. However, you do have to save your work in .docx format to upload it to Kindle Create (see more about Kindle Create below). 

To save your google document to a .docx format:

  • Click ‘File’ in the top left
  • Scroll down to ‘Download’
  • Several file saving options will show, choose (.docx)
  • Save the file to your computer. Done.

Oh, and guess how much I knew about Google Documents? Yep. Nada. I never had a reason to use it. However, I should have been! It’s a terrific tool. I’m using it for a ton of things now. So easy. I’m currently helping a family member out with a project and have been sharing work via Google Documents. No wonder people like it!

Here’s another google docs tip for you: 

In google docs, you can auto-generate a Table of Contents. However, on the editing bar, look for the button that says, “Normal Text." There’s a dropdown menu there that lets you choose various Heading options. 

Your Heading choices are essential because they determine what goes in your table of contents, and where:
  • Heading 1 - Puts the title as a Chapter Heading in your Table of Contents
  • Heading 2 - Places it as a Sub-Chapter below a Chapter

With my poetry book, sub-chapters were important. The main chapters are the headings that describe the types of poems, and the sub-chapters are each poem by title below it.
This is the Back Cover
It appears at the end of
the eBook on the inside

3. Download Kindle Create - Kindle Create is Where You'll Format Your Book for Publishing

There are conflicting views on using this. I would guess very experienced self-publishers don't need it.

Since I’m a newbie and Kindle Create was easy to understand, it served my needs. I’ll be using it again, at least until I become some sort of a pro. 

Download Kindle Create to your computer directly from Amazon. Then watch the video tutorials and read the help section. They’re fabulous.

Upload your saved book (either from Word or Google Docs - if that’s what you used), into Kindle Create. 

The file that's created in Kindle Create is the file you'll eventually upload to your KDP Amazon Publisher Account.

A Few Tips to Share: 

  • Kindle create generates a Table of Contents for you
  • However, I still created a detailed Table of Contents in Google Docs
  • I included both Tables of Contents in my book - The detailed Table of Contents with Sub-Chapters is from Google Docs, the other from Kindle Create only features the main chapters (because I designed it that way). You don’t have to do this, but I wanted more of a break-down.
  • It appears you can't directly internally link on your document while inside of Kindle Create. 
  • Do all your internal linking in Word or Google Docs before you upload it to Kindle Create.

Remember, these are the basics for beginner self-publishers like me. I wanted to give you a way to get started on your own ebook because I know how daunting getting started can seem.


Note: The author may receive a commission from purchases made using links found in this article. “As an Amazon Associate, Ebay (EPN) and/or Esty (Awin) Affiliate, I (we) earn from qualifying purchases.”


Most Recent Reviews on Review This Reviews


Search for Reviews by Subject, Author or Title

The Review This Reviews Contributors


SylvestermouseSylvestermouseDawn Rae BDawn Rae BMbgPhotoMbgPhotoBrite-IdeasBrite-IdeasWednesday ElfWednesday ElfOlivia MorrisOlivia MorrisTreasures by BrendaTreasures by BrendaThe Savvy AgeThe Savvy AgeMargaret SchindelMargaret SchindelRaintree AnnieRaintree AnnieLou16Lou16Sam MonacoSam MonacoTracey BoyerTracey BoyerRenaissance WomanRenaissance WomanBarbRadBarbRadBev OwensBev OwensBuckHawkBuckHawkDecorating for EventsDecorating for EventsHeather426Heather426Coletta TeskeColetta TeskeMissMerFaeryMissMerFaeryMickie_GMickie_G


Review This Reviews is Dedicated to the Memory of Our Beloved Friend and Fellow Contributor

Susan DeppnerSusan Deppner

We may be apart, but
You Are Not Forgotten


“As an Amazon Associate, Ebay (EPN) and or Etsy (Awin) Affiliate, I (we) earn from purchases.” Disclosure Statement

X