Showing posts with label photography classes. Show all posts

Thursday, December 28, 2023

Reviewing my 2023 Photography Journey


Split Rock Lighthouse surrounded by fall foliage

I consider every year to be part of my photography journey, where I learn some new techniques, enjoy new photographic opportunities, and hopefully increase my knowledge and skills.  2023 was no exception.  During the past year, I got out of my comfort zone and photographed four big events, I attended a photoshop summit where I learned a lot of new techniques and I even went back and reedited some old photos using what I have learned in the past 17 years since I started this journey.  The photo above is one of my past photos taken in 2010 and reedited this year.

Education

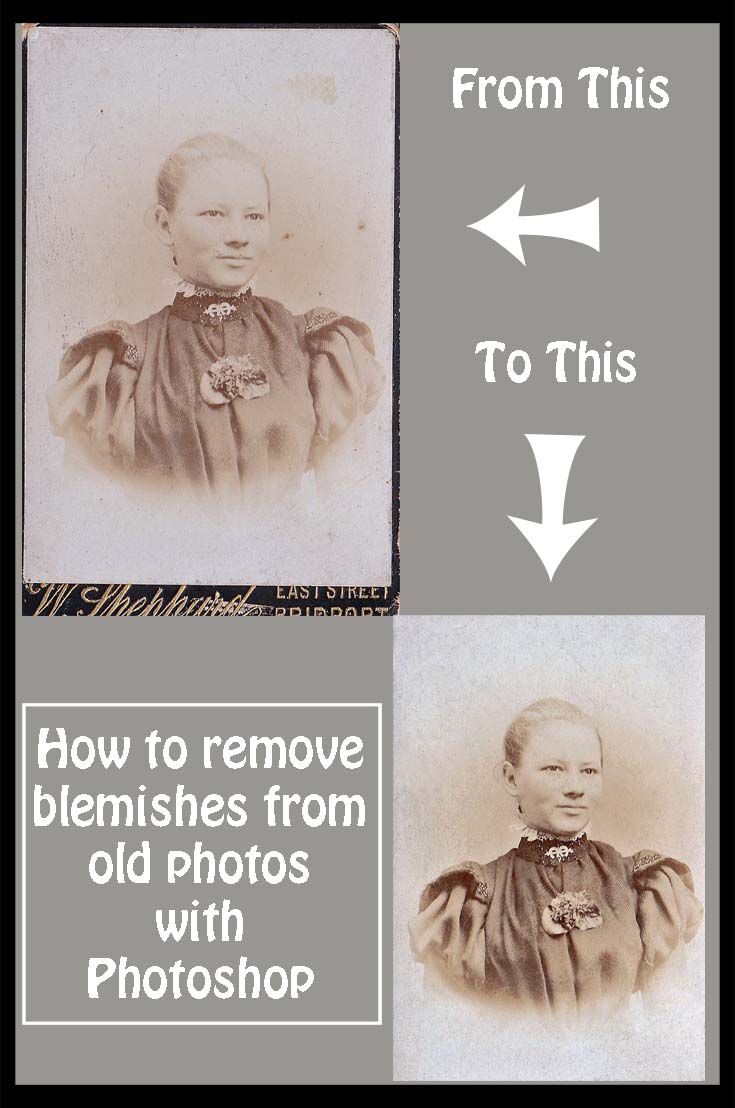
I always try to take a class each year either in person or online.  There are so many available, along with many You- tube instructional videos.  This year I listened to many free videos I found online and this fall I attended a Photoshop Summit online that had five days full of speakers all instructing us on various aspects of Photoshop.  They were very interesting and informative.  One of the subjects I found most interesting was about the new "generative fill" feature in Photoshop.  By just circling an area in a photo, you can remove an item or add something new.  Here is an example of a Halloween photo where I used this feature.  The first photo is my original photo.
Yard full of Halloween Decorations

In the next photo you will see that I first used generative fill to remove the mailbox and then added several additional items to the photo.  See if you can find all the additions.
Busy Yard with Halloween decor


I also used what I learned in the seminars to redo some older photos.  In this one the original photo had lots of people on the sidewalk leading to the lighthouse.  I used generative fill to remove them.
White lighthouse with leading path


Special Events

Sometimes I find I learn more when I take myself out of my comfort zone.  This year I was asked to photograph four major events.  Two of them were weddings of family members and two were events at church.

Both of the weddings were casual.  The first was held completely outdoors at my brother's home and the second was held at a small historic chapel with the reception being an outdoor event.  I was a little apprehensive at first, but the casual settings helped to put me at ease.  I carried two different cameras each with a different type of lens and settings and I was pretty pleased with the results.  Here is a photo from each of the weddings.
Outdoor wedding ceremony

Little White Chapel


The church events included the ordination of our newest pastor and a 20 year celebration of our senior pastor.  For these occasions I sat in the balcony and was able to photograph the ceremonies from above.  I used my camera that is a Sony mirrorless one that does great with lower light and inside photos without using a flash.  Here are two photos from those events.
Chapel of the Cross Lutheran

Chapel of the Cross Lutheran Church


Group Support

I find photography groups to be a great way to meet people with similar interests and share ideas.  I belong to two different groups; one Create 52 is an online Facebook group and the second is an in-person photography club in our town.  

    Create 52

This online group challenges us to be creative in both our photography and in our post processing.  We are given a topic each week and then we create a photograph to match the topic.  An example of this is during the week before Christmas our topic was Christmas card.  For this topic, I took a photo of our Christmas tree and then took it into Photoshop.  In Photoshop, I added an artist filter and placed it on a textured background.  I then added lettering and finally used generative fill to add stars around the lettering.  Here is my result.
Card with Christmas Tree and Stars

    O'Fallon Photo Club

Our in-person photography club meets once a month.  In this group we share ideas with other photographers, and we also bring photo files to get constructive criticism.  We share ideas for places to go for photography and we take a few field trips each year.  At the end of each meeting, we are given a topic for the month, and we post photos of that topic in the clubs Facebook page.  This fall several of the club members met at our local botanical gardens on an evening photographer's night, where we were able to bring in our tripods and capture some low light photography. There was a Chihuly exhibit going on at the gardens so there were lots of great opportunities for nighttime photography.  Here are a couple of photos I took.

Nighttime shot of Chihuly work

Framed Chihuly Art


Mentoring

I volunteer with a group called Willows Way that provides support for challenged adults.  This group has a photography club and I serve as one of the mentors for the group.  Each month we take several of the participants and their aids to a different locale to photograph.  We have gone to local parks, museums, and farmers markets.  I love to work with these wonderful people and find I get as much from them as I give.  It is a wonderful opportunity.  This summer we went to a farmers market that also had a sunflower field.  We talked about unique ways to capture the sunflowers.  Here are two of my photos.
Back of Sunflowers

Closeup on Middle of Sunflower

As I close, I Wish You and Yours a Very Happy New Year.  May your year be filled with joy and peace and lots of new things to learn.

Here are a couple of my favorite photos this past year.
Bluebird on Heated Water Bowl

Changing Sky

Sunflower with Blurred Background


Note: The author may receive a commission from purchases made using links found in this article. “As an Amazon Associate, Ebay (EPN) and/or Esty (Awin) Affiliate, I (we) earn from qualifying purchases.”


Saturday, August 27, 2016

How to Remove Blemishes From Photos Using Photoshop

How to restore old family photos using photoshop
©Louanne Cox
Let's review how easy it is to use Photoshop to remove blemishes from photos, trust me it's really simple and well worth the time spent to restore old family photos.

As one of the genealogists in our family I have been given a number of photographs over the years that have been in shocking condition from one that was ripped in half to countless that have age spots and blemishes on them and then there's the creased photos!   The positives is that today's photographs will all be preserved in a digital format so that future generations can see what their ancestors looked like.

I digress, this is supposed to be about removing blemishes (by which I mean the age spots that older photographs sometimes get, NOT grandma's birthmark or grandpa's big ears!) with Photoshop.

To begin I'm going to show you two versions of a  photograph of my great grandmother -

How to remove blemishes from old photos using photoshop

The original photograph was on a piece of card with the photographers name on it - this had actually been cut or broken off so you couldn't easily read it.   The first thing I did after I had scanned the photo was to crop it so that we were left with just the photo and no evidence of the 'card'.

remove blemishes using photoshop

Using the picture above you can see the Image drop down menu button is circled with the number 1 next to it.   If you click on here it will show you the option to crop your photograph, if you want to.

The number 2 circle is around the Enhance drop down menu and I went to this and clicked on the auto smart fix button.   Now why did I do this?   A number of older photos that I have which are in the sepia tones tend to be really light when I scan them in and the auto smart fix just seems to darken them slightly without over correcting.   If you don't like the result just click the undo button and miss out this step.

On the left hand side of the image you'll see the number 3 circle that is around an icon that looks like a band aid, this is the spot healing tool aka our best friend!

Now if you're into 'airbrushing' your photos this is the button that can get rid of wrinkles etc, but for our purposes we're just using it on age spots, spillages and creases that were on the photograph.

Once you've clicked on the icon and you move your mouse back to the picture you'll see a circle appear.   Move the circle around a 'spot' and click it, the 'spot' will disappear just like magic.

Restoring old family photographs with photoshop - a how to guide

When you've clicked on the 'band aid' you'll find that a sub menu appears at the top - see the red circle in the above picture.   This is where you can adjust the size of the circle that appears.

So now you know how to remove blemishes in Photoshop, let me give you a few more tips that I've found helpful.

Zoom in on the photo - just use Ctrl + to make the photograph a few sizes bigger and then remove the blemishes.   It can make it easier to see them, especially creases in photographs which can really show up once you get rid of the brown age spots.

When working on the face make the circle as small as you can so that it just covers the blemish you want to remove.   I had a photograph of my grandmother as a teenager and something that looked like coffee had been dripped onto it at some stage of it's life (before it came into my possession).   One of the splashes was over her eye and when I clicked on it her face just looked strange - I have no other words!   I zoomed in on her face, made the circle smaller than the stain and clicked on it from the outside of the stain in - that worked out really well and it's one of my favorite photos now.

Don't work on too many photos in one sitting.   When you're zooming in and doing a good job you don't realize what a strain on your eyes it is.   If you sit there and do half a dozen photographs once you walk away from the computer you'll realize that your eyes have been strained and they can really ache, so can your head!   It is quite addictive though, just make sure you only do a few photos at a time.

Now that I've shown you how easy it is, you might just be thinking - I need Photoshop!   Trust me you'll use it for far more than removing blemishes from old photographs, so I've added the link to purchase it just below.  

Adobe Photoshop Elements 2021Adobe Photoshop Elements 2021
I have Photoshop Elements, although not the 2021 version yet, I hope to get it upgraded for Christmas this year.

Having Photoshop is fun and addictive as there's so many different effects you can create with your images. I do have to share a funny story about my daughter a few years ago. It wasn't long after I first got Photoshop and she was looking at some photos I'd taken of her and didn't like any of them because she had a pimple and she was showing too much gum in some of them ........ personally I thought they looked great, but I'm just mum!

Anyway I asked her if she'd like me to Photoshop them, her eyes opened wide and she said, "can you do that mum?", I replied of course I can or words to that effect and she left me alone to work on it. She wasn't impressed with my results - I gave her elf ears and a wavy nose - her dad thought it was hilarious, but my pre-teen (at the time) did not appreciate my idea of photoshopping! I'm not suggesting other parents do this, but it was funny and even she tells the story of mum photoshopping her nowadays.

I hope that I've helped you to remove blemishes from your old photographs as they are precious. Looking at photos is a great way of triggering memories, I love pulling out our photo albums with my mum and reminiscing. It's funny how everyone remembers things differently and you can go off on a number of different tangents just from a single photo.


Note: The author may receive a commission from purchases made using links found in this article. “As an Amazon Associate, Ebay (EPN) and/or Esty (Awin) Affiliate, I (we) earn from qualifying purchases.”


Thursday, September 10, 2015

Nature Photography Tips

Classes Great Way to Enhance Photography Skills

red and yellow tulip photo by mbgphoto

I have found that the world of photography is a never ending learning experience. I am always so excited to learn new techniques and new ideas for photographs.
 
The opportunities to increase your skills with your camera are everywhere you look. You might find a good book written by a photographer you admire. Studying the works of others is a great way to learn. There are also some great photographer groups on Facebook where you can view the work of others and even post your own photos. Other photo enthusiasts always seem eager to give advice and tips.

I like to take a seminar or a photography class every year. I feel that I always learn something new and many times skills that I had learned and forget to use are reinforced in these classes. When I have taken classes in the past, I have written a  a blog post on them. For me the act of writing down what I have learned reinforces my learning. I hope it also helps others who read these tips.

On this page I will write on a nature photography class I am taking at our local community center. Our instructor Garry Rose has a great way of explaining concepts so that they make sense to me.

photos on this page are by the author mbgphoto


Lesson One

Introduction


In our first class the instructor gave us an introduction to nature photography. He described nature photography as anything taken outdoors that is not changed by man. Things like landscapes, wildlife, flowers, and animals would all be a part of nature photography.

We also talked about ethics for a photographer. Some key points included:

*Keep subjects safe

*Never dig up plants

*Never trim or snap plants

*Be careful not to expose nest or handle babies

A key point to remember is to leave the area looking exactly like it did when you arrived.


Know Your Subject

read or observe

It is always good to know your subject before you set out to photograph. You can do this by researching the subject or by observing what you see.

An example the instructor gave on knowing your subject is his own love of photographing dragonflies. Dragonflies are often times rather elusive but because our instructor has studied their habits he knows the best times and places to catch some great shots of dragonflies.

Know your Equipment

photography tips
The best way to get to know your camera and equipment is to use them and practice with them. Our instructor encouraged the use of the histogram on our cameras to help us to determine if the light is right on our photo. This is particularly good to use on a bright sunny day when it is hard to see the screen on the camera. You can use the + or - button on your camera to lighten or darken the subject as needed. 

Another camera feature that is good to know is the depth of field preview button. This will help you to determine if you have in focus what you want in focus. Check your camera manual if you don't know where your button is on the camera. The instructor gave us an assignment to help us learn about the depth of field with the various focal lengths on our camera. We were to photograph a 12 inch ruler using both the longest and the shortest focal lengths on each of our lenses. We were to use aperature priority set at F8 and make sure the ruler was in focus on each shot. I really enjoyed seeing how this changed the background in each of my photos. With my shortest focal length 18mm the house in the background is in focus as you see in this photo. Look at the photo below to see how that changes with the longer focal length.
 
With this lesson in mind I used my 300mm focal length to photograph a tulip in my neighbors yard. I was able to get the tulip in focus and the background blurred.

Same shot using a 300mm lens

ruler on fence rail

pink tulip photo by mbgphoto


Good Technique

The instructor gave us a lot of tips on good techniques to use during nature photography. Some of them were reinforcing techniques I already use and others were ideas that I need to incorporate into my photography.

These are some of the key points I took away from the lecture.
  • Always use a Tripod
  • Slow down and take your time. This is a great tip and one that I need to be work on.
  • Shoot both vertical and horizontal views.
  • Look for different vantage points. Everybody looks at a scene and takes it straight on. Find a way to make it different. Perhaps you might just photograph a section close up or photograph it with something interesting in the foreground.
  • Look for ways to frame the subject. This is one of my favorites. I love to find ways to frame my subjects as you can see in the lighthouse photo that I framed by colored leaves.
Here is a tripod that is the same brand and price range as the one that I use.  While it is not the most expensive, it is not the cheapest either and I find that it works well for my needs.

tripod
Tripod on Amazon.com


Note: The author may receive a commission from purchases made using links found in this article. “As an Amazon Associate, Ebay (EPN) and/or Esty (Awin) Affiliate, I (we) earn from qualifying purchases.”


Thursday, May 8, 2014

Field Photography and Close Ups

yellow flower photo by mbgphoto
This is the third post in my series on the Nature Photography Class I am taking.  Each week we have a homework assignment and the assignment for this past week was to take an artistic photo of a flower.  The photo above is the one I submitted.  It is the backside of a Gerbera daisy.  In order to take the photo I made my own background by draping a black velvet skirt over a chair and sitting the potted plant on the chair.  I used my tripod and zoomed in close to capture this photo.  Here is the photo of the front of that same flower.  The instructor said that although the front flower was a good one he enjoyed the photo of the back since it was a side people usually don't see.  He also said it was good that I did not center the back flower photo.  It gives it more interest.
pink flower photo by mbgphoto

Field Photography

In the class we talked a bit about field photography with an emphasis on what to bring when you go into the field to photograph.  The main point that I got from this was that you should think careful about what you want to photograph and not try to bring all your gear but rather just what will be needed.  Here are some considerations and items to pack in your bag to overcome them.

  • Wet Grass/Mud--carry a folded up heavy duty trash bag to kneel or sit on.
  • Wind- consider carrying an umbrella to use to block the wind
  • Controlling light- reflectors in various colors-black,white, gold, silver
  • Transporting gear- pick a bag that is lightweight and fits what you are doing....you wouldn't want a heavy bag for a longer hike

Macro  Photography

We also discussed macro and closeup photography in the class.  The instructor said the difference is that macro photography would be taking a photo  at 1/2 life size or greater.  Less than that it would be close up photography.  He said most macro settings on cameras are really close up photography.  He talked about several options for taking macro photos.
  • Macro Lenses--these are great for getting small details.  The lens come in a variety of size and the instructor said if you were to get just one he would suggest something in the 70-80 mm range.  Macro lenses are a bit on the expensive size so you may want to consider the next less expensive option.
  • Extension tubes--these tubes help you to get macro photos without the expense of the macro lens.  They can be purchased usually in sets of 3 and can be used in combination with any lens...zoom or otherwise.
  • Diopter lenses- these lenses will magnify and help in macro photography.  They DO NOT work well with zoom lenses.
  • Focus Rails--this is a great tool that can be attached to your tripod to move the camera back and forth when you are focusing.  Much easier than trying to move tripod to focus.


Note: The author may receive a commission from purchases made using links found in this article. “As an Amazon Associate, Ebay (EPN) and/or Esty (Awin) Affiliate, I (we) earn from qualifying purchases.”


Thursday, April 24, 2014

Nature Photography Class

jonquil flower photo by mbgphoto

Photography classes are a great way to enhance your skills as a photographer and to learn some new techniques.  I try to take a new class or seminar each year. I just started a new 6 week class on nature photography and over the next weeks I will share with you some of the tips that I have taken away from the class.

In our first class the instructor gave us an introduction to the class.  He first described his take on what comprises nature photography.  For him it is wildlife, panoramic scenes, and basically anything outdoors that does not involve the 'hand of man".  In the introduction we were given some guidelines on photo ethics.  A good photographer will respect the earth and leave the area in the same condition he found it.  Here are some of the points the instructor made.
  • Be concerned for the safety and welfare of the subject
  • Do not dig up plants
  • Don't trim or snap plants
  • Do not expose nests or handle babies
  • Do not lie!  Make your shot be authentic.
We were told that it is important to know your subject.  You can do this by taking the time to research your subject before you start photographing and to take the time to observe your subject.  For instance if you are trying to photograph butterflies take the time to learn a little bit about their habits and it will be much easier for you to find them and get a great photograph.  Many parks and wildlife areas will have pamphlets about their plants and wildlife that will give you hints on the best times to observe and photograph them.

The instructor also stressed the importance of knowing your camera.  He suggested sitting around at home and just taking photos of anything using all different settings just to get to know all the features on your camera.  In fact we have a homework assignment to photograph a ruler to learn how close our camera can focus.  We will  be doing this using each of our lenses.  We will then photograph the ruler outside with a zoom lens using both the shortest and the longest focal length at a F8 setting.  This will show us the difference in the backgrounds with each focal length.  Taking the time to learn the camera in this manner will help us to use the right settings when we are out in the field.

I am really looking forward to our next class next week and next Thursday I will again give you some tips from the class.


Note: The author may receive a commission from purchases made using links found in this article. “As an Amazon Associate, Ebay (EPN) and/or Esty (Awin) Affiliate, I (we) earn from qualifying purchases.”


Thursday, April 10, 2014

Photography Classes

I try to take at least one photography class or workshop each year.  There is always a wide array of classes available in many different price ranges.  You can even sometimes find free classes online. 

One of the places that I have gone to take photography classes in our local botanical garden.  Each year they come out with 10-12 different classes taught by some very talented photographers. Here are some pages that I wrote on two of these classes.  On these pages I give you some of the tips that I learned in these classes.
  • Garden Photography is a class that I took at Missouri Botanical Garden.  It was late spring and the irises were in full bloom for the class.  Stop by this page to learn how to take close up photos of these flowers.
  • Photographing Wildflowers  is another class I took through the Missouri Botanical Garden, but this one was held at their Shaw Nature Reserve sight.  Here is a photo I took during that session.
    wildflowers photo by mbgphoto
Kim Manley Ort is a Photographer who loves sharing her photography knowledge.  On this page she shares with us what she learned at a photography workshop of Visual Design


I am taking a six week class on nature photography during April and May.  I plan on sharing the tips that I learn each Thursday on this blog.  Stay tuned for more. 


Note: The author may receive a commission from purchases made using links found in this article. “As an Amazon Associate, Ebay (EPN) and/or Esty (Awin) Affiliate, I (we) earn from qualifying purchases.”


Most Recent Reviews on Review This Reviews


Search for Reviews by Subject, Author or Title

The Review This Reviews Contributors


SylvestermouseSylvestermouseDawn Rae BDawn Rae BMbgPhotoMbgPhotoBrite-IdeasBrite-IdeasWednesday ElfWednesday ElfOlivia MorrisOlivia MorrisTreasures by BrendaTreasures by BrendaThe Savvy AgeThe Savvy AgeMargaret SchindelMargaret SchindelRaintree AnnieRaintree AnnieLou16Lou16Sam MonacoSam MonacoTracey BoyerTracey BoyerRenaissance WomanRenaissance WomanBarbRadBarbRadBev OwensBev OwensBuckHawkBuckHawkDecorating for EventsDecorating for EventsHeather426Heather426Coletta TeskeColetta TeskeMissMerFaeryMissMerFaeryMickie_GMickie_G


Review This Reviews is Dedicated to the Memory of Our Beloved Friend and Fellow Contributor

Susan DeppnerSusan Deppner

We may be apart, but
You Are Not Forgotten


“As an Amazon Associate, Ebay (EPN) and or Etsy (Awin) Affiliate, I (we) earn from purchases.” Disclosure Statement

X