I've been asked quite a few times how I create my images for Pinterest which is why I thought I'd just show you. Now I can't promise you that your images will take off in popularity on this social media platform, but I can promise you that the steps will be easy to understand.
I have been using Photoshop for a few years now, but the way I create the majority of my images are easy for beginners and experts alike to follow.
The first thing you have to do is open up your Photoshop and select a new file, I simply press Ctrl N to do this, but you could use the file menu and open it that way.
You will be greeted with a pop up box where you have to select your image details, it looks like this -

I only change two things on the default and that is the width and height as you can see on the image. I have changed the image height a few times, but the majority of the time I just use the standard 738 x 1105.
The next step means finding the image you want to use for your pin so I've decided that I want to do a pin for my welcome to Lou16.com post (I can't believe I was missing a Pinterest image on that post until I wrote this!)
I'm going to use the image I have in my introduction as the main image for my Pinterest image as well so let's have a look at what we're going to do....

So the first thing I do is create a new file, then I open up the photo I want to use and drag it onto the new file.
1. Here you can see that this image has a border that I created previously. I'm going to use this color for the background so to do this I need to use the eyedropper tool to select the exact color.
2. This is the eyedropper tool. To use this you click on the tool and then click on the color that you want to select.
3. After selecting the color I make sure to select the correct layer (in this case the blank one as I'm using this for background.
4. The paint bucket tool will cover the layer with the selected color.
After doing all of these steps you'll be left with the next image.

3. I'm going to do things backwards here and get you to look at number 3! When I did the background color the teal was on top and the white was underneath, as I'm thinking of doing the text in white I switched them around. Sometimes when you're using two colors you can just change between these two to save having to use the eyedropper tool again.
Back to our image..
Now I want to add some text to the image so I have to select the text box.
1. This is the Text box and you have to click on this before adding any text.
2. This is the text tool bar, you can change the color from here (it will default to the top square at number 3 unless you change it), you can also alter the font, the font size and whether you want to use a bold or italic or both.

As you can see I dragged the image down a little so that I could add text above and below it. Above I just used regular and underneath I selected italics. You can also highlight just one or two words and change their color or size in order to make an impact.
1. There are different things you can select on the side including a border which I always use for my Pinterest images. You select the border (or arrow as I have done on these images for you) and click apply - the color on top of the color box is what color the object will appear as.
I didn't want to use white as a border because the website background is white so I used the eyedropper tool to select another color from the photograph.
I always try to pull either the border, background or text (sometimes all of them) from the actual photo as you know it's going to go.

I always keep Photoshop open until I see the final image uploaded to the website. In this case I uploaded the border from a light green in the foliage that really made it pop on Photoshop, but looked strange on the white background of the website.
I then changed the border to the blue of my t-shirt, but again on the white background of this site it just didn't look quite right. The third and final one is what is pictured above and I've use the brown of my hair!
Now you don't always have to use a photo, sometimes I'll use a graphic from a site like Pixabay and use that.
This is a very basic way to create a Pinterest image using Photoshop, as you get used to using it you can get more and more creative with using several images merged together like this one from another post I created -

In this image I used an image of traffic which I reduced and played with to get it to fit onto the laptop screen. The background is taken from the laptop color and you can see I changed the color and font size of the 21 in the image.
Start off simple and as you get used to using these tools you'll find yourself creating all kinds of images, try not to become too addicted to Photoshop as once you start down this rabbit hole you can lose all sense of time!
You might be interested in my other Photoshop tutorial (and there will probably be more to come!) -
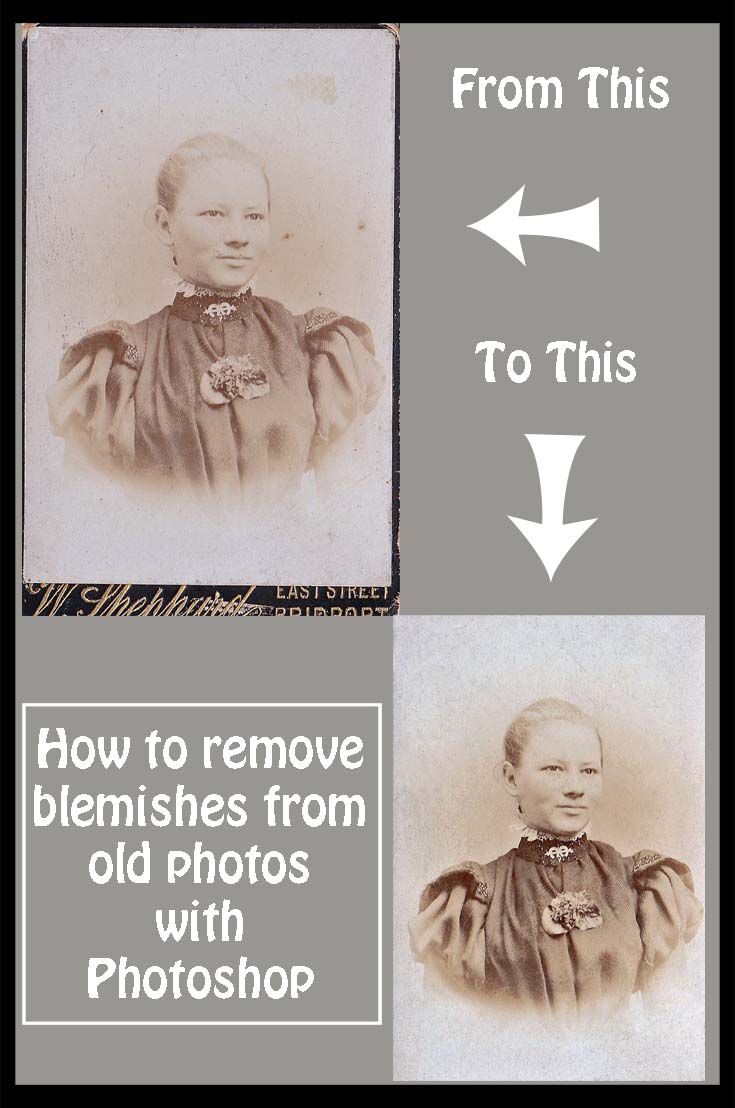
 How to Remove Blemishes From Photos Using Photoshop
Let's review how easy it is to use Photoshop to remove blemishes from photos, trust me it's really simple and well worth the time spent to restore old family photos.
Our contributors here on Review This also use other platforms to create their images for Pinterest so be sure to check out our tips for writers including -
... and let's not forget our Pinterest tips -
Before leaving I'd like to tell you one of the things that really helped me with getting traffic from Pinterest (obviously the images help!) and that was using Tailwind, I highly recommend this scheduling tool for anyone who wants to harness the power of this visual social media platform.
If you've found this article helpful please share on your favorite social media platform.
 |
| Image by Lou of Lou's Designs |
Note: The author may receive a commission from purchases made using links found in this article. “As an Amazon Associate, Ebay (EPN) and/or Esty (Awin) Affiliate, I (we) earn from qualifying purchases.”
FOLLOW US ON: