Showing posts with label how to. Show all posts

Tuesday, May 24, 2022

How to Replace a Window Screen

 Five easy steps to replace a window screen reviewed.

How to Replace a Window Screen

Replacing window screens is not as difficult as some people may think it is. Our screen door into our kitchen has a screen at the bottom of the door. So, with traffic in and out all year long I replace this screen almost every year.

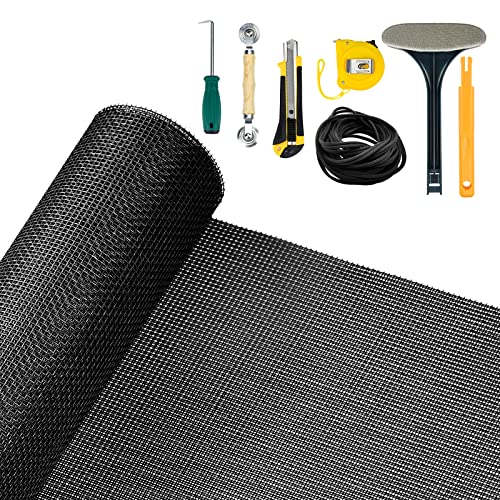
Replacing a screen requires a few simple tools. First, you need a fiberglass or aluminum screen. I always use fiberglass, then you will need a screwdriver, spline, utility knife, and 
roller tool all seen in the photo above.

Replacing a Window Screen Step 1:


Step one Remove the old screen

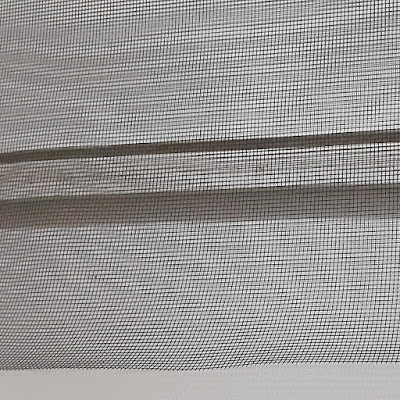
With a screwdriver locate the end of the spline in the old screen and pry it up. Continue to pull the spline out all around the window. You can save and reuse the old spline, but I never do, I always use a new spline it really doesn't cost that much.

Step 2:

Step 2

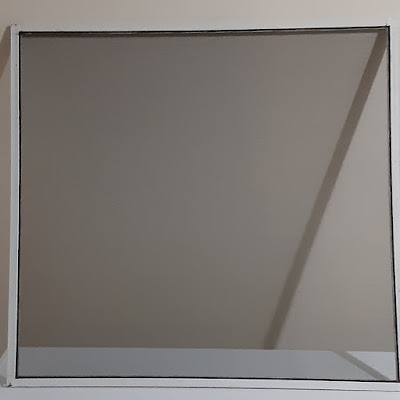
Now, roll out the new screen over the window frame. Before you cut it make sure you're 2 to 3 inches over on all sides. Don't worry you will trim the excess off later.

Step 3:

Step 3

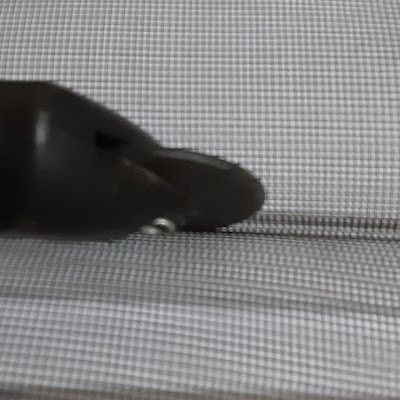
There are two wheels on the roller tool, one wheel is smooth, and the other wheel is grooved. Using the smooth wheel, begin pressing the screen into the groove on the window frame one side at a time.

Step 4:

Step 4


Set the spline at one end of the window frame and stretch it to the other end. Now, use the grooved end of the roller toll and press the spline into the groove. Repeat steps 3 and 4 for the other 3 sides of the window frame.

Step 5:

Step 5

Now it's time to trim off the excess screen. Using the utility knife, carefully run it along the outside edge of the window frame groove. Take your time with this because you don't want to slip and cut your new screen. If the spline is not completely pressed down in the corners you can use a screwdriver to push it in.

Replacement Complete

My screen replacement is complete and ready to be placed back on my door until next year. Although, this year I have placed this screen on the top of the door so hopefully I won't have to replace it next year.

 Five easy steps and you can easily replace your window or door screens. You can find all the tools needed to replace window screens at any hardware store.

Find more DIY Projects here: ReviewThisCrafts.com

DIYSELF 2Pack Utility Knife Box Cutter Retractable Blade Heavy Duty(Red)DIYSELF 2Pack Utility Knife Box Cutter Retractable Blade Heavy Duty(Red)DIYSELF 2Pack Utility Knife Box Cutter Retractable Blade Heavy Duty(Red)Yoochee Screen Tools - Screen Rolling Tool and Screen Spline Remover Hook - Screen Roller Tool with Wooden Handle and Steel Wheel for Screen Repair - Durable Tools for Installing Door Screens WindowYoochee Screen Tools - Screen Rolling Tool and Screen Spline Remover Hook - Screen Roller Tool with Wooden Handle and Steel Wheel for Screen Repair - Durable Tools for Installing Door Screens WindowYoochee Screen Tools - Screen Rolling Tool and Screen Spline Remover Hook - Screen Roller Tool with Wooden Handle and Steel Wheel for Screen Repair - Durable Tools for Installing Door Screens WindowSenneny 7 PCS Screen Repair Kit - 39Senneny 7 PCS Screen Repair Kit - 39Senneny 7 PCS Screen Repair Kit - 39HOMWMPA Window Screen Replacement Kit, 36HOMWMPA Window Screen Replacement Kit, 36HOMWMPA Window Screen Replacement Kit, 36


Note: The author may receive a commission from purchases made using links found in this article. “As an Amazon Associate, Ebay (EPN) and/or Esty (Awin) Affiliate, I (we) earn from qualifying purchases.”


Sunday, November 21, 2021

Cooking For The Holidays? Tie On A Christmas Apron!

If you're cooking for the holidays, you'll want to tie on one of these fun aprons!

Cooking for the holidays? Why not tie on a Christmas apron? Christmas aprons are a recipe for holiday fun! 

Don't ask me how something as simple as an apron can generate so much excitement but believe me when I say it can. Aprons are associated with warm memories. memories of moms, grandmas and great aunts. Memories of growing up and of home and yes, of course, of good food, too. So if you are cooking for Christmas, I suggest you strap on a holiday apron or maybe even present one as a beautiful gift to the cook in your family. On this page, we will review a few great Christmas aprons. 

NEW APRONS


New aprons abound but I liked the set shown above from Amazon that actually includes four aprons. I love the idea of being ready to put everyone to work in the kitchen this Christmas.

These four aprons start with the basic pattern of buffalo plaid in bright, Christmastime colors and are printed with assorted rustic Christmas and nostalgic themes like snowflakes, vintage trucks, bells, garlands, birds, mugs of hot chocolate and more. Find this set of four on Amazon by clicking right here.

The Grinch Who Stole Christmas
For fans of Dr. Seuss, a Christmas apron that reads, "In a world full of Grinches be a Cindy Lou Who."
Inspired by the Dr. Seuss story, here is a wonderful new apron featuring The Grinch Who Stole Christmas. It reads, "In a world full of Grinches, be a Cindy Lou Who!" Brilliant sentiment and of course, it features images of two of our favorite Christmas characters. Find it here on Amazon.

Santa Claus Believe


For those who embrace the spirit of Christmas, you'll love this handmade apron with its plaid, polka dot and Santa theme.

I love this handmade Santa Claus-themed apron from Etsy. It has so much spirit, featuring polka dots, plaids, Santa Claus and Christmas-themed words.  The presence of the simple word 'Believe' reminds me of the Chris Van Allsburg book and movie, The Polar Express. This apron would make a fabulous gift for any fan of that story or of the holidays in general.  Find it and a few similar aprons with other Christmas themes in the Etsy shop of Little Links Co. by clicking right here.  

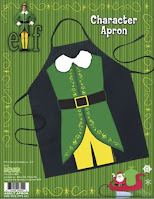
Loved the Will Ferrell's Christmas movie Elf? You'll love this apron!
Elf the Movie

Can you find new Christmas aprons on eBay? Yes, you can! Often eBay has a much wider selection available than at our local shops because they have retired aprons, which are no longer available at retail. Anyway, to see the large selection of new aprons on eBay, just search on eBay for Christmas apron, click the condition box on the left and select new or simply follow this link to eBay. 

If you are interested specifically in this now-retired apron from the movie Elf, click here. It would suit fans of the movie and those who simply want to dress like an elf. eBay is the best place to find items like this that are out of production.

VINTAGE APRONS


For some old fashioned style, consider a vintage apron like this one with a cheery Santa Claus.

ETSY and EBAY both offer up a wide assortment of vintage holiday aprons that are practical and fun, too! Remember that vintage items are often one-of-a-kind pieces and once they are sold they are gone forever. If you see one you like don't hesitate. Don't let something you love get away.

The Santa Claus apron shown above is from the Etsy shop of Vintage Chic Dream. I love the cheery Santa. You can find it by clicking right here or, if it is sold, you can find more vintage Christmas aprons on Etsy here.

Rather shop on eBay? Follow this link to see eBay's collection of vintage Christmas aprons.

HOW TO MAKE A CHRISTMAS APRON


Christmas Aprons With Famous Stacie

If you are interested in making your own Christmas apron, you will appreciate this video with The Famous Stacie. It is a DIY video on how to make your own personalized Christmas aprons using a purchased apron. You will LOVE how simple Stacie's idea is with sayings like "Tidings of Comfort and GEORGE" and "Unto us a CHAD is born."


How To Make Holiday Aprons by Jo Pearson

This video is called How To Make Holiday Aprons and is by Jo Pearson, Michaels' Creative Expert. Jo demonstrates an easy way to make a holiday apron using paint and featuring a gingerbread man. She also shows numerous easy-to-do variations. "Run, run as fast as you can...you can't catch me, I'm the gingerbread man!"


How To Make An Apron Resource Page

Finally, if you are interested in making an apron, you might like to check out my resource page, How to Make an Apron, where you will find more interesting 'how to' videos, more aprons and more information about making your own aprons!

-------------------------------------------------------
 
I believe that an apron is the ultimate fashion accessory for the kitchen whatever the occasion. Will you be wearing a holiday-themed apron this Christmas?

See you
at Christmastime!
Brenda

MORE APRONS


Wear a Halloween Apron
Looking for a Halloween apron? You might find just what you are looking for here on this page.

Real Men Don't Wear Aprons, Do They?
There are so many amazing aprons for men available that the choice seems almost endless. On this page you will find a selection of humorous but tasteful aprons and a debate about whether or not men actually do wear aprons...I hope you will...

The Best Sizzlin' Hot Barbecue Aprons
Summertime and the living is easy. Great weather, good music and your trusty friend, the barbecue, will help you prepare some good food. Before you throw your meat on the grill though you might want to throw on a grilling apron.

On this page, find the ingredients to create a cookie themed gift set, which include, unsurprisingly, a cookie-themed apron.

Discover chef Julia Child's apron.


Note: The author may receive a commission from purchases made using links found in this article. “As an Amazon Associate, Ebay (EPN) and/or Esty (Awin) Affiliate, I (we) earn from qualifying purchases.”


Thursday, August 5, 2021

Upcycled DIY End Table Pet Bed

Upcycled DIY End Table Pet Bed
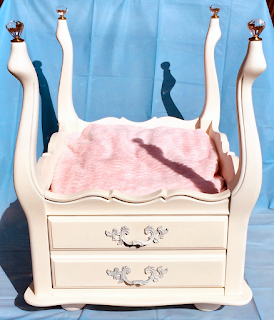
Upcycled End Table Pet Bed

As a continuation of my DIY series on repurposed furniture projects, I present to you my latest pet bed creation.  These upcycled end table dog or cat beds are extremely popular with both fur babies and their pet parents.  I speak from direct experience.  My animals spend nearly all of their time in these beds.  

The four-poster pet bed featured here can be easily completed in a weekend.  Here's a quick rundown of the process I used to bring new life to a vintage end table.  

Supplies Needed: 

  1.  Vintage End Table
  2.  Sand Paper or Sanding Sponge
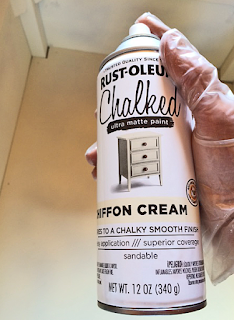
  3.  Paint (I used Rust-Oleum Chalked Spray Paint - Chiffon Cream)
  4.  Bun Feet (optional)
  5. Finials (I used crystal drawer knobs; lamp finials are another great option)
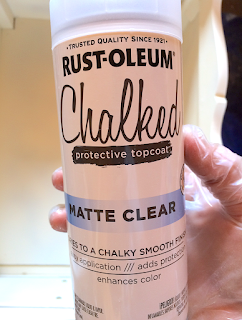
  6. Clear Coat Sealer (I used the Rust-Oeum Chalked Paint Matte Topcoat)
Tools Used:
  1. Screwdriver
  2. Hack Saw
  3. Sander
  4. Drill
  5. Pliers
  6. Brad Nailer

vintage end table
Vintage End Table (Before)

I started with a quick shopping trip to the Habitat for Humanity ReStore and the Goodwill Store.  This vintage end table was perfect for my project and easy on my budget (eight dollars).  It's nice to get a bargain while supporting a cause near and dear to my heart.

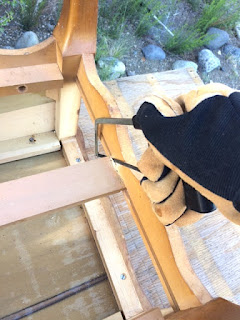
Step One: Flip table. Pull out drawer. Remove inner drawer supports to clear space for bed. I simply used a mini hack saw to cut the cross piece and then a screwdriver to remove the two side supports. 

upside down end table with drawers removed
End Table With Drawer Removed


cutting out the drawer base of a vintage end table
Cutting Out Drawer Brace


removing screws
Unscrewing Side Drawer Support


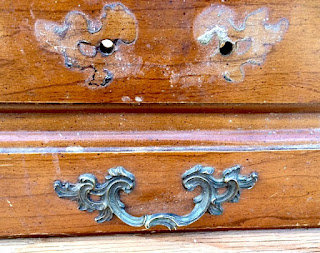
Step Two: Remove drawer pulls by unscrewing inside hardware.  Save parts for later.

removing handles
Removing Drawer Pulls

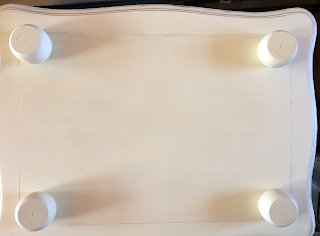
Step Three: Pull off the plastic leg disks used for leveling and protecting the floor.  Discard.

removing plastic leg disks
Removing Plastic Leg Disks

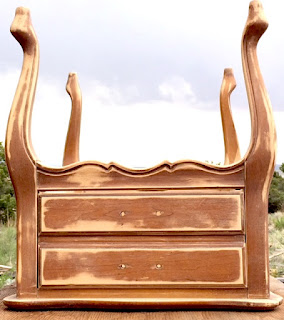
Step Four: Cut off the back part of the drawer and reinstall drawer front (I cut it with a hacksaw leaving an inch of the drawer's side and then used a brad nailer to affix it).  As you can see from the second photo, the drawer takes up room needed for the pet bed.  However, the drawer face is needed for the front side of the cabinet.  I considered using the drawer to make a little step up into the princess bed.  That would be a fun option if you have a tiny dog that could use a boost.


vintage end table prepared for refinishing
Drawer Front/Side After Cut-Off


end table drawer
Drawer Inside Table (Before)

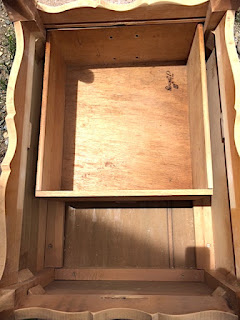
Step Five: Install supports and false bottom for bedding area.  The wood pieces will provide enough depth to drill in the bolts for the bun feet (from the other side). The veneer of the end table top was too thin for the bolts and bolt inserts, hence the wood blocks covered by a sheet of masonite.

false bottom of vintage end table
Supports For False Bottom

masonite covering
Masonite Covering Bottom Supports

Step Six: Sand wood in preparation for two fresh coats of paint.

preparing and sanding a vintage end table
Paint Prep - Sanding

Step Seven: Prime and paint with two coats of Rust-Oleum Chiffon Cream chalked paint.

spray paint
Chiffon Cream Spray Paint

Step Eight: Seal the paint with a clear finish. I used the Rust-Oleum matte topcoat.

clear topcoat
Clear Topcoat Protective Finish

Step Nine
: Attach bun feet. This was done by drilling holes for the bolt inserts.

bun feet
Bun Feet Installed With Threaded Inserts

Step Ten: Screw in finials atop the legs.  I love the rainbows that wash over the bed when sunlight shines through the prisms.

crystal finials
Crystal Finials Installed

Step Eleven: Reattach the drawer pulls after painting them.  I used the same creamy chalk paint.

painted drawer pulls on painted end table
Painted Drawer Pulls Back In Place

Step Twelve: Select fabric and make a cozy bed cushion/pillow.  I used foam cushions and two fabric selections: one is a fleece damask pattern in pink and chocolate; one is a super soft ribbed pink chenille.  Which do you like best?  

fleece bed cushion
Damask Fleece Bed Cushion

chenille bed cushion
Pink Ribbed Chenille Bed Cushion

So there you have it.  Upcycling is a fun way to exercise your imagination while feeling great about saving an item from a premature demise.  Why send something to the landfill when it has plenty of life left in it?  

I like to think this old end table is pretty pleased to be looking better than ever and to be enfolding the life of a beloved pet.  There's nothing like being needed and valued.  

Interested in more pet bed demos?  Check out my DIY upcycled dresser drawer beds.  My cats adore them.

Stay tuned for upcoming DIY demo projects.  Up next is an antique door hall tree and a vintage metal suitcase coffee table (recent Habitat for Humanity ReStore finds that I could not resist).


Note: The author may receive a commission from purchases made using links found in this article. “As an Amazon Associate, Ebay (EPN) and/or Esty (Awin) Affiliate, I (we) earn from qualifying purchases.”


Wednesday, July 14, 2021

How to Make an Apron Resource Page

A page full of ideas of aprons to craft. If you love aprons and sewing, you will be inspired, for sure!

A PAGE FULL OF RESOURCES TO HELP YOU MAKE AN APRON


This page is packed with resources for anyone wanting to make an apron. Whether you want to make one for yourself or for someone else, you've come to the right spot. It will point you in the direction of some wonderful resources that are available online for making your very own aprons.

I have included a few Youtube videos that show you how to make aprons, including one from Angel Fleece Aprons and one from the Missouri Star Quilt Company. I have also included links to pages with great apron how-tos an interesting apron-making book from Amazon.

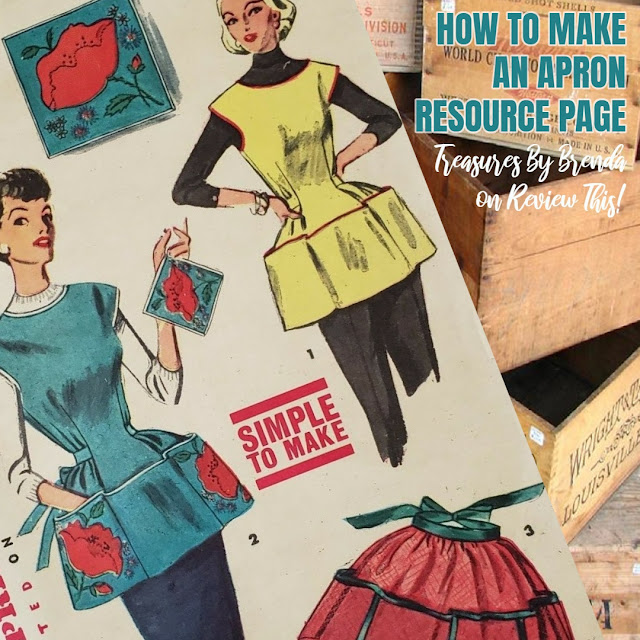
The aprons shown above are from a vintage 1950s Simplicity pattern, number 4492. I love the turquoise blue one and the big pockets! You can find it on eBay by clicking here.

I hope this page inspires you to make an apron.

HOW TO MAKE AN APRON VIDEO FROM ANGEL OF FLEECE


This first video is inspired by the Baking Outside the Box cookbook. Angel of Fleece steps you through the creation of an elegant apron.


HOW TO MAKE AN APRON VIDEO FROM A TEA TOWEL BY THE MISSOURI STAR QUILT COMPANY (PARTS 1 & 2) 


HOW TO CREATE A RETRO APRON BY CINDY TAYLOR OATES

Cindy Taylor Oates has written a few retro-themed pattern books in this series that offers well written instructions and excellent illustrations. The patterns need to be traced because they are printed on two-sided paper but doing so is, according to reviewers, worth the effort. The author includes ways to make the apron look retro and ways to make it look contemporary so no matter your style, the aprons in this book can be adopted to suit. Click here to find these Retro Aprons books on eBay.

HOW TO SEW A FULL APRON VIDEO FROM PROFESSOR PINCUSHION


HOW TO SEW A SIMPLE APRON FROM MELANIE HAM


HOW TO MAKE AN UPCYCLED DENIM APRON FOR CHILDREN


BLOGS & POSTS DEDICATED TO MAKING APRONS


His and Her Aprons
Blogger Make it and Love It shares, His and Her Aprons.

Romantic Cottage or Shabby Chic Style Apron
Blogger Sew4Home shares how to make a romantic cottage or shabby-chic style apron.

How to Make an Apron on eHow.com
This page at eHow will step you through ow to make a simple bib-style apron. It is a good project for beginners.

Make A Make Do Apron
Mary Jane shows you how to make an apron out of a shirt. That reminds me of the aprons my great grandmother crafted from a worn out dress.

How to make an apron with one yard of fabric. 

An easy-to-make pattern.

An awesome project for a new sewer.

No pattern needed for this kitchen apron.

Martha Stewart shows you how.

A FEW APRON FACTS


Previous polls on this page when it appeared elsewhere online showed that 40 percent of the people who visited owned an apron and that 43 percent were looking for a new project or an apron inspiration. Only 19 percent of the visitors said that they ALWAYS don an apron when they're in the kitchen but 30 percent of them said that they should but only do so when cooking a particularly messy item. That is where I fit, in that last 30 percent. How about you? Do you usually wear an apron? Are you looking to craft a new one?

See you in the kitchen.
Hopefully, with your apron on!
Brenda

MORE APRON READING:


Note: The author may receive a commission from purchases made using links found in this article. “As an Amazon Associate, Ebay (EPN) and/or Esty (Awin) Affiliate, I (we) earn from qualifying purchases.”


Saturday, July 28, 2018

How To Make The Easiest Cuticle Oil Ever

How to make the easiest cuticle oil ever
Photo's by Lou16
Today I'm going to review how to make the easiest cuticle oil ever. Once you see how easy it is you'll wonder why you haven't always made your own DIY cuticle oil!

Don't use a cuticle oil? You're not alone, it's a step many people miss out when they do their nails at home. I must admit, but cuticles were in pretty bad shape and I would just rub my hand cream into them and think 'oh well, that's just my cuticles!'

This year I've decided to treat myself my getting my nails done once a month (well it's about every three weeks, but my husband thinks it's a monthly thing LOL!) and I do love it when they pop on the cuticle oil at the end. My cuticles are looking much better, but they would look even better if I used it a little bit more often.

Now I like the idea of using natural products and not having some of the additives that you find in some skincare/personal care products being present. I also know that lemon oil is great for softening cuticles, I just had to look for some cuticle oil recipes ...

There are so many recipes for DIY cuticle oil that they would make your head spin, but many of them used so many ingredients that it just seem such an effort. Using sweet almond oil, jojoba oil, vitamin E oil and about 5 different essential oils just seemed a lot for me to recommend to people, after all we don't have all these ingredients just lying around the house do we?

Well I found a recipe that used olive oil and just two essential oils and I changed the essential oils (based on my own aromatherapy knowledge, and on what I had on hand) and I've come up with the easiest cuticle oil ever -

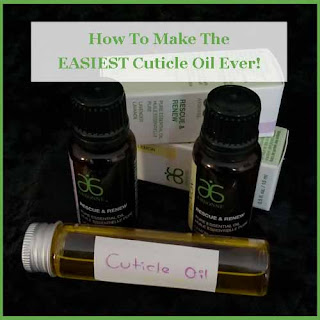
How to make the easiest DIY cuticle oil ever - every thing ready to begin - olive oil, lemon oil, lavender oil, bottle and funnel

Easy DIY Cuticle Oil That Your Nails Will Love!


4 tbsp extra virgin olive oil
2 drops pure lemon essential oil
2 drops pure lavender essential oil.

Simply mix the ingredients together and keep in a bottle, I recommend seeing if you can find a nail polish style of bottle with a nail polish brush to keep it in (they didn't have any at my local store) or even a roller bottle.

These type of bottles will made it easier to apply, but aren't essential.   As you can see from my photo I just used a test tube style bottle (as I had it on hand) and I use a Q-tip to add the oil around my nails. I will let you know, however, that I have some roller bottles on order.

Lemon oil is fantastic for softening hard skin which is why it's a perfect addition to a cuticle oil. Lavender oil is a very nourishing oil, softening and just great for skin. The combination of these two oils works fantastically to help keep your cuticles looking fabulous and as an added bonus, using a cuticle oil after a manicure actually helps it stay looking beautiful for longer something I've only just found out!

                                                                                                                                                              
EXTRA TIP - if you take vitamin E capsules then simple pierce one of them and squeeze the contents into the cuticle oil.  It will make the oil even more moisturizing and rich (a much cheaper alternative to adding vitamin E oil!).
                                                                                                                                                                                                                                                                                                                             
It's very important that you use pure essential oils and not synthetic ones when making your own skincare as each essential oil brings it's own benefits and fragrant oils don't have these benefits.

I love to use Arbonne's essential oils when available, if I'm after an oil that they don't have then I make sure that the one I buy is 100% pure essential oil.

Aromatherapy Isn't Just About DIY Skincare!


You can use essential oils for lots of different things, here's a few articles that you might find interesting ...

How Aromatherapy can Help StressHow Aromatherapy Can Help Stress
Aromatherapy has proven to be very successful at helping to relieve stress, simply by using certain essential oils stress and conditions caused by stress can be alleveiated.

Essential Oil Room Humidifier and DiffuserEssential Oil Room Humidifier and Diffuser
Using essential oils in a humidifier or diffuser can add a lovely atmosphere to a room as essential oils can really help to work on your emotions from relaxing you or making you more upbeat.

Reviewing Uses for Tea Tree OilReviewing Uses for Tea Tree Oil
The herbaceous fragrance of tea tree doesn't begin to hint at how many uses there are for this essential oil from medicinal to beauty to household uses this is one very versatile essential oil.


How to make the easiest cuticle oil with only 4 ingredients
PIN ME


Note: The author may receive a commission from purchases made using links found in this article. “As an Amazon Associate, Ebay (EPN) and/or Esty (Awin) Affiliate, I (we) earn from qualifying purchases.”


Thursday, June 21, 2018

DIY Mercury Glass


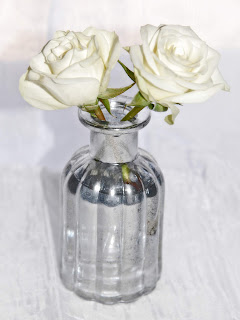
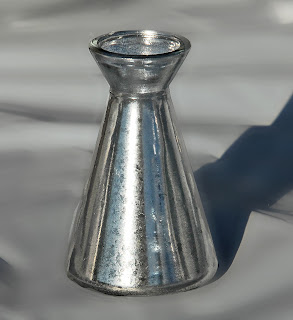
diy mercury glass vase
It's time for a DIY project for the true romantics out there.  Is there anything lovelier than fresh cut flowers in an antiqued mercury glass vase?  Perhaps the reason mercury glass is such a popular centerpiece at weddings is the nostalgic effect it has on us.  I absolutely love the understated beauty and elegance of silvered glass.  The look, and the effect, is way too wonderful to save only for special occasions.  

I invite you to follow along with me and transform your own gorgeous flower vessels.  It takes very little time and money to create the beautiful mercury glass effect presented here.  In less than an hour, you can be enjoying your own timeless centerpiece.  If you're like me, you'll get hooked and create any number of these mercury glass vases for yourself and for gifting to friends and family.  This is a gift you can be sure will be used and appreciated.


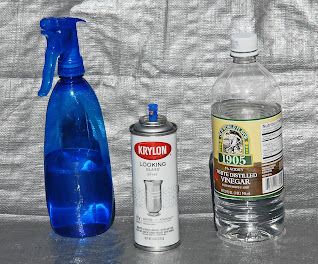
products needed for diy mercury glass
What You Will Need
* Glass vase
* White vinegar
* Water
* Misting pump bottle
* Paper towels

Optional
* Tarp or plastic drop cloth
* Wooden dowel rod
* Gloves

Steps 1-5
  1. Mix one cup of white vinegar with one cup of water.  Pour into misting bottle.
  2. Use a paper towel or soft cloth to wipe your glass clean.
  3. Protect work surfaces with a tarp, newspapers, or a drop cloth.  
  4. Test mister to ensure you will get a very fine spray.
  5. Shake up your spray paint for two minutes.
glass container vase

Step 6
Depending on the type of glass container you are painting, you may find it very helpful to use a dowel rod.  Supporting your vase with a dowel makes it easy to mist and spray all of the surfaces at the same time (without getting paint on your hands or fingerprints on your vase).  It also enables you to spray the bottom of the vase without waiting for the paint to dry on the sides of the container.

When I was painting the test tube vases, I used short dowel rods that I stood on end in an old piece of wood.  All I did was drill some holes in a two-by-four.  Then, I stacked each test tube on a dowel, leaving enough space in between to give me room to maneuver with the mister and spray paint.


spray painted

Steps 7-8
Spray a very fine mist of the vinegar water on your vase.  The key to success is to start with a very light coating of the mist.  If you get large, running droplets, go ahead and wipe it down with a paper towel and start again.

Immediately spray over the mist with a light coat of the Looking Glass spray paint.  You will repeat these steps two to three times, so it is important not to try to get all of the silvering done all at once.  Light layering is essential to getting the desired vintage look of mercury glass.


painting progress diy mercury glass

Step 9
Very gently dab all over the misted and painted surface of the glass with a clean and dry paper towel. You want to blot up all spots of water and any larger droplets of paint.  This step creates the aged look of the silvered glass.


diy mercury glass vase

Step 10
Repeat the misting, painting, and blotting process until you are happy with the final effect.  I repeated the process three times on the vases pictured in this tutorial.

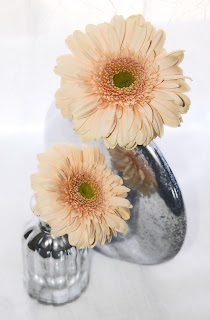
diy mercury glass vase with flowers

Step 11
Once the paint is dry, experiment with arranging your favorite flowers in your gorgeous mercury glass vases.  They look really nice in groupings of various sizes and shapes.

diy mercury glass holders with flowers
In this example, I placed three mercury glass test tubes in an antique bed spring.  The addition of a beveled mirror base created stability and an interesting reflective quality.  Peonies seemed just right for this type of vintage floral arrangement.


diy mercury glass vase with flowers

Mercury glass centerpieces don't have to be expensive to look like you spent big bucks at a floral shop.  Use the glass you already have at home.  It is so easy to upcycle any ordinary jar or cheap vase into something extraordinary.  There is something incredibly satisfying about giving a face-lift to a common, plain item.

We all hold the power of transformation in our hands.  Let's go create and share some beauty today.


Note: The author may receive a commission from purchases made using links found in this article. “As an Amazon Associate, Ebay (EPN) and/or Esty (Awin) Affiliate, I (we) earn from qualifying purchases.”


Most Recent Reviews on Review This Reviews


Search for Reviews by Subject, Author or Title

The Review This Reviews Contributors


SylvestermouseSylvestermouseDawn Rae BDawn Rae BMbgPhotoMbgPhotoBrite-IdeasBrite-IdeasWednesday ElfWednesday ElfOlivia MorrisOlivia MorrisTreasures by BrendaTreasures by BrendaThe Savvy AgeThe Savvy AgeMargaret SchindelMargaret SchindelRaintree AnnieRaintree AnnieLou16Lou16Sam MonacoSam MonacoTracey BoyerTracey BoyerRenaissance WomanRenaissance WomanBarbRadBarbRadBev OwensBev OwensBuckHawkBuckHawkDecorating for EventsDecorating for EventsHeather426Heather426Coletta TeskeColetta TeskeMissMerFaeryMissMerFaeryMickie_GMickie_G


Review This Reviews is Dedicated to the Memory of Our Beloved Friend and Fellow Contributor

Susan DeppnerSusan Deppner

We may be apart, but
You Are Not Forgotten


“As an Amazon Associate, Ebay (EPN) and or Etsy (Awin) Affiliate, I (we) earn from purchases.” Disclosure Statement

X