Showing posts with label craft ideas. Show all posts

Thursday, July 30, 2020

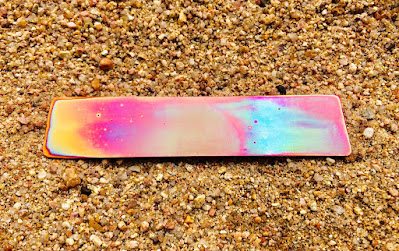
DIY Copper Bookmark - Painting With Fire

DIY Copper Bookmark
DIY Copper Bookmark

I have always been a maker.  At the moment, I find myself fascinated with copper as canvas. There is something entirely mesmerizing about painting with fire on copper.  Over the past few days, I have experimented with the creation of copper bookmarks.  I'd like to share the process for those who might enjoy giving this a try.

You can do so much with copper, but I am focusing, right now, on hammered, stamped, and annealed copper.  I call the annealing of my pieces "painting with fire."  It is my absolute favorite part of this project.  When you take a torch to copper, you never know exactly how the finished piece will look.  I am always delighted to see the surprising effects of heat on my metal works of art.

My M.O. (modus operandi) happens to be the repurposing of materials.  I love nothing more than to bring new life to those things that have unseen, or unused, potential.  In this case, I was fortunate enough to reclaim some small copper sheets that were the remnants of a solar installation.  Though the metal was scratched and tarnished, with irregular edges, I knew it held great promise, and a beauty to be found when its true colors were revealed.  These are the steps I took to transform the copper.

Step One: Cutting the Copper
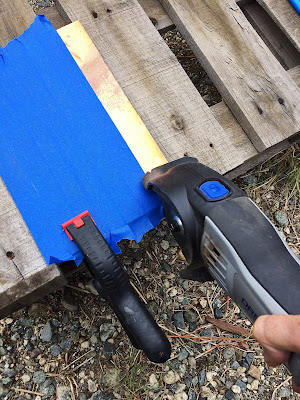
I first considered using a hacksaw to cut the copper sheets into bookmark-sized pieces.  After trying that, I decided it would be much faster and easier to use my Dremel Saw-Max with the metal cut-off wheel.  That worked perfectly.  The important thing was to protect the surface of the copper using painter's tape.
cutting the copper
Cutting the Copper Using Dremel Saw-Max

Step Two: Filing the Rough Edges
After cutting the copper, the edges needed to be deburred to remove the sharp slivers of metal.  I used a round file for this step.

metal bookmark
Filing the Metal Burrs

Step Three: Rounding the Corners
Because the corners of the bookmark were sharp, the next step was to use my Dremel rotary tool, with a sanding bit, to gently round off those points.
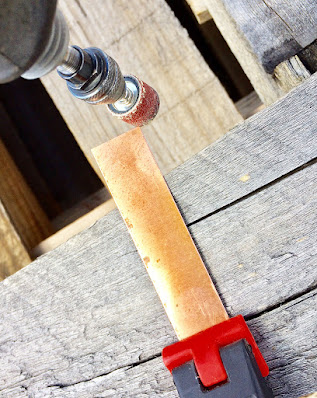
rounding the corners of a piece
Rounding the Corners Using Dremel Rotary Tool

Step Four: Cleaning the Copper Surface
Before heating the copper, I needed to clean off the surface tarnish, fingerprints, etc.  The simple way to do this is with fine steel wool (00 grade) and a little elbow grease.  When I was done, the copper was nice and shiny (see the center image below).  I chose to leave some of the character marks (a few nicks and minor scratches).  My work is not meant to have a machined look.  I want it to be wabi-sabi (where the imperfection is the beauty).

preparing metal
From Tarnished to Bright, Shiny Copper

Step Five: Painting With Fire
I love this step!  My bookmark blank is now laid on a moist sand mound.  I place the front side of the bookmark facing down (because that is the side of the copper that will have the most colorful effect after I torch the back side).  I use a mini butane torch to paint (anneal) the copper.  Basically, I just heat the metal until it begins to turn vibrant purple, blue, and fuschia colors.  The possibilities are endless and no two "paintings" are ever the same.

butane mini torch
Butane Mini Torch and Fuel

painting copper with fire
Painting With Fire - Torching the Copper Blank

copper bookmark
Newly Torched Copper Bookmark

painted copper bookmark
The Infinite Variety of Fire - Painted Copper Bookmarks

Step Six: Water Bath
Using a forceps, I then plunge the hot metal into a cool water bath.  Next, I pat dry the copper with a soft cloth.  (It's also important to wear clean, soft gloves so you don't mar the metal surface with fingerprints, etc.)

cooling torched copper
Cooling the Torched Copper in a Water Bath
Step Seven: Stamping the Bookmark
At this point, I used metal stamps (Impress Art uppercase alphabet set) to imprint a message on the front of the bookmark.  This is the hardest part of the process.  Getting the spacing and impressions right can be extremely challenging.  I had to leave the perfectionist in me out of the equation and just go for it.  What will be, will be!  And that is okay.  It is the charm of handmade art.

stamped copper bookmark
Stamped Copper - Rumi Quotation


Step Eight: Edging the Bookmark
Depending on the look you want, you can leave the edges of the bookmark plain, but I wanted a hammered copper look.  This is where I used a ball-peen hammer to make some shallow depressions all around the perimeter of the piece.

hammered copper edge on bookmark
Creating Hammered Copper Edge Using Ball-Peen Hammer

Step Nine: Finishing the Piece
I used a tiny bit in my Dremel rotary tool to drill a hole in the end of the bookmark (for attaching a chain and embellishments).  Next, I applied a finish wax (a natural carnauba wax) to protect the surface from fingerprints, tarnish, etc.  Finally, I chose a pair of wing charms to be a whimsical play on my chosen sentiment.
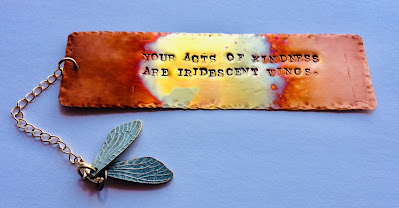
finished copper bookmark
Finished Copper Bookmark

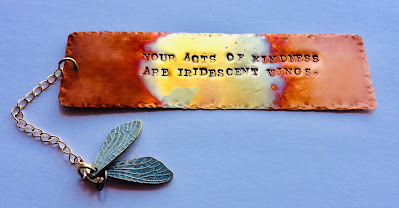
Your acts of kindness are iridescent wings of divine love,
Which linger and continue to uplift others
Long after your sharing.  ~Rumi

I may consider creating a few custom bookmarks for my Etsy store.  Most likely, though, these pieces will be offered as gifts because they are truly a labor of love.


Note: The author may receive a commission from purchases made using links found in this article. “As an Amazon Associate, Ebay (EPN) and/or Esty (Awin) Affiliate, I (we) earn from qualifying purchases.”


Thursday, June 21, 2018

DIY Mercury Glass


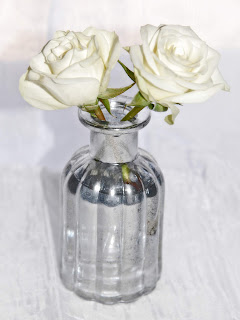
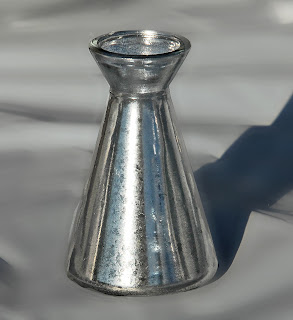
diy mercury glass vase
It's time for a DIY project for the true romantics out there.  Is there anything lovelier than fresh cut flowers in an antiqued mercury glass vase?  Perhaps the reason mercury glass is such a popular centerpiece at weddings is the nostalgic effect it has on us.  I absolutely love the understated beauty and elegance of silvered glass.  The look, and the effect, is way too wonderful to save only for special occasions.  

I invite you to follow along with me and transform your own gorgeous flower vessels.  It takes very little time and money to create the beautiful mercury glass effect presented here.  In less than an hour, you can be enjoying your own timeless centerpiece.  If you're like me, you'll get hooked and create any number of these mercury glass vases for yourself and for gifting to friends and family.  This is a gift you can be sure will be used and appreciated.


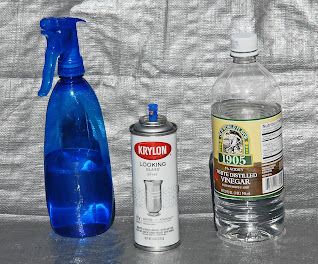
products needed for diy mercury glass
What You Will Need
* Glass vase
* White vinegar
* Water
* Misting pump bottle
* Paper towels

Optional
* Tarp or plastic drop cloth
* Wooden dowel rod
* Gloves

Steps 1-5
  1. Mix one cup of white vinegar with one cup of water.  Pour into misting bottle.
  2. Use a paper towel or soft cloth to wipe your glass clean.
  3. Protect work surfaces with a tarp, newspapers, or a drop cloth.  
  4. Test mister to ensure you will get a very fine spray.
  5. Shake up your spray paint for two minutes.
glass container vase

Step 6
Depending on the type of glass container you are painting, you may find it very helpful to use a dowel rod.  Supporting your vase with a dowel makes it easy to mist and spray all of the surfaces at the same time (without getting paint on your hands or fingerprints on your vase).  It also enables you to spray the bottom of the vase without waiting for the paint to dry on the sides of the container.

When I was painting the test tube vases, I used short dowel rods that I stood on end in an old piece of wood.  All I did was drill some holes in a two-by-four.  Then, I stacked each test tube on a dowel, leaving enough space in between to give me room to maneuver with the mister and spray paint.


spray painted

Steps 7-8
Spray a very fine mist of the vinegar water on your vase.  The key to success is to start with a very light coating of the mist.  If you get large, running droplets, go ahead and wipe it down with a paper towel and start again.

Immediately spray over the mist with a light coat of the Looking Glass spray paint.  You will repeat these steps two to three times, so it is important not to try to get all of the silvering done all at once.  Light layering is essential to getting the desired vintage look of mercury glass.


painting progress diy mercury glass

Step 9
Very gently dab all over the misted and painted surface of the glass with a clean and dry paper towel. You want to blot up all spots of water and any larger droplets of paint.  This step creates the aged look of the silvered glass.


diy mercury glass vase

Step 10
Repeat the misting, painting, and blotting process until you are happy with the final effect.  I repeated the process three times on the vases pictured in this tutorial.

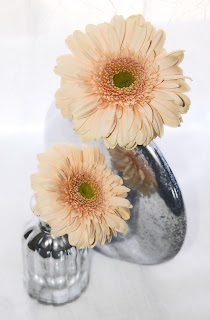
diy mercury glass vase with flowers

Step 11
Once the paint is dry, experiment with arranging your favorite flowers in your gorgeous mercury glass vases.  They look really nice in groupings of various sizes and shapes.

diy mercury glass holders with flowers
In this example, I placed three mercury glass test tubes in an antique bed spring.  The addition of a beveled mirror base created stability and an interesting reflective quality.  Peonies seemed just right for this type of vintage floral arrangement.


diy mercury glass vase with flowers

Mercury glass centerpieces don't have to be expensive to look like you spent big bucks at a floral shop.  Use the glass you already have at home.  It is so easy to upcycle any ordinary jar or cheap vase into something extraordinary.  There is something incredibly satisfying about giving a face-lift to a common, plain item.

We all hold the power of transformation in our hands.  Let's go create and share some beauty today.


Note: The author may receive a commission from purchases made using links found in this article. “As an Amazon Associate, Ebay (EPN) and/or Esty (Awin) Affiliate, I (we) earn from qualifying purchases.”

Thursday, December 29, 2016

Site Review of Teabag Folding|Paper Facets

Review of Teabag Folding Site


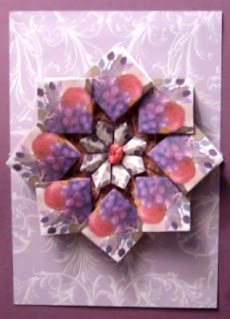
Teabag Folding rosette from Teabag Folding website
Rosette from Teabag Folding Site
If  you are a fan of hand made cards you will love the site: http://paperfacets.com. 

It has many beautiful cards for you to purchase and they are very reasonable for such unique designs that are made entirely by hand. Even the shipping is much less than it is on other sites. 

Teabag folding is sort of an obscure paper craft but the results are gorgeous and your card recipients are going to be stunned by the beauty of the cards you give them. I was blown away by all the beautiful cards available on this site.

Learn the Art of Teabag Folding


And if you would like to learn about the craft of paper folding you are in for a treat as the owner has many many tutorials with clear and precise directions to help you from start to finish. (Tea bag folding is also known as flat fold origami.) She also lists and reviews many sources of the supplies you will need to get started making your own beautiful cards and the craft of teabag folding. 


Hand Made card
Hand Made Card from Paper Facets
From the beginning of learning the craft, to learning some of the techniques and patterns, to sourcing some of the materials, and her reviews of some of the suppliers and supplies, you will find everything you need to get started and to become an expert on this very unique paper craft. You will also find hints on how to run an arts and crafts business if you want to take it that far. 

As an aside, I met the owner, Sherry, at an event in 2010 and she was very lovely and funny.  I am not surprised that her art is so wonderful. And that's what it is, art. Each and every card is a little work of art. She told a hilarious story of making her designs while on break when she worked at the phone company for many years so she could rush to craft fairs with her beautiful cards and sell them.

Buy Hand Made Cards at the Teabag Folding Website


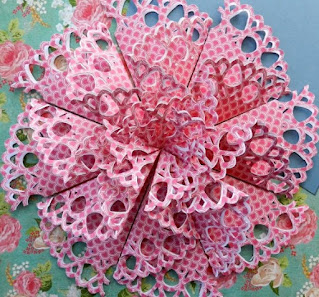
Rosette teabag
Cut Out Rosette from Teabag Folding Site
I am so glad she now has them online so you don't have to find her at a crafts fair. You can just go to her site: Tea Bag Folding or http://paperfacets.com and look at some of her beautiful cards or you can order custom work too by contacting her on the site. There is lots of information for everyone. from the customer to the beginner to the expert paper craft artisan.

I totally recommend Teabag Folding, both the craft, and the site. Prepare to be enthralled. 

Photos on this page are courtesy of  paperfacets.com.


Two books about the paper craft of Origami to get you started:


Note: The author may receive a commission from purchases made using links found in this article. “As an Amazon Associate, Ebay (EPN) and/or Esty (Awin) Affiliate, I (we) earn from qualifying purchases.”


Wednesday, July 15, 2015

Reviewing American Girl Doll Sewing Patterns

Sewing Patterns For American Girl Doll Clothes

Save money or even make money by making doll clothes at home. Using sewing patterns for American Girl doll clothes can save you money and allow you to create unique one of a kind clothing for your doll or the doll that belongs to a special little girl in your life. It is also a way to use up some extra fabrics that are just waiting to be taken out of the "someday I'll use that" pile. Come on, you crafters know of what I speak! There is also the possibility of making yourself some extra income by purchasing several sewing patterns. If you are a good seamstress, you can take these patterns, make some doll clothing and sell them to Moms and Grandmas who do not sew but want something unique and different for their American Girl Doll. You can sell them online or do craft shows. There is some real potential for earning some extra cash for yourself and your family.

A Few Sewing Patterns For Doll Clothing to fit 18 inch dolls

There are just so many options when looking for sewing patterns for American Girl doll clothes and accessories. I found four cute ideas to show you.


This book of patterns includes the instructions and tissue paper pattern sheets to make 16 mix and match outfits for the American Girl dolls or any of the 18 inch dolls on the market. The designer actually took the time to interview little girls to find out what they want for their dolls to be able to wear.

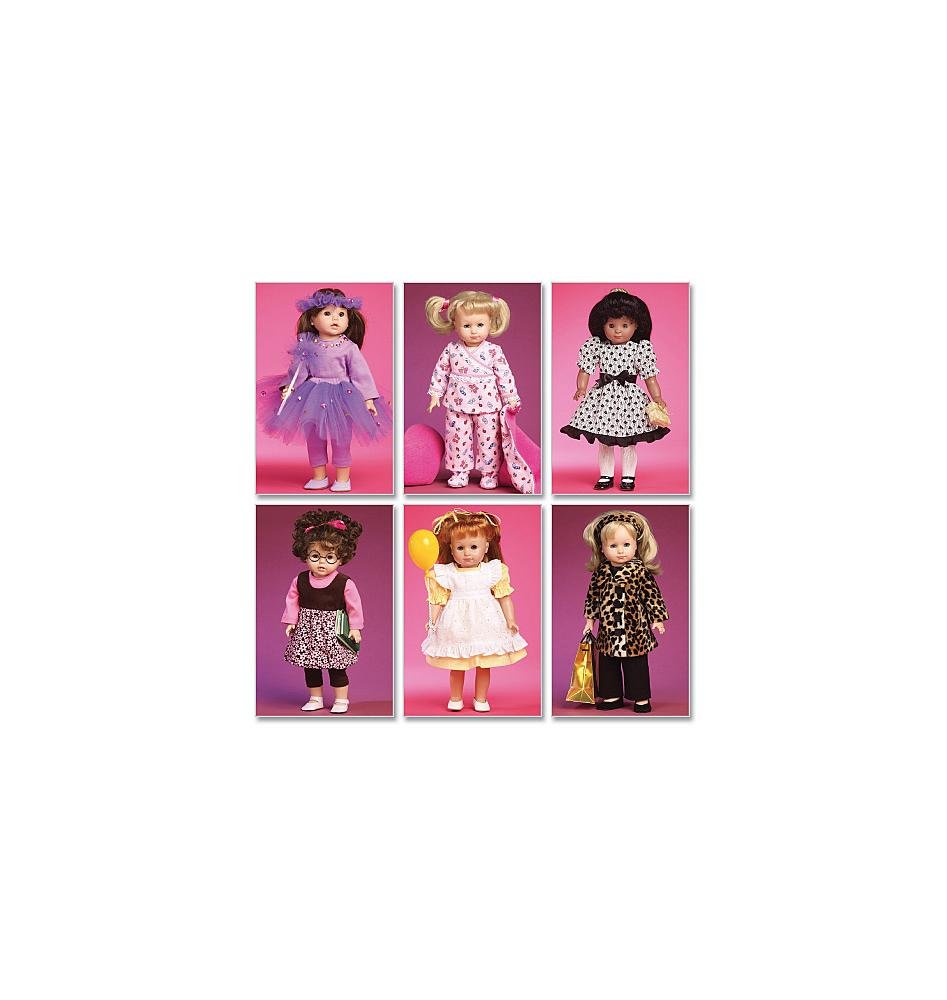
This pattern from the company known for sewing patterns for 145 years, McCall's, offers the instructions and pattern pieces to sew up 6 adorable little outfits for dolls.


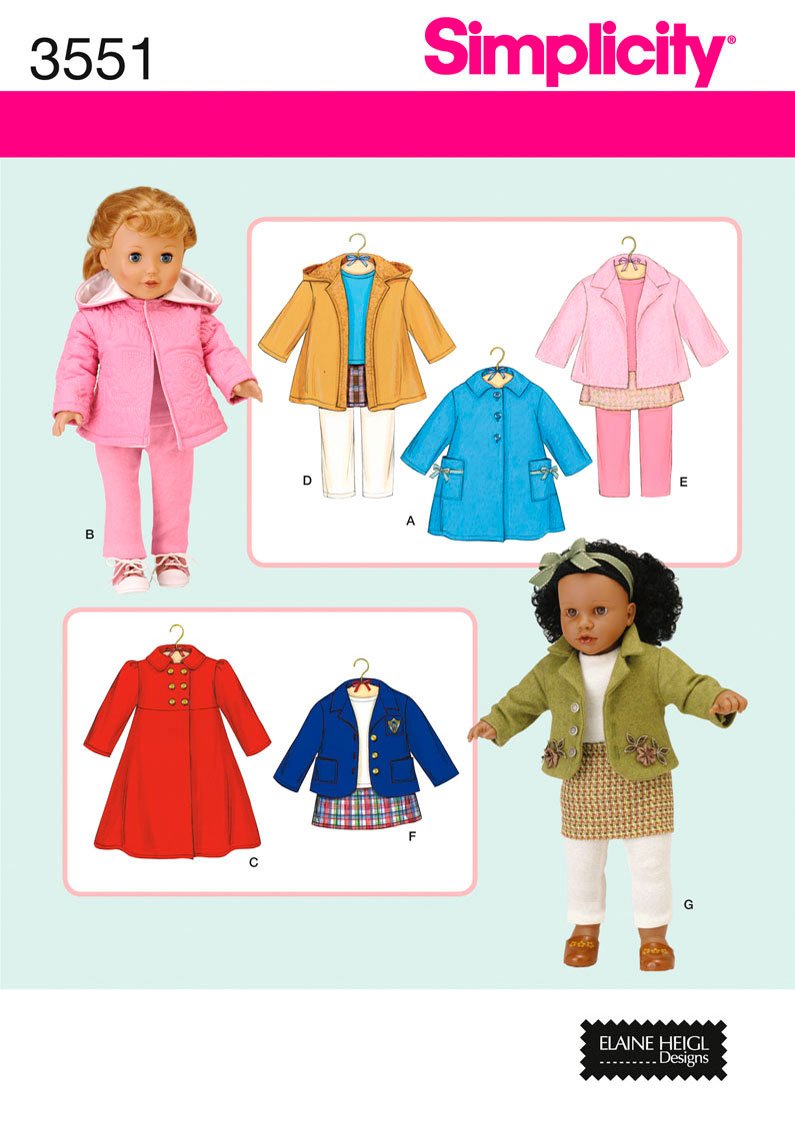
From Simplicity, also a popular company for many decades, we find a sweet little sewing pattern with 41 pieces. You can make a top, pants, skirt, jacket and coat with this one! Depending on the fabrics you choose they can be for the spring and summer seasons or for fall and winter.


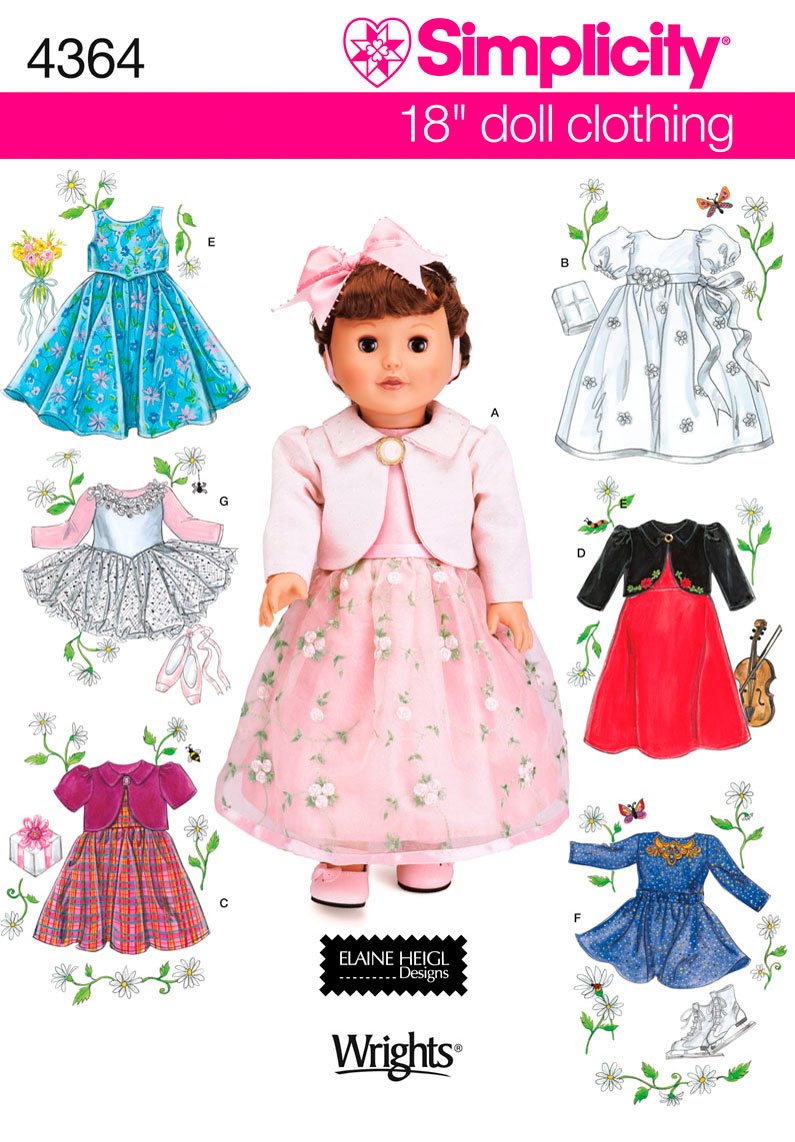
What little girl doesn't love to dress up in a party dress? Well, with this Simplicity sewing pattern for dolls, her little friend can be dressed for a party or special occasion, too. The dress can be sleeveless, short sleeved, long sleeved and the length can be short or long. How much fun is that?

Sewing Patterns For The Historical Character American Girl Dolls

If you have one of the Historical Character Dolls from American Girl, choosing a pattern for doll clothing of the specific era is a distinct option. The Felicity and Elizabeth dolls were from the Colonial era of history so outfits made from patterns with that era in mind are perfect. There are also patterns for other eras that work for the other historical character dolls.

What size sewing patterns do you need?

Not all sewing patterns will say that they are for American Girl Doll Clothes. In fact, most of the time they will state that they are for 18 inch doll clothes. Those will work just fine for the American Girl dolls or 18 inch dolls in general. American Girl also has Bitty Baby and Bitty Twins but those are 15 inch dolls so if you are sewing clothing for them, you will need to shop for the 15 inch size patterns.

Seasonal Fashions In One Sewing Pattern for American Girl Doll Clothes

The really great and economical thing about most doll clothes patterns is that you get more than one outfit in the package. It is not uncommon to find a pattern that allows you to make 6 different outfits that will work for the Spring and Summer clothing or for Fall and Winter.

Suggestion For Selling The Doll Clothes that you make from the sewing patterns

May I offer some suggestions to you if you are planning to make doll clothes for the American Girl Doll or any 18 inch doll and sell them? I believe that it is wise to make a variety of outfits to offer for sale. More importantly, I think it is important that you do not make too many outfits using the same fabric. Mix it up a bit. Your buyers will be looking for something unique that they can't find in a store or online. They don't want an outfit that hundreds of others have one identical to. You can make a cute little sun dress 100 times but use different color combinations and mixtures of fabrics. Perhaps only make 5 that are identical. Believe me, you will sell more that way.

Also, when working on your inventory to offer for sale make sure you have fashions for the specific seasons of the year and holidays. Sports clothing is also very popular for the dolls. Plan to give your customers a nice variety of unique doll clothing.

Pay Attention To Adult Fashion Trends:

Keep your eye on the colors and fashion trends for adults and see if you can use those ideas in making your doll clothes for the American Girl Doll. Especially if you plan to sell them. Trendy colors in your fabrics can lead to some pretty good sales. Your initial investment does not have to be a lot of money. You can start with one pattern and make it in a few different options. Once you have made some money selling those doll clothes, you can invest in additional sewing patterns for American Girl doll clothes.

What should you charge for the doll clothing?

If you have decided to sell the items that you have made using the sewing patterns for American Girl Doll clothes, you should have a plan for how much to charge for each outfit. It isn't always an easy calculation or decision to make. Obviously you need to make enough money to cover the cost of making the outfit. You also need to make some profit to pay for your time and to re-supply your working inventory. A good practice is to look around at online sites and see what the asking price for something similar is. One really good measuring unit is to ask yourself what you would be willing to pay for an outfit from someone else. Chances are if you think the price is too much, so will your potential customers. Try to come up with a fair and affordable price for your customers. If doing a craft show, you can sometimes have a slightly higher price to give yourself some negotiating room for those times when the customer asks if you can do any better on the price. You already added a little cushion to your bottom line. If selling your doll clothing online, remember that the customer is looking at the price of the item plus shipping charges. You might look at what the shipping is going to be and perhaps try to keep the total under $20. Of course that depends on how much you have in the outfit. I would also suggest that you have one price for items you have made up ahead of time to sell and a higher price for custom orders.

Well known Designers Get Into The Spirit Of Dolls

I just love that there are well known designers who are starting to create fun and unique clothing for dolls. Whether it is an American Girl doll or any 18 inch doll they can wear designer clothes made by you or the seamstress of your choosing. Whether you plan to use sewing patterns for American Girl doll clothes to make a few outfits for your own doll, a special little girl's doll, or you want to sell them to others, I hope you had fun looking at the ideas that I have presented on this page. Making doll clothes is a great way to add some income and to use up pieces of fabric. Let me know you stopped in to the craft room today by leaving a comment.


Note: The author may receive a commission from purchases made using links found in this article. “As an Amazon Associate, Ebay (EPN) and/or Esty (Awin) Affiliate, I (we) earn from qualifying purchases.”


Saturday, March 21, 2015

The Crafty Month of March in Review

March is National Craft Month


A collection of handcrafted teddy bears


March is 'National Craft Month', a month which also includes National Crochet Week

This is the perfect time to look at some handmade crafty creations, including DIY projects and tutorials, and read some articles about the art of crafting to get you in the mood for creating.


To Craft means to make or produce something skillfully.


Craft in Green for St. Patrick's Day


Crafting for holidays is quite often a popular endeavor.  Since the month of March includes the St. Patrick's Day holiday, crafters enjoy the opportunity to 'Craft in St. Patrick's Day Green'


Crochet octopus in green
St. Patrick's Day Octopus on eBay

Craft Ideas for National Craft Month


  • If you check out the Craft Section here on Review This, you will find many articles with crafts to try for all the other holidays during the year from Thanksgiving to Valentine's Day and throughout the year right back to the Fall Holidays which begin with Halloween!
  • Or try out one of these DIY Craft Books with projects and gift ideas for a large variety of holidays available on Amazon.

  • A fun example is the one for the next nearest holiday – Easter.  DIY Projects & Gift Ideas for Easter is filled with amazingly easy guided gift ideas for beginners to the more experienced (with pictures!) and is available in Amazon's Kindle Store. 

Handmade gifts are such a joy to create, give and receive and this book will give you lots of crafty ideas.  There are homemade Easter crafts in the popular areas of Easter Eggs and Easter Bunnies and fun DIY Easter food, to name a few of the projects available in this book.


Time to Get Crafting...


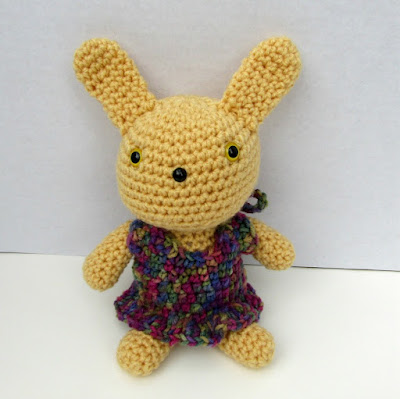
Golden Bunny Girl in handmade crochet
Golden Bunny Girl on eBay

This sweet bunny girl in gold is all dressed up for Easter in a pretty dress. Bunny rabbit in crochet is hopping by to remind you that if you love to craft, but find life getting in the way and your crafting time getting put on a back-burner, circle the month of March on your calendar and use National Craft Month as a reminder to restore your creative self!  


Crochet crafter Wednesday Elf uses National Crochet Week in March as her reminder.

If you are a crafter and have a DIY tutorial to share with those of us who love hand-crafts, please feel free to share a link with us in the comments section. 
 
Wednesday Elf on Etsy
Follow Wednesday Elf on Twitter
Crochet Blog by Wednesday Elf


Note: The author may receive a commission from purchases made using links found in this article. “As an Amazon Associate, Ebay (EPN) and/or Esty (Awin) Affiliate, I (we) earn from qualifying purchases.”


Tuesday, July 15, 2014

Banish Summertime Boredom with Greeting Card Craft Projects!

"Hey Mom (or Dad), I'm bored! What can I do?"

 How many times have you heard those words in your lifetime? Summer is usually when those words ring out in even the busiest homes. The best advice I can give you is to have plenty of paper, glue sticks and colorful markers on hand. If you have a good public library, I suggest that you go to the "Arts and Crafts" section and look for books about greeting card making.

I recently found a delightful crafting book at my own public library.  Pop-Up Paper Structures: The Beginner's Guide to Creating 3-D Elements for Books, Cards & More is jammed packed with well-written instructions for making creative pop-up greeting cards for all kinds of occasions. The best part is that you can adapt any of the design concepts so you can use supplies that you might have on hand. Those are MY kinds of projects--the ones that reuse stuff!

pop-up paper structures book


I have a big storage box where I keep all of my hoarded paper supplies. (If you are a regular reader of this blog you might remember my post about re-using greeting cards. ) That big box is the home for the file with all those greetings card pieces. There is also a big zipper bag with my favorite tools and glues in that same big box.

I am sure your older children will be able to find a pop-up greeting in the book shown above, that they could figure out how to make. Just remember, dear parent, try not to be too critical and just go with the flow. So what if some of the cutting is not as straight as you might expect. Let your children be creative. Sometimes their ideas might just be better than yours.

If you are not in the red and green "holiday" spirit yet, you should read "How to make a Watermelon Card Invitation for Summer Parties", make the card then throw one! Not a watermelon--a party! You will still be red and green, but this card will not feature any holly or red noses!


greeting card craft projects
 "Creative Ways To Recycle Holiday Greeting Cards"
Have you saved a ton of cards, you most definitely should read Creative Ways to Recycle Holiday Greeting Cards. This page abounds with many of ideas for recycling those greetings. I particularly like the projects for a "Star Tree" and a "Woven Card" (see them above--Thank you AcornOakForest for allowing me to use your image!). You will be happy to know that there are wonderful photo tutorials to walk you through the steps for making both of these green crafty projects.

If you need a good crafting glue for paper projects, I highly recommend Elmer's Craft Bond Fabric and Paper Glue. I use it myself to repair books and make my own greeting cards.


Note: The author may receive a commission from purchases made using links found in this article. “As an Amazon Associate, Ebay (EPN) and/or Esty (Awin) Affiliate, I (we) earn from qualifying purchases.”

Friday, May 30, 2014

Flip Flop Time!


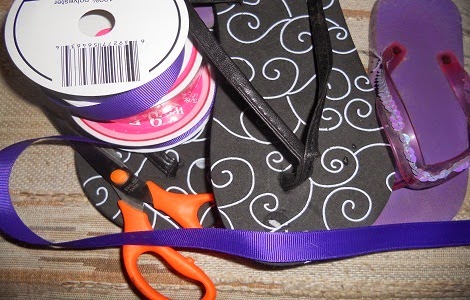
flip flop craft idea
With summer on the horizon and beach vacations in the works, I have decided that it is definitely "Flip Flop Time!"

What better way to get your family excited about summer than creating cute, inexpensive footwear to wear on that beach vacation?  If you shop wisely and use stuff you already have on hand, you could create new sandals for every summer outfit or bathing suit you own. Of course, you should remember that "You Get What You Pay For",  so if you want your personalized sandals to last, buy the best shoe you can afford.  Really examine the shoe to make sure it is made well and will not break the first time you wear it.  Bend that shoe and pull on the straps!

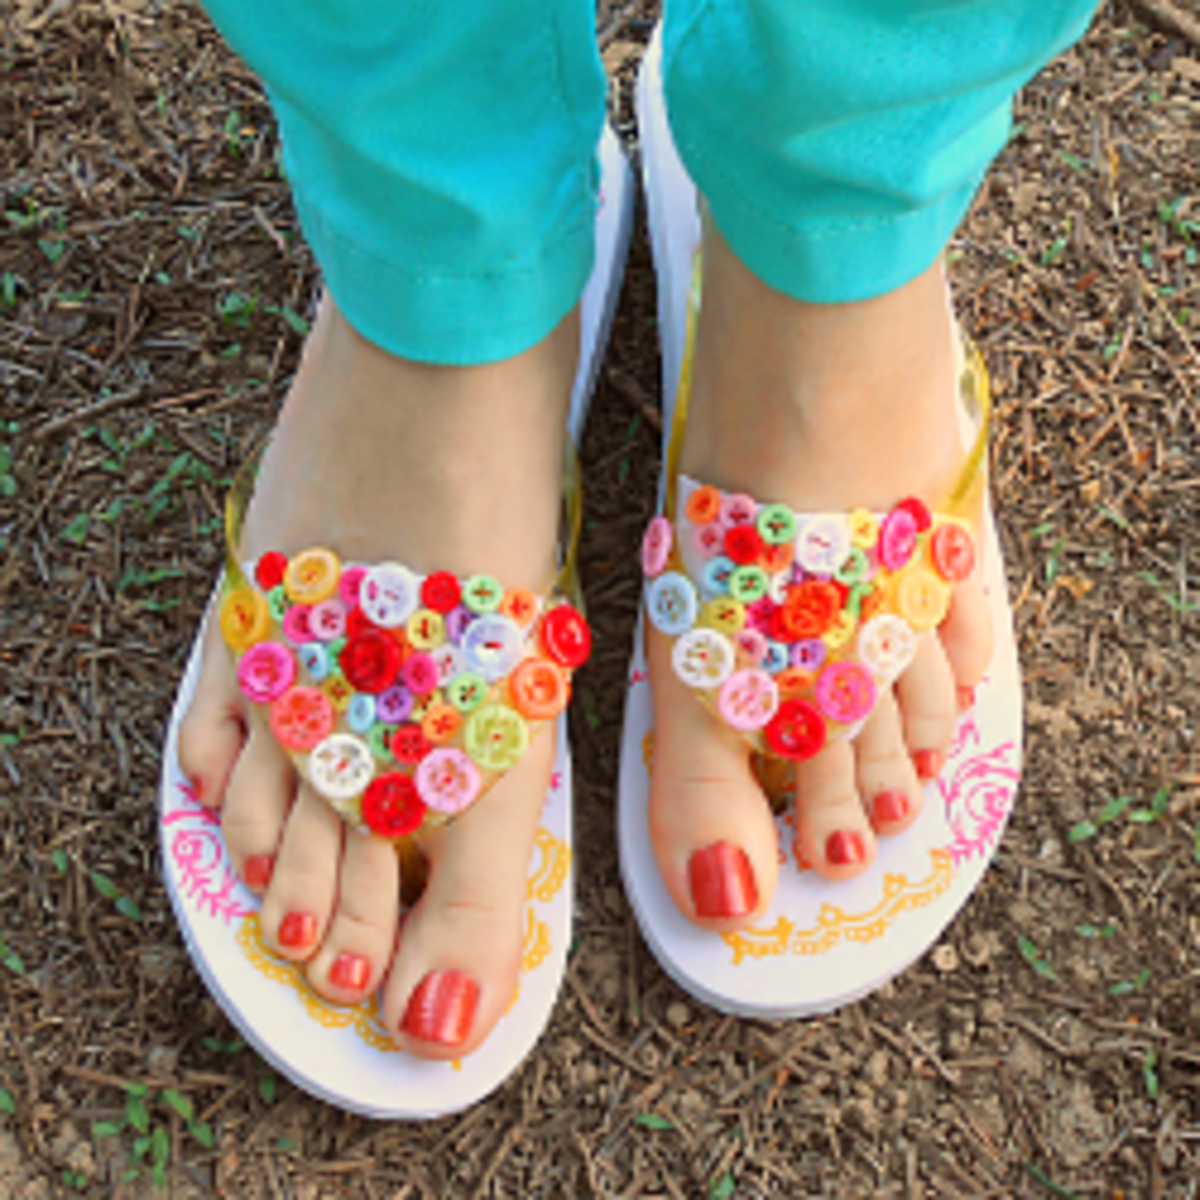
If you have a ton of buttons in your craft cache, you should read DIY Button Flip Flops . One of the best ideas I found on malina123's page on Squidoo, involved recycling an old pair of shorts for use on her summer flipping footwear! By reusing a bit of fabric, she completely refashioned an ordinary pair of beach thongs into a colorful fashion statement. (Thank you, malina123 for letting me use the image below!)

colored button flip flops


Of course if you think you might try this project shown above, you should probably own a glue gun. (Click here to find a top rated glue gun on Amazon!glue gun)

However, one does not have to use a glue gun to decorate your flips if you want to use beads or rhinestones. One blogger suggested using E6000 Adhesivedecorate flipflops with beads and rhinestones.  I have read many good reviews for this product on Squidoo and on the Amazon website. I highly recommend that you research products before you buy them.

Need more ideas for creating summertime sandals with lots of bling? Then I would like to send you to Make Your Own Bedazzled Flip Flops on Hubpages.com. There you find will several suggestions (ie. buy your flip flops at Old Navy) and tips for adding your own style to your flip-floppy summer shoes.

Another blogger alerted me to a product I had never heard of before, Beacon Flip Flop Glueflip flop glue.


One last Tip: Prepare the rubber straps on your purchased flip-flops by cleaning them with rubbing alcohol or vinegar to remove any reside that might inhibit the glue from sticking to the shoe. It also helps to scuff up the surface of the strap with an emery board, too.

Now that you have all of these wonderful summer sandals, you might need to store them somewhere! I saw an "green" idea to recycle old wire clothes hangers that just might help you out! Click "Shoe Hanger"  to be taken directly to a photo of that shoe hanger. Lensmaster lbrummer found  lots of ways to upcycle clothes hangers from all over the web.

Now, you can begin summertime with your best-looking foot forward.


(flip flops with ribbon photo credit: Lyn Lomasi via photopin cc)


Note: The author may receive a commission from purchases made using links found in this article. “As an Amazon Associate, Ebay (EPN) and/or Esty (Awin) Affiliate, I (we) earn from qualifying purchases.”

Tuesday, May 13, 2014

Mod Podge can make miracles happen!

craft idea modpodge
A Dictionary Lamp--just needs some trim!
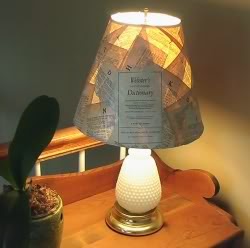
A few years ago I got the "make over" bug and decided to re-do an old lampshade (that is a link to my DIY page, btw).  I used what I had on hand and you can see the result in the photo to the left. Yes, I did rip up an old dictionary! Do not hate me, because the book was already headed to the recycle bin. Those of you who know me will confirm that I never destroy a book that is still in good shape. I then decoupaged the pages from that torn up book onto the lamp using watered down craft glue. This recycled lampshade project turned out pretty good. 


While I was the The Glue Gun Slinger Contributor on the now defunct website, Squidoo, I  discovered that I could have used ModPodge (by Plaid) for the project instead of that diluted glue! Using a glue + water mixture was successful for me at the time, however. As it turns out, lots of people use a homemade version of ModPodge just as I did on my lampshade project. Tracy Boyer wrote and article and shared a recipe for this economical adhesive mixture for those of us who don't want to guess at proportions.  The Tracy suggests 2 parts glue to 1 part water.

Sometimes using a name brand commercial product will produce consistently good looking results. I have to admit that my own decoupage medium did not look as good after it dried as some other projects that I have seen at craft fairs and such. 


Now, I need to haul out the glue gun and put some trim on that dictionary themed lampshade. Who knows, I just might give it a fresh coat of ModPodge! Stay tuned for the results!


Note: The author may receive a commission from purchases made using links found in this article. “As an Amazon Associate, Ebay (EPN) and/or Esty (Awin) Affiliate, I (we) earn from qualifying purchases.”


Sunday, May 4, 2014

Do Not Toss Your Greeting Cards--Reuse Them!

I am a hoarder! I will admit that to you, but you have to promise not to tell my friends and family.

I mostly hoard greeting cards that I cannot bear to toss into the recycle bin or trash barrel. In order to save space, I usually tear off the front of the card so I can use the artwork again in some other form (ie. gift tags -- see the image below, the stocking tag used to be the front of a greeting card).

However, the one practical use is to recycle the front of the card INTO another greeting card. That is actually very easy to do. All you need is some card stock or blank greeting cards and envelopes. You then just cut the original front to fit on the new blank card. Sometimes I find the written verse in a card to be so very good that I trim off the signature on the card and so I can "borrow" the sentiment and glue it into my "new" card.

gift bag stenciled with green tree and snowflakes

Having been the "official" Glue Gun Slinger Contributor on the now defunct website, Squidoo, I do have a few adhesives in my crafting tool kit, but my knowledge about glues for "paper" crafts is mostly limited to book repair. However, I have been know to make a paper craft project or two, and I highly recommend Elmer's Washable All-Purpose School Glue Stickscraft glue

While you are on the site, be sure to check out "Card Making and Craft Budget Tips" by writer/crafter "paperfacets". If you are at all interested in making greeting cards, this page will be helpful, indeed.

I have read that it is best to use a glue that will not "wrinkle" the card stock when making a card. Does anyone have a good suggestion for me to try? I am thinking that a glue stick might work. What about glue dots? Has anyone used them? I really like to know about a product before I invest my hard earned cash.


Note: The author may receive a commission from purchases made using links found in this article. “As an Amazon Associate, Ebay (EPN) and/or Esty (Awin) Affiliate, I (we) earn from qualifying purchases.”


Tuesday, April 22, 2014

Mailboxology


decorative painted mailbox
Photo Credit: ©Renaissance Woman (aka Bird Legs)
What gives a home instant curb appeal?  For me, it’s always the little touches: a willow garden arbor; watching hummingbirds blissing out on red geraniums in window boxes; that classic rocker calling my name on the porch.

When I think first impressions, I always recall a teacher of mine who had the kind of front yard that made you want to stop and linger.  Her brand of curb appeal started less than six inches from the street.  It was always about the mailbox.  People went out of their way to see her latest creation.  I know because I was one of them... her mailbox groupies. 

Today, as I finished revitalizing a seriously sorry looking mailbox at the end of my country lane, I realized I was paying homage to that most extraordinary individual who taught me the true meaning of painting on a whole different kind of canvas.  I only wish it hadn’t taken me so many years to do something about the forlorn sight that greeted every visitor to my home. 

When does a mailbox become more than a mailbox?  It ceases to be a standard 6-inch x 18-inch receptacle when it becomes a means of celebrating life, personal expression, and the essence of home.  Thank you, my friend, for teaching me to see the potential in everything.  If there were such a thing as human curb appeal, its name and definition would be Carolyn.

Though my first mailbox renovation isn’t on a par with her works of art, I think she would be pleased that I went all out to create something whimsical.  Carolyn, more than anyone, understood that whimsy is good for the soul.  I hope my new mailbox makes someone, maybe you, smile on the inside. 

What kind of whimsy might you express today? 


Note: The author may receive a commission from purchases made using links found in this article. “As an Amazon Associate, Ebay (EPN) and/or Esty (Awin) Affiliate, I (we) earn from qualifying purchases.”


Most Recent Reviews on Review This Reviews


Search for Reviews by Subject, Author or Title

The Review This Reviews Contributors


SylvestermouseSylvestermouseDawn Rae BDawn Rae BMbgPhotoMbgPhotoBrite-IdeasBrite-IdeasWednesday ElfWednesday ElfOlivia MorrisOlivia MorrisTreasures by BrendaTreasures by BrendaThe Savvy AgeThe Savvy AgeMargaret SchindelMargaret SchindelRaintree AnnieRaintree AnnieLou16Lou16Sam MonacoSam MonacoTracey BoyerTracey BoyerRenaissance WomanRenaissance WomanBarbRadBarbRadBev OwensBev OwensBuckHawkBuckHawkDecorating for EventsDecorating for EventsHeather426Heather426Coletta TeskeColetta TeskeMissMerFaeryMissMerFaeryMickie_GMickie_G


Review This Reviews is Dedicated to the Memory of Our Beloved Friend and Fellow Contributor

Susan DeppnerSusan Deppner

We may be apart, but
You Are Not Forgotten


“As an Amazon Associate, Ebay (EPN) and or Etsy (Awin) Affiliate, I (we) earn from purchases.” Disclosure Statement

X